This is the third installment of a four part series on using Microsoft Teams and Azure services to collaborate with machines and devices. In the previous posts, I described how Teams and the Azure BOT services work to send commands to the IoT device attached to the RoboRaptor. This post will describe the IoT hardware and connection on the RoboRaptor to the MXCHIP.
To recap, Teams messages are sent from the Teams user interface to our Azure BOT for analysis. The command is then sent from the Azure BOT to the Azure IoT HUB. The IoT HUB then forwards the command message to the MXCHIP mounted on the back of the RoboRaptor. The MXCHIP then translates the received command into IR pulses for direct input to the RoboRaptor.

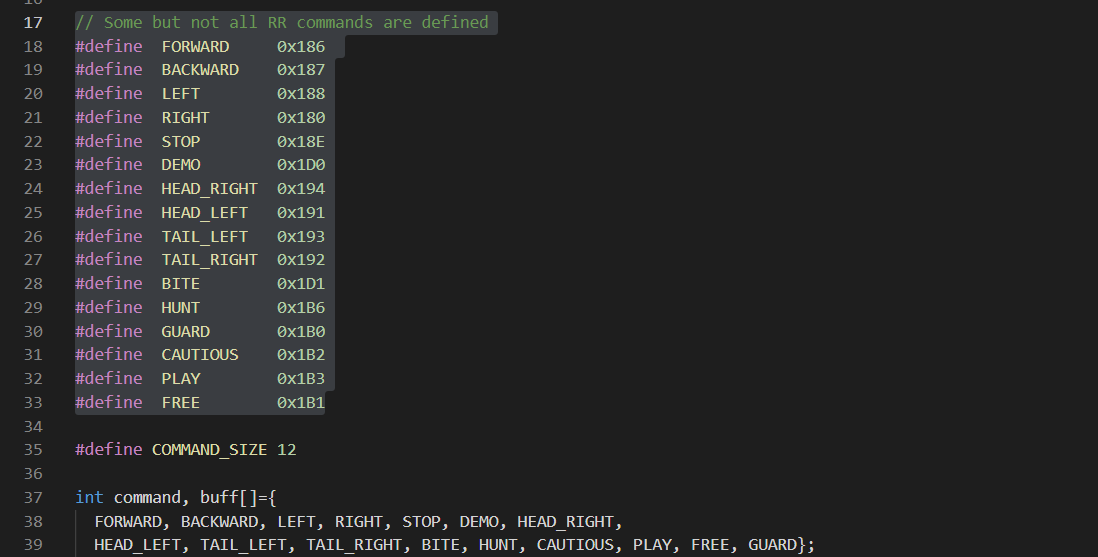
The factory version RoboRaptor is controlled through a hand held infra-red controller. In order to send commands to the RoboRaptor I first had to read the IR pulses sent from the controller and analyze the Infra red pulse stream from the factory controls of the RoboRaptor. For this i created another project and used an Arduino UNO 3 and an IR receiver. There are lots of prebuilt free code on GIT HUB. As I pushed each button of the controller I recorded a hex signal from the UNO 3 serial port.
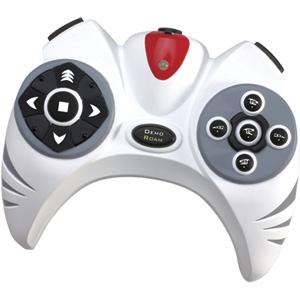
The Teams controlled RoboRaptor controller.
As I pushed each button on the controller I recorded a hex signal from the UNO 3 serial port. The diagram below shows the codes received.
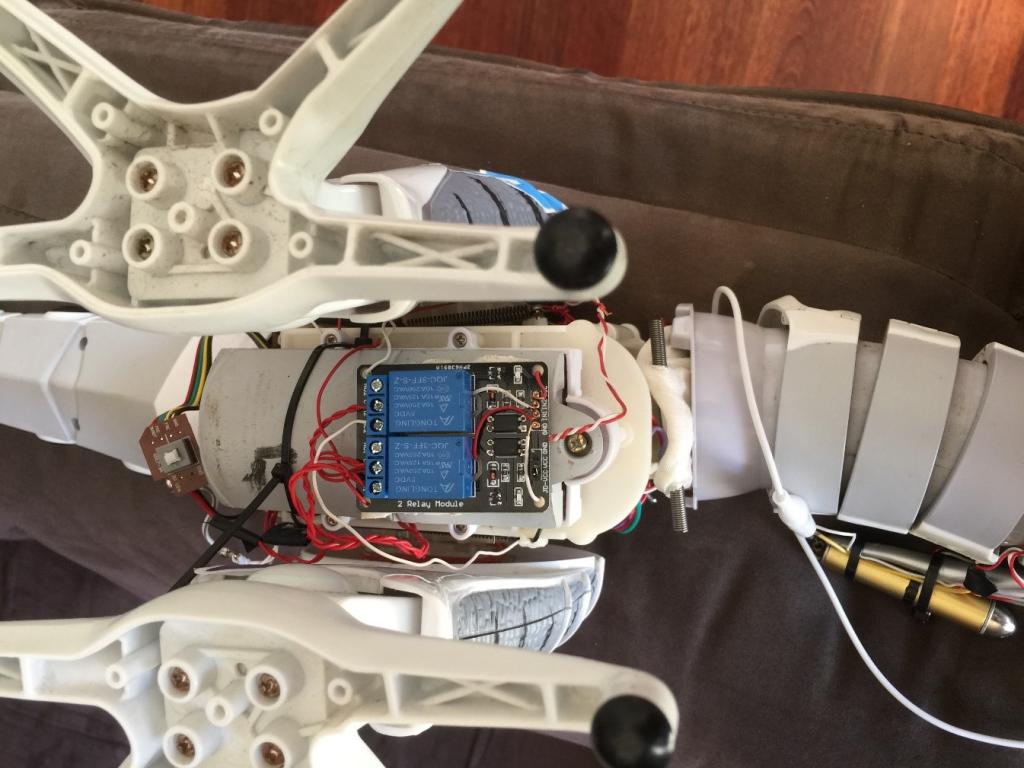
My second key objective was to remotely activate hardware through sending commands that activate an attached relay module and supplying power to a remote external device. In this project the aim was to activate the power switch of the RoboRaptor and the Laser remotely with Teams commands. I used a 2PH63091A dual optical relay for this role. I mounted the relays on the RoboRaptor belly.
Connection Diagram
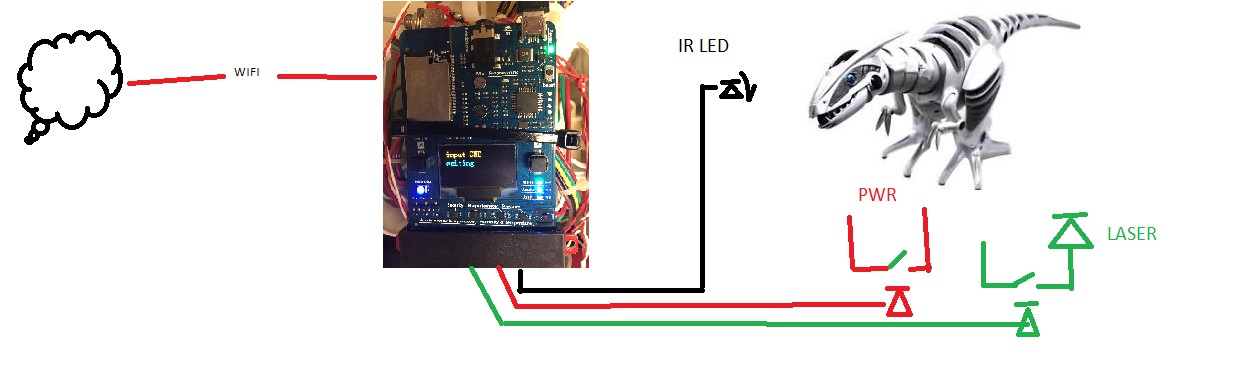
To activate the relays I need to connect the relay input signal port to external pins of the MXCHIP. The switching of a MXCHIP external pin to a low or high signal will activate and deactivate the relay
The Arduino code to configure MXCHIP pins are as follows.

To control the signals sent to external sensors and relays I need to assign a logical Arduino PIN and a physical MXCHIP PIN to an external relay switch. For example, to switch on power to activate the RoboRaptor, is to assign Logical pin 45 IN CODE. The physical pin 45 on the MXCHIP is wired the its Relay input trigger. On the pin going low the relay will activate and close its relay contacts and supply power to the RoboRaptor.
Project Libraries:

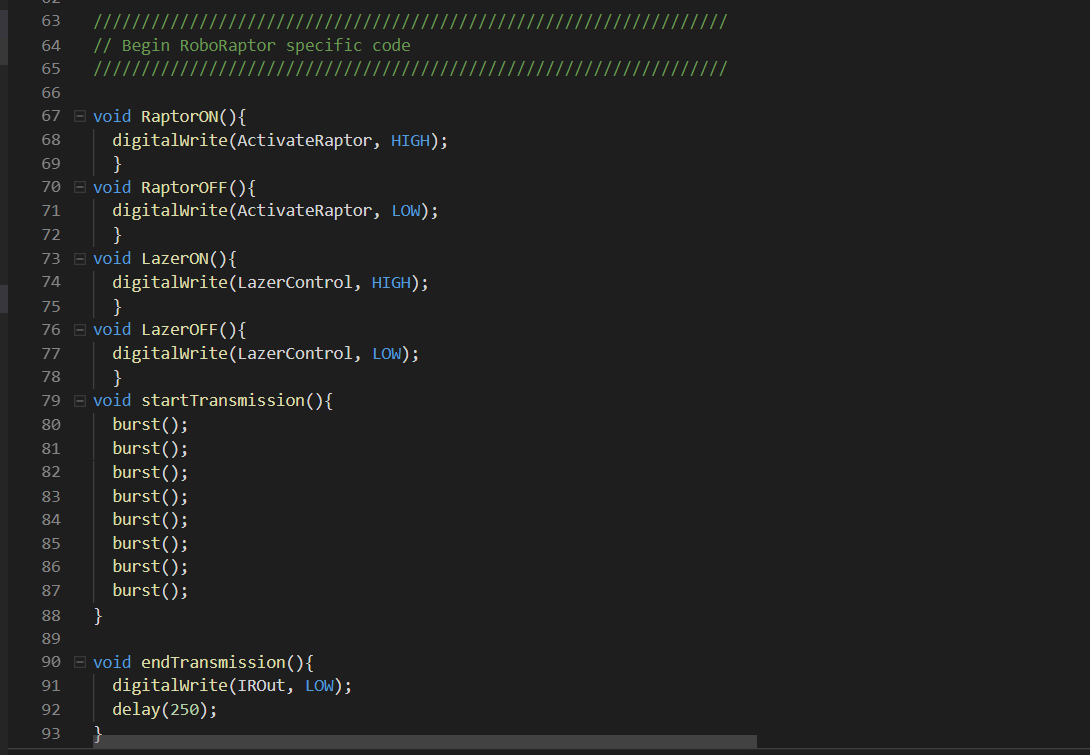
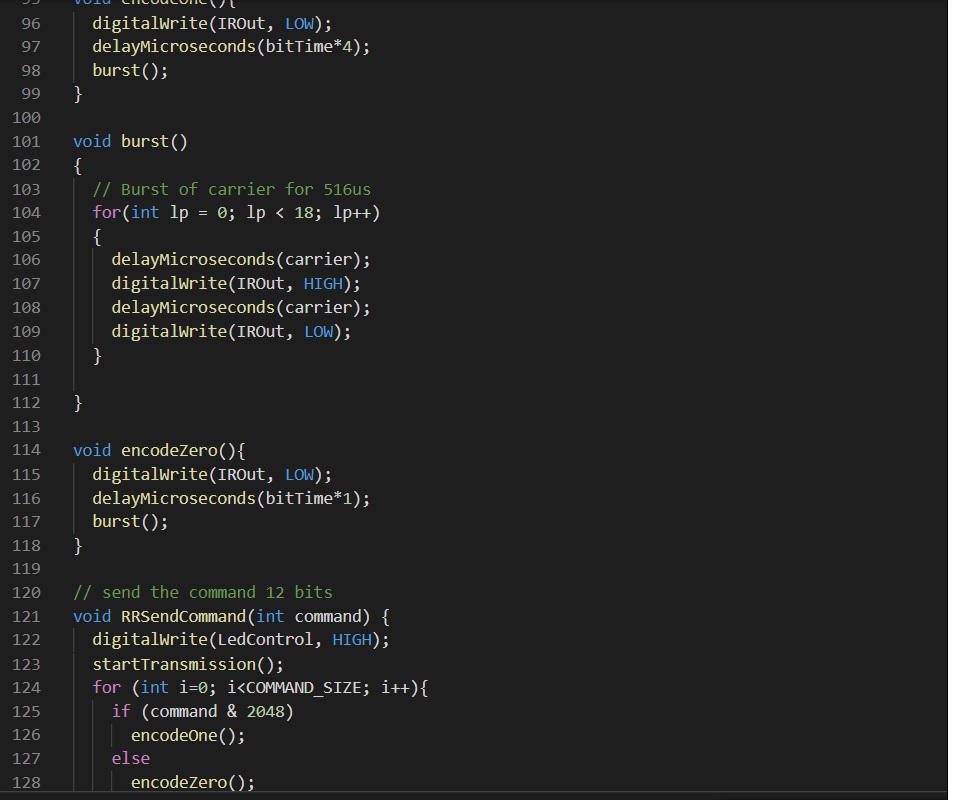
My development platform for the project is Microsoft Visual Studio code. The key libraries required are AZ3166WifI.h for running the WIFI role, The AzureIOTHub.h library is used to manage Azure IoT HUB connectivity, The DEVKitMQTTClient.h library is used to manage the cloud to device and device to cloud messaging. The other libraries manage MXCHIP hardware and sensors.The MXCHIP library has its own IRDA infra-red Library code. The coding description of this library was very light, so I created my own function code to control the transmission of InfraRed pulses and commands.
CODE TO CONTROL IR SIGNAL
The following code sets up the IR carrier and a 12 BIT command code. The MXCHIP onboard LED works fine, however I found I needed to add an additional external IR LED as the signal was degraded when I mounted the MXCHIP board to the back of the raptor.
MAIN CODE BODY.
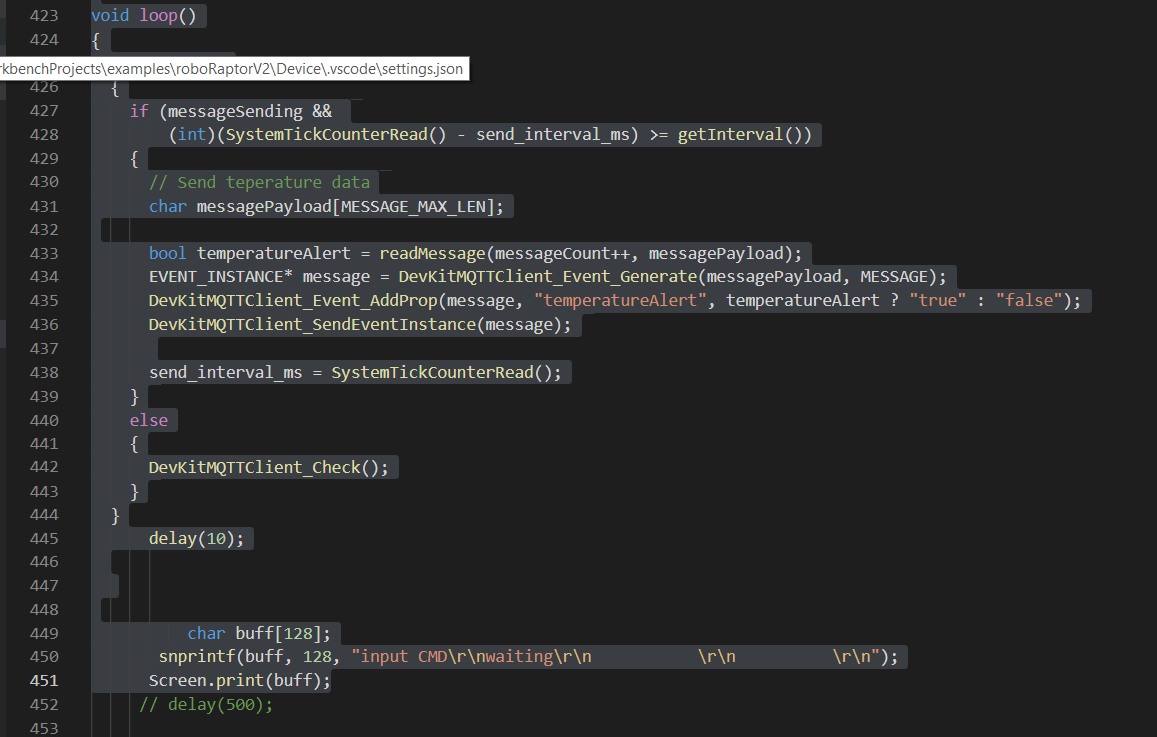
The void loop() function contains the main body of code, and will continuously run in a loop checking for WIFI connectivity and new received MQTT messages. The following code shows the continuous monitoring of a system tick heart beat. If the WIFI connection is up the IoT device will send telemetric data to the IoT HUB. For this project I send temperature and humidity reading every few seconds to the IoT HUB for processing. The IoT HUB will route the telemetric messages to Azure blob storage and make it available for Power BI analytics.
The DevKittMQTTClient function will then check for any new MQTT cloud to device messages. Any new messages that come in will be compared to command strings. If we have a match the command function will activate and call the IR transmission function, otherwise it will repeat the void loop.
MQTT
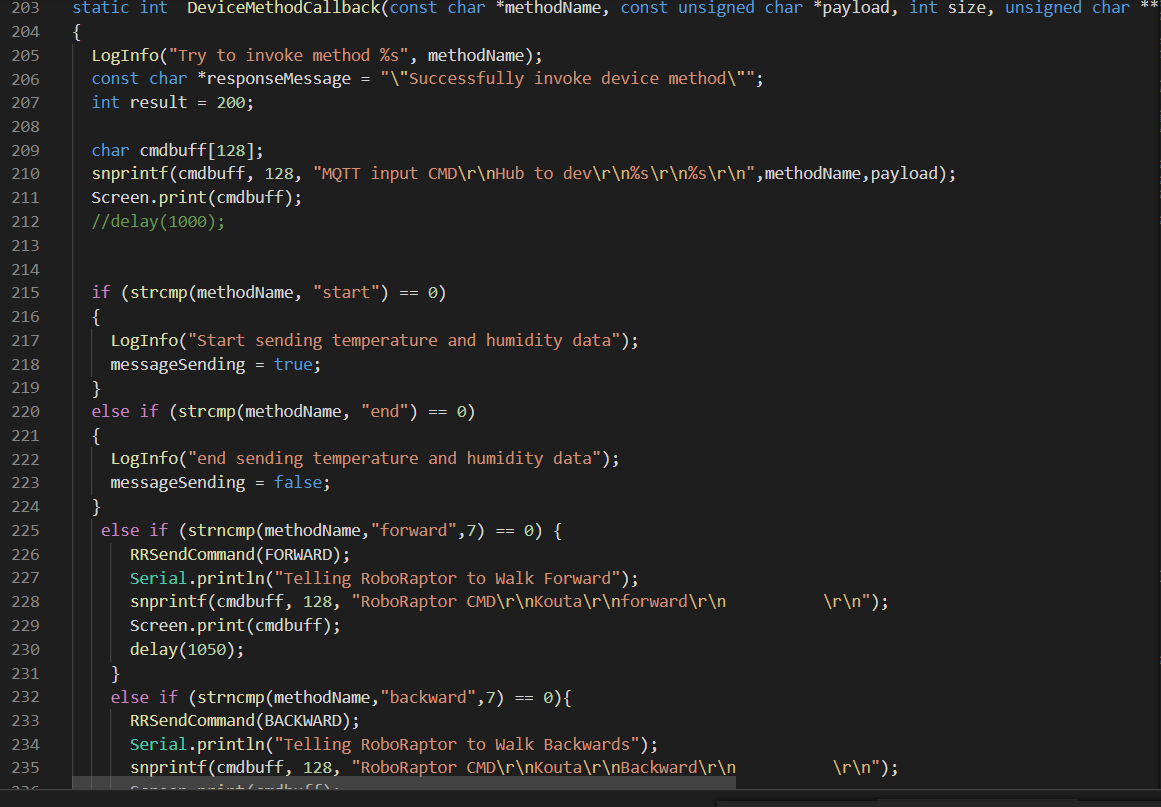
The RoboRaptor only requires a basic command for it to understands the intent of the user’s message. The basic intent of moving forward just need to be acknowledged and resent to the RoboRaptor as IR pulse 0x186. I used the direct method for sending commands to the IOT MXCHIP device.
The direct method is an excellent lightweight message that contains a method name and a small message payload.
The message format is in two parts. A method name as the header and the payload message for the body. For example, the Method name = forward and the payload = robo moving forward.
The code below shows how I am only checking the method-Name variable and if I get a match for the method name I will run a function then will send the correct IR signals to the RoboRaptor.
How to create an IoT Hub and register a device for the IoT Dev-Kit:
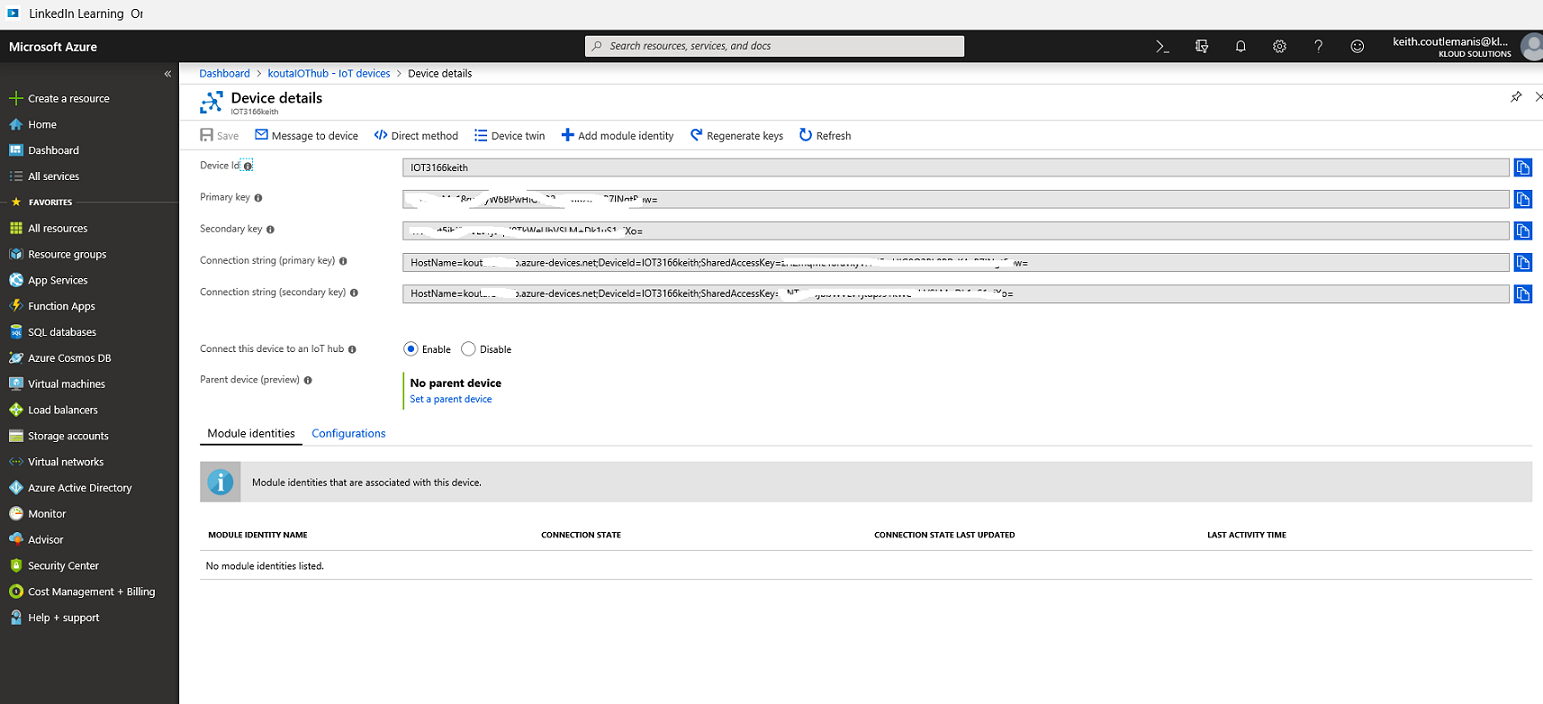
The IoT HUB is an Azure service that you will register your multiple end point devices. The free tier allows you to register a single device and capacity for 8000 messages. To add a new device to the IoT HUB is as simple as selecting the add device button on the IoT HUB Menu. You will be asked to supply a device-ID name. When the resource is configured it will create a new host name URL and a set of primary and secondary keys and connection strings. The values need to be saved as they are required by the IoT device to securely connect to the IoT hub Service.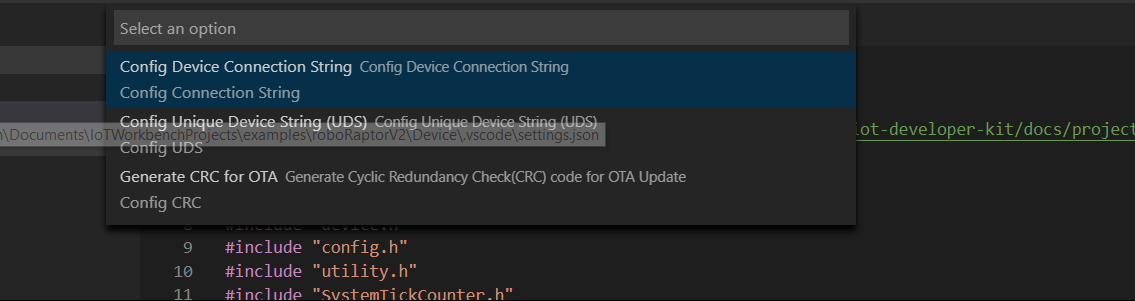
Setting the connection string:
Now I have created a IoT HUB device in the cloud I need to set up the device with the device URL and secure connection string. In my Visual Studio code platform I press F1 to bring up a list of commands and I select configure device > Config Device Connection String. The Menu system will direct me to supply the Device FQN and Connection string. Once I have submitted the info the IoT device (MXCHIP) can now connect with the IOT_HUB service
The last installment of the RoboRaptor project will be looking into adding facial recognition. The objective is to use a camera to capture images and compare these to a saved photo of myself. If the Face ID gets a match the RoboRaptor will come towards me.
Links to other posts in this series:
- Intelligent Man to Machine collaboration with Microsoft TEAMS. -Robo Raptor
- Microsoft Teams and IOT controled Robotics & The BOT
- Configuring Facial recognition – COMING SOON