Users Migration
The gun seems to be pretty much loaded with all the ammunition, ready to fire? Probably not yet …
Here I want to discuss about few basic things that are easily missed and can cause the migration to fail or go wrong. Few things worth noting down before getting into the migration:
- Make sure you have a plan to provide the permissions of file shares that built-in groups in source domain have access to. I used universal groups in target domain and assigned the permissions to those fileshares using these universal groups.
- Make sure the default O365 policy in target domain includes new OU for default email address. Otherwise you will wonder where those funny email addresses are populating from for migrated users.
- OU folders added to AAD Connect Sync configuration in target domain and the AADC sync service account has write permissions on the new OU containers. If this step is missed, you’ll get permissions issues for migrated users in AADC console.
- Disable mail capability of mail-enabled security and distribution groups in source domain
- Modify attributes for Distribution Groups and mail-enabled Security Groups to sync them to O365
- Enable mail capability of mail-enabled security and distribution groups in target domain with appropriate attributes (email address and mailnickname)
- MAKE 100% SURE IMMUTABLE ID FOR THE USER OBJECT IS NOT CHANGED. THIS IS VERY CRITICAL OTHERWISE USER WILL LOSE ACCESS TO THE MAILBOX
Migrating Users
During the user account migration, audit events are logged in both the source and target domains.
- On the ADMT server in the target domain, log on by using the ADMT account migration account.
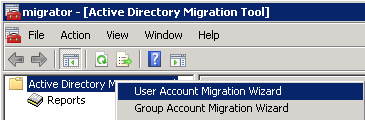
- Use the User Account Migration Wizard by performing the steps in the following table.
| Source user accounts to Target | Action |
| Domain Selection | Under Source, in the Domain drop-down list, type or select source domain. In the Domain controller drop-down list, type or select the name of the domain controller, or select Any domain controller. Under Target, in the Domain drop-down list, type or select target domain. In the Domain controller drop-down list, type or select the name of the domain controller, or select Any domain controller, and then click Next. |
| User Selection | Click Select users from the domain, and then click Next. On the User Selection page, click Add to select the users identified to be migrated in the source domain, click OK, and then click Next. |
| Organizational Unit Selection | Ensure that ADMT lists the correct target OU. If it is not correct, type the correct OU, or click Browse. In the Browse for Container dialog box, locate the target domain and OU, and then click OK. |
| Password Options | Click Do not update passwords for existing users. |
| Account Transition Options | In Target Account State:, click Disable target accounts. In Source Account Disabling Options:, click Days until source accounts expire:, 5 days to keep the source account. Select the Migrate user SIDs to target domains check box. |
| User Account | Type the user name, password, and domain of an ADMT admin migration account in source domain domain. |
| User Options | Select the Update user rights check box. Select the Migrate associated user groups check box. Select the Fix users’ group memberships check box. |
| Object Property Exclusion | Clear the Exclude specific object properties from migration check box. |
| Conflict Management | Click Do not migrate source object if a conflict is detected in the target domain. Ensure that the Before merging remove user rights for existing target accounts and Move merged objects to specified target Organizational Unit check boxes are not selected. |
- When the wizard has finished running, click View Log, and then review the migration log for any errors.
- Start Active Directory Users and Computers, and then verify that the user accounts exist in the appropriate OU in the target domain.
- Post user migration using ADMT, change exchange related attributes using powershell script
- Mailnickname
- Proxy addresses
- LegacyDN attributes as X500 in proxy addresses
- Manual sync to Azure AD using AADConnect
- Enable-remote mailbox for migrated user (if this command is not sun, user will not showup in on-prem exchange admin center.)
- Enable-RemoteMailbox -Identity <mailnickname> -RemoteRoutingAddress <.onmicrosoft.com id>
- Use the command below to verify sID history has been copied over
- dsquery * -filter “&(objectcategory=user)(samaccountname=xxx.xxxx)” -attr objectsid sIDHistory
Series:
Part 1. Introduction and high-level migration approach
Part 2. Configuring source and target domains for SID history and accepted-domains
Part 3. Installation and configuration of ADMT tool and Password Export Server
Part 4. Groups Migration
Part 5. Users Migration
Part 6. Security Translation Wizard – Local Profiles and things to consider for end user experience
Good morning, thank you for the process. I have some issue with the post migration step like: change exchange related attributes using powershell script
Mailnickname
Proxy addresses
LegacyDN attributes as X500 in proxy addresses
do you have any script sample you could share with us ?
thanks