Quick Hack for Transferring Sonus Transformation Table between two Sonus gateways
Recently I been working on migration of users from an aging Cisco platform to Skype for Business 2015 on premise platform.
Customer has two Sonus 2000 Voice Gateways connected to Enterprise grade SIP trunks providing an Active-Active connection for inbound calls.
Both gateways are connected to CUCM via SIP using 5060 as below:
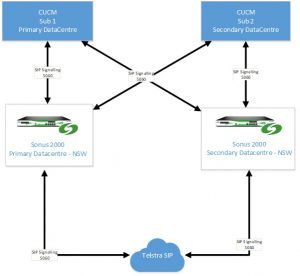
Note: To meet Disaster Recovery requirements for the Business they had their Datacentre 50km+ from each other.
The gateways are set as Upstream for the migration process.
As the Sonus SBC’s have identical configuration, in the Sonus gateways just backing up and restoring configuration has some quirks around “Contact Registrant Table”. I notice that the configuration even when “Import Partial Configuration” is used the registration does break.
A question you would be asking is “Why not just manually update the transformation table?”
This would have been the most convenient method if the Telephone number range assigned to each user per department or floor or site was consistent. Sadly, this was not the case for the customer and users had extension in various different number blocks.
Number blocks referred to here are within the 100 number block range, example:
02 7685 1000 à 02 7685 1199 (100 number block)
The requirement was to still maintain the users who are not being migrated to be able to receive, example:
All users on Floor 2 are being migrated to Skype for Business Enterprise Voice however users in all remain floors needed to remain in Cisco.
The easiest step initially was to create a separate transformation table purely for the users who were getting migrated and add all their extension within this table and place this in an appropriate Call Routing take.
Example of Transformation Table:
Note: You can use any naming convention that allows you to better understand the flow however I always use the word “Match” in my Transformation tables within Sonus as it makes more sense to me.
![]()
Within this Transformation Table (TT) I have multiple entries:
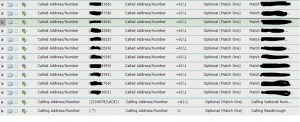
I have shorted the example above however I had over 100 extensions as you can see no real pattern. I had a separate Transformation Table to allow anything else not matching the above table to be handed over to Cisco.
Once all the changes have been applied to the first gateway follow the steps below to back-up the transformation table:
Change the tab from Setting –> Tasks:
![]()
On the left hand pane select “Import/Export Configuration Items” –> Select Transformation Tables –> Select Export as below:
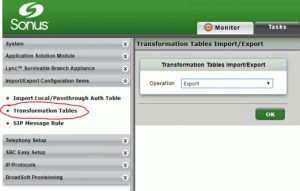
This will save “Tranformation Table” configuration as an xml file:

File type;

Now open the “XML” file in either Notepad or Notepad++ (preferred)
Example of the XML file opened in Notepadd++ is as follows:
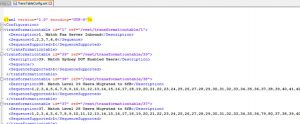
Look for the table you would like to export to Second gateway:

The table entry we are interested in is highlight in “Yellow”
Now delete all entries above this table so it looks like:

Now scroll down the document until you start hitting the actual transformation entries as shown below:
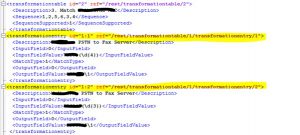
As note previously the actual Transformation table ID entry was “20”, if you missed it see below: (highlighted in yellow)
![]()
Based on the ID value, scroll down the “XML” document to identify all the Transformation Entry with “id=20” value as shown below (example truncated)
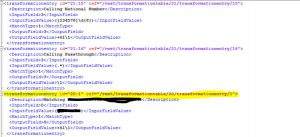
Above screenshot shows the start of the Transformation Entries for Transformation Table “id=20”.
Now identify all the entries and delete all values above this as shown below:
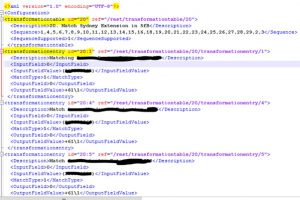
Do not worry too much about the inconsistent (transformationentry id=’20:X’) values.
Now identify all the Sequence for (transformationtable id=”20”) in the “XML” file and delete unwanted values and the outcome for the bottom half of the file should be as below:
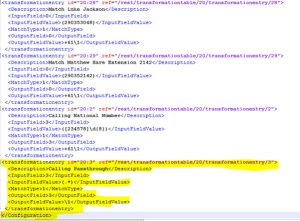
Once all changes made safe the file and now go to the Second gateway and import the “XML” file following the steps below:
Change the tab from Setting –> Tasks:
![]()
On the left hand pane select “Import/Export Configuration Items” –> Select Transformation Tables –> Select Import as below:
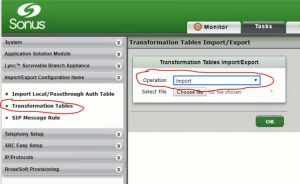
Allow the gateway to import the “XML” file. Once imported you will be able to see the Table entry under transformation tables.
You will now be able to add this table to the necessary Call routing table.
