The Site pages approval process in Modern Communication Sites provide us with an option to include an approval process to manage life cycle of content published in the Intranet.
Currently, there is no roll back process to pull a published page back or unpublish it but that can be done through custom flow and script as blogged here.
In this blog, we will look at enabling the page approval process, steps of the process and finally will have a look at way to customize the flow when needed with an example scenario.
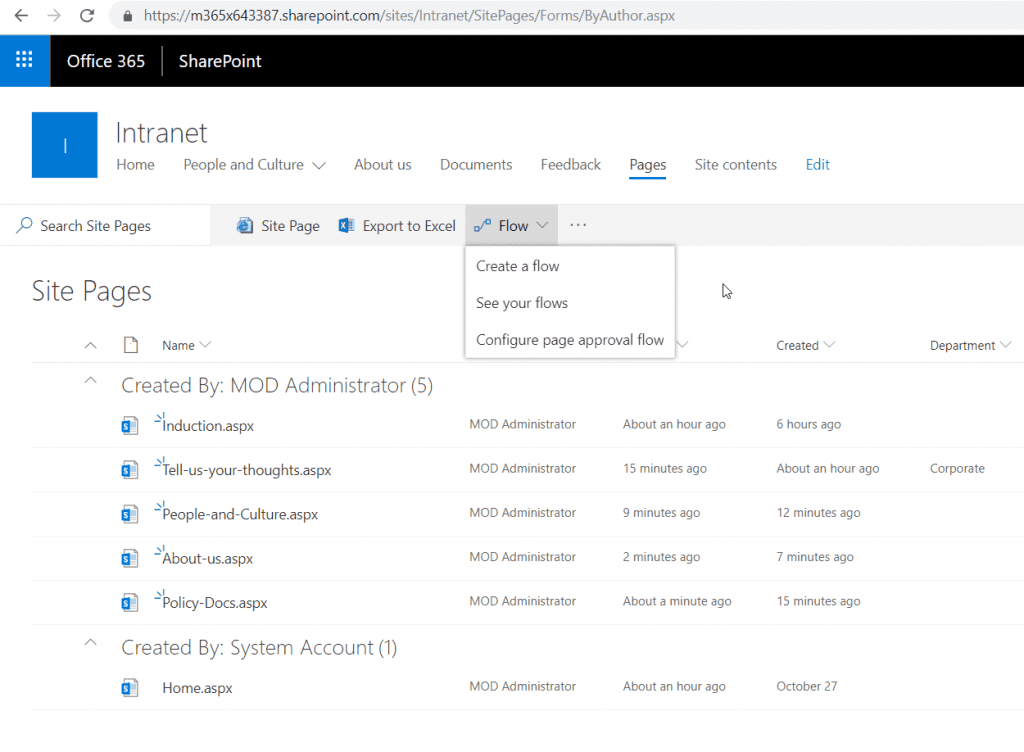
To enable a page approval process flow is simple, just go to the Site Pages library, click Flows and configure page approval flow. During the configuration process, you could set the names of the approvers who will approve the pages as in the screenshots below.
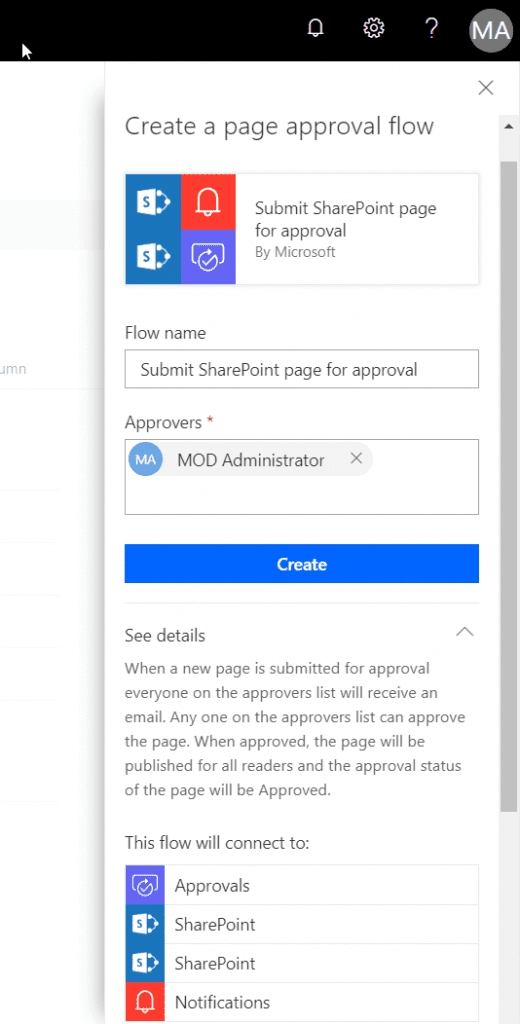
By default, for submit workflow process, all or any approvers from the names provided above can approve the page. This flow can be improved which we will see below. With this the page approval process is set and ready to use.
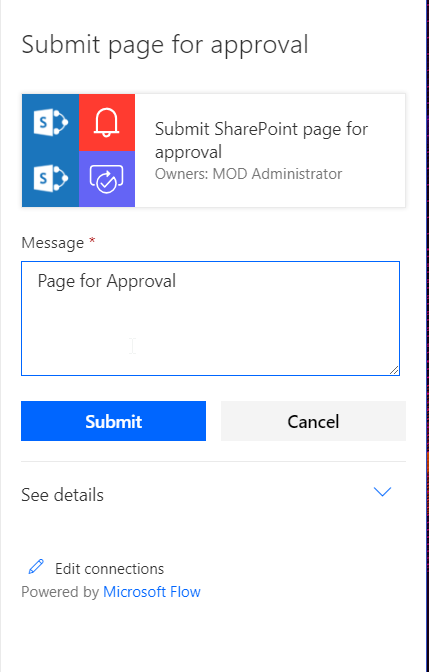
Next let’s look into the user flow. When an user creates a page, he/she gets to submit the page for approval. This also needs to be done for any change done on the page. For submitting to approval, click on Submit for Approval button and fill details as in screeshot below.
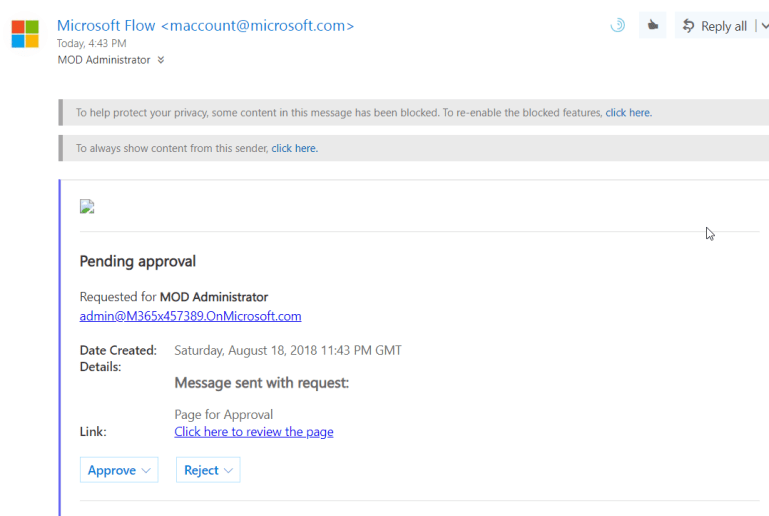
Once the page is submitted for approval, the approvers get an email about the approval. The cool thing about the approval email is that it comes with an actionable message which allows the approved to act on the approval from the email too.

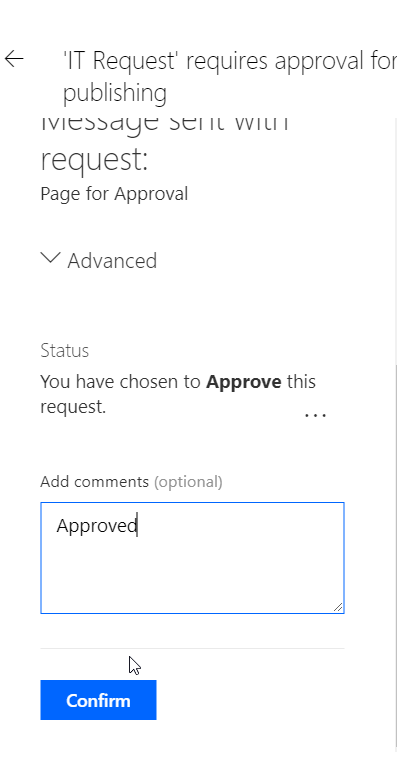
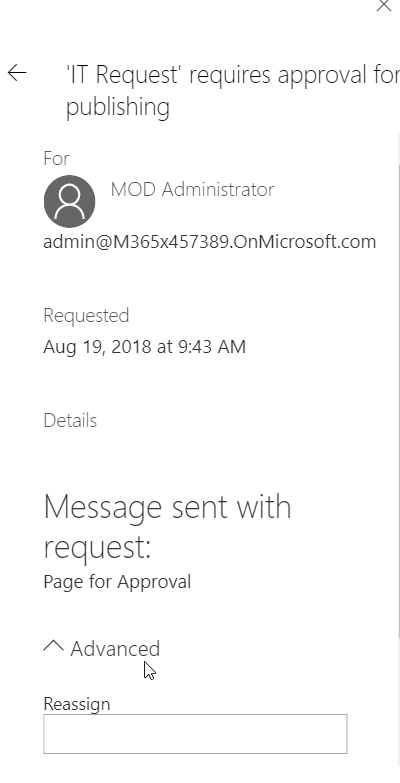
The approver can also approve the request from the page itself. The approver can also reassign (delegate) the approval to someone else in lieu of him/her if needed.
Once the page is approved, the page is published and ready for view.
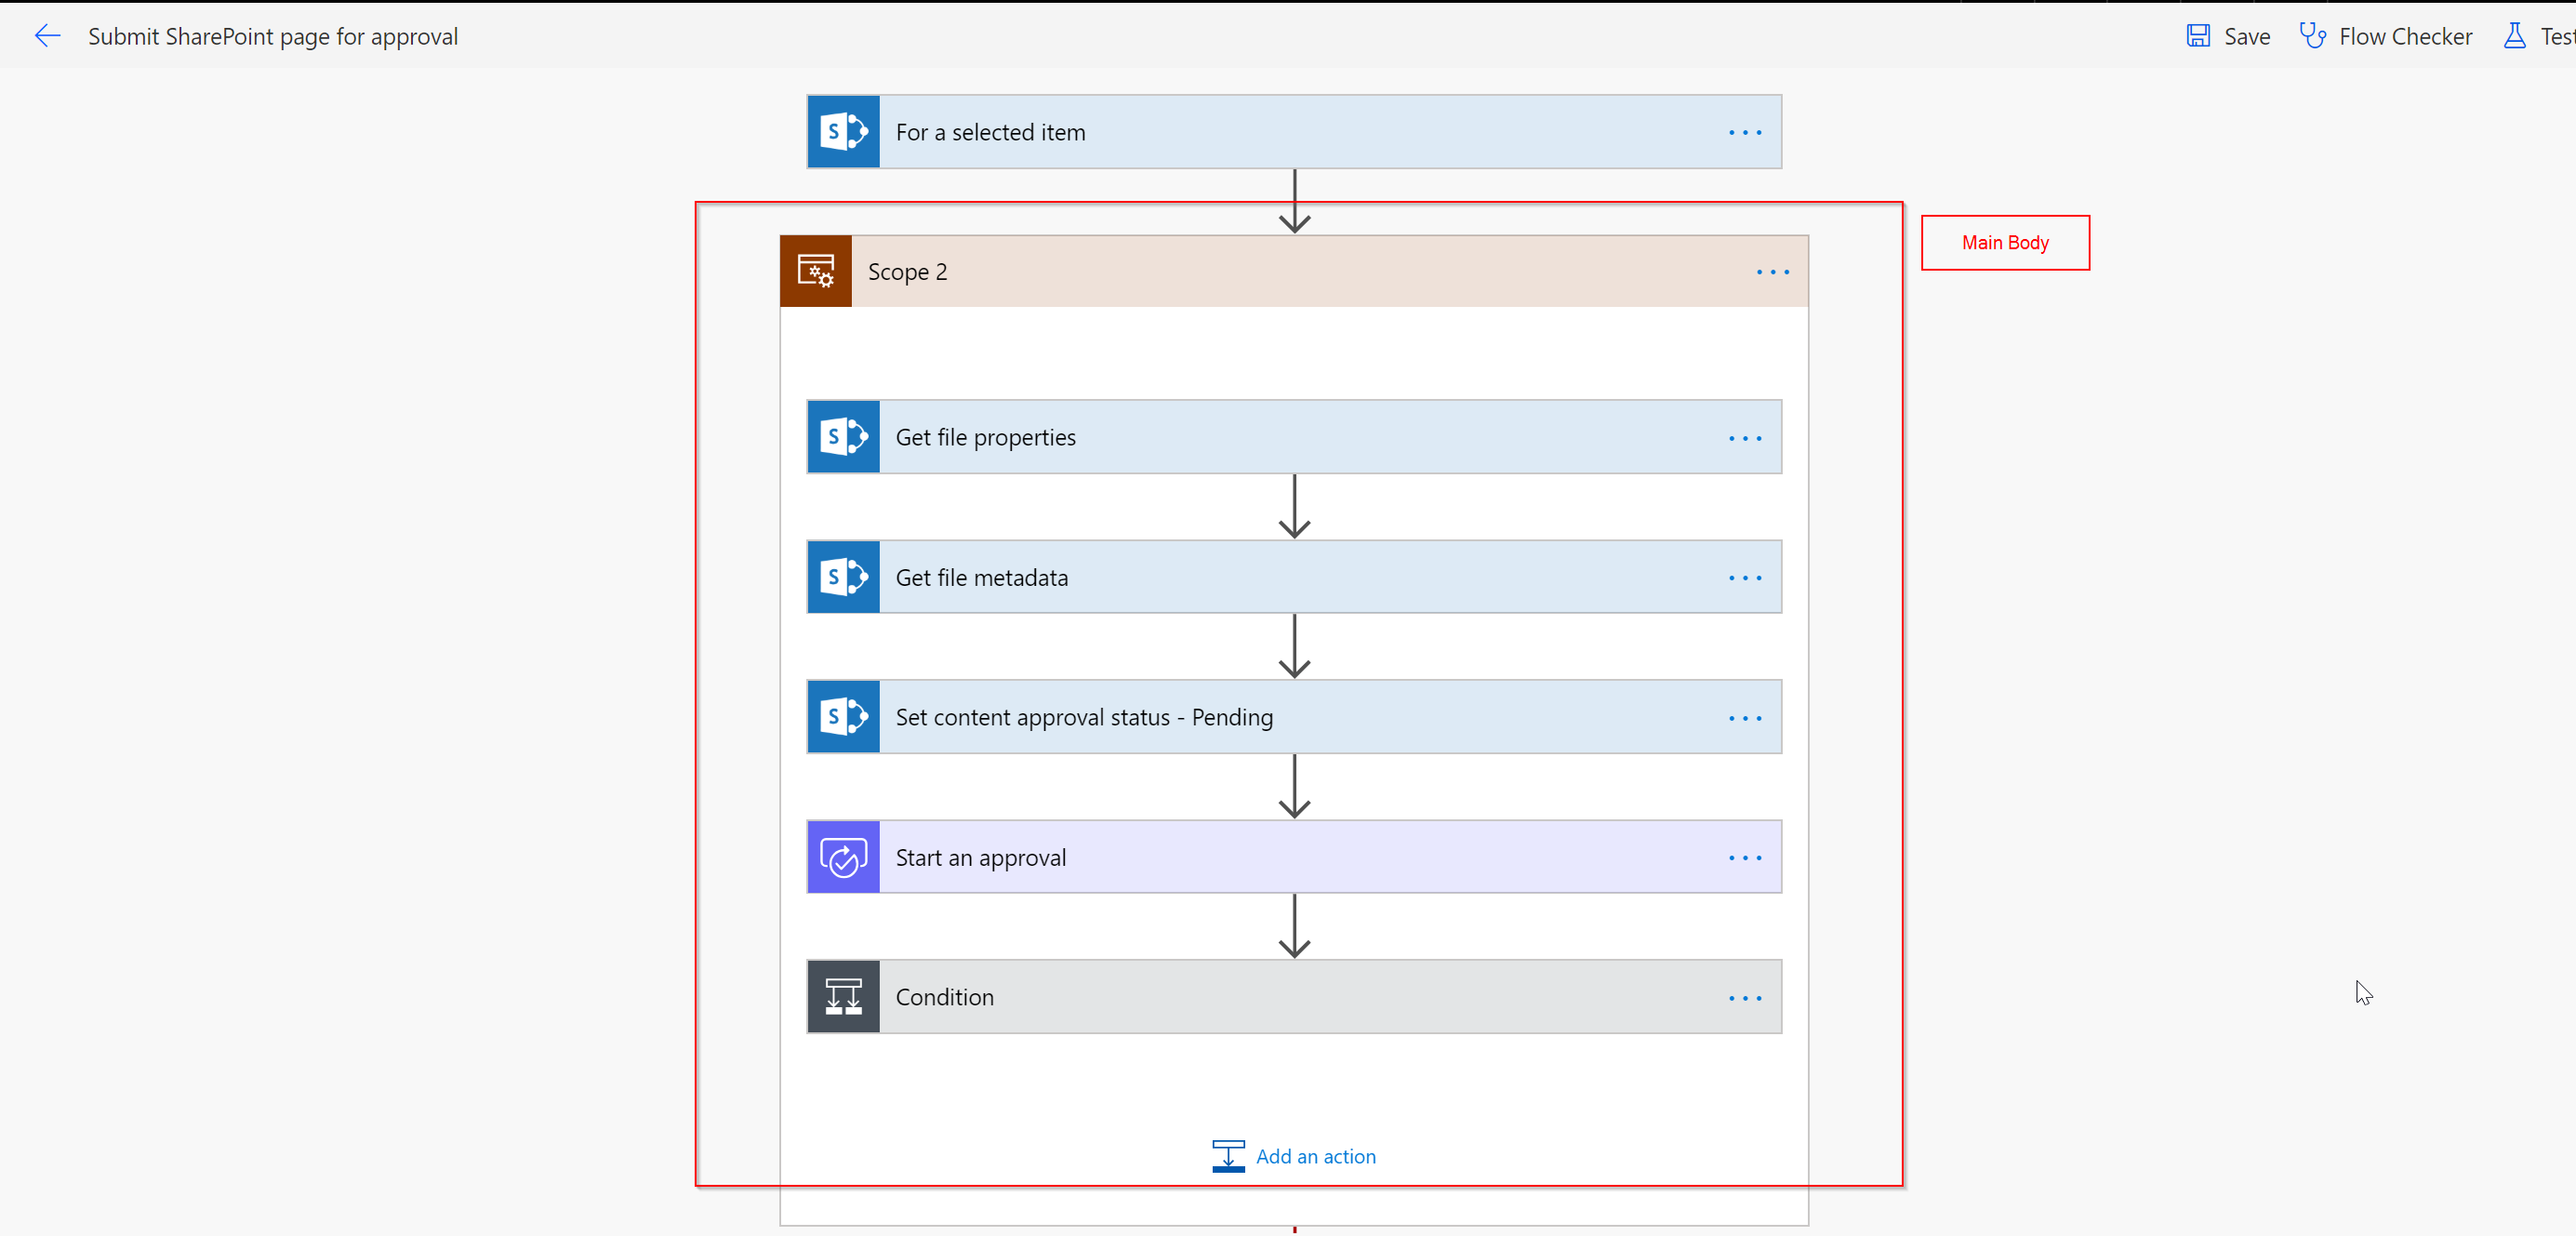
Lets’ look at what is happening in the background in the flow and how we could customise it.
Default Approval Flow –
The flow is triggered at the Site Pages library and gets the page metadata properties. The author set during the approval process is captured. The steps are as follows:
- Get the properties and metadata of the page submitted
- Start the Content Approval process on the page
- Start the approval flow and send email to Approver
- The Approver can now approve or reject as required
- A notification is send based on the request is approved or rejected
Customize the approval Flow
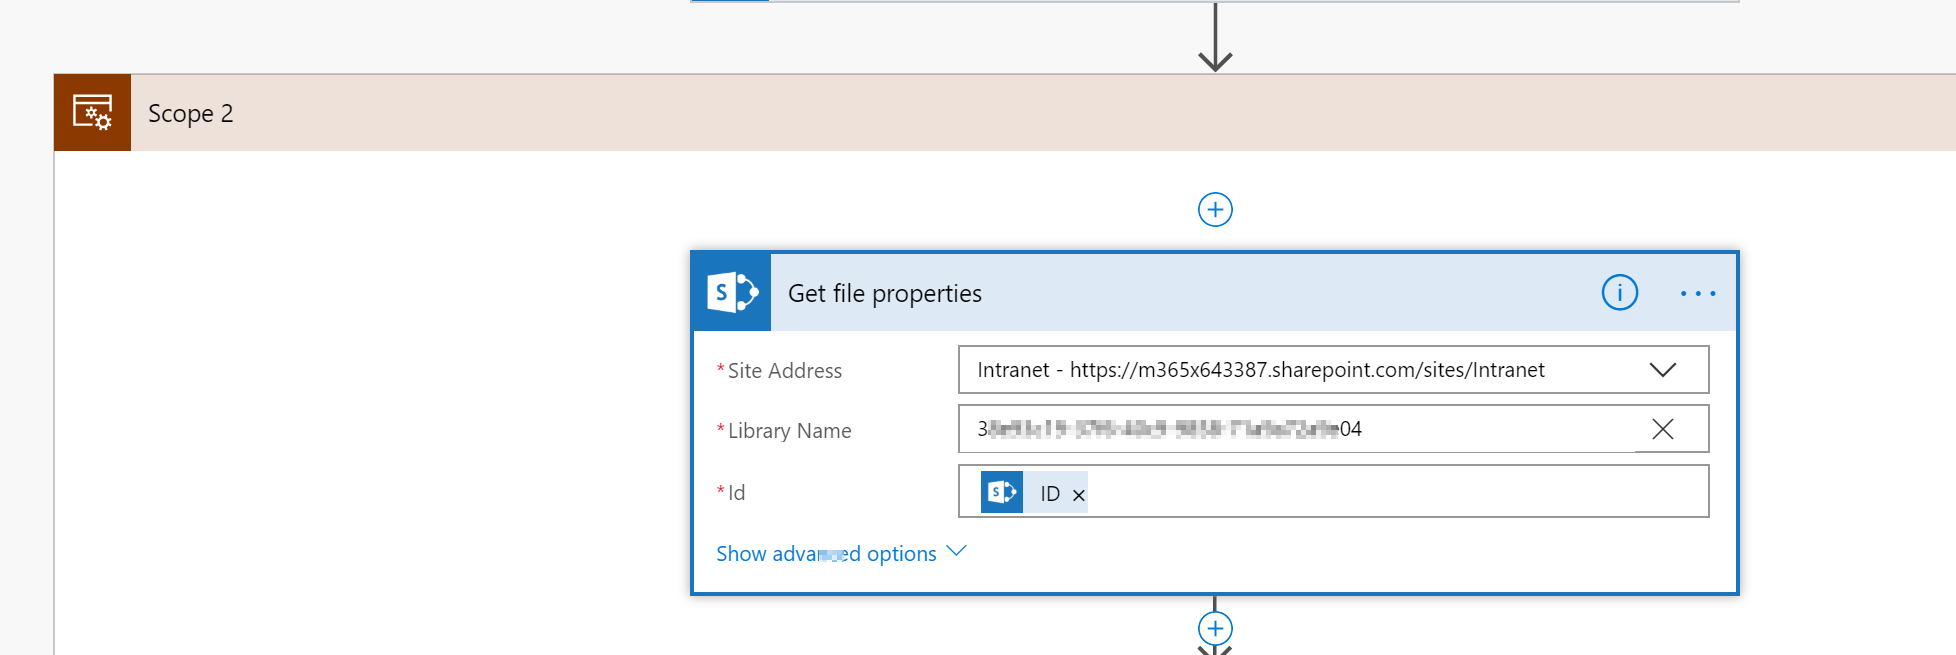
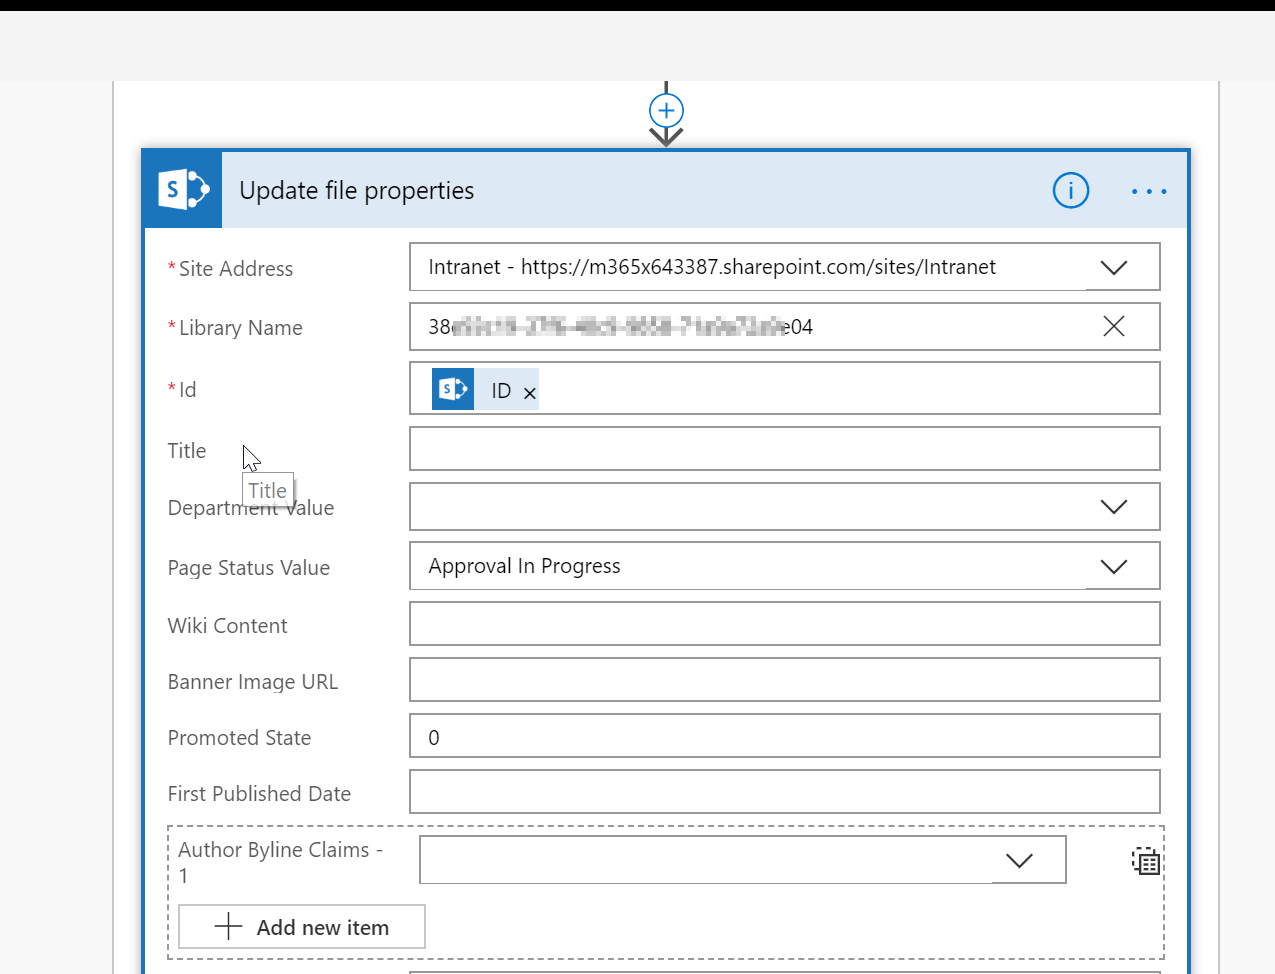
The flow can be customised as needed to work with any custom requirements for approval process, such as in the test scenario, I have included an additional column for updating more statuses of Approval and updated it from the flow as in the screenshot below. The steps are as follows:
- Go to flow.microsoft.com
- Open the flow that was created to Submit for Approval
- Customise the flow to add the status column update using “Update Properties”. Since Site pages library will not show up in the dropdown list, copy the library guid from “Get File properties” action and paste it the “Update properties”.
- Publish the flow
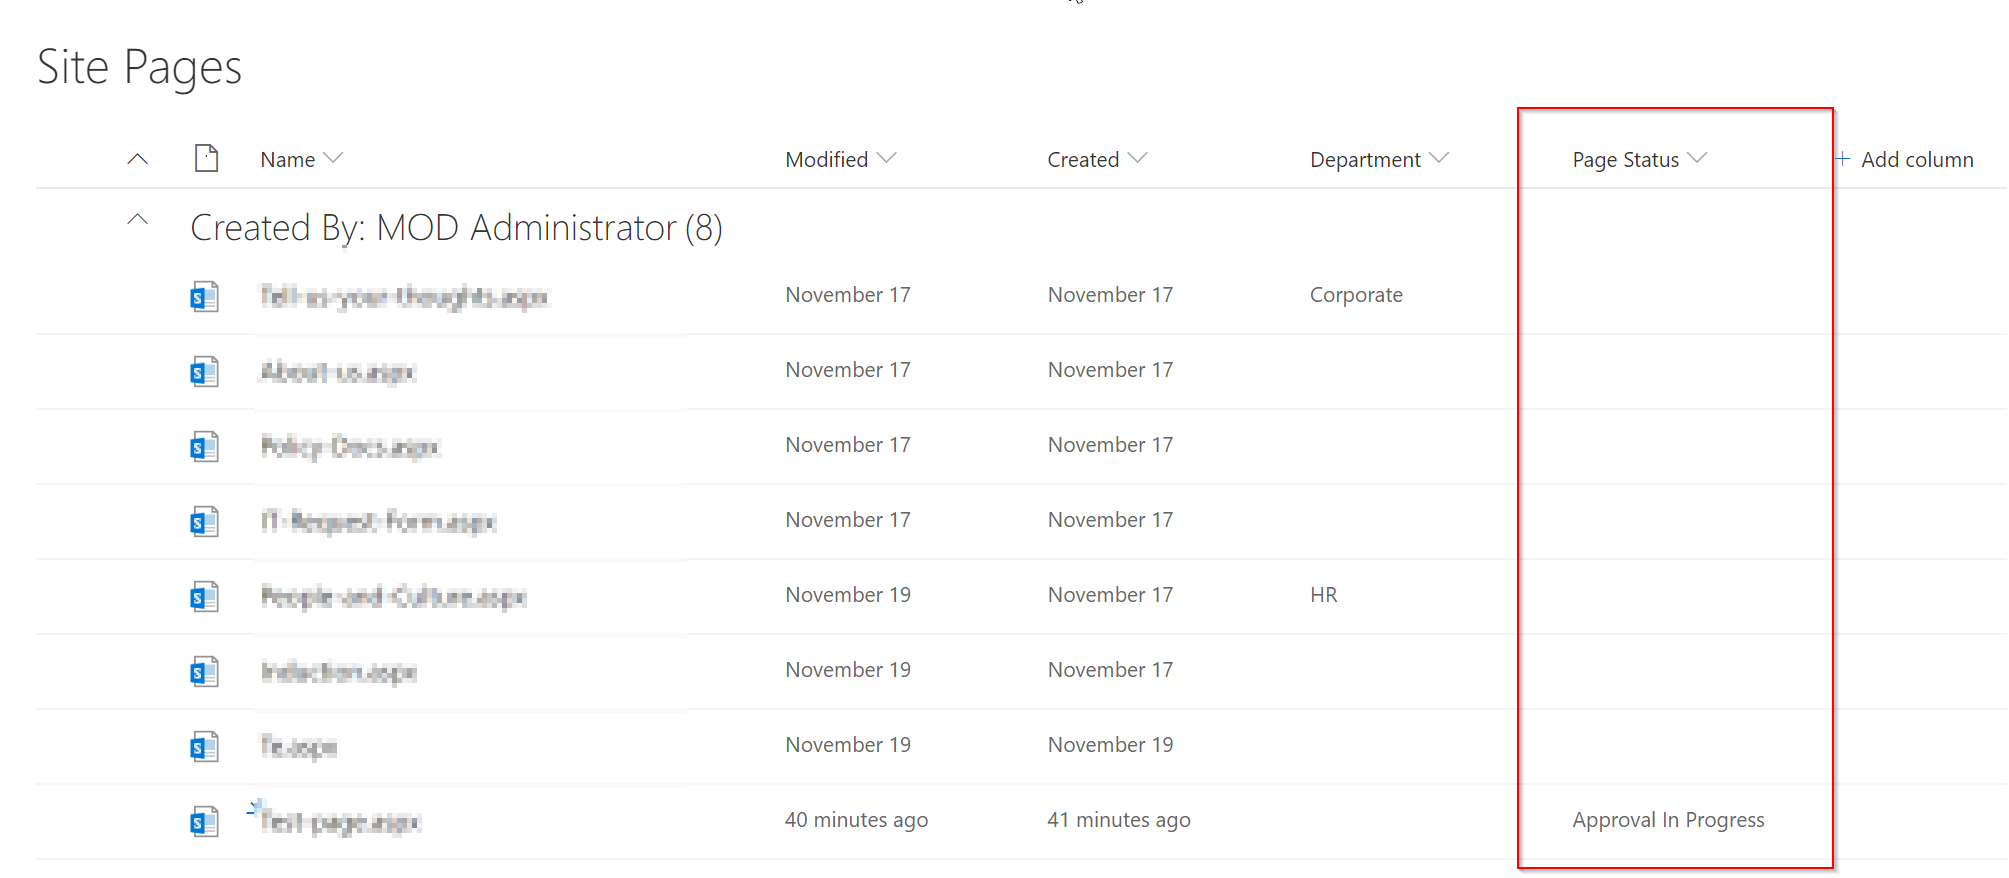
After we run the flow we could see the status reflected in the library.
Conclusion
In this blog, we saw how we could create a page aprpvoal flow for approving pages.