There is a feature in Azure AD Connect that became available in the November 2015 build 1.0.9125.0 (listed here), which has not had much fanfare but can certainly come in handy in tricky situations. I happened to be working on a project that required the DNS domain linked to an old Office 365 tenant to be removed so that it could be used in a new tenant. Although the old tenant was no long used for Exchange Online services, it held onto the domain in question, and Azure AD Connect was being used to synchronise objects between the on-premise Active Directory and Azure Active Directory.
Trying to remove the domain using the Office 365 Portal will reveal if there are any items that need to be remediated prior to removing the domain from the tenant, and for this customer it showed that there were many user and group objects that still had the domain used as the userPrincipalName value, and in the mail and proxyAddresses attribute values. The AuthoritativeNull literal could be used in this situation to blank out these values against user and groups (ie. Distribution Lists) so that the domain can be released. I’ll attempt to show the steps in a test environment, and bear with me as this is a lengthy blog.
Trying to remove the domain minnelli.net listed the items needing attention, as shown in the following screenshots:
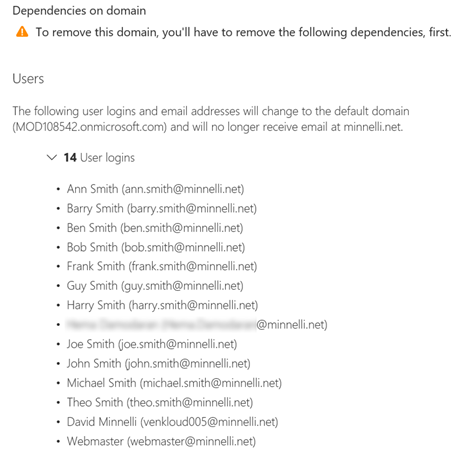
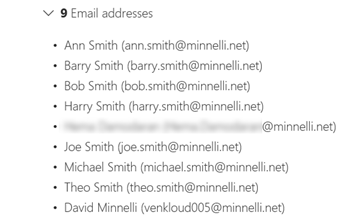
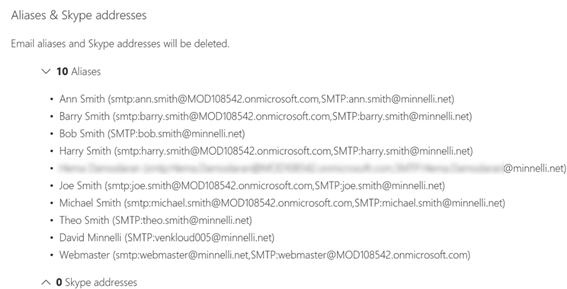

This report showed that three actions are required to remove the domain values out of the attributes:
- userPrincipalName
- proxyAddresses
userPrincipalName is simple to resolve by changing the value in the on-premise Active Directory using a different domain suffix, then synchronising the changes to Azure Active Directory so that the default onmicrosoft.com or another accepted domain is set.
Clearing the proxyAddresses and mail attribute values is possible using the AuthoritativeNull literal in Azure AD Connect. NOTE: You will need to assess the outcome of performing these steps depending on your scenario. For my customer, we were able to perform these steps without affecting other services required from the old Office 365 tenant.
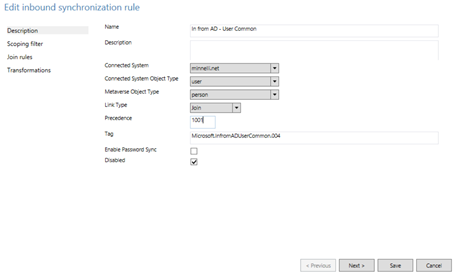
Using the Synchronization Rules Editor, locate and edit the In from AD – User Common rule. Editing the out-of-the-box rules will display a message to suggest you create an editable copy of the rule and disable the original rule which is highly recommended, so click Yes.

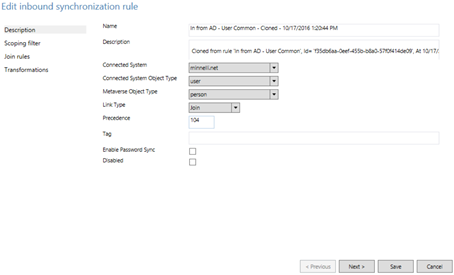
The rule is cloned as shown below and we need to be mindful of the Precedence value which we will get to shortly.
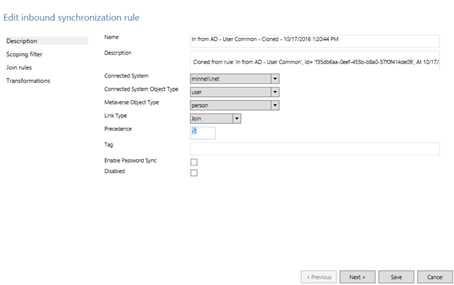
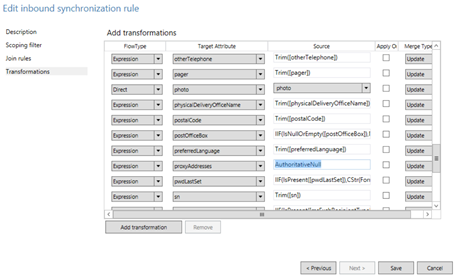
Select Transformations and edit the proxyAddresses attribute, set the FlowType to Expression, and set the Source to AuthoritativeNull.
I recommend setting the Precedence value in the new cloned rule to be the same as the original rule, in this case value 104. Firstly edit the original rule to a value such as 1001, and you can also notice the original rule is already set to Disabled.
Set the cloned rule Precedence value to 104.
Prior to performing a Full Synchronization run profile to process the new logic, I prefer and recommend to perform a Preview by selecting a user affected and previewing a Full Synchronization change. As can be seen below, the proxyAddresses value will be deleted.
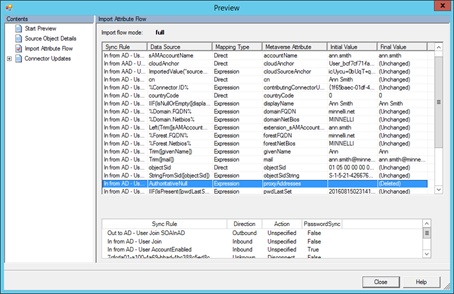
The same process would need to be done for the mail attribute.
Once the rules are set, launch the following PowerShell command to perform a Full Import/Full Synchronization cycle in Azure AD Connect:
- Start-ADSyncSyncCycle -PolicyType Initial
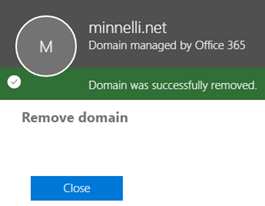
Once the cycle is completed, attempt to remove the domain again to check if any other items need remediation, or you might see a successful domain removal. I’ve seen it take upto 30 minutes or so before being able to remove the domain if all remediation tasks have been completed.
There will be other scenarios where using the AuthoritativeNull literal in a Sync Rule will come in handy. What others can you think of? Leave a description in the comments.