When using Forefront / Microsoft Identity Manager for provisioning users into Active Directory, determining which organisational unit (OU) to place the user in varies from customer to customer. Some AD OU structures are flat, others hierarchical based on business, departmental, functional role or geography. Basically every implementation I’ve done has been different.
That said the most recent implementation I’ve done is for an organisation that is growing and as such the existing structure is in flux and based on differing logic depending on who you talk to. Coming soon they’re restructuring their OU structure but not before MIM will be live. Damn.
This blog post details my interim solution to enable provisioning of new users into AD with an existing complex OU structure until the customer simplifies their hierarchy with upcoming work and without having to maintain a matrix of mapping tables.
Overview
In this blog post I’ll document how you can perform dynamic Active Directory user provisioning placement utilising Søren Granfeldt’s extremely versatile PowerShell Management Agent.
Using the Synchronisation Rule for AD Outbound I land the new AD account into a landing OU. My Placement MA (using the PS MA), see’s accounts in this landing OU and then queries back into AD using the new users Title (title) and State (st) attributes to find other AD users with the same values, location (DN). It orders the results and moves our new AD account to the location of the greatest number of users with the same metadata.
My User Placement MA is used in conjunction with an Active Directory MA and Declarative Rules in the MIM Portal.
Getting Started with the Granfeldt PowerShell Management Agent
In case you haven’t read my other PS MA blog posts here is the background on getting started with the Granfeldt PS MA. If you have you can skip through this section.
First up, you can get it from here. Søren’s documentation is pretty good but does assume you have a working knowledge of FIM/MIM and this blog post is no different. Configuration tasks like adding additional attributes the User Object Class in the MIM Portal, updating MPR’s, flow rules, Workflows, Sets etc are assumed knowledge and if not is easily Bing’able for you to work it out.
Three items I had to work out that I’ll save you the pain of are;
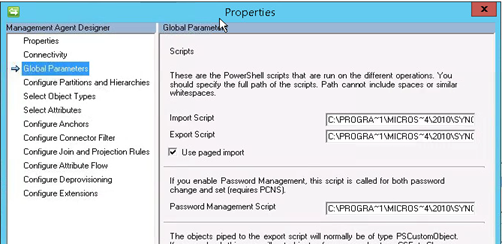
- You must have a Password.ps1 file. Even though we’re not doing password management on this MA, the PS MA requires a file for this field. The .ps1 doesn’t need to have any logic/script inside it. It just needs to be present
-
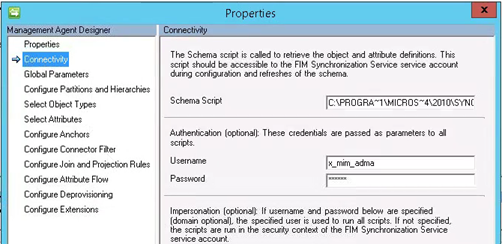
The credentials you give the MA to run the scripts as, needs to be in the format of just ‘accountname’ NOT ‘domain\accountname’. I’m using the service account that I’ve used for the Active Directory MA. The target system is the same directory service and the account has the permissions required (you’ll need to add the service account to the appropriate Lync role group for user management)
-
The path to the scripts in the PS MA Config must not contain spaces and be in old-skool 8.3 format. I’ve chosen to store my scripts in an appropriately named subdirectory under the MIM Extensions directory. Tip: from a command shell use “dir /x” to get the 8.3 directory format name. Mine looks like C:\PROGRA~1\MICROS~4\2010\SYNCHR~1\EXTENS~2\Placement
Schema Script (schema.ps1)
As I’m using the OOTB (out of the box) Active Directory MA to provision the AD account and only using this MA to move the AD Object the schema only consists of the attributes needed to workout where the user should reside and update them.
Password Script (password.ps1)
Just a placeholder file as detailed above.
Import Script (import.ps1)
The import script looks to see if the user is currently residing in the LandingOU that the AD MA puts new users into. If the user is, then the Import Script gets the users ‘Title’ and ‘State’ attribute values and searches AD to find any other users with the same State and Title and pulls back their OU. The script discounts any users that are in the Expired OU structure and any users (including the user being processed) that are in the Landing OU. It orders the list by occurrence and then selects the first entry. This becomes the location where we will move the user to. We also update the targetOU custom attribute with where the user is, once moved to keep the synchronisation rule happy and no longer trigger a move on the user (unless someone moves the user back to the LandingOU). The location of the LandingOU and the Expired OU’s path are set near the top of the script. If we don’t find any matches then I have catchall per State (st) where we will put the user and they can then be moved manually if required later.
On the $request line you’ll see I have a filter for the User Object Class and users with an account name starting with ‘U’. For the customer I wrote this for, all users start with U. You can obviously also have Filters on the MA. I have a few there as well, but limiting the size of the returned array makes things quicker to run full imports.
Export Script (export.ps1)
The export script is basically doing the move of the users AD account.
Wiring it all together
In order to wire the functionality all together there are the usual number of configuration steps to be completed. Below I’ve shown a number of the key points associated with making it all work.
Basically create the PS MA, import attributes from the PS MA, add any additional attributes to the Portal Schema, update the Portal Filter to allow Administrators to use the attribute, update the Synchronisation MPR to allow the Sync Engine to flow in the new attributes, create the Set used for the transition, create your Synchronisation Rule, create your Terminal Services Workflow, create your Terminal Services MPR, create your MA Run Profiles and let it loose.
Management Agent Configuration
As per the tips above, the format for the script paths must be without spaces etc. I’m using 8.3 format and I’m using the same service account as my AD MA.
Password script must be specified but as we’re not doing password management it’s empty as detailed above.
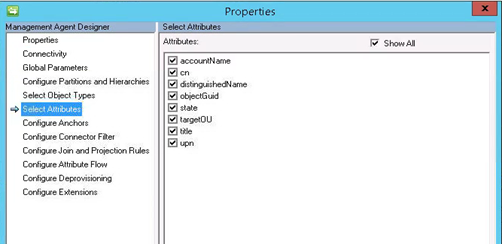
If your schema.ps1 file is formatted correctly you can select your attributes.
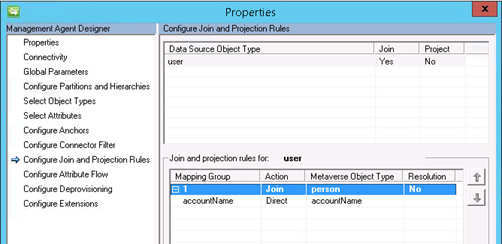
My join rule is simple. AccountName (which as you’ll see in the Import.ps1 is aligned with sAMAccountName) to AccountName in the MetaVerse.
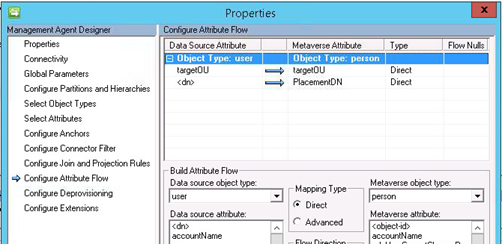
My import flow is just bringing back in the DN to a custom MV attribute.
Synchronisation Rules
My Placement MA Outbound Sync rule relies on the value of the new OU that was bought in on the Import script.
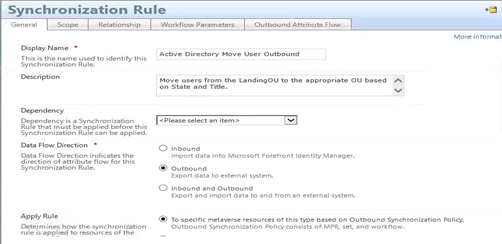
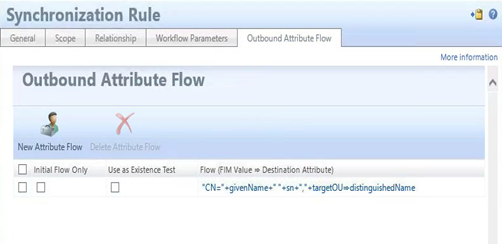
We flow out the new DN for the user object.
Set
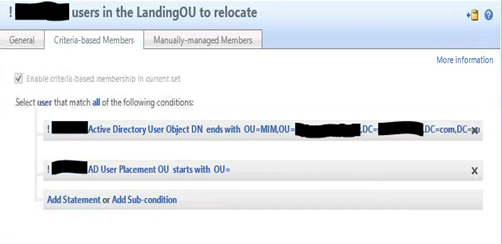
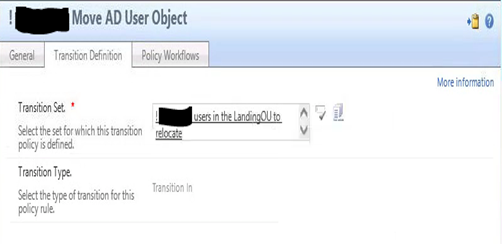
I created a Set that I use as a transition to trigger the move of the user object on my Placement MA. My Set looks to see if the user account is in AD and active (I have a Boolean attribute not shown and another rule in the MIM Portal that is set based on an advanced flow rule in the Sync engine that has some logic to determine if employment date as sourced from my HR Management Agent is current and the user should be active) and that the user is currently in the LandingOU.
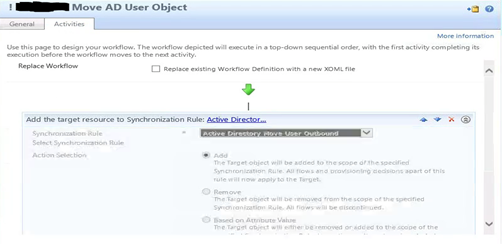
Workflow
An action based workflow that will use the trigger the Synchronisation rule on the Placement MA.
MPR
Finally my MPR for moving the AD object is based on the transition set,
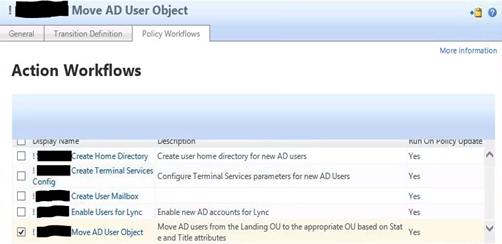
and my Placement Workflow.
Summary
Using the Granfeldt PowerShell MA it was very easy to accomplish something that would have been a nightmare to try and do with declarative rules or un-maintainable using a matrix of mapping tables. It would also be possible to use this as a basis to move users when their State or Title changes. This example could also be reworked easily to use different attributes.
Follow Darren on Twitter @darrenjrobinson
