Two and half years ago I wrote this post on creating an Azure Function to trigger the process of Automating Microsoft Identity Manager Configuration backups. The Azure Function piece was a little obtuse. I was using it, as it was the “new thing” and it was my new hammer. And everything was a nail. The reality is that the rest of the process is completely valid (nightly backups of your development Identity Manager configuration).
Recently I was implementing this process in another development environment. With most things I do, each time I do them again I attempt to iterate and refine. Try to improve on the process and functionality. I’ve done just that with the nightly backups, now copying the configuration backup to Azure Storage, but also incorporating the automation of the Identity Manager Configuration Report and presenting the output of both as an Azure Static Website.
This post details those changes which are;
- Backup Configuration script changes
- run as a local scheduled task (instead of a Schduled Azure Function)
- copy the compressed backup to an Azure Storage Account
- Generate Configuration Documentation
- copy the configuration report to Azure Static Website
- generate a new Azure Static Website page with all the configuration backups and documentation reports
Prerequisites
In order to use my updated script that combines the generation of MIM Configuration Documentation along with a Backup of the MIM Configuration and generation of the Documentation webpage you will need to;
- create a Storage Account that will be used to store the generated documentation and the MIM Configuration backups and present the Web Page with a list of the configs in the Storage Account.
- in this post I detail how to create a Storage Account for use as an Azure Static Website.
- Note: I also configured the Azure Storage Account to only allow traffic from the Azure VNets that contain my MIM Servers and the development networks that need access to the documentation and configs. DON’T leave your Storage Account with a Website open to the entire Internet
- enable your MIM Sync Server for Azure Managed Identity
- this post details the process to enable a VM for Managed Identity that then allows AzCopy to copy files to an Azure Storage Account
- make sure you give permissions to your MIM Sync VM to the Storage Account you created for the Static Website. On the Storage Account add a Role Assignment for your Identity Manager Azure VM for Storage Blob Data Contributor to give it the permissions to upload files to Blob Storage
- this post details the process to enable a VM for Managed Identity that then allows AzCopy to copy files to an Azure Storage Account
- download and install the MIM Documenter and make the config changes to the documentation script
- I show how to do that in this previous post
Create the Website Structure
Using Azure Storage Explorer or the Storage Explorer via the Azure Portal locate the Storage Account you created and enabled for use as a Static Website.
Create a Configs and a Reports directory under the $web container in Blob Containers as shown below. The nightly generated archive containing the exported MIM Service, MIM Sync, and Extensions will be put into the Configs directory. The nightly generated MIM Configuration report will be put into the Reports directory.
404.html
This is a requirement of the Azure Static Website functionality. I simply generated a silly 404 webpage. Here is the contents of my 404.html file. Make yours whatever works for you.
<head>
<meta http-equiv="refresh" content="0; URL='https://http.cat/404'" />
</head>
Index.html
The index.html file is generated each night by the script. This means that if you want to delete any Reports or Configs make sure you delete the corresponding file from both the Reports and Configs directory.
Backup Script
Here is the consolidated Backup, Documenter and Web Page generation script.
You will need to make the following updates;
- the local path for the config exports on Line 8
- URI for your Azure Storage Account on Line 13
- the URI for you Azure Static Website on Line 15
- where you copied the MIM Documenter on Line 64
- the name of the updated Documenter script on Line 64
- where the reports will go on Line 67 and Line 68
Create a Windows Scheduled Task
The script above will be triggered and executed by a Windows Scheduled Task. Make sure the account that will be running the script is in the MIM|FIM Sync Admins and Portal Administrators so the configuration can be exported.
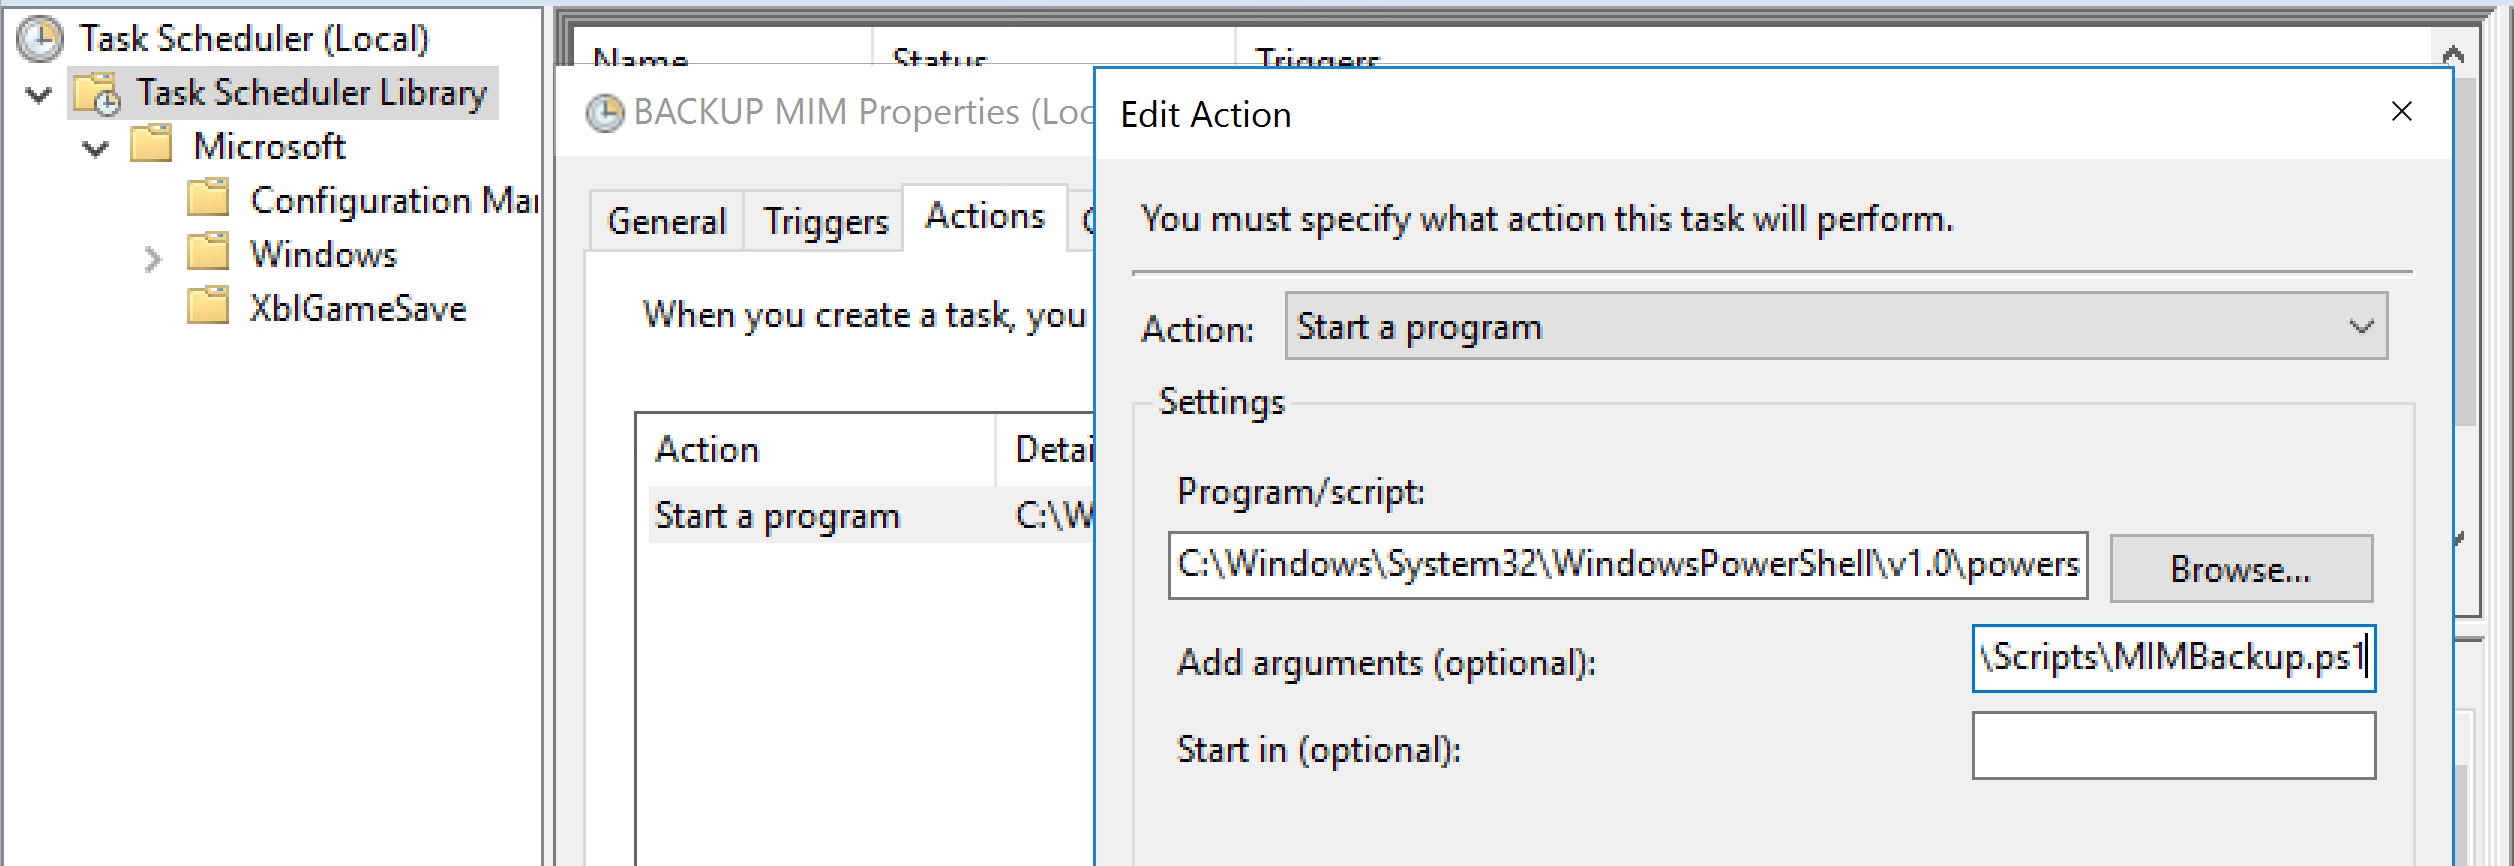
The Scheduled Task to run the PowerShell script should look like the screenshot below. My script is named MIMBackup.ps1

Summary
We now have a centralised off box export of our MIM environments configuration along with the MIM Configuration documentation with a handy HTML page to locate different versions as the environment changes during the development cycle.

