With the absence of content editor web part (CWEP) or script editor web part in SharePoint Modern experience, power users have the challenge to style the page as per their requirements.
The only approach is to create a custom SPFx component that can add the custom css onto the page. That’s it !! Easy right. But how to do it? In this blog we will look at the steps for the same and is also a link (with steps) in case to easily build it.
This adds the overhead of managing a custom component but the simplicity of the component puts all the support on the external CSS and not the webpart itself, so easy to maintain. In other words, it means that the webpart just adds the custom CSS to the page, so the CSS does all the work.
Note: The custom CSS doesn’t solve all scenarios as would the earlier Script editor or CWEP but still could do the styling part and solve a lot of alignment issues. Also another note, applying custom inline JavaScript to the page has its challenges and don’t work. We will discuss the reason of not using custom scripts in another blog, but the advise for now is not to use custom scripts.
Deployment using Code from Repo
For those who would like to get the code directly or start with, here is the link to the repo. The steps to use it are simple as below.
1. Clone the repo or download the solution
2. Open the folder in Visual Studio Code
3. Then, as with any cloned code, do the following,
gulp clean

npm install

gulp build
4. If the above doesn’t result any build errors, then go to step 7, else go to step 5
5. Fix any errors in the code
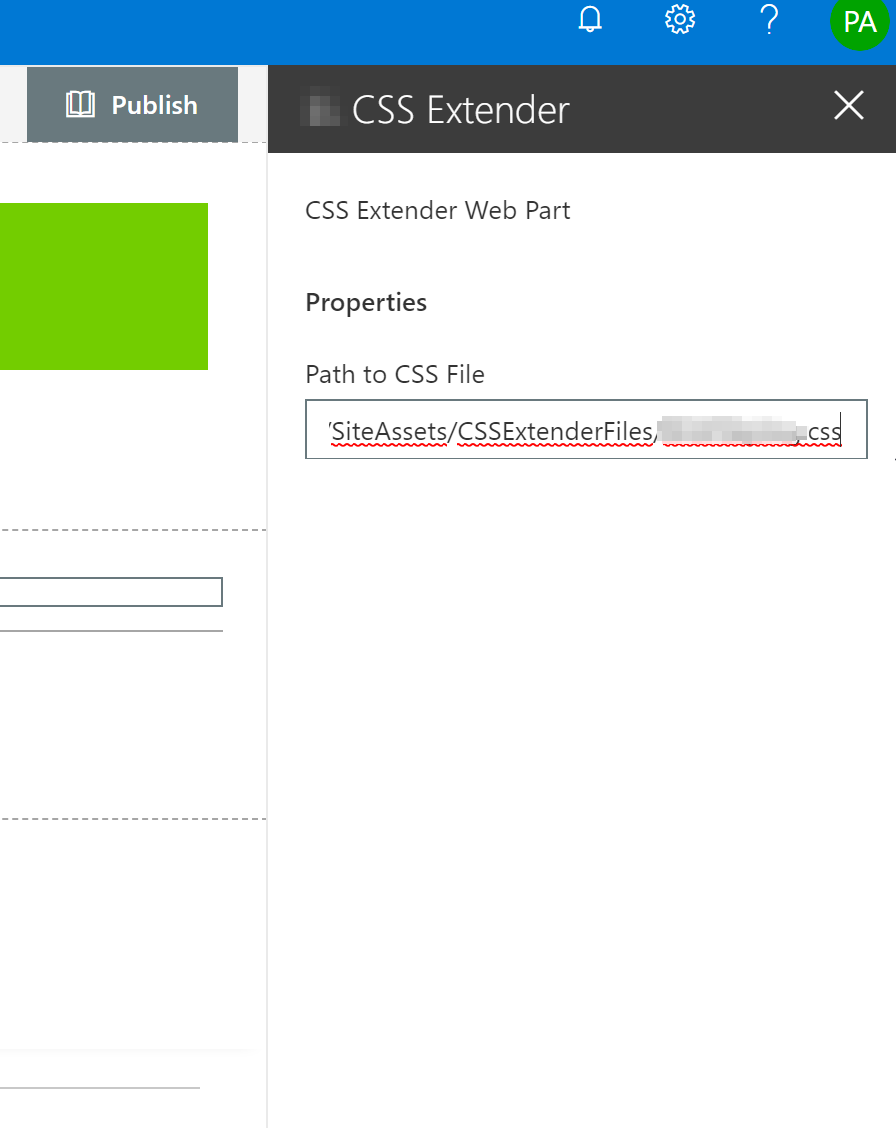
6. Test the code using gulp serve. Open the workbench and test the custom CSS using property pane. For details see below step x.
gulp serve
7. Deploy the assets using Gulp ship.
gulp --ship
8. Package the solution
gulp package-solution --ship
9. Go to Code folder and migrate to SharePoint/sources and find the sppkg file.
10. Deploy the sppkg file to App catalog of your site or tenant app catalog. For more details to how to enable site collection app catalog check here.
11. Add the app to the site
12. Add the web part to the page.
13. Edit the web part and provide the CSS class path from the property pane.
14. Apply the changes. The css should reflect on the site.
Building your own CSS implementor
If you are not interested to copy the code from the repo and write it yourself below are the steps. The code is not complex so way to create it.
1. Create a SPFx webpart using yeoman. Recommended to use version SPFx 1.4 or greater.
2. Add a property to read the CSS Path from.
3. Next open the .tsx file from the components folder. And add the SPComponentLoader from @microsoft/sp-loader class
4. Next use SPComponentLoader.Loadcss() method to apply the custom css onto the page. Sample code below
public render(): React.ReactElement {

if(this.props.pathtocssfile!=="")

{

SPComponentLoader.loadCss(this.props.pathtocssfile);

}

}
5. Gulp serve and test the webpart
And that’s it !!
Follow the steps from above repo section for the steps to deploy the web part to the application catalog.
Conclusion
In this blog we saw how to implement custom css on a page using some quick SPFx scripting.
Happy Coding !!
love the idea, but the repo link doesn’t seem to exist?