Azure Functions code can often contain important functionality that needs to be tested. The two most common ways of testing code are unit testing and integration testing. Unit testing runs pieces of code in isolation, and this is relatively simple to do with Azure Functions. Integration testing can be a little trickier though, and I haven’t found any good documentation about how do this with version 2 of the Functions runtime. In this post I’ll outline the approach I’m using to run integration tests against my Azure Functions v2 code.
In an application with a lot of business logic, unit testing may get us most of the way to verifying the code’s quality. But Azure Functions code often involves pieces of functionality that can’t be easily unit tested. For example, triggers, input and output bindings are very powerful features that let us avoid writing boilerplate code to bind to HTTP requests, connect to Azure Storage and Service Bus blobs, queues, and tables, or building our own timer logic. Similarly, we may need to connect to external services or databases, or work with libraries that can’t be easily mocked or faked. If we want to test these parts of our Functions apps then we need some form of integration testing.
Approaches to Integration Testing
Integration tests involve running code in as close to a real environment as is practicable. The tests are generally run from our development machines or build servers. For example, ASP.NET Core lets us host an in-memory server for our application, which we can then connect to real databases, in-memory versions of systems like the Entity Framework, or emulators for services like Azure Storage and Cosmos DB.
Azure Functions v1 included some features to support integration testing of script-based Functions apps. But to date, I haven’t found any guidance on how to run integration tests using a precompiled .NET Azure Functions app running against the v2 runtime.
Example Functions App
For the purposes of this post I’ve written a very simple Functions App with two functions that illustrate two common use cases. One function (HelloWorld) receives an HTTP message and returns a response, and the second (HelloQueue) receives an HTTP message and writes a message to a queue. The actual functions themselves are really just simple placeholders based on the Visual Studio starter function template:
In a real application you’re likely to have a lot more going on than just writing to a queue, but the techniques below can be adapted to cover a range of different scenarios.
You can access all the code for this blog post on GitHub.
Implementing Integration Tests
The Azure Functions v2 core tools support local development and testing of Azure Functions apps. One of the components in this set of tools is func.dll, which lets us host the Azure Functions runtime. By automating this from our integration test project we can start our Functions app in a realistic host environment, run our tests, and tear it down again. This is ideal for running a suite of integration tests.
While you could use any test framework you like, the sample implementation I’ve provided uses xUnit.
Test Collection and Fixture
The xUnit framework provides a feature called collection fixtures. These fixtures let us group tests together; they also let us run initialisation code before the first test runs, and run teardown code after the last test finishes. Here’s a placeholder test collection and fixture that will support our integration tests:
Starting the Functions Host
Now we have the fixture class definition, we can use it to start and stop the Azure Functions host. We will make use of the System.Diagnostics.Process class to start and stop the .NET Core CLI (dotnet.exe), which in turn starts the Azure Functions host through the func.dll library.
Note: I assume you already have the Azure Functions v2 core tools installed. You may already have these if you’ve got Visual Studio installed with the Azure Functions feature enabled. If not, you can install it into your global NPM packages by using the command npm install -g azure-functions-core-tools, as per the documentation here.
Our fixture code looks like this:
The code is fairly self-explanatory: during initialiation it reads various paths from configuration settings and starts the process; during teardown it kills the process and disposes of the Process object.
I haven’t added any Task.Delay code, or anything to poll the function app to check if it’s ready to receive requests. I haven’t found this to be necessary. However, if you find that the first test run in a batch fails, this might be something you want to consider adding at the end of the fixture initialisation.
Configuring
Some of the code in the above fixture file won’t compile yet because we have some configuration settings that need to be passed through. Specifically, we need to know the path to the dotnet.exe file (the .NET Core CLI), the func.dll file (the Azure Functions host), and to our Azure Functions app binaries.
I’ve created a class called ConfigurationHelper that initialises a static property that will help us:
The Settings class is then defined with the configuration settings we need:
Then we can create an appsettings.json file to set the settings:
That’s all we need to run the tests. Now we can write a couple of actual test classes.
Writing Some Tests
You can write your integration tests in any framework you want, whether that be something very simple like pure xUnit tests or a more BDD-oriented framework like SpecFlow.
Personally I like BDDfy as a middle ground – it’s simple and doesn’t require a lot of extra plumbing like SpecFlow, while letting us write BDD-style tests in pure code.
Here are a couple of example integration tests I’ve written for the sample app:
Test the HelloWorld Function
This test simply calls the HTTP-triggered HelloWorld function and checks the output is as expected.
Test the HelloQueue Function
The second test checks that the HelloQueue function posts to a queue correctly. It does this by clearing the queue before it runs, letting the HelloQueue function run, and then confirming that a single message – with the expected contents – has been enqueued.
Running the Tests
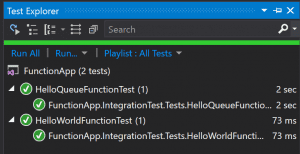
Now we can compile the integration test project and run it from Visual Studio’s Test Explorer. Behind the scenes it runs the .NET Core CLI, starts the Azure Functions host, executes our tests, and then kills the host when they’re finished. And we can see the tests pass!
Running from Azure Pipelines
Getting the tests running from our local development environment is great, but integration tests are most useful when they run automatically as part of our continuous integration process. (Sometimes integration tests take so long to run that they get relegated to run on nightly builds instead, but that’s a topic that’s outside the scope of this post.)
Most build servers should be able to run our integration tests without any major problems. I’ll use the example here of Azure Pipelines, which is part of the Azure DevOps service (and which used to be called VSTS’s Build Configurations feature). Azure Pipelines lets us define our build process as a YAML file, which is also a very convenient way to document and share it!
Here’s a build.yaml for building our Azure Functions app and running the integration tests:
The three key parts here are:
- Lines 3 and 4 override the
FunctionHostPathapp setting with the location that Azure Pipelines hosted agents use for NPM packages, which is different to the location on most developers’ PCs. - Line 6 links the
build.yamlwith the variable groupIntegrationTestConnectionStrings. Variable groups are outside the scope of this post, but briefly, they let us create a predefined set of variables that are available as environment variables. Inside theIntegrationTestConnectionStringsvariable group, I have set two variables –AzureWebJobsStorageandStorageConnectionString– to a connection string for an Azure Storage account that I want to use when I run from the hosted agent. - Lines 16 through 21 install the Azure Functions Core Tools, which gives us the
func.dllhost that we use. For Azure Pipelines hosted agents we need to run this step every time we run the build since NPM packages are reset after each build completes. - Lines 23 through 28 use the
dotnet testcommand, which is part of the .NET Core tooling, to execute our integration tests. This automatically publishes the results to Azure DevOps too.
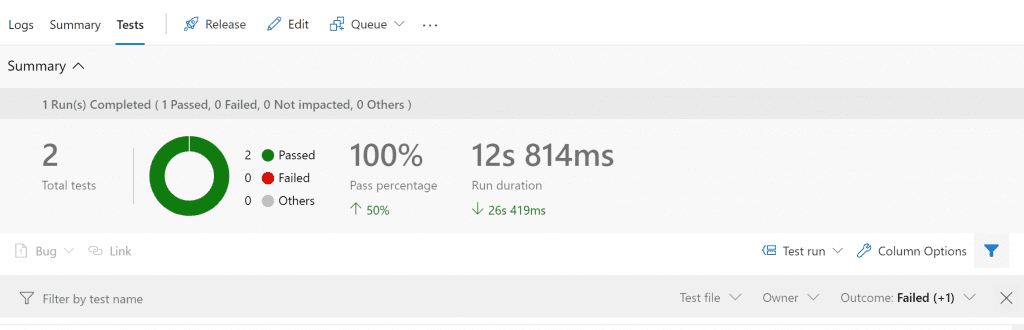
When we run the build, we can see the tests have run successfully:
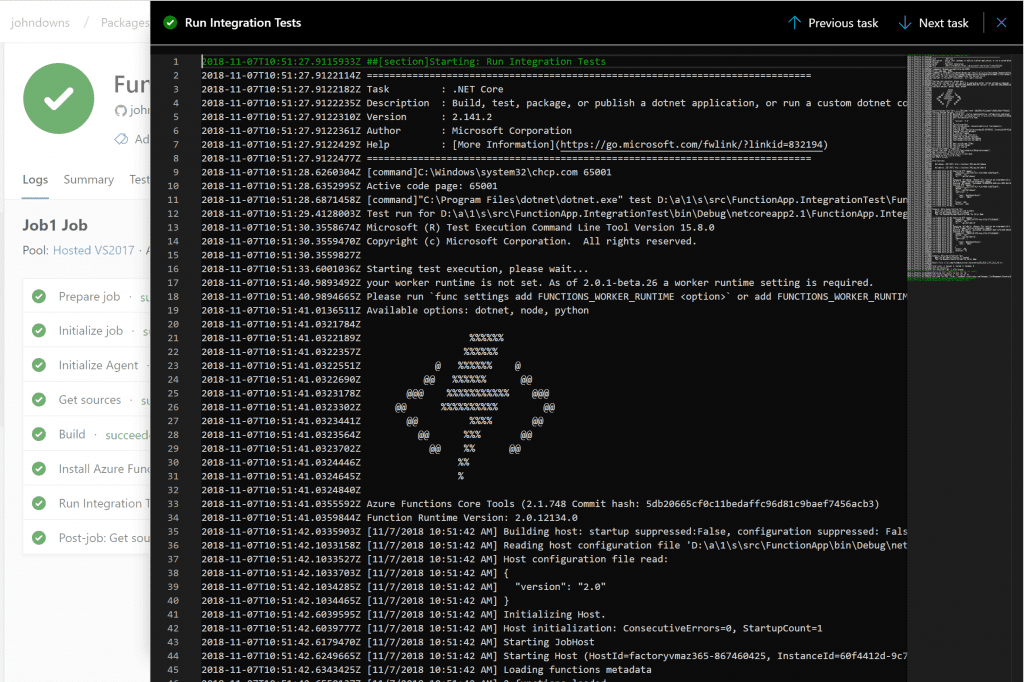
And not only that, but we can see the console output in the build log, which can be helpful when diagnosing any issues we might see:
I’ve found this approach to be really useful when developing complex Azure Functions apps, where integration testing is a part of the quality control necessary for functions that run non-trivial workloads.
Remember you can view the complete code for this post on GitHub.
Update: A second post, adapting this method to test timer-triggered functions, is now available too.
Could you please share step to execute the test case for Azure function v2 with back end as Azure database.
We are unable to connect our Azure SQL database in devops build pipeline
In advance Thank you