First published at https://nivleshc.wordpress.com
Introduction
Coming from a system administration background, I am used to writing scripts to get mundane tasks done. Whenever I saw repeatable tasks, I saw an opportunity to script them, and pass them onto a junior to do 😉
However, writing scripts brings about its own challenges.
Ok, time to fess up 😉 Hands up those that have modified a script, only to realise that the modifications broke it! To make matters worse, you forgot to take a copy of the original!
Don’t worry, I have been in that boat, and can remember the countless hours I spent, getting the script back to what it was (mind you, I am not talking about a formal business change here, which is governed by strict change control, but about personal scripts, that you have created to make your daily tasks easier)
To make a copy of a script, I would normally suffix the file with the current time and date. This provided me with a timestamp of when I changed the file and a way of reverting my changes. However, there were instances when I was making backups of the modified script because I had tested a modification and it worked, however I didn’t want to risk breaking it when further modifying the file. Guess what, these are the times when I found I made the worst mistakes! I used to get so engrossed with my modifications that I would forget to make a backup of the changes and end up with an unworkable script. The only version to revert to was the original, which meant all my hard work went to waste!
This is why I started my search for a better change tracking system. One that will show me the changes I had made, and which will allow me to easily revert to a previous version.
Guess what! I think I just found this golden goose and it is truly amazing!
In this blog I will show you how you can use Git, an open source version control system, to track changes to scripts stored locally on your computer. The main use of Git is for source control of files that a team contributes to. In these situations, a Git Server is used to store the repository.
Please ensure that the local folder you are tracking for source control is backed up either to the cloud or to an external hard disk.
For editing our code/script, we will use Microsoft’s Visual Studio Code, a free IDE that has Git support in-built. We will also use Sourcetree, Atlassian’s free Git client.
Introducing Git
Git is an awesome opensource distributed version control system. When working in a team, it allows you to have your files centrally managed, and at the same time, allowing multiple people to work on them. Team members can pull the repository to their local computer. They can also branch a part of the repository, update the files in that part and then merge them with the master. If there are no conflicts, Git will update the files in its repository. However, if there are conflicts, Git will inform that team member, showing them the conflicts. The team member then can either resolve the conflicts and then re-merge or discard their changes altogether.
If you want to read more on git, check out https://git-scm.com
To host the repositories for your team, two commonly used solutions are a Git Server or Visual Studio Teams Server. You can also use Github, however, your repositories will be public, unless you sign up for a paid account.
For personal use, you can store your git repositories in a local directory that is backed up to the cloud. For my personal projects, I use a Dropbox synchronised folder.
To use Git, you need to use a Git client. If you have a MacBook, a git client comes built-in. For windows, there are lots of clients available, however in my view, Sourcetree is one of the best (more about this abit later).
For MacBook users, below are some basic commands you can use from a terminal session
#change to directory where you will store your repository
cd /Users/tomj/Documents/git-repo/personalproject
#create a git repo in this folder
git init
#you can copy files into this folder
#to get git to start tracking the changes in the newly added files use the following command
git add .
As mentioned above, https://git-scm.com is an awesome site to learn more about Git.
You can also check out this page https://www.atlassian.com/git/tutorials/atlassian-git-cheatsheet for some quick git commands.
Using Sourcetree
For those that prefer a GUI client, I found that Sourcetree, from Atlassian, is an awesome Git client.
It gives you all the features of a good Git client plus it also shows you the history of all the changes made to the repository.
For this blog, I will be using Sourcetree to create and manage the Git repository.
So head over to https://www.sourcetreeapp.com to download and then install the client.
After installing Sourcetree, you will be prompted for a login account. Follow the links provided in the Sourcetree app to create a free Bitbucket account and then login.
Ok, lets begin.
Create a new repository
A repository is essentially a collection of files (or file) that we will track for changes. You can think of it as a directory.
To create a new repository, open Sourcetree.
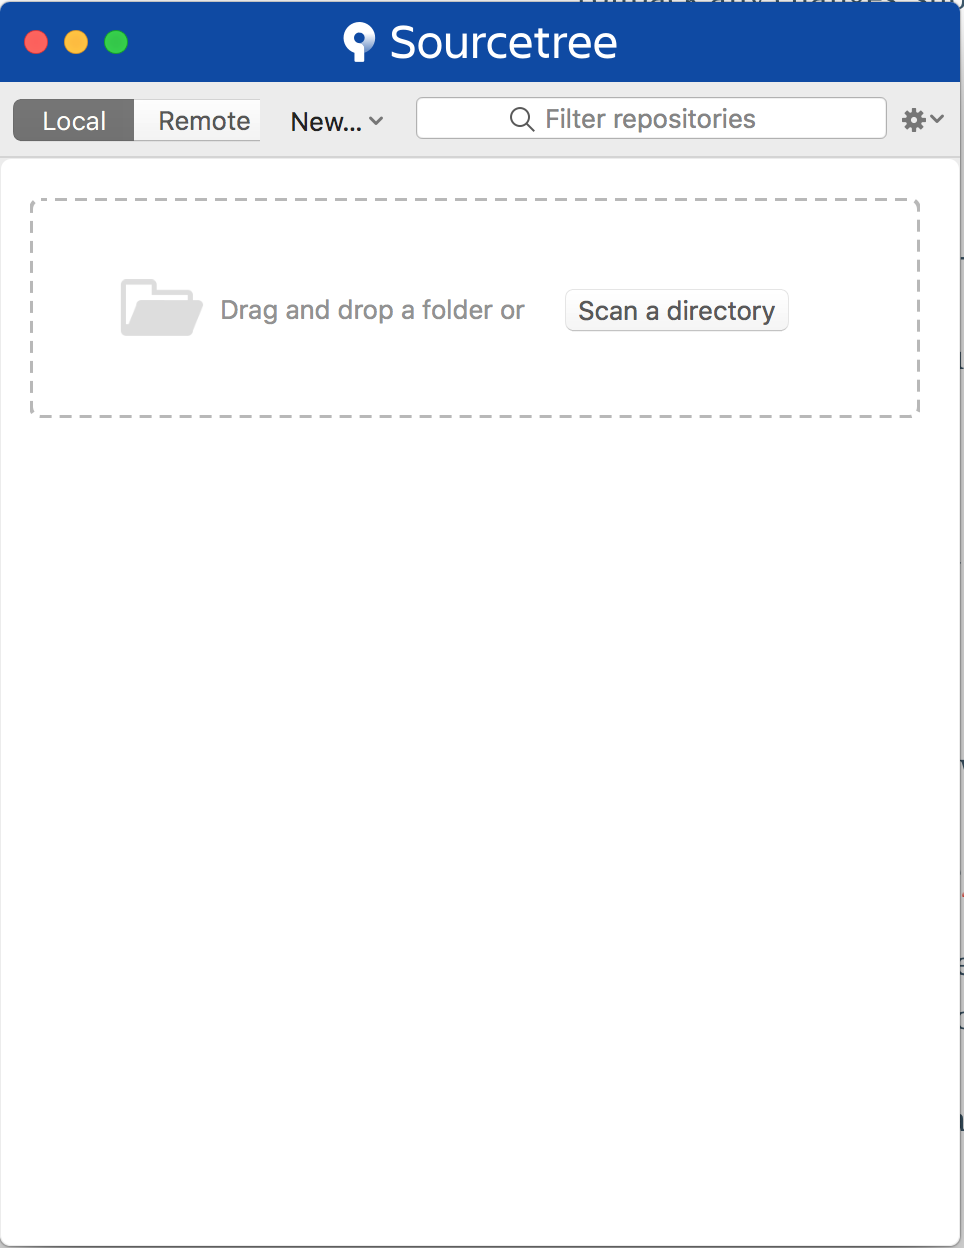
From the menu, click on File and then click New. You will get the following screen.

Next, click on New and then click on Create Local Repository.
In the next window, for Destination Path, select the folder that will contain the scripts that you want to monitor for source control.
For Name leave it to the default (name of the folder). Ensure the Type is Git and then click Create.
Guess what, thats all it takes to create a local repository! Simple ?
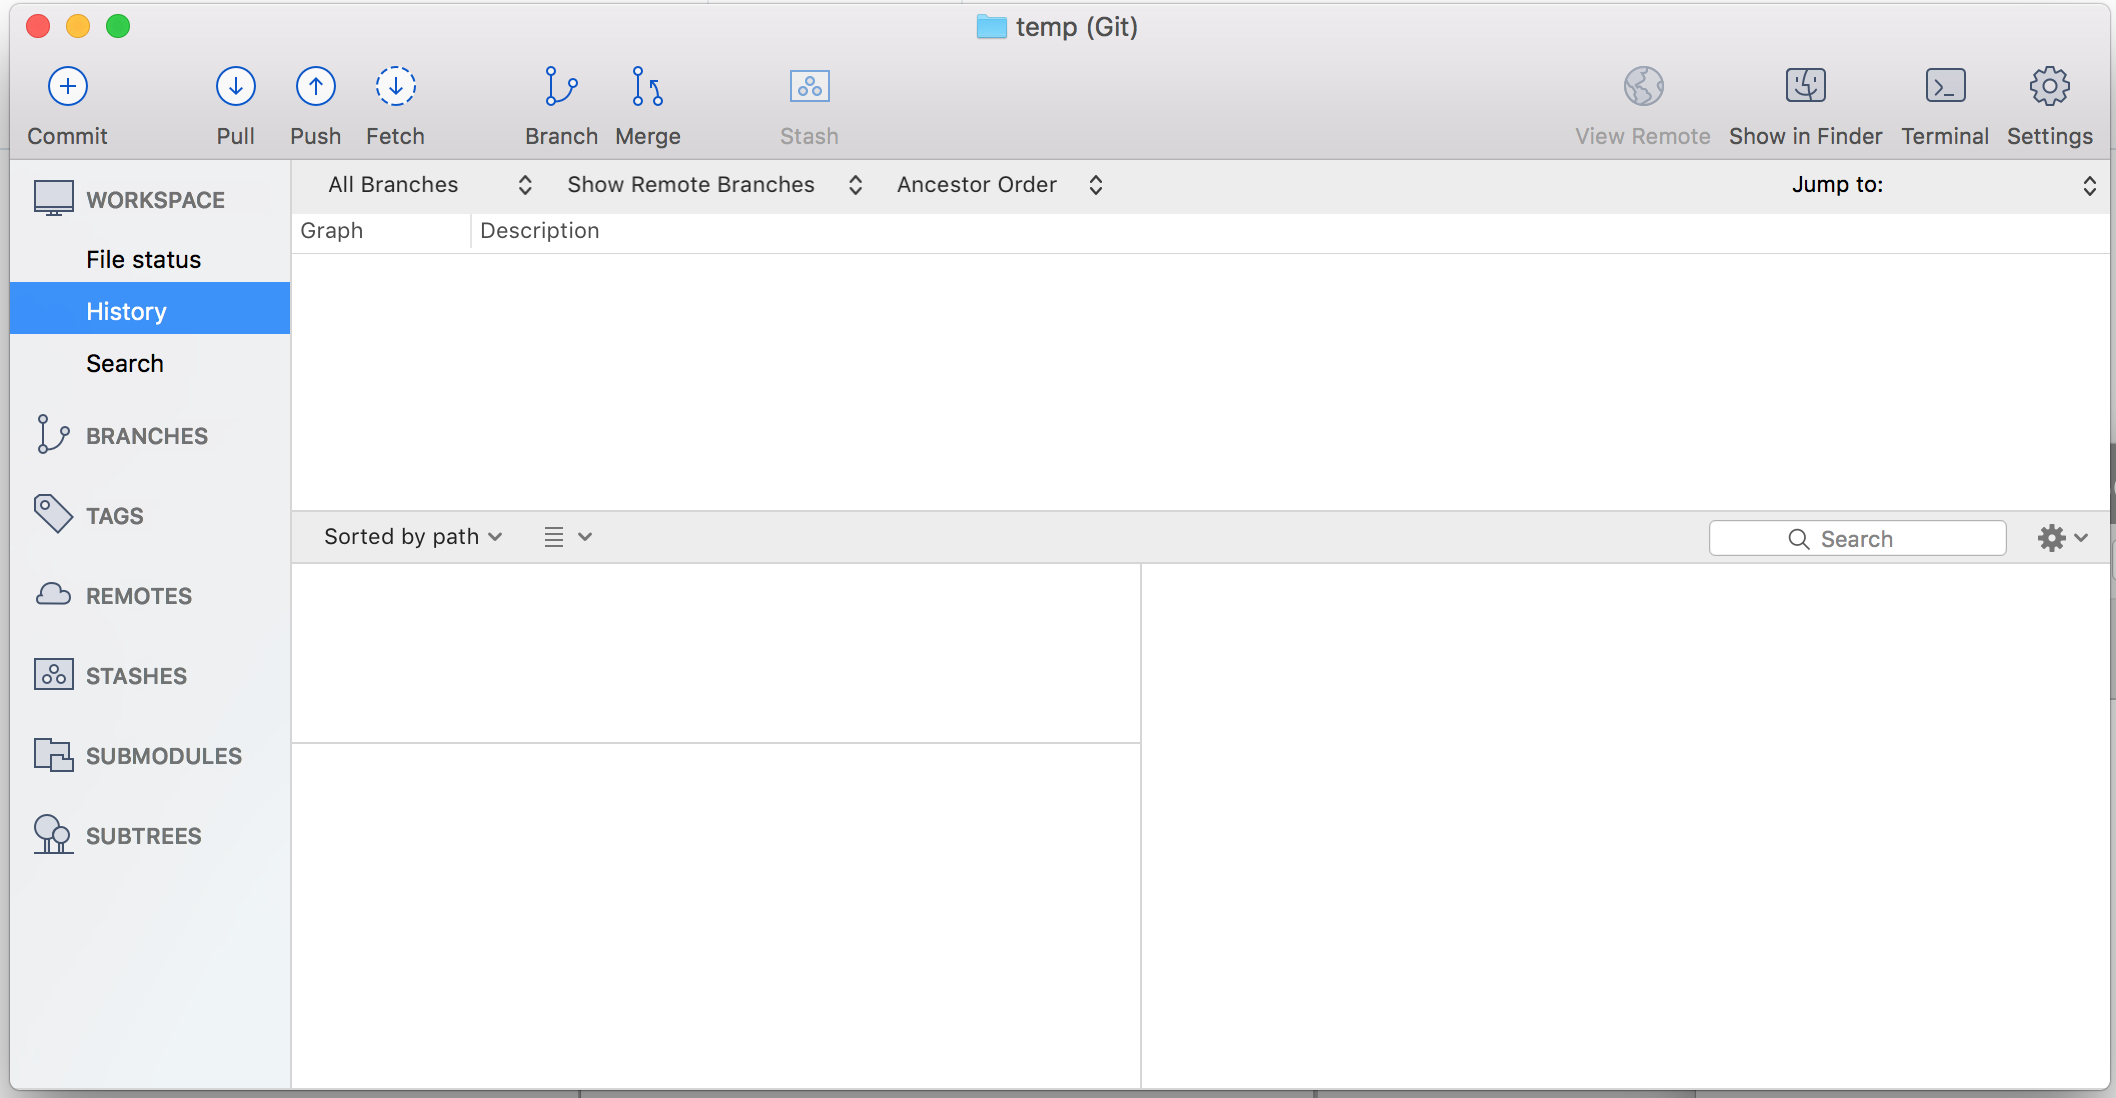
Once the repository is created, you will see a screen similar to the one shown below (my repository is called temp)
 .
.
Double click on the newly created repository (as shown above). This will show the dashboard where everything happens 😉

To see all the changes that have been made to the repository, click on History in the above screen.
Visual Studio Code
Ok, so we have created our repository and it is being monitored for changes. Now, we can start coding.
As mentioned above, we will be using Visual Studio Code, a free IDE from Microsoft. If you haven’t got it already, download it from https://code.visualstudio.com
Once installed, open Visual Studio Code.
From the menu, click on File and then click on Open. Next, choose the folder that you created the repository for above and then click on Open.
You will now see the folder structure, with all the files inside it in the left pane.
You can open any of the existing files or create new ones. For new ones, ensure you save them in the repository’s folder.
As soon as you save the file, you will notice the Source Control icon shows the number of changes that are currently ready to be staged (Source Control section is denoted by the “stethoscope” icon – ok it’s not really that but it surely looks like it 😉 )

Now, one thing to note about Source Control via Git is that, you have to stage your changes. When you stage your changes, those changes will be written to the Git repository when you click Commit.
Click into the Source Control section and then under Changes click the + for each of the files, to stage the change.

To commit the changes, enter a short description of what the changes were and then click on the tick at the top.

That’s it. Your changes has now been successfully committed to the Git repository.
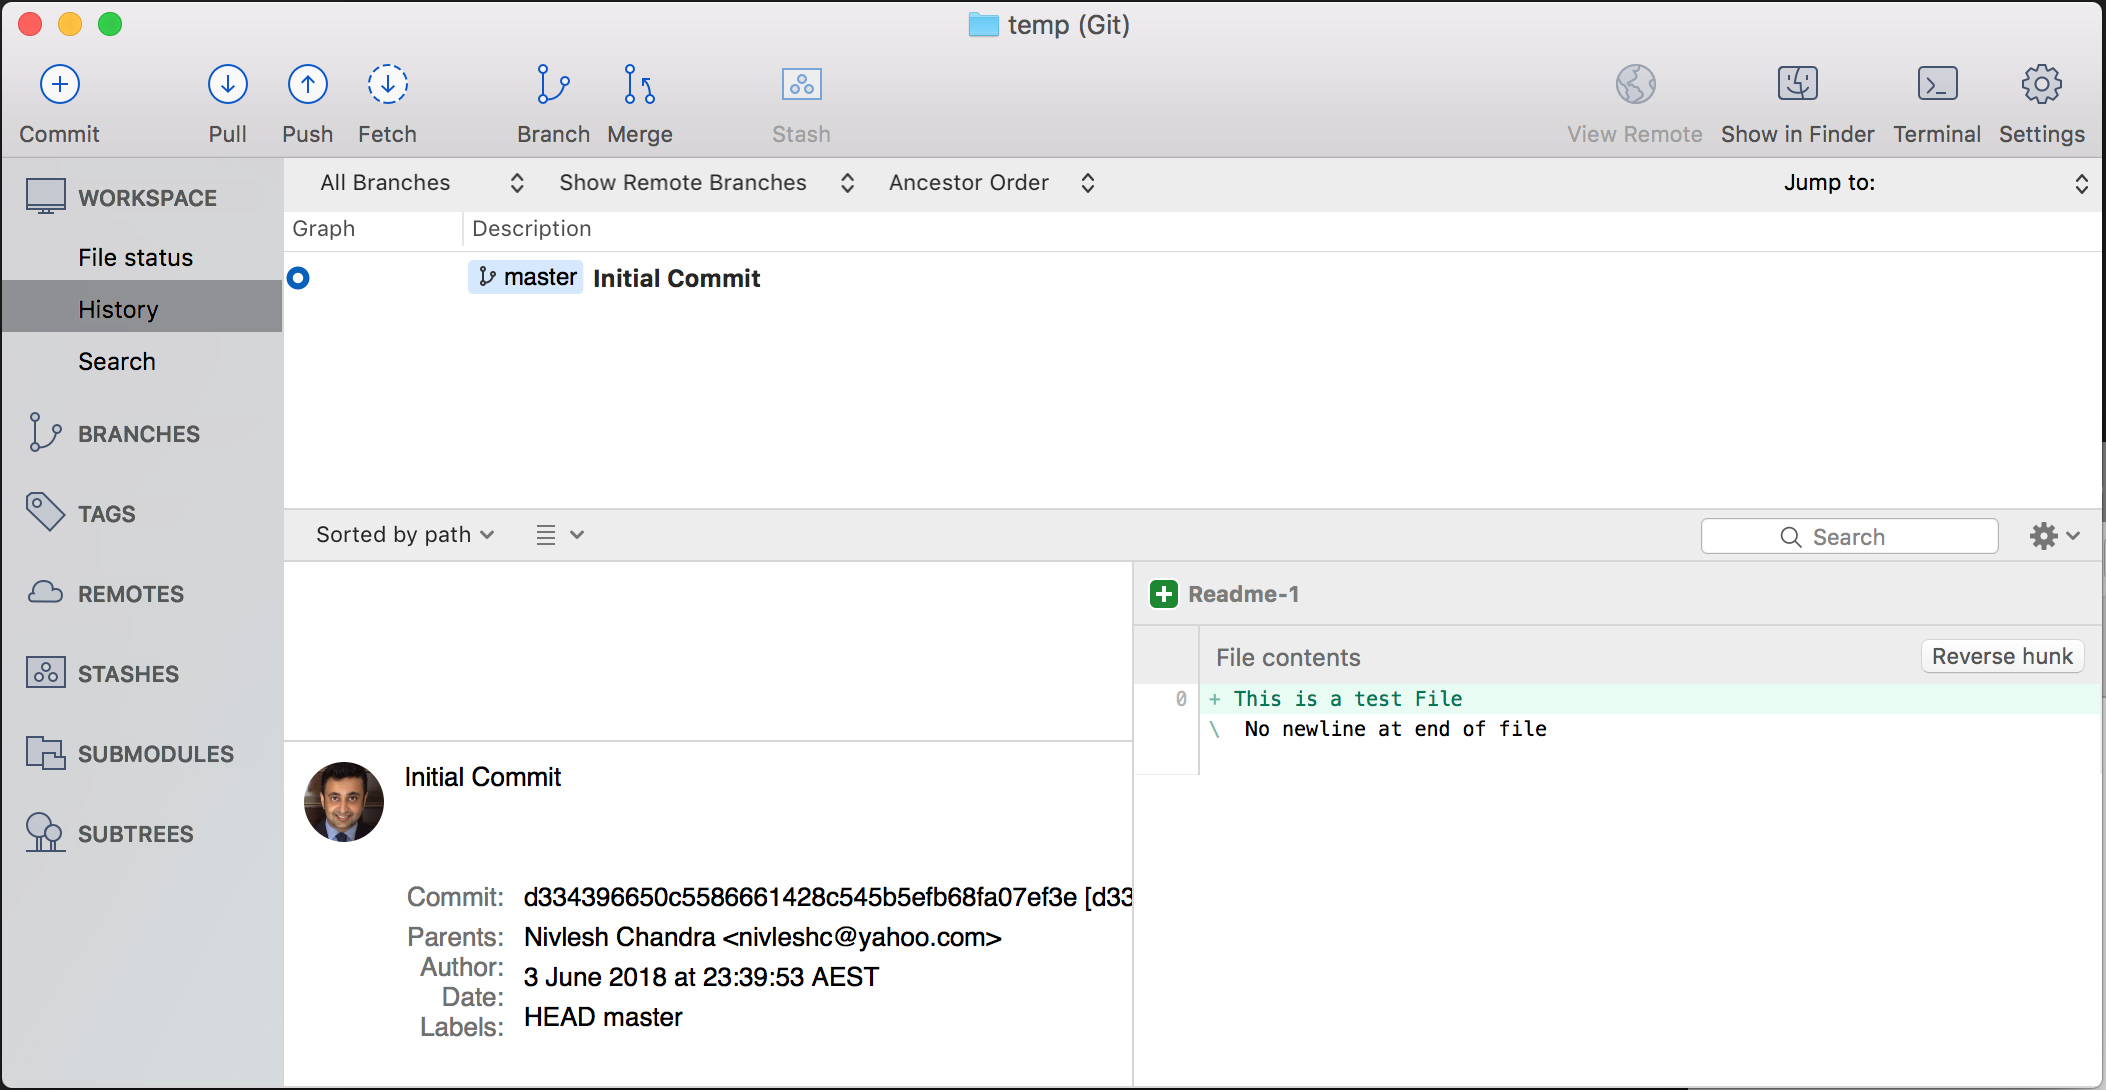
To view a history of all the changes that have been done to your repository, open Sourcetree and then click on History.
Notice the description column. This contains the comments you wrote when committing your staged changes. This provides a quick reminder of what the changes were. To drill down deeper into the changes, check the pane at the bottom right. Here, you will see the actual changes that were made (green denotes additions and red denotes deletion of characters). If there are multiple people committing to the same repo (as would be the case in a team), the names of each person will be shown beside each line in the History section.

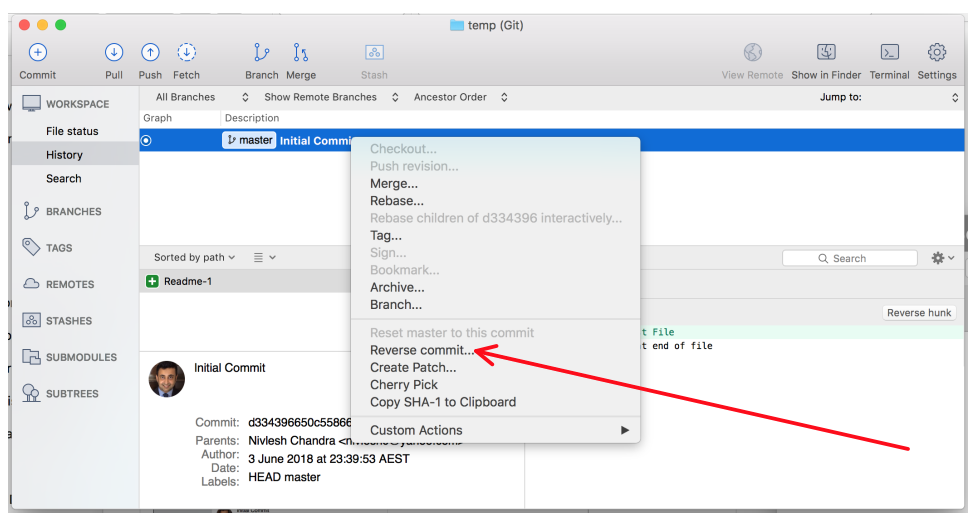
Now, lets say that after you did your commit, you realised that you didn’t want that change, and in-fact you prefer what the file was before the commit. All you need to do is go into Sourcetree, in the History section, find the change and then right click on it and then click on Reverse commit. This reverses the commit and changes the file to what it previously was. If after that, you want to get back the change? Well, you can reverse the reverse commit 😉 (this is so much better than my method of copying the last suffixed version to the current version)

Closing Remarks
I am absolutely loving Git. It is an awesome tool and I would highly recommend it to each and everyone. For me personally, it helps in controlling the various changes I make to my code, with easy auditability and view of the changes I make between versions.
For teams, Git provides even more benefits. Using a central server (Git Server or Visual Studio Team Services) to host the Git repositories, the whole team can work on the files without blocking each other. The files will be stored centrally (actually with Git, when you pull a repo, you download the full repo to your local computer. If you merge your changes, the files are merged to the copy on the server). The changes to the files are easily trackable and there is an easy way to revert to a previous version should issues arise due to modifications.
I hope you embrace Git as I have and use it to track all your code changes.
Till the next time, Enjoy 😉
