Overview
A couple of weeks back I wrote this post that detailed Building a Teenager Notification Service using Azure IoT an Azure Function, Microsoft Flow, Mongoose OS and a Micro Controller.
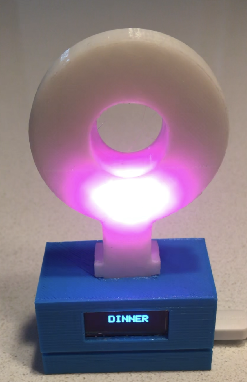
Over the Easter break I enhanced it with the inclusion of a display. I was rummaging around in a box of parts when I found a few LCD displays I’d purchased on speculation some time ago. They are SSD1306 LCD driven units that can be found on Amazon here. A quick upgrade later and …
… scrolling text to go with rotating lights. The addition of the display requires the following changes to the previous project which are detailed in this post;
- inclusion of the SSD1306 library
- configure your micro controller for the display
- a few changes in the Mongoose OS Init.JS file to have the appropriate text displayed for the notification
- change to the Notifier Base case to integrate the display
- it is available in the Thingiverse Project for this thing here and named NodeMCU with Display Window.stl
Incorporating the SSD1306 Library
Before starting, with your micro controller connected and using the MOS UI, take a copy of your Init.js configuration file by selecting Device Files, then Init.js and copying the content to somewhere safe. Also the Device Config by choosing Device Config, Expert View and Save Configuration.
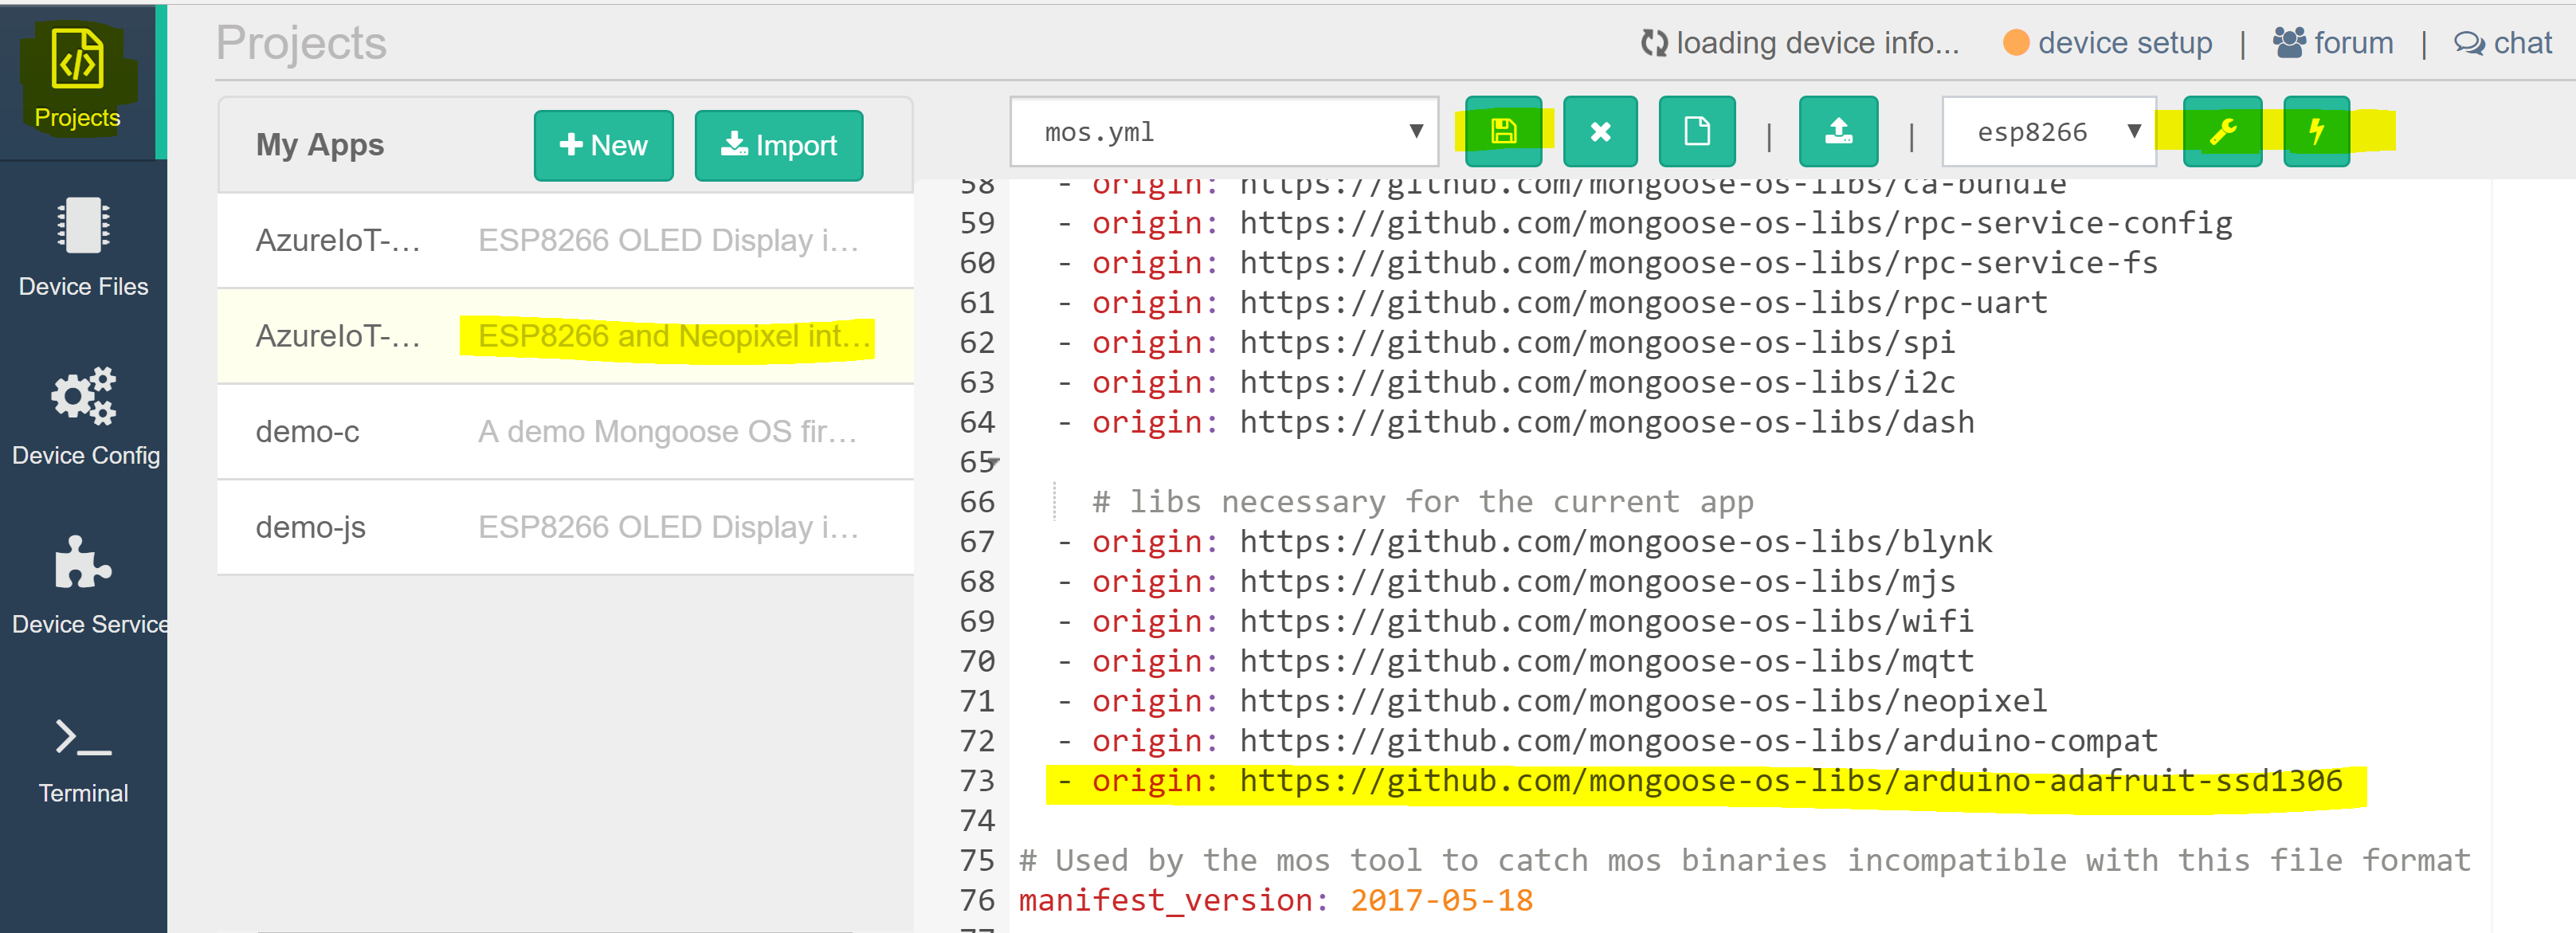
From the MOS UI select Projects, select the AzureIoT-Neopixel-js project then from the drop down menu select mos.yml.
Add the line – origin: https://github.com/mongoose-os-libs/arduino-adafruit-ssd1306 then select the Spanner icon to Rebuild the App. Once completed select the Flash icon to update your micro controller.
Once written to your micro controller check your Init.js and copy back your backup. Check your Configuration and make sure your MQTT settings are still present. Copy your previous config back if required.
Configure your Micro Controller for the SSD1306 Display
We need to tell your micro controller which GPIO Pins we have attached the display too. I actually also moved the GPIO Pin I attached for the Neopixel as part of this. The configuration is;
- Neopixel connected to GPIO 12
- SSD1306 SDA connected to GPIO 4
- SSD1306 SCL connected to GPIO 5
In the Expert Device Config mode update the I2C section as shown below. Save the configuration.
 "i2c": {
 "enable": true,
 "freq": 100000,
 "debug": false,
 "sda_gpio": 4,
 "scl_gpio": 5
 },
Wiring the SSD1306 to the Micro Controller
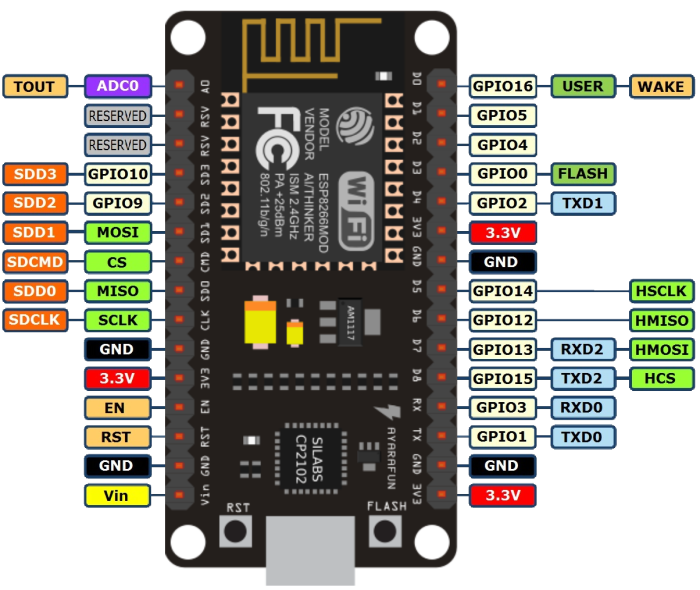
Looking at the NodeMCU diagram you can see where the connections need to be made for the NeoPixel and SSD1306 display. SSD1306 SCL to D1, SDA to D2. The Neopixel data connection is now on D6. Power and GND using the PWR and GND pins. I’m using them all on the same side of the NodeMCU to make it fit cleanly into the case later.
Init.js code additions
Incorporate the display library in your Init.js by including the line below.
load('api_arduino_ssd1306.js');
With that done we to initialize the display also in the Init.js. The following lines initialize the display address, SCL pin the display is connected to, the size of the text we are going to display and color. Put them before or after the initialization for the Neopixel.
//------------ Setting up Display ----------------
let oled_addr = 0x3C; // I2C Address for SSD1306let
oled = Adafruit_SSD1306.create_i2c(5 /* RST GPIO */, Adafruit_SSD1306.RES_128_32);
// Initialize the display.
oled.clearDisplay();
oled.setTextSize(2);
oled.setTextColor(Adafruit_SSD1306.WHITE);
In the MQTT Subscriber section where you are looking at the MQTT message being sent from the Microsoft Flow and displaying a color on the Neopixel add the following lines to send output to the display. The following below outputs Pink to the display. If Pink indicates some task then change oled.write(‘PINK’); to oled.write(‘TASK’); or similar.
 if (msg === "Pink"){
 // PINK
 oled.clearDisplay();
 oled.setTextSize(2);
 oled.setCursor(1, 10);
 oled.write('PINK');
 oled.display();
 oled.startScrollLeft(0x00, 0x0F);
Following the Neopixel loop after
 strip.clear();
 strip.show(strip);
add the following to clear the display as the the Neopixel has finished displaying its color notification.
 oled.clearDisplay();
 oled.display();
Repeat for the differing colors and their tasks/meanings.
Summary
Now the notifier includes both a visual color notification AND the text associated with the notification. No confusion here, or does it need a buzzer as well?