In this blog post we review the process for implementing an AWS Direct Connect for an AWS account. An AWS Direct Connect is a dedicated network connection between your network and one of the AWS Direct Connect location (such as Sydney) ranging in speed from 50mbps all the way up to 10Gbps for bandwidth intensive workloads. This dedicated connection, can be partitioned into multiple network interfaces allowing for a single Direct Connect service to access both public resources (such as S3) and private resources such as virtual machines within your VPC, while maintaining network separation.
see how Bradnam’s Windows and Doors use Telstra Cloud Gateway and AWS Direct Connect
Benefits of Direct Connect
The main benefit of an AWS Direct Connect is that it provides a private connection to your AWS environment, while reducing the bandwidth cost associated with bandwidth-heavy workloads. This is because of the reduced cost per bandwidth across a Direct Connect when compared with standard Internet bandwidth ($0.042 per GB outbound for Direct Connect vs $0.14 per GB outbound for Internet*). It also provides more predictable performance than direct internet connectivity due to it being a dedicated connection.
Hosted Connection vs Virtual Interface
When provisioning an AWS Direct Connect, the first question you need to answer is whether you want a Virtual Interface for a Hosted Connection. A Hosted Connection, is a connection provided by a Direct Connect APN Partner, which allows for the provisioning of a Sub-1Gbps connection without the need to physically run new/additional cables. This solution is the only way of getting a service with less than 1Gbps of allocated bandwidth. A Virtual Interface service is available in 1Gbps or 10Gbps versions, and can either be self-provisioned or procured via a AWS APN Partner (such as Telstra). For the purposes of this blog post, we will focus on procuring a service from an APN Partner as this is the most common method.
Setup Process for Direct Connect
Create a Virtual Private Gateway
In order to use an AWS Direct Connection, we need somewhere within our VPC to connect it to which is where a Virtual Private gateway come in. VPG will provide an ingress/egress point in our VPC. To create a VPG
- From the AWS Management Console, select “VPC” and select “Virtual Private Gateway” from the left-hand side.
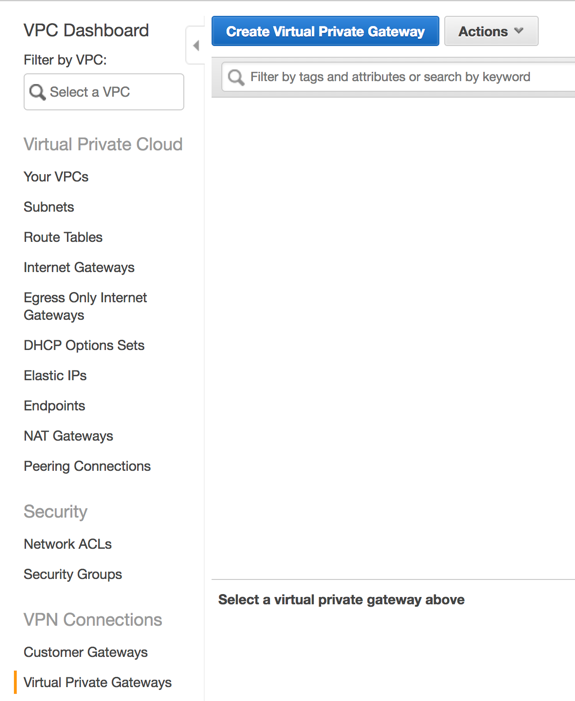
- Click “Create Virtual Private Gateway”
- On the next screen provide a logical name for the new VPG. Leave the ASN set to “Amazon default ASN” and click “Create Virtual Private Gateway”
Now that the VPG is created, it needs to be added to a VPC which is as simple as selecting “Attach to VPC” from the actions menu. Your VPG is now attached to the VPC and ready to accept a VPN connection.
Request Service from APN Direct Connect Partner
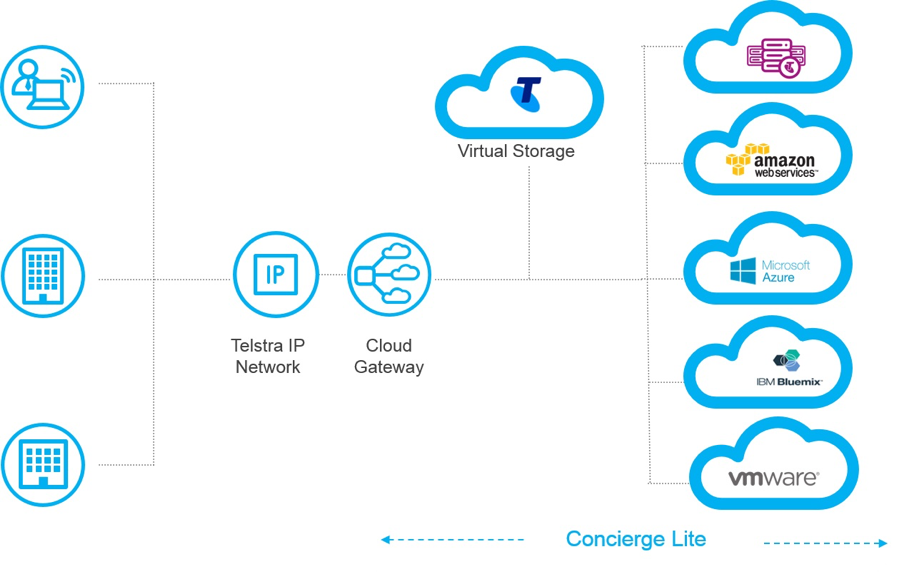
As we will be procuring our Direct Connect service from an APN partner, the first step is to find and procure a service. For our example, we will use the Telstra Cloud Gateway product which will allow us to connect our AWS environment, back to our Telstra IP Network as shown in the diagram below.
For further details on procuring a Telstra Cloud Gateway, visit https://www.telstra.com.au/business-enterprise/solutions/network-services/networks/cloud-gateway#getting-started
Accept your Hosted Connection
Accepting our new Connection is as simple as browsing to the “Direct Connect” section of the “AWS Management Console” and selecting “Connections” from the left-hand pane. Once their Select “I Understand that Direct Connect Port charges apply once I click “Accept This Connection”” and then choose “Accept Connection”.
Once you have successfully accepted the connection, you will be presented with the following screen.
Create Virtual Interface
Now that we have a valid Connection, we can provision our Virtual Interfaces which we will use to route traffic back to our network. We can use our Virtual Interface in one of several ways:
- to create a private virtual interface to connect to our VPC.
- to create a public Virtual Interface to connect to AWS Service that aren’t in a VPC (Such as S3 or Dynamodb).
Given that most organisations purchase Direct Connects to access resources they have within their VPC, for this example we will provision a Private Virtual Interface. To. do this, we need to make sure that in addition to the detail of our Virtual Private gateway (that we provisioned above), we also have the following information which was provided to us by our APN Partner:
- a unique VLAN tag that’s not in use on the AWS Direct Connection for another virtual interface. This number should be between 1 and 4094.
- a BGP ASN number which is used to identify your network routes. This number should be between 64512 and 65536.
To provision our Private Virtual Interface, from the “Direct Connect -> Connections” we select our connection choose “Actions, Create Virtual Interface”.
At the next screen, we need to select “Private – A private virtual Interface should be used to access an Amazon VPC using private IP Addresses” and then under “Define Your New Private Virtual Interface”:
- for “Virtual Interface Name”, we enter a logical name for the virtual Interface.
- for “Virtual Interface Owner”, we select “My AWS Account”
- for “Connection To”, we select “Virtual Private Gateway” and then from the dropdown, select the VPG we created earlier.
- For “VLAN”, we enter the ID Number provided to us by our APN Partner which should be between 1 and 4094
- We Select “IPv4” as our Address Family.
- Check “Auto-Generate peer IPS”
- for “BGP ASN” Enter the ASN provided to us by our APN Partner, which should be between 64512 and 65535
- Check “Auto-generate BGP Key unless these have been provided to us.
Once we have completed the form, click “Continue”
Verify Connectivity
Now that we have established our Virtual Interface, it’s time for us to verify that it’s working. To do this, simply log into an EC2 instance within the VPC and perform a traceroute (or tracert if in Unix/Linux) back to an on-premise device (ensure that an associated Security group allows outbound ICMP).
Notes & Tips
From our experience, when designing or implementing an AWS Direct Connect solution, there are a couple of things you want to remember:
- You can only have a maximum of 50 Virtual interface per Direct Connect Connection. if you require more, you will need to provision more than one service.
- There is a limit of 100 routes per BGP session one private Virtual Interface. If you require more, either leverage summary routes or static routing.
- Don’t forget to monitor the status of our Direct Connects. This can be done via AWS CloudWatch and Lambda functions. See https://github.com/awslabs/aws-dx-monitor for an example.
- Direct Connects are physical services and as such require maintenance from time to time. Keep an eye on your Personal Health Dashboard for any scheduled maintenance activities.
Customer Example
An example of a good use case for the AWS Direct Connect would be Bradnam’s Windows and Doors. Bradnam’s had a requirement to connect their corporate network, into their newly create VPC within the Amazon AWS environment. Due to the need for reliability, performance predictability and secure communication AWS Direct Connect was the logical solution. The Direct Connect was provided by the Telstra Cloud Gateway solution which allowed it to be connected directly into their existing Corporate network without any additional hardware or on-premise equipment. Bradnam’s AWS environment now simply appears on their Next IP network as a logical site with the ability to scale the bandwidth between 50Mbps and 500Mbps as their business needs change.
* prices quoted are in USD for the AWS Sydney region and taken from the AWS website on November 20th, 2017
Read More