The Ionic Framework (https://ionicframework.com/) is an angular 4 based framework that is designed to build beautiful applications quickly and easily that can be targeted to native platforms as well as Progressive Web Apps (PWAs). In this blog post, I’ll walk through the steps to start your own Ionic PWA hosted on Azure App Services, which will then serve your application.
What is Microsoft Azure App Services?
Microsoft Azure is a cloud platform that allows you to host server workloads that you’d previously host locally in a data centre or on a server somewhere to be hosted in an environment where massive scale and availability becomes available at an hourly rate. This is great for this application because our application only needs to serve static HTML and assets, which is very low on CPU overhead. We’ll host this as a free site in Azure and it will be fine. Azure App Services are Platform-as-a-Service web applications, your code, hosted on Azure’s infrastructure. You don’t worry about the operating system, or the web server, only the code you want to write.
What is Angular?
Angular is a browser based framework that allows complex single page applications to be built and run using a common set of libraries and structure. Angular 4 is the current version of the framework, and uses Typescript as the language you write programming components in, along with SCSS for CSS files, and HTML.
What is Ionic Framework?
Ionic Framework is an application that takes the Angular framework and powers it with Cordova to allow web application developers to be able to develop native apps. This means you have one common language and framework set that everyone can use to develop apps, native or web based. It also recently enabled support to build applications into PWA’s, or Progressive Web Apps, which are web based applications that behave very similar to native apps. Its this capability that we will take advantage of in this tutorial.
Prerequisites
You’ll need a Microsoft Azure account to create the Web App. You should have some knowledge of git, typescript and web application development, but most of this we’ll step through. You also need to install node and npm (https://nodejs.org/en/download/) which will enable you to develop the application. You can check that node and npm are working correctly by opening terminal or a command prompt and typing “npm -v” which will show you the current version of npm.
Steps to take
- First you need to install the ionic framework and cordova on your machine. You do this by opening a command prompt or terminal window and running: “npm install -g ionic cordova”
- Once you’ve done this, you’ll be able to run the command “ionic” and you should see the following:
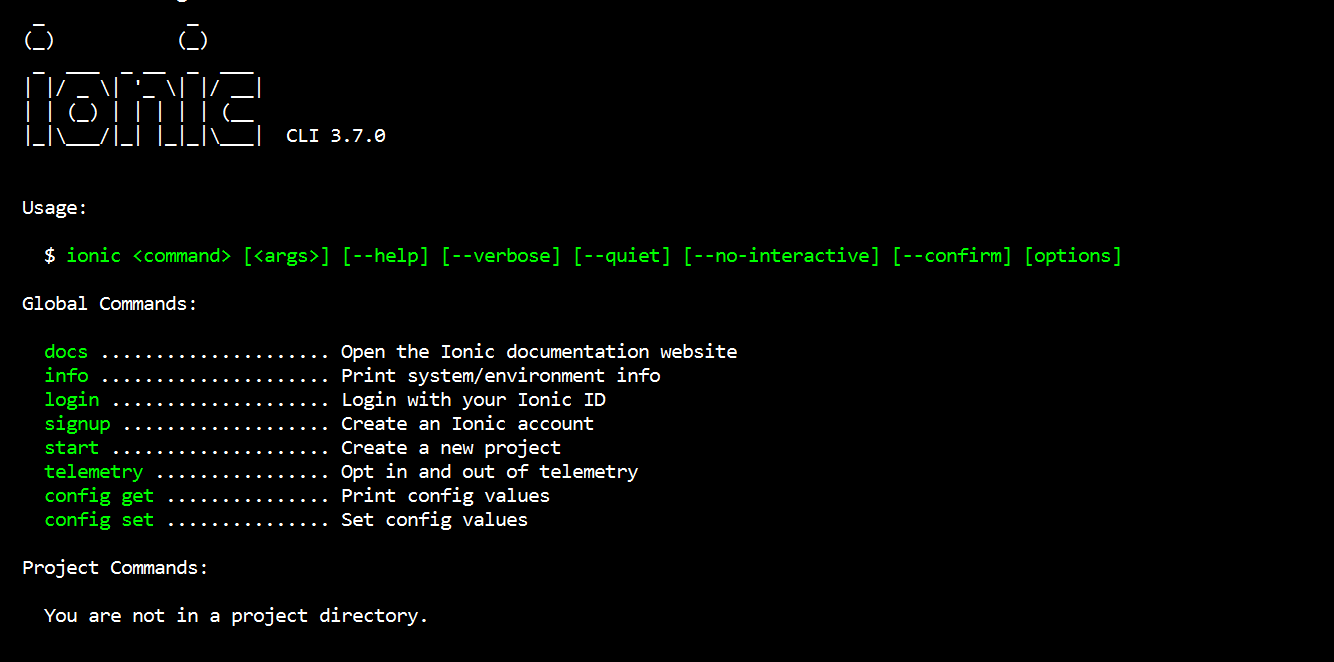
- Once this is done, you will need to create a directory, and create your ionic app. From your newly created directory, run “ionic start myApp blank”. You’ll be asked if you want to integrate your new app with Cordova. This means you would like to make a native application. In this instance we don’t (we’re creating a PWA) so type “n” and enter. This will download and install the required code for your application. Wait patiently – this will take a few minutes.

- Once you’ve seen the success message, then your app is ready to serve locally. Change directory to “./myApp” and then run “ionic serve” and you should see your browser open with your app running. If you get an error saying “Sorry! ionic serve can only be run in an ionic project directory” you aren’t in the right folder.
- Now that your application is built, its ready for you to develop. All you do is go and edit the code in your src folder, and build what you need to. There are great generators and assistants that you can use to structure your app.
- At this point we need to ready our code for production – this means we need to minify, AoT and treeshake any wasted code from the Typescript, and remove our debug maps to reduce the size of the delivered application to our apps. To do this we run “ionic build –prod” which produces our production ready output.
- Its worth noting the “–prod” in the above build. This does the magic of reducing your code size. If you don’t do this, then the app will be megabytes (as you will take all of angular and ionic and its dependencies, which you won’t need). Try checking the size of the “www” folder using both steps. Mine went down from 11.1Mb to 2.96Mb.
- Our code is ready to commit to git. In fact, Ionic has already done that for you, there are only a few other items to check in – so run “git add .” and “git commit -m “initial build”” and you’ll be all good.
- The next step is to create your web app in Azure. Go to portal.azure.com and click Add -> Web App, then enter the details and choose your plan (note you will need to force the “free” plan in the settings.
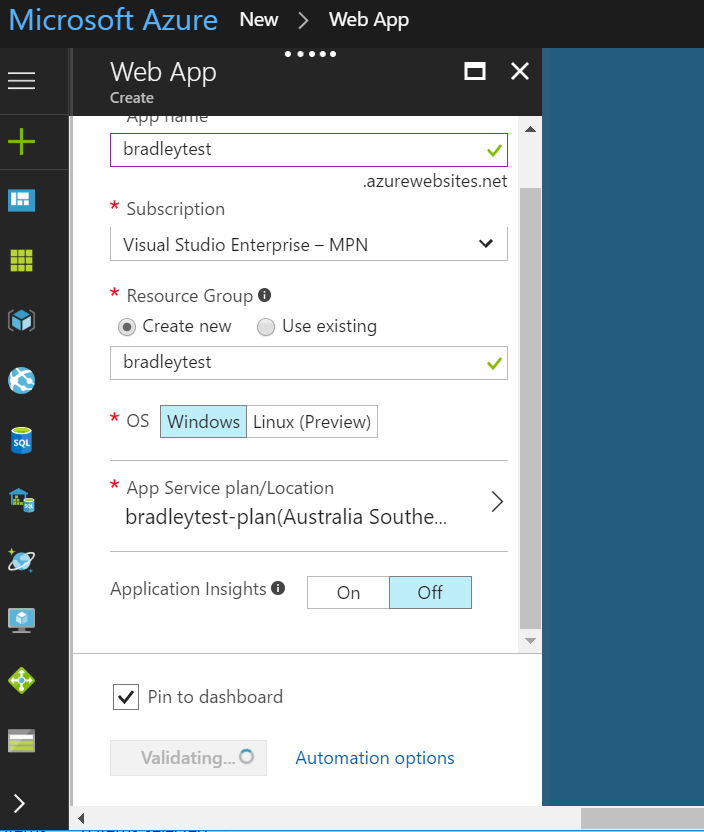
- Once you’ve deployed – your app will be able to be viewed at https://{yourwebappnamehere}.azurewebsites.net/. In this case https://bradleytest.azurewebsites.net/:
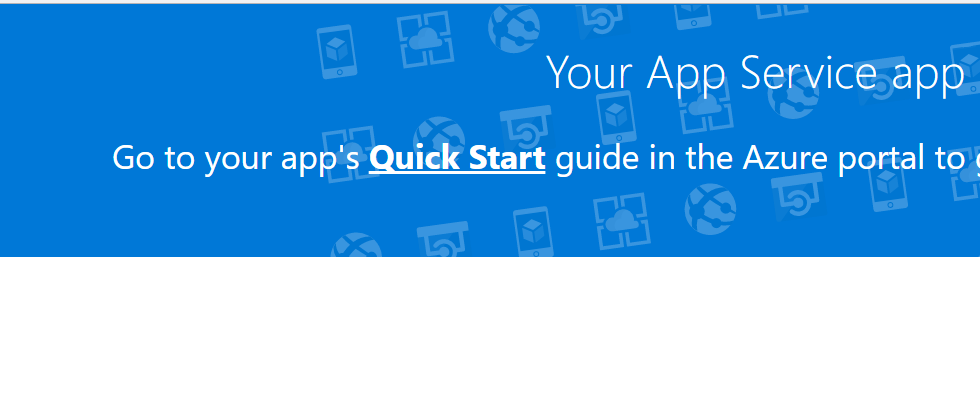
- Now its just time to get our running ionic code from our local (or build server if you use continuous integration/delivery) to our application. I’ve got a remote GitHub repository I’m going to push this code to (https://github.com/bsmithb2/ionicdemo), so ill run “git remote add origin https://github.com/bsmithb2/ionicdemo.git” and then “git push origin master”.
Connecting git to Microsoft Azure
In this part, we’ll use git to connect to Windows Azure and continuously build and deploy using Visual Studio Team Services.
- Go to your web application you created in the Microsoft Azure portal, and then choose the “Continuous Delivery (preview)” menu option.
- Choose your source control repository (Github in my case) in the first stage.

- Now select Build, then configure Continuous Delivery. This will set up your build in Visual Studio Team System. You’ll need to select nodejs as your build type. It will take a few minutes to set up the build and perform the first build and deploy. At this stage your app won’t work, but don’t worry – we’ll fix that next.
- Once your build is set up, click on “Build Definition”. We need to make a change in the build definition, as the build isn’t yet running for npm, and the folder you wish to package and deploy is actually the “www” subdirectory.
- In the build process, add a new task – choose npm. Change the Command to “Custom” and then add “npm build –prod” to the arguments. This matches the build you did with “ionic build –prod” in step 6.
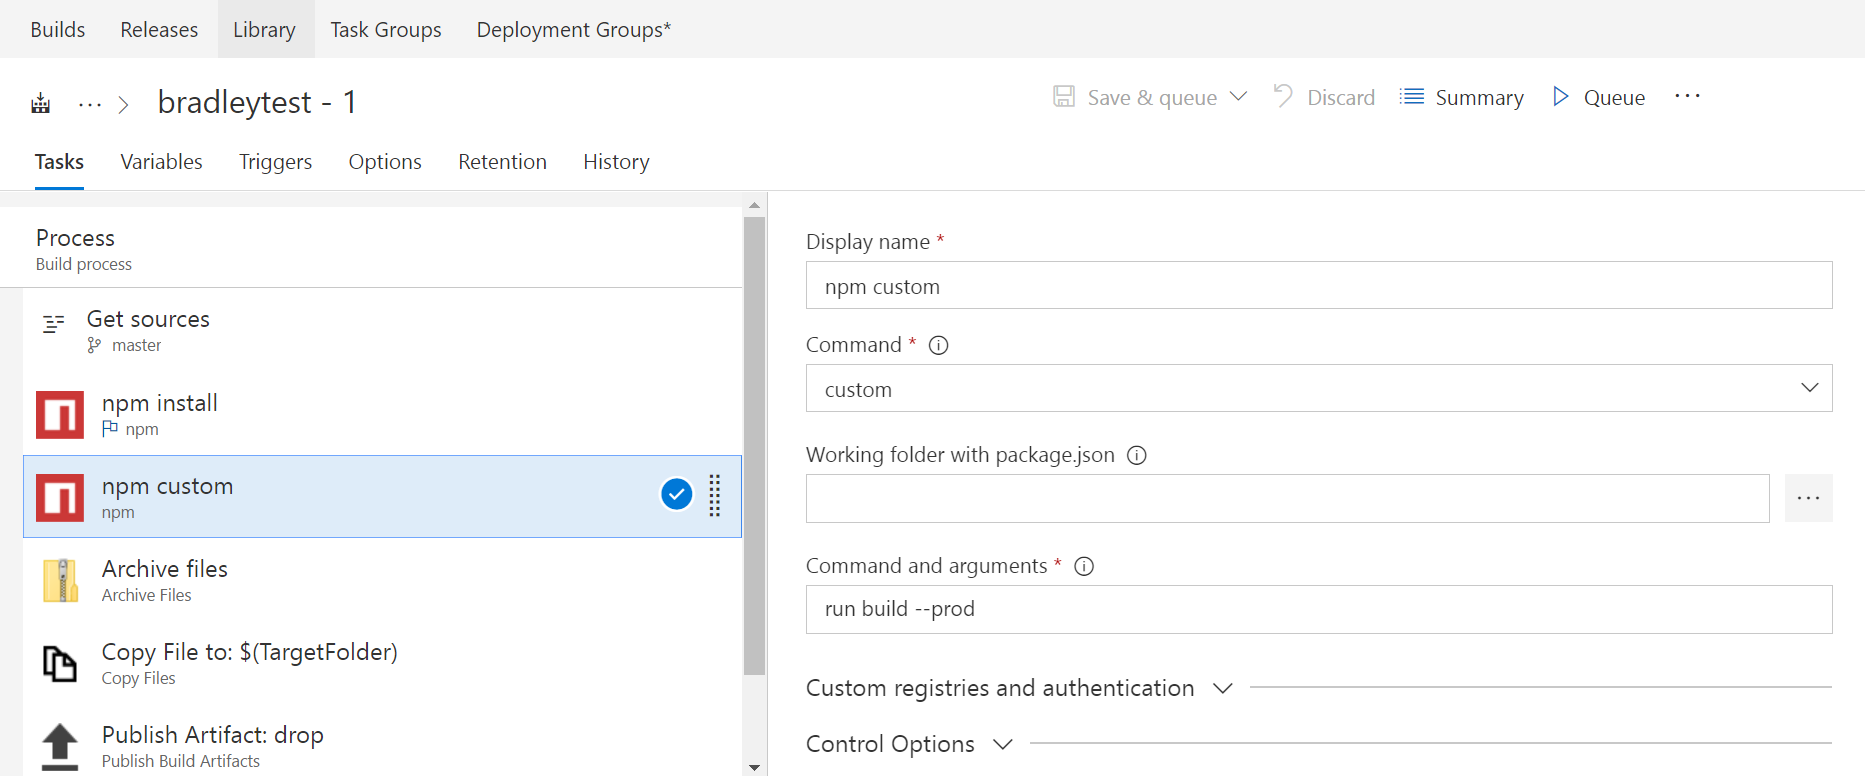
- Once done, click the “Archive files” task, and add “/www” to the Root folder (or files) to archive. This tells VSTS to only package our output directory, which is all we need.
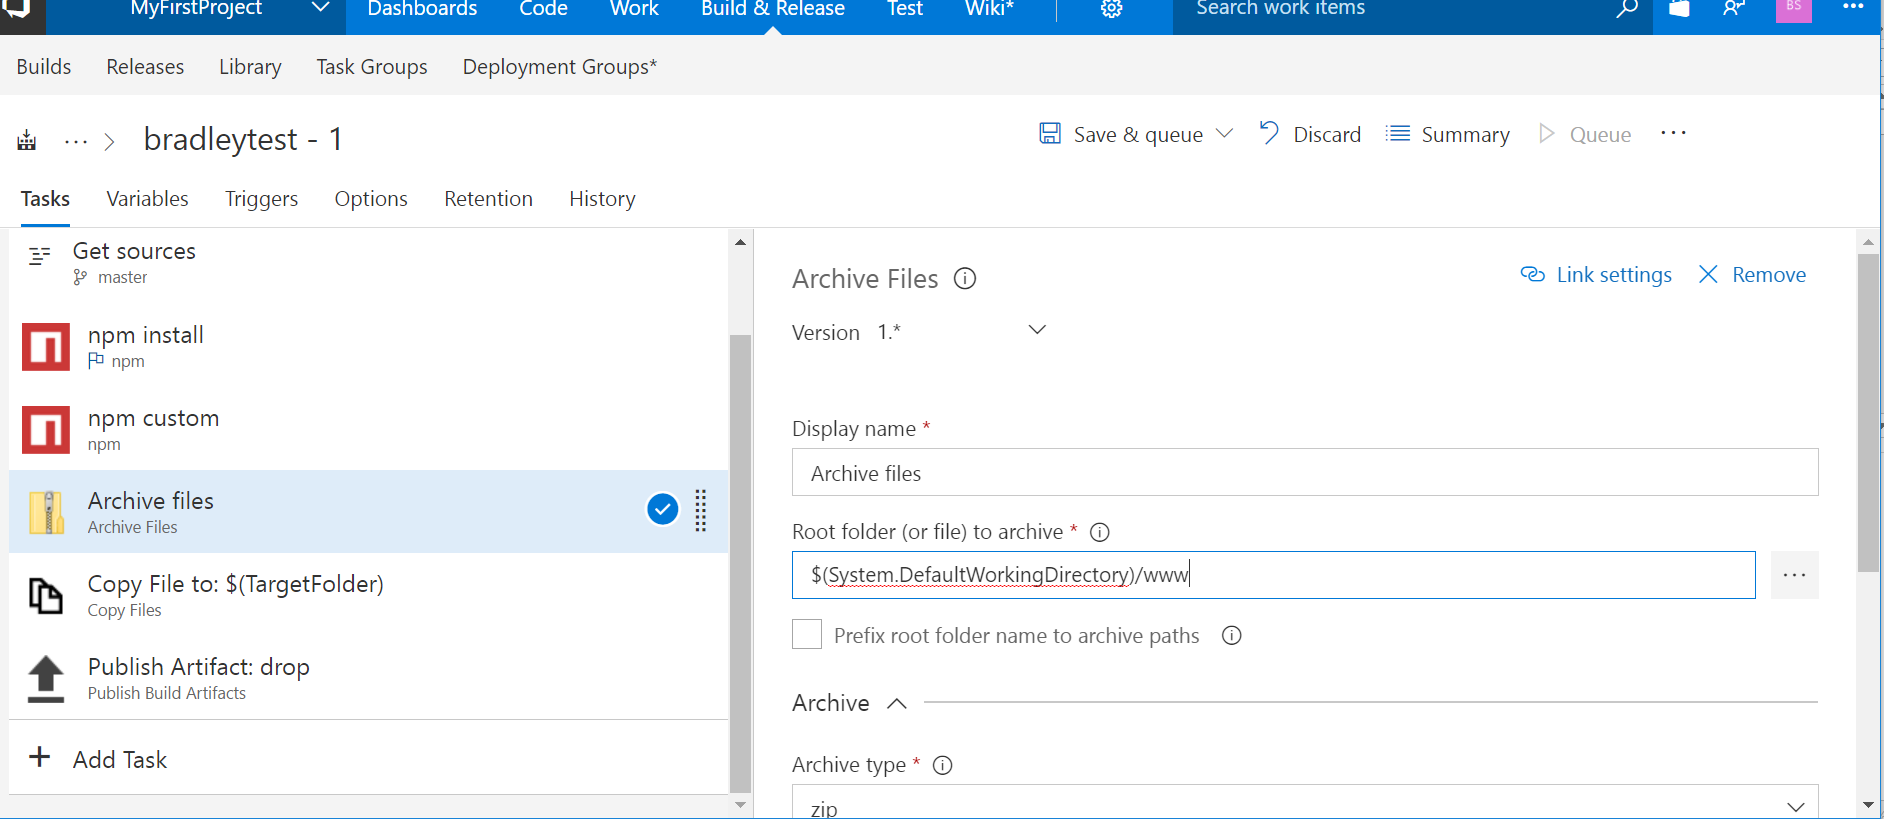
- Save the build. You can queue a build now if you like, or wait and queue one once we’ve tweaked the release.
- Go to releases, then choose your release (if you are unsure which, there is a “Release Definition” link in the Azure Portal near the Build Definition one.
- Turn off the web.config creation in File Transforms & Variable Substitution Options.
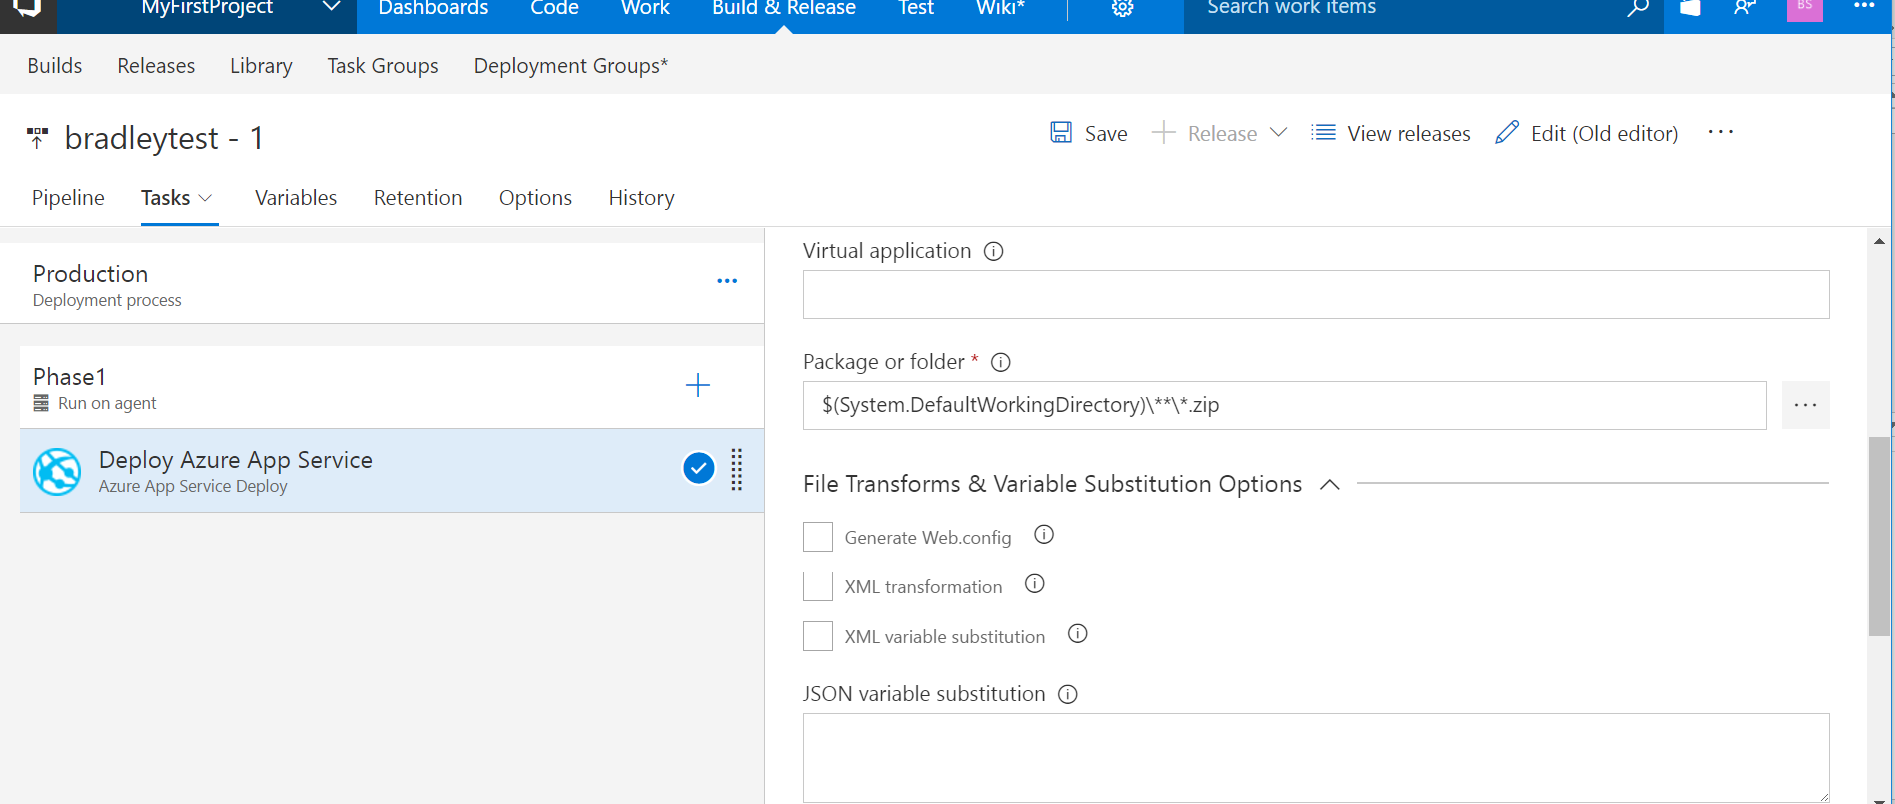
- Turn on the “Remove Additional Files” setting in Additional Deployment Options.
- Save the Release Definition.
- At this point, you can trigger a build. It should take a few minutes. You can do this in VSTS, or alternatively change a file in your local git repository and push to github.
- Once the build has completed, open your web application again, and you’ll see your Ionic application!

Conclusion
Ionic is a great solution to build cross-platform, responsive, mobile applications. Serving these applications is incredibly easy to do using Visual Studio Team Services and Microsoft Azure. We get great benefits in separation of concerns, while our scalability, security and cost management processes are simple as we’ve only deployed our consumer side code to this service, and its secured and managed infrastructure saves us time and risk. In this tutorial, we’ve built our first Ionic Application, pushed it to github and then set up our continuous delivery system in a few easy steps.

I always get stuck during the npm custom command phase while building – I inserted “npm build -prod” but the log reports back that there is no debug log found in the cache or the working directory and halts the build process. Any idea why this is happening?
You need to insert “run build –prod” rather than “npm build –prod”
The article text doesn’t match the image.
https://bradleyjsmith.files.wordpress.com/2017/09/build-add-npm.png
recent versions sometimes crash with random errors. try running it locally to perfect your build commands… hopefully that helps. remember that everything you do on the server is possible locally.
Hi,
I’ve tried this several times with existing and New Ionic projects however I keep getting this same error when it is in the npm install stage of the build:
ENOENT: no such file or directory, stat ‘D:\a\1\s\www’
Any help would be greatly appreciated!
Worthful Azure Tutorial Blog. Appreciate a lot for taking up the pain to write such a quality content on Azure Training. Just now I watched this similar Azure Tutorial and I think this will enhance the knowledge of other visitors for sure. Thanks anyway.:-https://www.youtube.com/watch?v=8_0qGTdHZSs&t=51s