SailPoint IdentityNow comes with many connectors to allow provisioning and lifecycle management of entities in connected systems. However there will always be those systems that require some manual tasks/input. In those instances SailPoint IdentityNow to ServiceNow Ticketing Integration can create a ticket in ServiceNow that can then be tracked whilst those manual steps are fulfilled.
Integration of IdentityNow with ServiceNow doesn’t use a connector in the same sense as the other Sources do in IdentityNow. It uses an Integration Module. The SailPoint ServiceNow Integration Module (SIM) is configured using the SailPoint IdentityNow integration APIs. The Integration Module Configuration Guide on Compass here provides the basis of what is required to List Integrations, Create, Update and Delete Integrations. However I had a few difficulties completing this due to a couple of ambiguous (from the sample documentation) configuration items. This post details how I got it configured so I can find it next time.
All the following API calls leverage authentication using the v3 API AuthN method I detail in this post here.
List Integrations
This call does exactly what it says it does; list any integrations such as IdentityNow to ServiceNow Ticketing Integration. If you haven’t configured any yet, then it will return nothing otherwise you will get the full configuration for each integration. To list integrations the /integration/listSimIntegrations API is called using a GET operation.
$orgName = 'yourIdentityNowOrgName'
$integrationBaseURI = "https://$($orgName).api.identitynow.com/cc/api/integration"
$listIntegrations = Invoke-RestMethod -Method GET -Uri "$($integrationBaseURI)/listSimIntegrations" -Headers @{Authorization = "$($v3Token.token_type) $($v3Token.access_token)"}
Create an Integration
To create an integration the /integration/createSimIntegration API is called using a POST request with a JSON Body containing the Integration configuration.
$createIntegration = Invoke-RestMethod -Method Post -Uri "https://$($orgName).api.identitynow.com/cc/api/integration/createSimIntegration" -Headers @{Authorization = "$($v3Token.token_type) $($v3Token.access_token)"; "Content-Type" = "application/json"} -Body $createBody
Create ServiceNow Integration Configuration Document
A lot of the configuration is prescriptive as per the IdentityNow documentation. However there are a few items that aren’t always obvious.
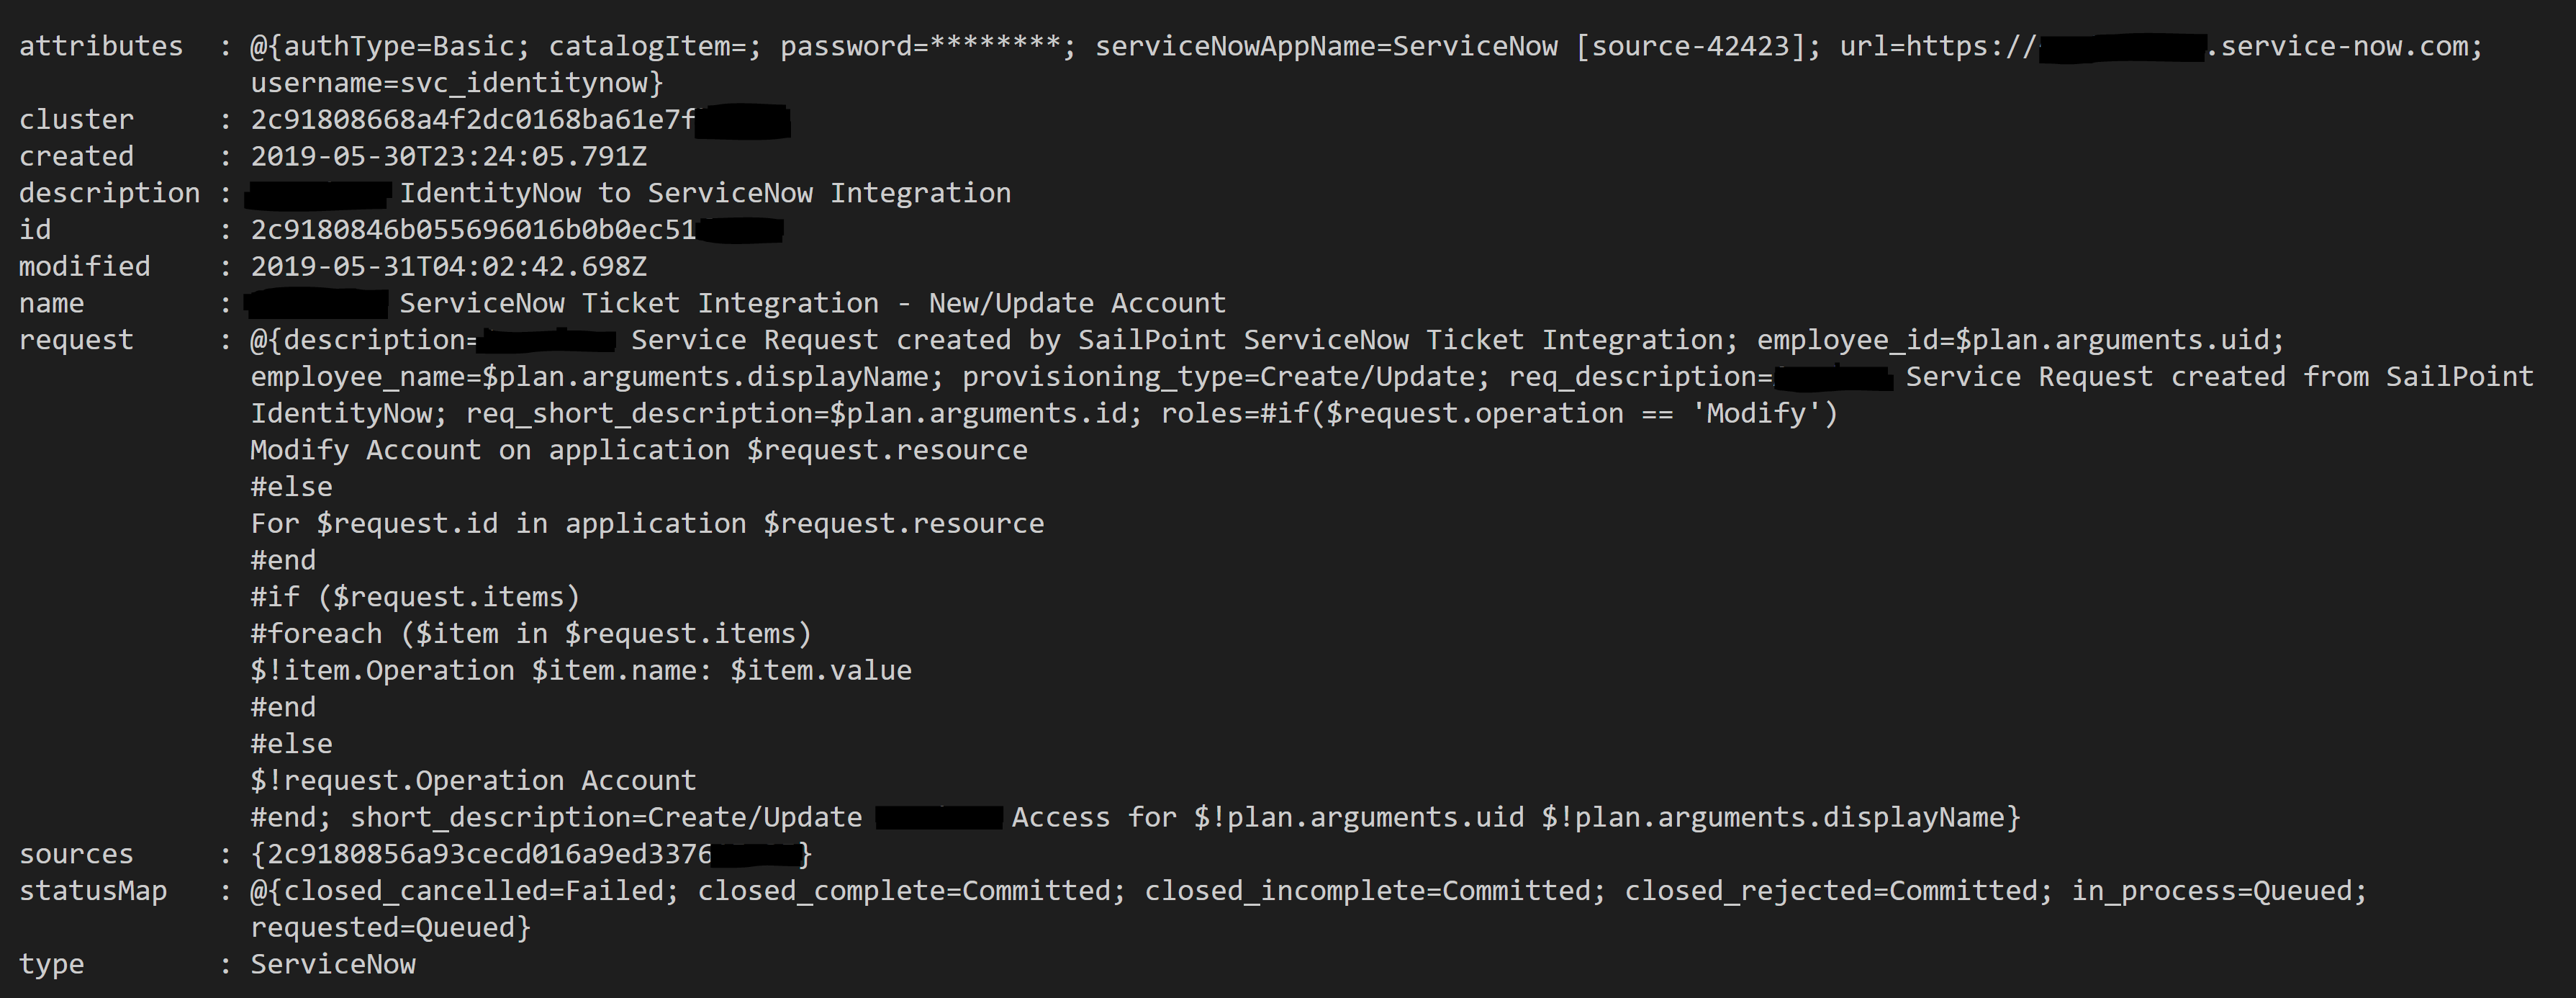
The configuration object further below is for integration from IdentityNow to ServiceNow using Basic authentication.
- Line 4 is the ServiceNow Service Account created for IdentityNow with the permissions detailed in the IdentityNow documentation
- Line 5 is the password for the Service Account
- Line 7 is a piece that isn’t (or wasn’t) in the documentation when we configured this.
Important
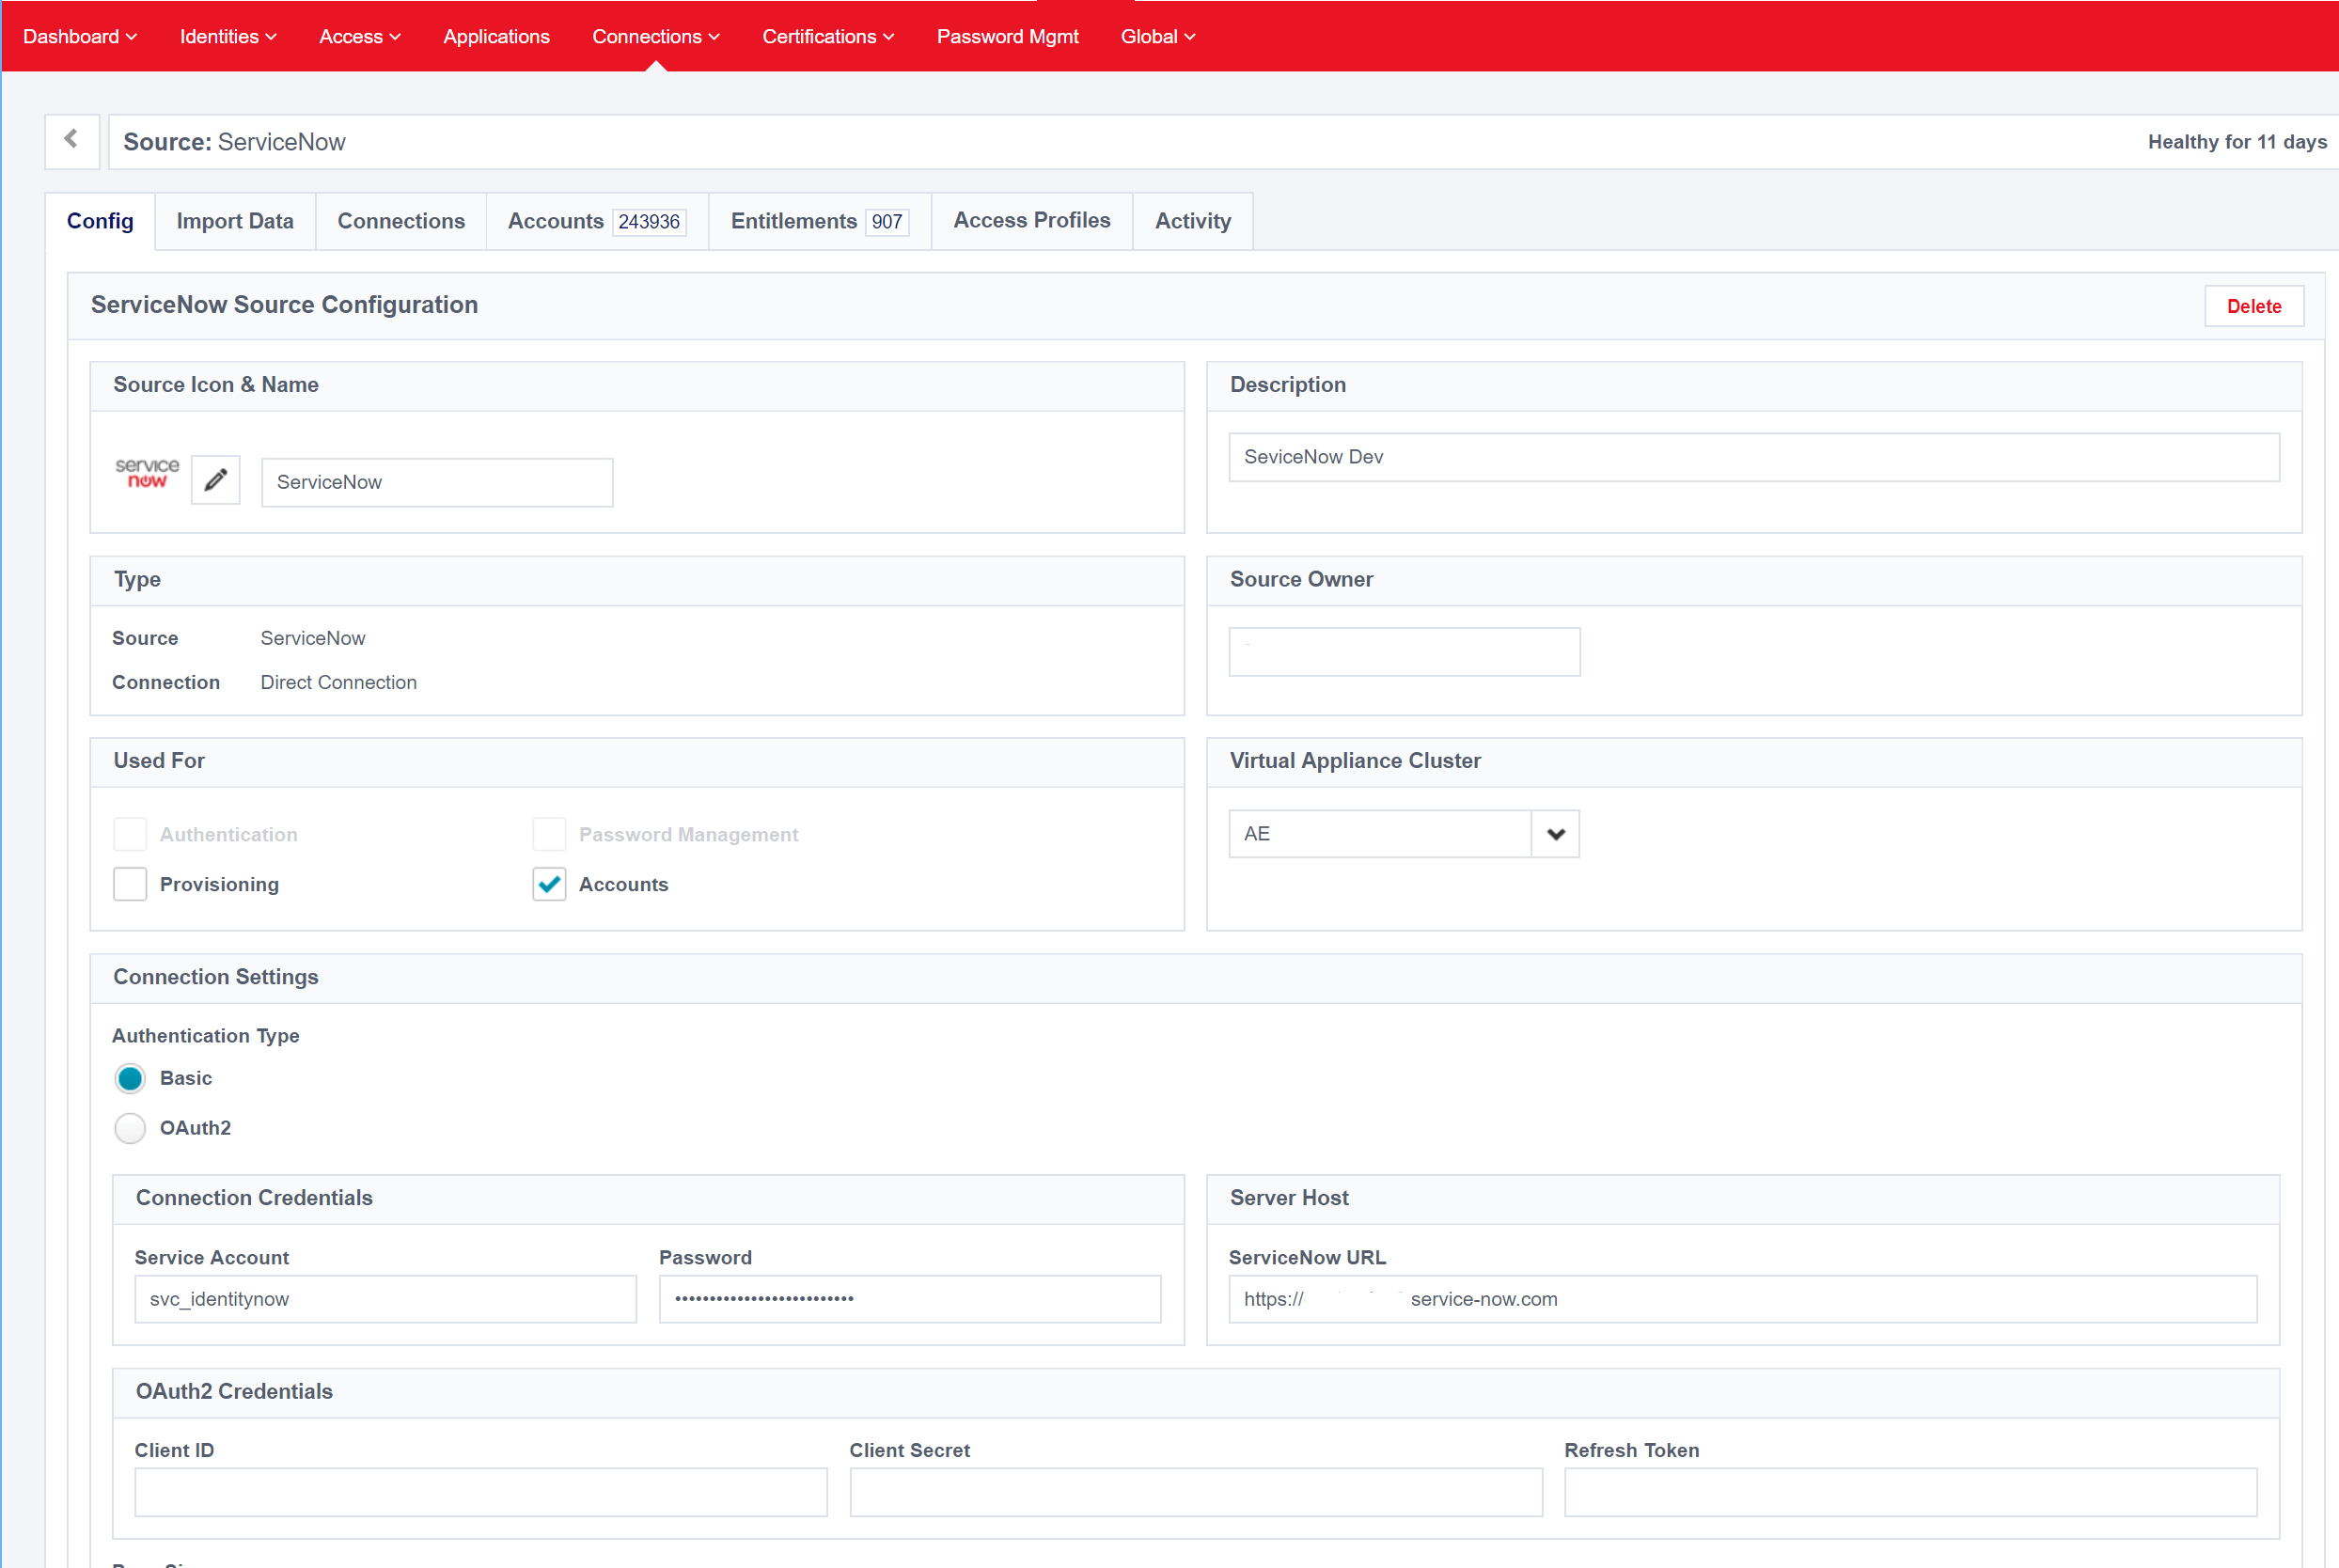
In order for IdentityNow to pass through all the details for the account the request is for, you need to also have a ServiceNow Source configured. Make sure you have your Correlation Rules setup so that accounts in ServiceNow match/join to IdentityNow. Essentially this will match the ServiceNow Record for who the request is for and populate the Service Request with all their details (from ServiceNow). The Source is required to be able to pass the ServiceNow Account ID associated identity with the IdentityNow request.
The Source Configuration screenshot below shows the basic ServiceNow Source configured using Basic Auth. Make sure you have your Correlation configuration configured to appropriately join Accounts. Take note of the name you give the Source and the Source ID (visible in the Browser URL when configuring the Source).
- Line 9 is the mapping from the IdentityNow Source (Flat File/Generic) that you will be sending Service Requests through to ServiceNow for, and the ServiceNow Catalog Item. The IdentityNow Source ID is the externalID. You will need to get the Source Configuration via API to get this as detailed in this post.
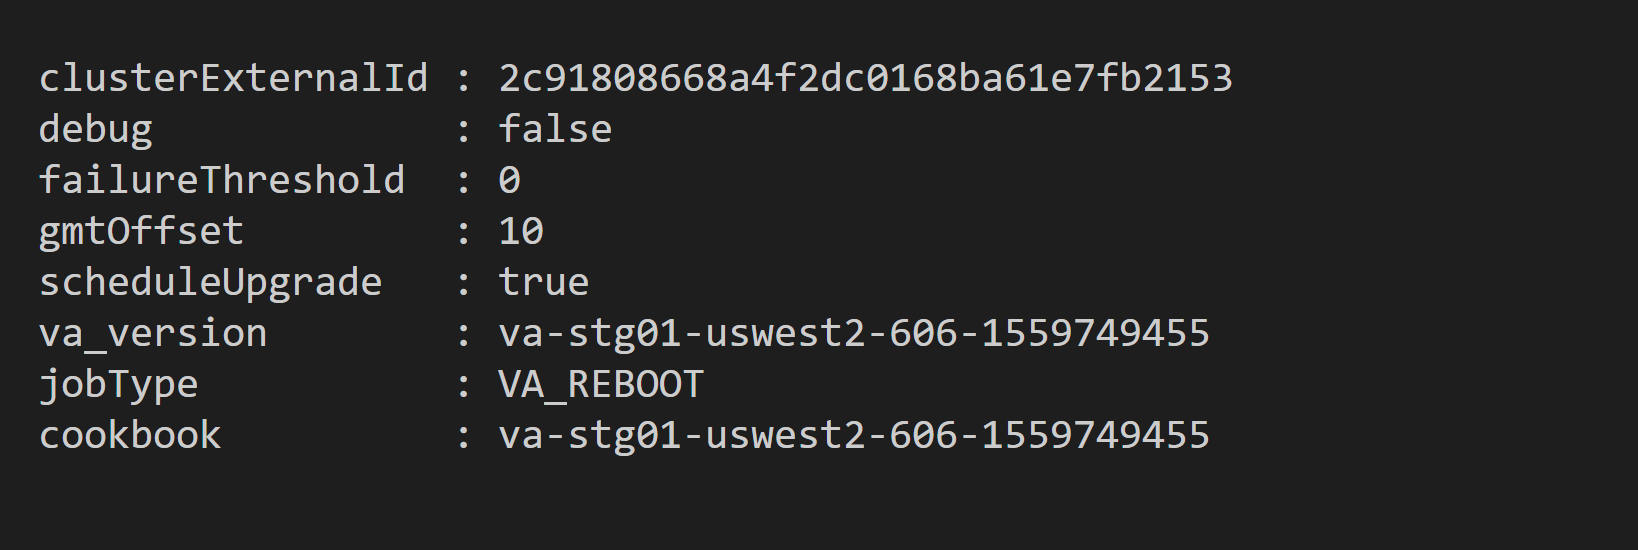
- Line 12 is the Virtual Appliance Cluster where the Integration will be configured for. The clusterExternalId can be retrieved via API as detailed in this post. It can be found under Configuration on a VA Cluster object
- Lines 13 – 23 are what you want to pass to ServiceNow for the Service Request. Modify accordingly but this example will pass through the details of the request from IdentityNow. Create or Update x, y, z etc.
- Line 26 is the IdentityNow Source ID of the Generic/Flat file source you are configuring for integration with ServiceNow. It’s the same as you used on Line 9 for the IdentityNow to ServiceNow Catalog Item mapping.
- Lines 29 – 34 are the status mappings for the requests. You can configure how often ServiceNow is polled for status updates through the integration/setStatusCheckDetails API. Send a POST request to the API with the provisioningStatusCheckIntervalMinutes and provisioningMaxStatusCheckDays as shown below for check every 15mins and max days 90 (dev environment type settings).
# Schedule for Status Checks
$schConfig = '{"provisioningStatusCheckIntervalMinutes":15,"provisioningMaxStatusCheckDays":90}'

$scheduleIntegration = Invoke-RestMethod -Method Post -Uri "https://$($orgName).identitynow.com/cc/api/integration/setStatusCheckDetails" -Headers @{Authorization = "$($v3Token.token_type) $($v3Token.access_token)"; "Content-Type" = "application/json"} -Body $schConfig
ServiceNow Integration Configuration Document
Below is a sample IdentityNow to ServiceNow integration configuration.
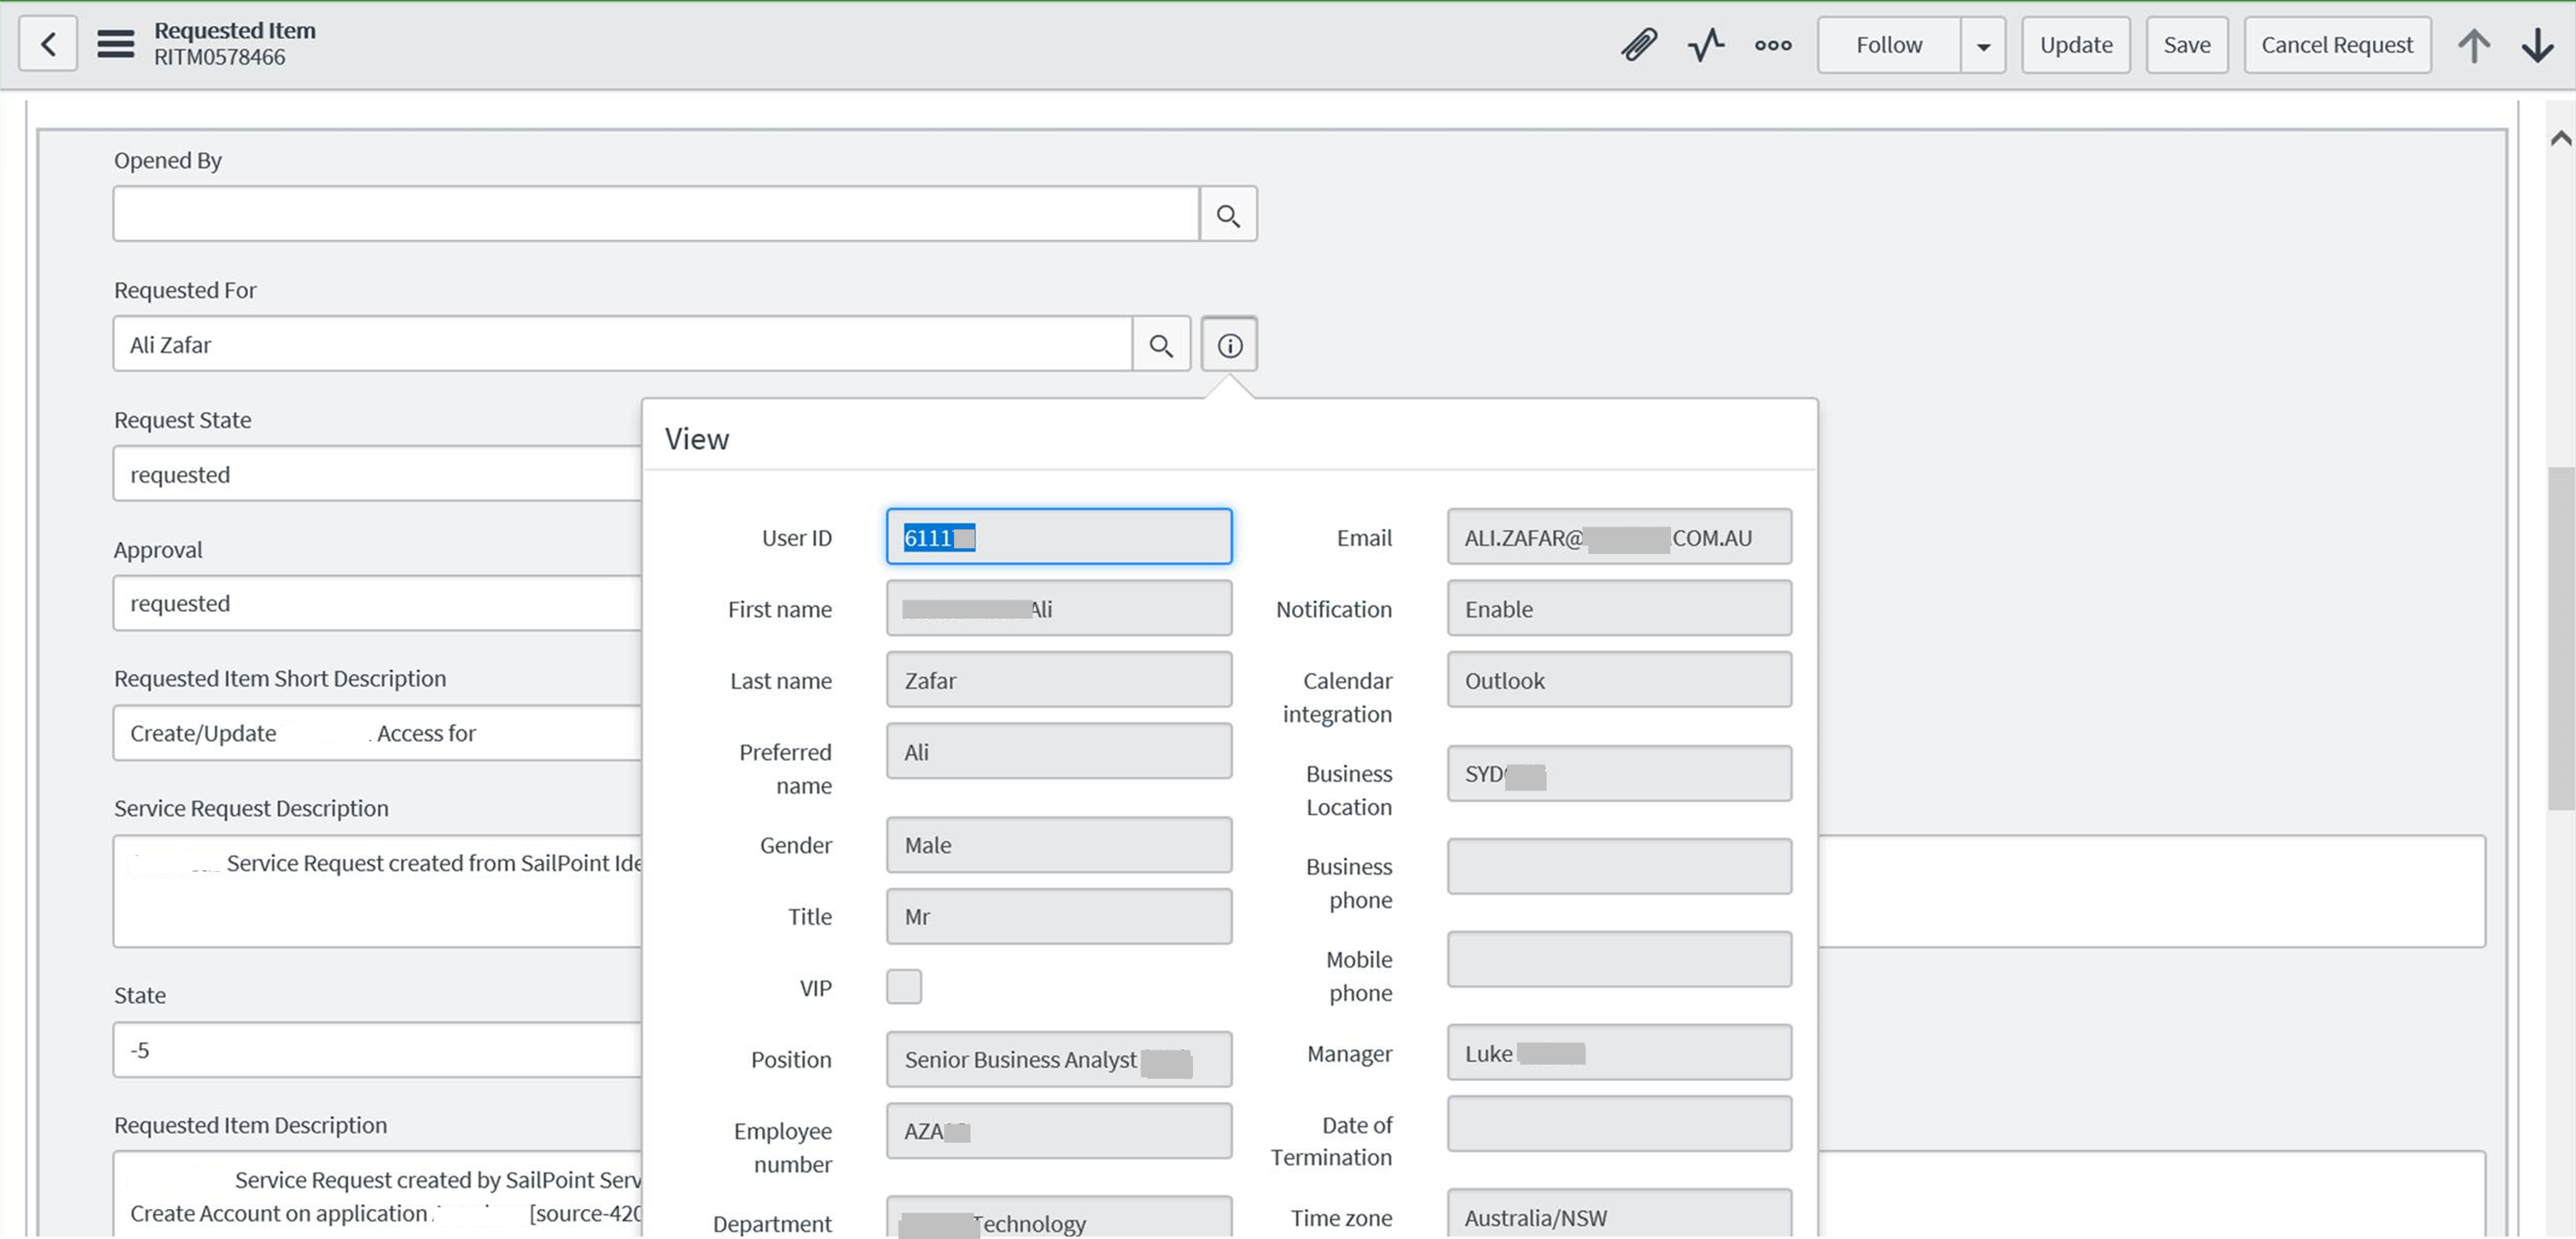
Example Request in ServiceNow
With all that detail and how to, this is what you actually get. Here is an example of a request that has been generated in ServiceNow from IdentityNow via ServiceNow Integration.
Get an Integration
If you know the ID of an integration you can get it directly using the /getSimIntegration/{ID} Get API call. The ID can be retrieved using List Integrations as detailed at the beginning of this post.
# Get Integration
$getIntegration = Invoke-RestMethod -Method Get -Uri "https://$($orgName).api.identitynow.com/cc/api/integration/getSimIntegration/2c9180846a6a22c8016a75adafake" -Headers @{Authorization = "$($v3Token.token_type) $($v3Token.access_token)"; "Content-Type" = "application/json"}
Delete an Integration
To delete an integration is similar to the Get Integration call except the API endpoint is /deleteSimIntegration/{ID} and the operation is a Delete rather than a GET.
# Delete Integration
$deleteIntegration = Invoke-RestMethod -Method Delete -Uri "https://$($orgName).api.identitynow.com/cc/api/integration/deleteSimIntegration/2c9180856a6a22d0016a6ec2a3fake" -Headers @{Authorization = "$($v3Token.token_type) $($v3Token.access_token)"; "Content-Type" = "application/json"}
Summary
Rather a long post, but hopefully it will give anyone else trying to do this integration the leg up on how to get it operational a lot quicker than it took us.


Hey Darren,
Quite helpful post.
I was able to execute the API using postman however now when i am requesting an application in sailpoint, the request is getting redirected to ServiceNow and i am getting error on ServiceNow side.
I am getting below error in ServiceNow.
“x_sap_sim” is not defined.: com.glide.rest.domain.ServiceException: “x_sap_sim” is not defined.: com.glide.rest.service.custom.CustomServiceExceptionResolver.throwServiceException(CustomServiceExceptionResolver.java:91)
com.glide.rest.service.custom.CustomServiceExceptionResolver.throwServiceException(CustomServiceExceptionResolver.java:81)
com.glide.rest.service.custom.CustomServiceExceptionResolver.resolveForException(CustomServiceExceptionResolver.java:45)
com.glide.rest.service.custom.CustomServiceResultHandler.handle(CustomServiceResultHandle