Introduction
This is the third and final post on my recent experiments integrating small micro controllers (ESP8266) running Mongoose OS integrated with Azure IoT Services.
In the first post in this series I detailed creating the Azure IoT Hub and registering a NodeMCU (ESP8266 based) micro controller with it. The post detailing that can be found here. Automating the creation of Azure IoT Hubs and the registration of IoT Devices with PowerShell and VS Code
In the second post I detailed communicating with the micro controller (IoT device) using MQTT and PowerShell. That post can be found here. Integrating Azure IoT Devices with MongooseOS MQTT and PowerShell
Now that we have end to end functionality it’s time to do something with it.
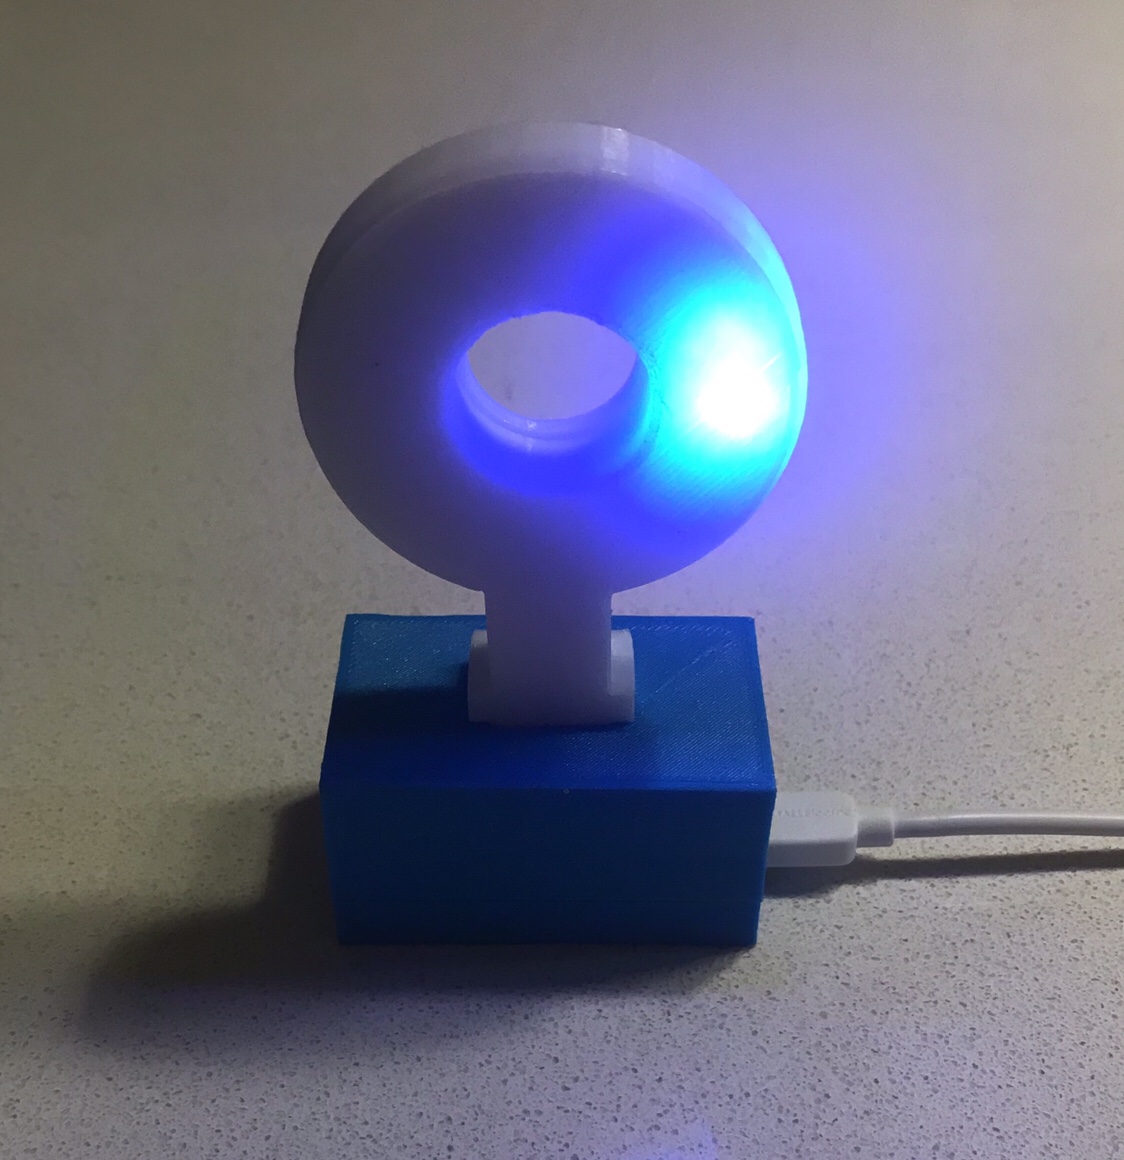
I have two teenagers who’ve been trained well to use headphones. Whilst this is great at not having to hear the popular teen bands of today, and numerous Facetime, Skype, Snapchat and similar communications it does come with the downside of them not hearing us when we require their attention and they are at the other end of the house. I figured to avoid the need to shout to get attention, a simple visual notification could be built to achieve the desired result. Different colours for different requests? Sure why not. This is that project, and the end device looks like this.
Overview
Quite simply the solution goes like this;
- With the Microsoft Flow App on our phones we can select the Flow that will send a notification
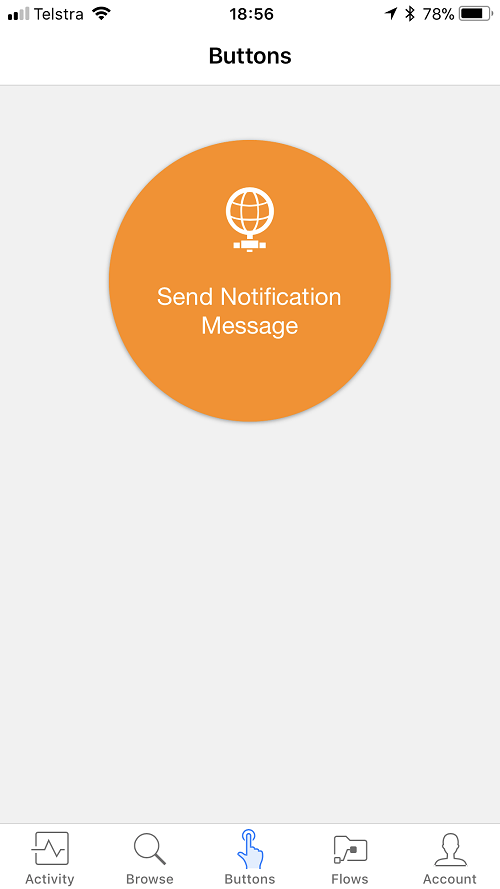
- Choose the Notification intent which will drive the color displayed on the Teenager Notifier.
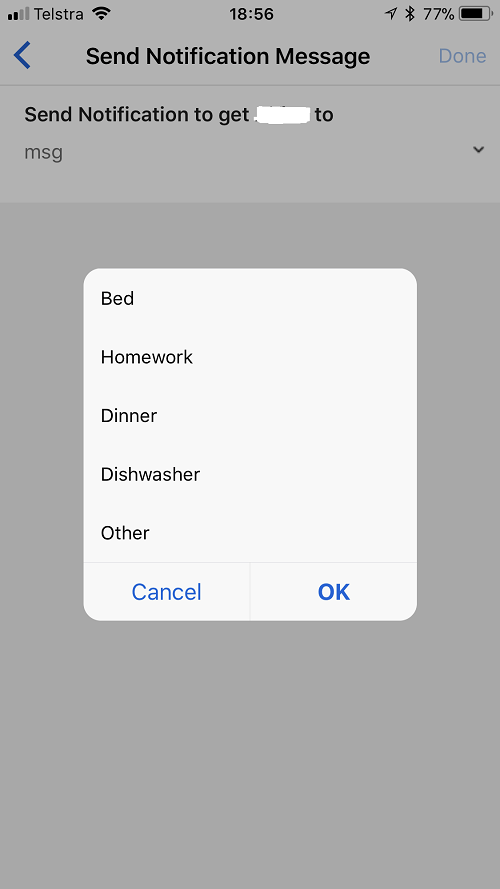
- The IoT Device will then display the color in a revolving pattern as shown below.
The Architecture
The end to end architecture of the solution looks like this.
![]()
Using the Microsoft Flow App on a mobile device gives a nice way of having a simple interface that can be used to trigger the notification. Microsoft Flow sends the desired message and details of the device to send it to, to an Azure Function that puts a message into an MQTT queue associated with the Mongoose OS driven Azure IoT Device (ESP8266 based NodeMCU micro controller) connected to an Azure IoT Hub. The Mongoose OS driven Azure IoT Device takes the message and displays the visual notification in the color associated with the notification type chosen in Microsoft Flow at the beginning of the process.
The benefits of this architecture are;
- the majority of the orchestration happens in Azure, yet thanks to Azure IoT and MQTT no inbound connection is required where the IoT device resides. No port forwarding / inbound rules to configure on your home router. The micro controller is registered with our Azure IoT Hub and makes an outbound connection to subscribe to its MQTT topic. As soon as there is a message for the device it triggers its logic and does what we’ve configured
- You can initiate a notification from anywhere in the world (most simply using the Flow mobile app as shown above)
- And using Mongoose OS allows for the device to be managed remote via the Mongoose OS Dashboard. This means that if I want to add an additional notification (color) I can update Flow for a new option to select and update the configuration on the Notifier device to display the new color if it receives such a command.
Solution Prerequisites
This post builds on the previous two. As such the prerequisites are;
- you have an Azure account and have set up an IoT Hub, and registered an IoT Device with it
- your IoT device (micro controller) can run Mongoose OS on. I’m using a NodeMCU ESP8266 that I purchased from Amazon here.
- the RGB LED Light Ring (generic Neopixel) I used I purchased from Amazon here.
- 3D printer if you want to print an enclosure for the IoT device
With those sorted we can;
- Install and configure my Mongoose OS Application. It includes all the necessary libraries and sample config to integrate with a Neopixel, Azure IoT, Mongoose Dashboard etc.
- Create the Azure PowerShell Function App that will publish the MQTT message the IoT Device will consume
- Create the Microsoft Flow that will kick off the notifications and give use a nice interface to send what we want
- Build an enclosure for our IoT device
How to build this project
The order I’ve detailed the elements of the architecture here is how I’d recommend approaching this project. I’d also recommend working through the previous two blog posts linked at the beginning of this one as that will get you up to speed with Mongoose OS, Azure IoT Hub, Azure IoT Devices, MQTT etc.
Installing the AzureIoT-Neopixel-js Application
I’ve made the installation of my solution easy by creating a Mongoose OS Application. It includes all the libraries required and sample code for the functionality I detail in this post.
Clone it from Github here and put it into your .mos directory that should be in the root of your Windows profile directory. e.g C:\Users\Darren.mos\apps-1.26 then from the MOS Configuration page select Projects, select AzureIoT-Neopixel-JS then select the Rebuild App spanner icon from the toolbar. When it completes select the Flash icon from the toolbar. When your micro controller restarts select the Device Setup from the top menu bar and configure it for your WiFi network. Finally configure your device for Azure MQTT as per the details in my first post in this series (which will also require you to create an Azure IoT Hub if you don’t already have one and register your micro controller with it as an Azure IoT Device). You can then test sending a message to the device using PowerShell or Device Explorer as shown in post two in this series.
I have the Neopixel connected to D1 (GPIO 5) on the NodeMCU. If you use a different micro controller and a different GPIO then update the init.js configuration accordingly.
Creating the Azure Function App
Now that you have the micro controller configured and working with Azure IoT, lets abstract the sending of the MQTT messages into an Azure Function. We can’t send MQTT messages from Microsoft Flow, so I’ve created an Azure Function that uses the AzureIoT Powershell module to do that.
Note: You can send HTTP messages to an Azure IoT device but …
….. that doesn’t suit my requirements
I’m using the Managed Service Identity functionality to access the Azure Key Vault where credentials for the identity that can interact with my Azure IoT Hub is stored. To enable and use that (which I highly recommend) follow the instructions in my blog post here to configure MSI on an Azure Function App. If you don’t already have an Azure Key Vault then follow my blog post here to quickly set one up using PowerShell.
Azure PowerShell Function App
The Function App is an HTTP Trigger Based one using PowerShell. In order to interact with Azure IoT Hub and integrate with the IoT Device via Azure I’m using the same modules as in the previous posts. So they need to be located within the Function App.
Specifically they are;
- AzureIoT v1.0.0.5
- AzureRM v5.5.0
- AzureRM.IotHub v3.1.0
- AzureRM.profile v4.2.0
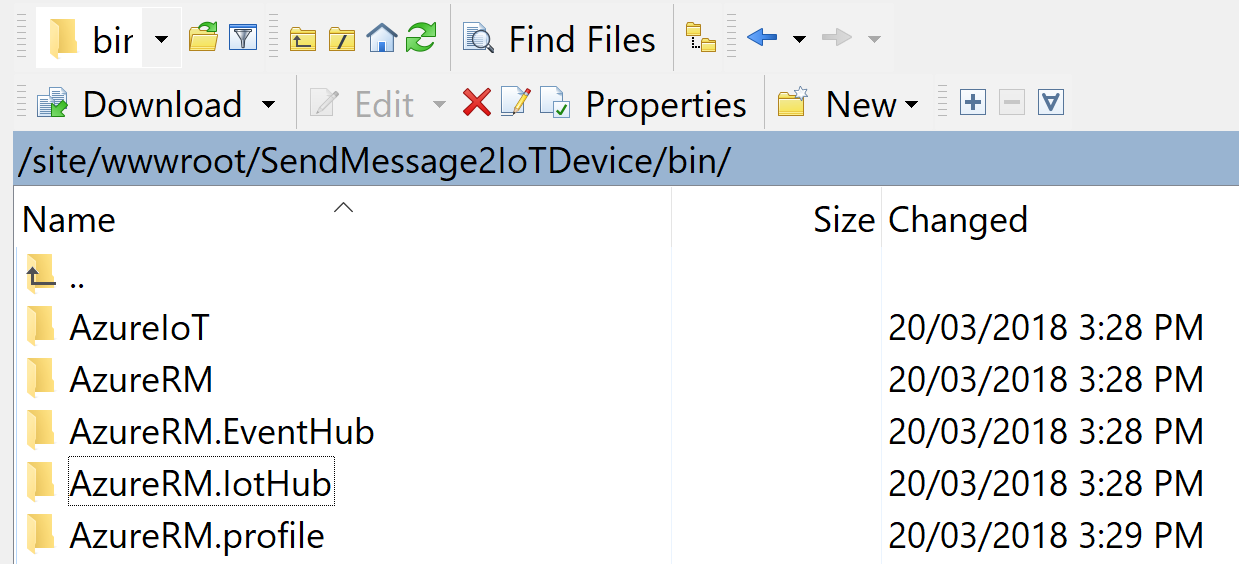
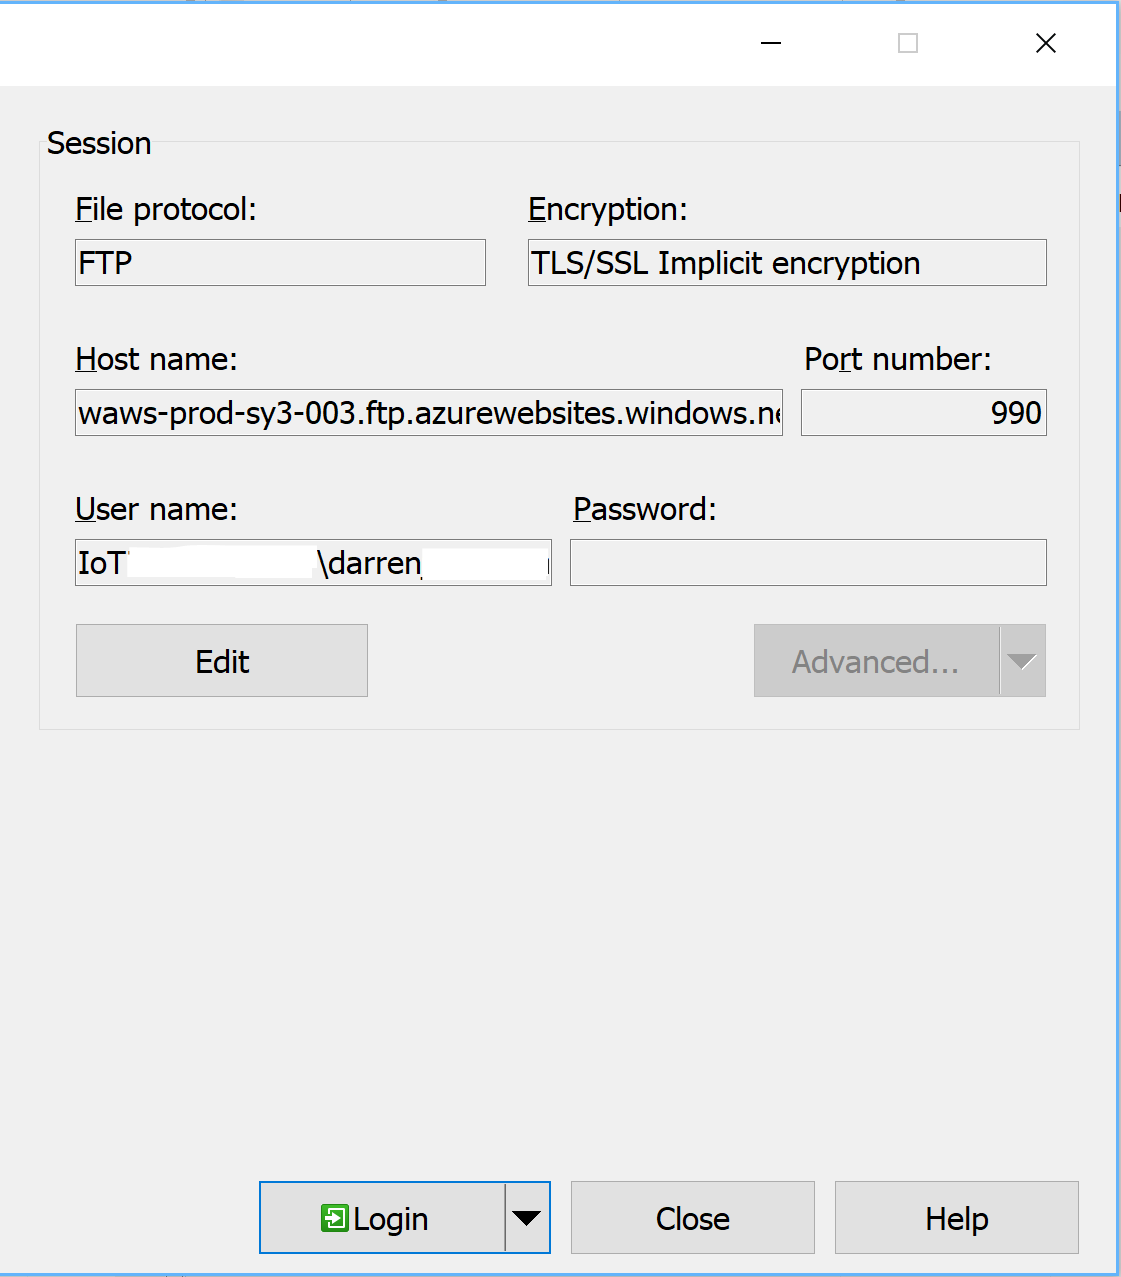
The configuration in WinSCP to upload to the Function App for me is
Edit the AzureRM.IotHub.psm1 file
The AzureRM.IotHub.psm1 will locate an older version of the AzureRM.IotHub PowerShell module from within Azure Functions. As we’ve uploaded the version we need, we need to comment out the following lines in AzureRM.IotHub.psm1 so that it doesn’t do a version check. See below the lines to remark out (put a # in front of the lines indicated below) that are near the start of the module. The AzureRM.IotHub.psm1 file can be edited via WinSCP & notepad.
#$module = Get-Module AzureRM.Profile
#if ($module -ne $null -and $module.Version.ToString().CompareTo("4.2.0") -lt 0)
#{
# Write-Error "This module requires AzureRM.Profile version 4.2.0. An earlier version of AzureRM.Profile is imported in the current PowerShell session. Please open a new session before importing this module. This error could indicate that multiple incompatible versions of the Azure PowerShell cmdlets are installed on your system. Please see https://aka.ms/azps-version-error for troubleshooting information." -ErrorAction Stop
#}
#elseif ($module -eq $null)
#{
# Import-Module AzureRM.Profile -MinimumVersion 4.2.0 -Scope Global
#}
HTTP Trigger Azure PowerShell Function App
Here is my Function App Script. You’ll need to update it for the location of your PowerShell Modules (I created a bin directory under my Function App D:\home\site\wwwroot\myFunctionApp\bin), your Key Vault details and the user account you will be using. The User account will need permissions to your Key Vault to retrieve the password (credential) for the account you will run the process as and to your Azure IoT Hub.
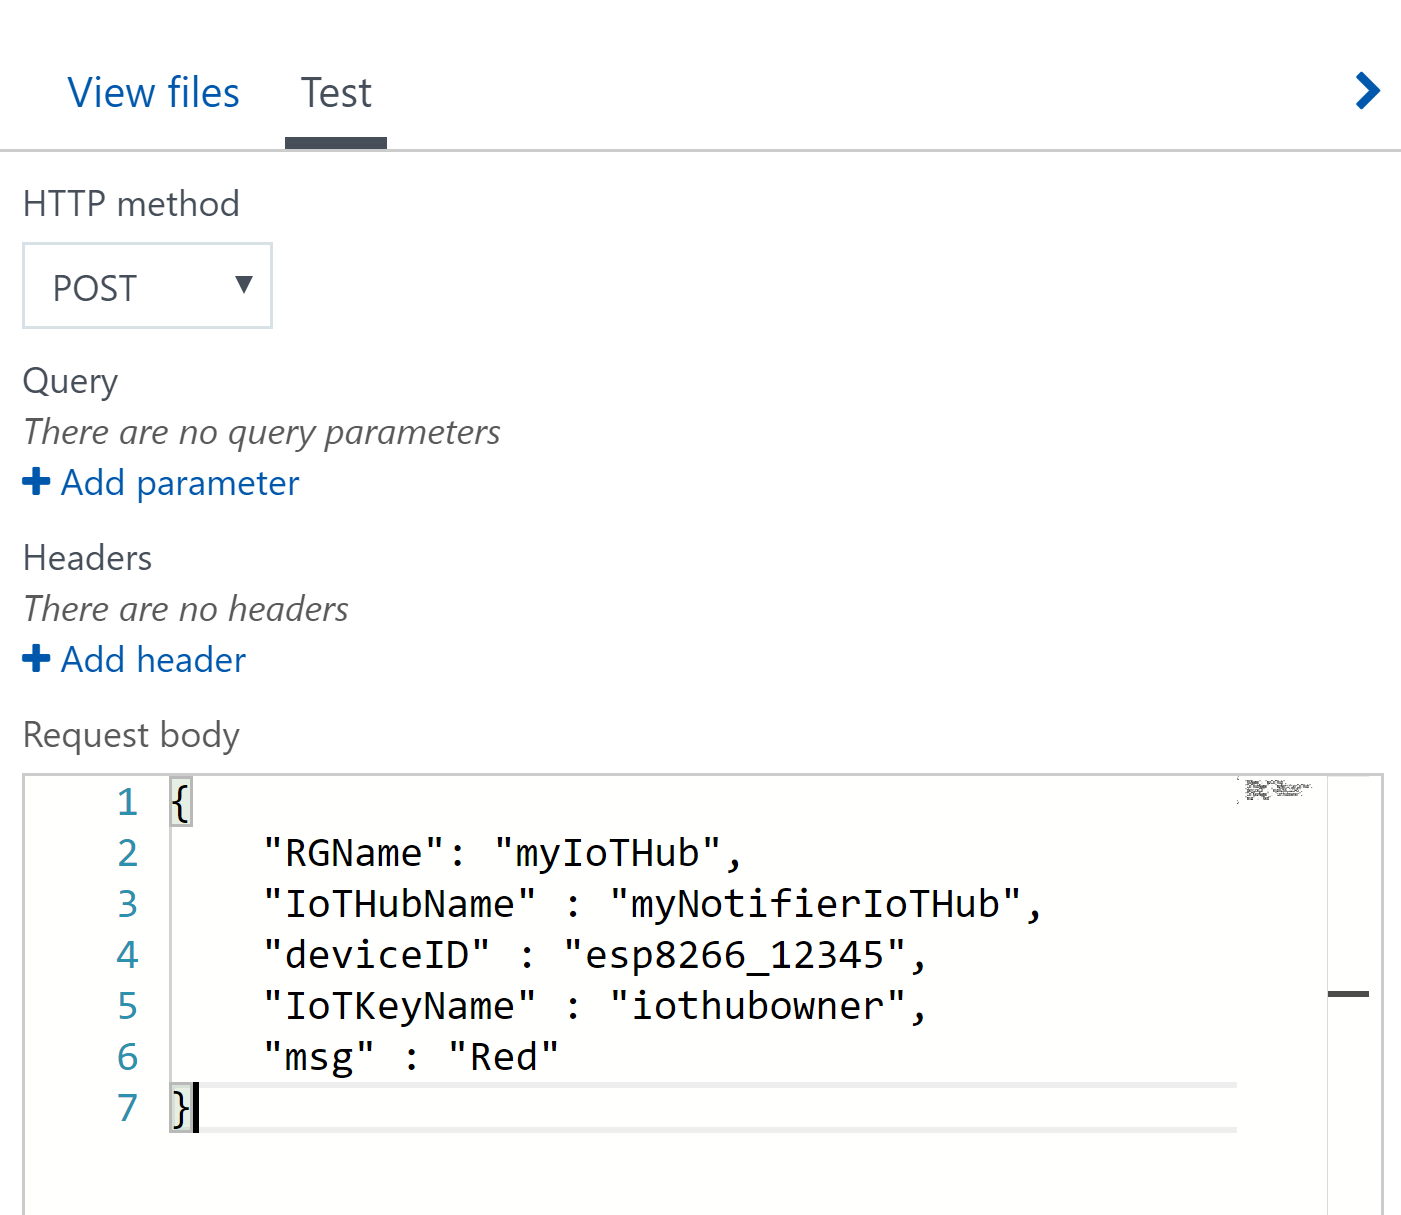
You can test the Function App from within the Azure Portal where you created the Function App as shown below. Update for the names of the IoT Hub, IoT Device and the Resource Group in your associated environment.
Microsoft Flow Configuration
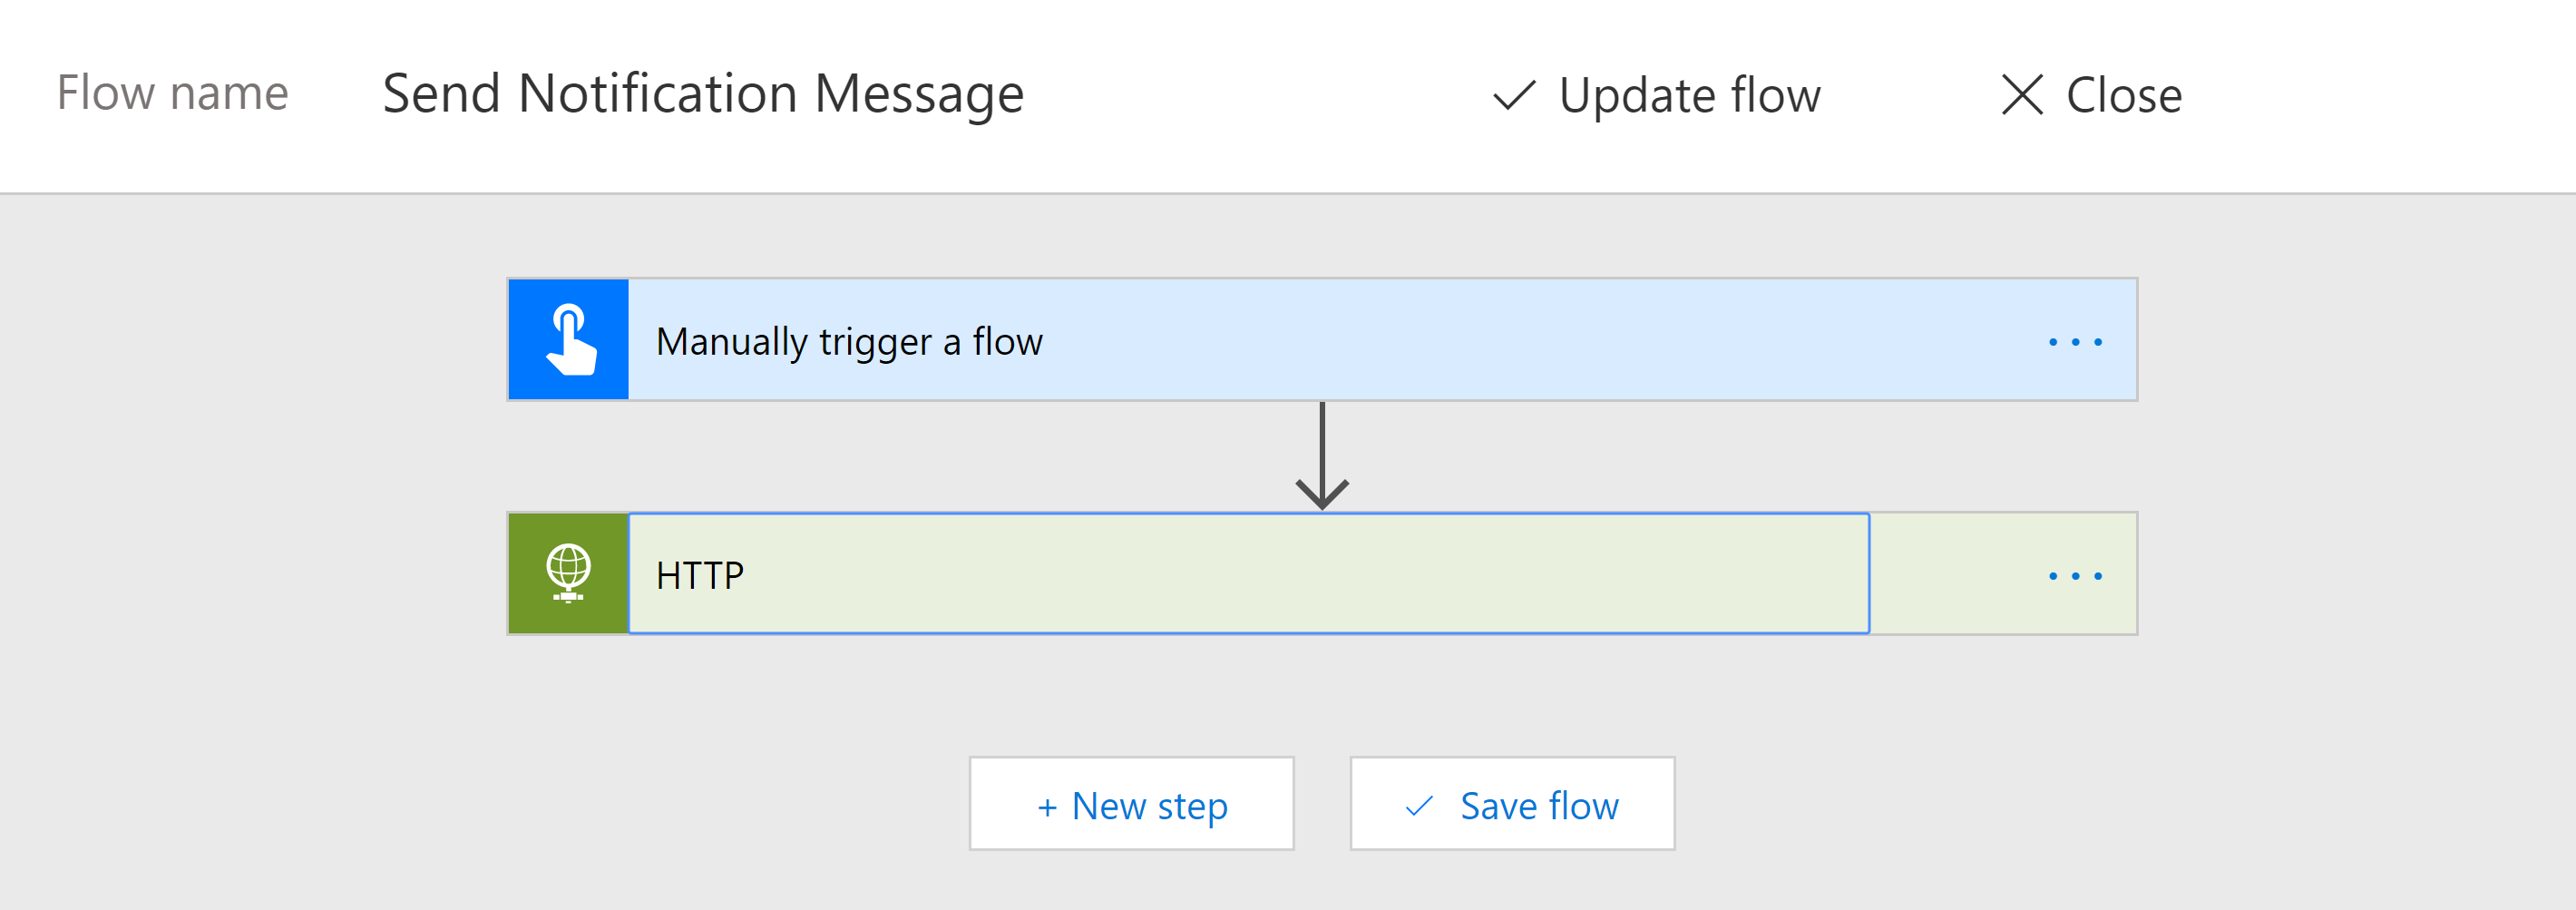
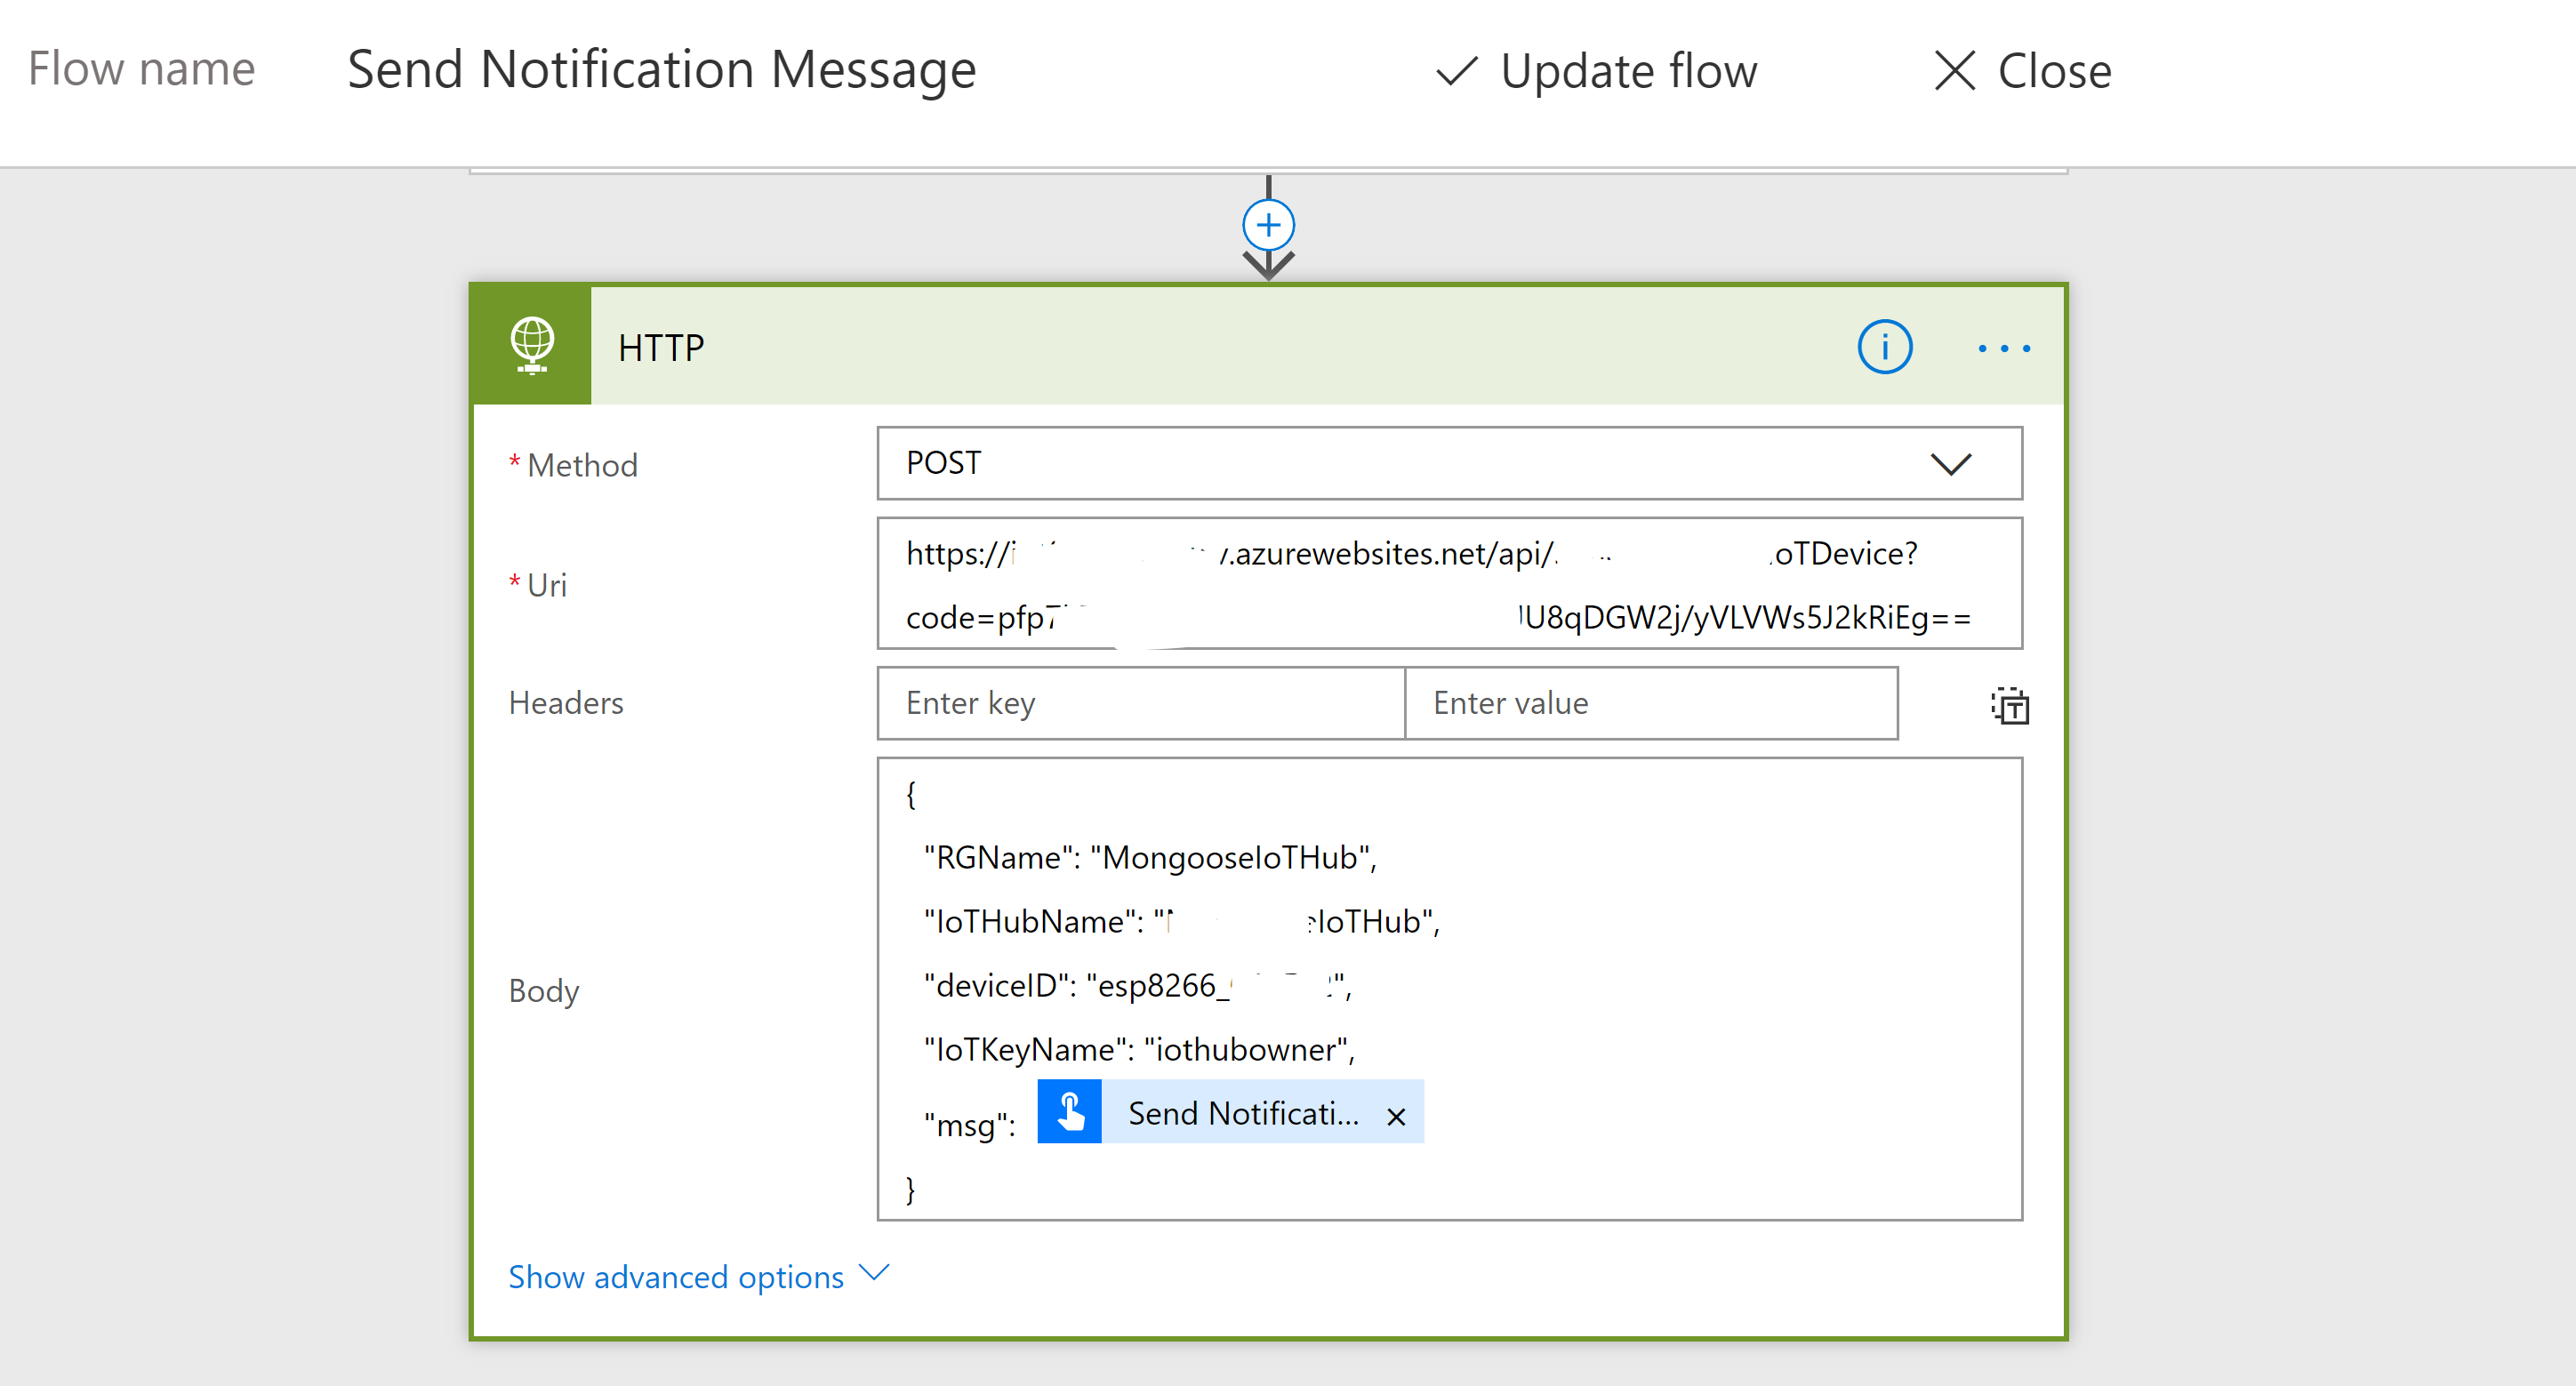
The Flow is very simple. A manual button and a resulting HTTP Post.
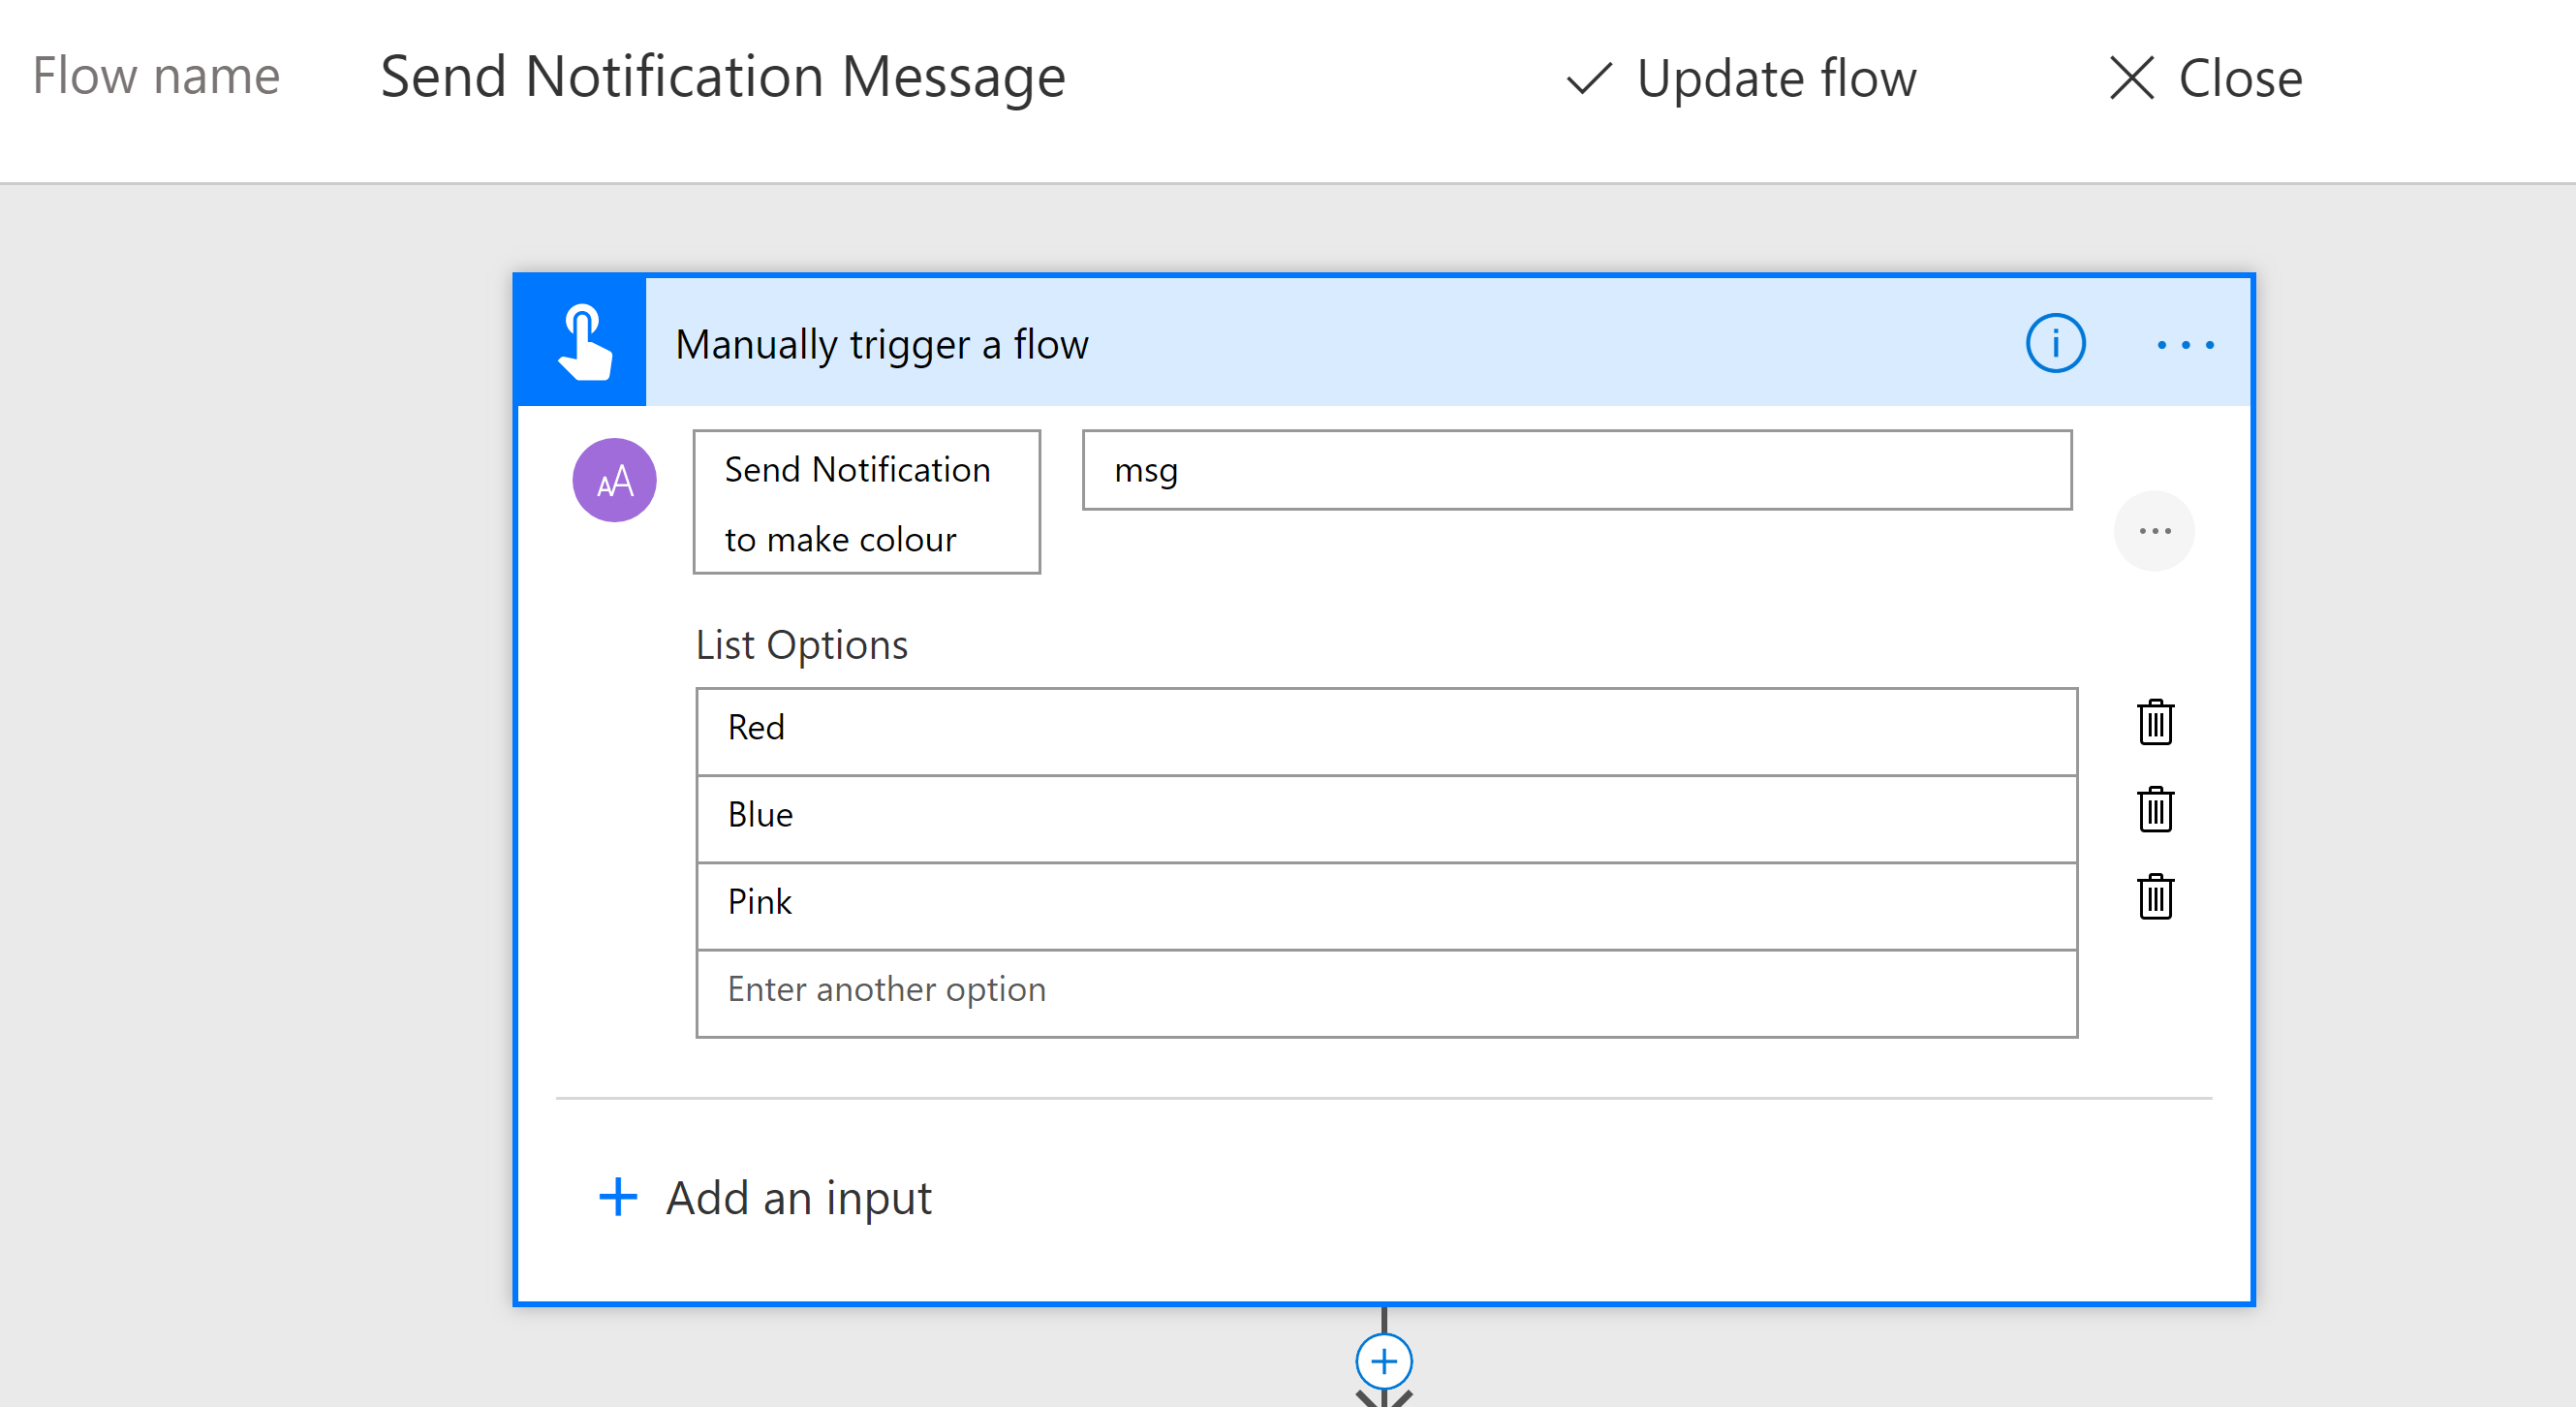
For the message I have configured a list. This is where you can choose the color of the notification.
The Action is an HTTP Post to the Azure Function URL. The body has the configuration for the IoTHub, IoTDevice, Resource Group Name, IoTKeyName and the Message selected from the manual button above. You will have the details for those settings from your initial testing via the Function App (or PowerShell).
The Azure Function URL you get from the top of the Azure Portal screen where you configure your Function App. Look for “Get Function URL”.
Testing
Now you have all the elements configured, install the Microsoft Flow App on your mobile if you don’t already have it for Apple iOS Appstore and Android Google Play Log in with the account you created the Flow as, select the Flow, the message and done. Depending on your internet connectivity you should see the notification in < 10 seconds displayed on the Notifier device.
Case 3D Printer Files
Lastly, we need to make it look all pretty and make the notification really pop. I’ve created a housing for the neopixel that sits on top of a little case for the NodeMCU.
As you can see from the final unit, I’ve printed the neopixel holder in a white PLA that allows the RGB LED light to be diffused nicely and display prominently even in brightly lit conditions.
![]()
I’ve printed the base that holds the micro controller in a different color. The top fits snugly through the hole in the micro controller case. The wires from the neopixel to connect it to the micro controller slide through the shaft of the top housing. It also has a backplate that attaches to the back of the enclosure that I secure with a little hot glue.
Here is a link to the Neopixel (WS2812) 16 RGB LED light holder I created on Thingiverse.
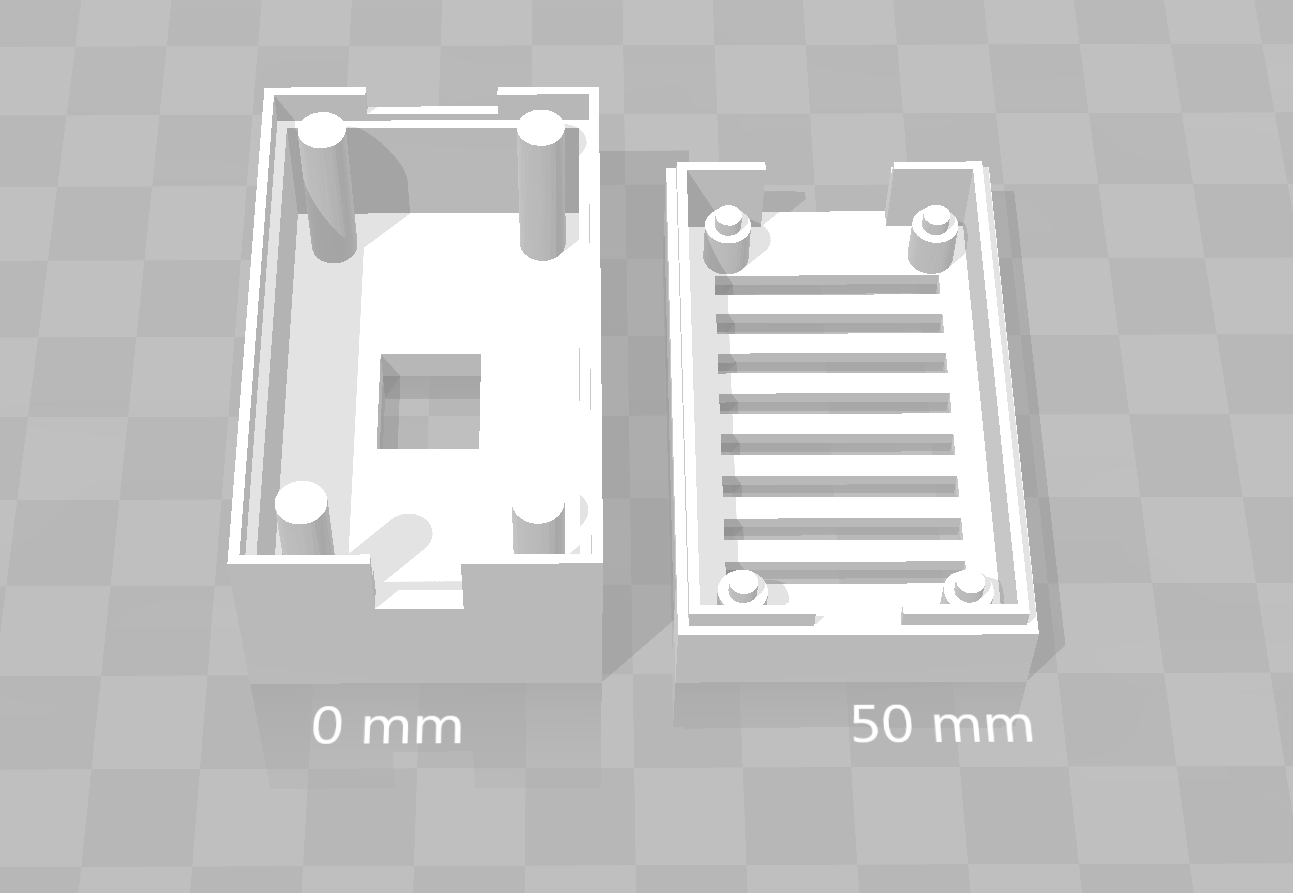
Depending on your micro controller you will also need an appropriately sized case for that. I’ve designed the neopixel light holder top assembly to sit on top of my micro controller case. Also available on Thingiverse here.
Summary
Using a combination of Azure IoT, Azure PaaS Services, Mongoose OS and a cheap micro controller with an RGB LED light ring we have a very versatile Internet of Things device. The application here is a simple visual notifier. A change of output device or even in conjunction with an input device could change the application, whilst still re-using all the elements of the solution that glues it all together (micro-controller, Mongoose OS, Azure IoT, Azure PaaS). Did you build one? Did you use this as inspiration to build something else? Let me know.
