So far in this series we’ve been compiling our server-side TypeScript code to JavaScript locally on our own machines, and then copying and pasting it into the Azure Portal. However, an important part of building a modern application – especially a cloud-based one – is having a reliable automated build and deployment process. There are a number of reasons why this is important, ranging from ensuring that a developer isn’t building code on their own machine – and therefore may be subject to environmental variations or differences that cause different outputs – through to running a suite of tests on every build and release. In this post we will look at how Cosmos DB server-side code can be built and released in a fully automated process.
This post is part of a series:
- Part 1 gives an overview of the server side programmability model, the reasons why you might want to consider server-side code in Cosmos DB, and some key things to watch out for.
- Part 2 deals with user-defined functions, the simplest type of server-side programming, which allow for adding simple computation to queries.
- Part 3 talks about stored procedures. These provide a lot of powerful features for creating, modifying, deleting, and querying across documents – including in a transactional way.
- Part 4 introduces triggers. Triggers come in two types – pre-triggers and post-triggers – and allow for behaviour like validating and modifying documents as they are inserted or updated, and creating secondary effects as a result of changes to documents in a collection.
- Part 5 discusses unit testing your server-side scripts. Unit testing is a key part of building a production-grade application, and even though some of your code runs inside Cosmos DB, your business logic can still be tested.
- Finally, part 6 (this post) explains how server-side scripts can be built and deployed into a Cosmos DB collection within an automated build and release pipeline, using Microsoft Visual Studio Team Services (VSTS).
Build and Release Systems
There are a number of services and systems that provide build and release automation. These include systems you need to install and manage yourself, such as Atlassian Bamboo, Jenkins, and Octopus Deploy, through to managed systems like Amazon CodePipeline/CodeBuild, Travis CI, and AppVeyor. In our case, we will use Microsoft’s Visual Studio Team System (VSTS), which is a managed (hosted) service that provides both build and release pipeline features. However, the steps we use here can easily be adapted to other tools.
I will assume that you have a VSTS account, that you have loaded the code into a source code repository that VSTS can access, and that you have some familiarity with the VSTS build and release system.
Throughout this post, we will use the same code that we used in part 5 of this series, where we built and tested our stored procedure. The exact same process can be used for triggers and user-defined functions as well. I’ll assume that you have a copy of the code from part 5 – if you want to download it, you can get it from the GitHub repository for that post. If you want to refer to the finished version of the whole project, you can access it on GitHub here.
Defining our Build Process
Before we start configuring anything, let’s think about what we want to achieve with our build process. I find it helpful to think about the start point and end point of the build. We know that when we start the build, we will have our code within a Git repository. When we finish, we want to have two things: a build artifact in the form of a JavaScript file that is ready to deploy to Cosmos DB; and a list of unit test results. Additionally, the build should pass if all of the steps ran successfully and the tests passed, and it should fail if any step or any test failed.
Now that we have the start and end points defined, let’s think about what we need to do to get us there.
- We need to install our NPM packages. On VSTS, every time we run a build our build environment will be reset, so we can’t rely on any files being there from a previous build. So the first step in our build pipeline will be to run
npm install. - We need to build our code so it’s ready to be tested, and then we need to run the unit tests. In part 5 of this series we created an NPM script to help with this when we run locally – and we can reuse the same script here. So our second build step will be to run
npm run test. - Once our tests have run, we need to report their results to VSTS so it can visualise them for us. We’ll look at how to do this below. Importantly, VSTS won’t fail the build automatically if there are any test failures, so we’ll look at how to do this ourselves shortly.
- If we get to this point in the build then our code is successfully passing the tests, so now we can create the real release build. Again we have already defined an NPM script for this, so we can reuse that work and call
npm run build. - Finally, we can publish the release JavaScript file as a build artifact, which makes it available to our release pipeline.
We’ll soon see how we can actually configure this. But before we can write our build process, we need to figure out how we’ll report the results of our unit tests back to VSTS.
Reporting Test Results
When we run unit tests from inside a VSTS build, the unit test runner needs some way to report the results back to VSTS. There are some built-in integrations with common tools like VSTest (for testing .NET code). For Jasmine, we need to use a reporter that we configure ourselves. The jasmine-tfs-reporter NPM package does this for us – its reporter will emit a specially formatted results file, and we’ll tell VSTS to look at this.
Let’s open up our package.json file and add the following line into the devDependencies section:
Run npm install to install the package.
Next, create a file named spec/vstsReporter.ts and add the following lines, which will configure Jasmine to send its results to the reporter we just installed:
Finally, let’s edit the jasmine.json file. We’ll add a new helpers section, which will tell Jasmine to run that script before it starts running our tests. Here’s the new jasmine.json file we’ll use:
Now run npm run test. You should see that a new testresults folder has been created, and it contains an XML file that VSTS can understand.
That’s the last piece of the puzzle we need to have VSTS build our code. Now let’s see how we can make VSTS actually run all of these steps.
Creating the Build Configuration
VSTS has a great feature – currently in preview – that allows us to specify our build definition in a YAML file, check it into our source control system, and have the build system execute it. More information on this feature is available in a previous blog post I wrote. We’ll make use of this feature here to write our build process.
Create a new file named build.yaml. This file will define all of our build steps. Paste the following contents into the file:
This YAML file tells VSTS to do the following:
- Run the
npm installcommand. - Run the
npm run testcommand. If we get any test failures, this command will cause VSTS to detect an error. - Regardless of whether an error was detected, take the test results that have been saved into the
testresultsfolder and publish them. (Publishing just means showing them within the build; they won’t be publicly available.) - If everything worked up till now, run
npm run buildto build the releaseable JavaScript file. - Publish the releasable JavaScript file as a build artifact, so it’s available to the release pipeline that we’ll configure shortly.
Commit this file and push it to your Git repository. In VSTS, we can now set up a new build configuration, point it to the YAML file, and let it run. After it finishes, you should see something like this:
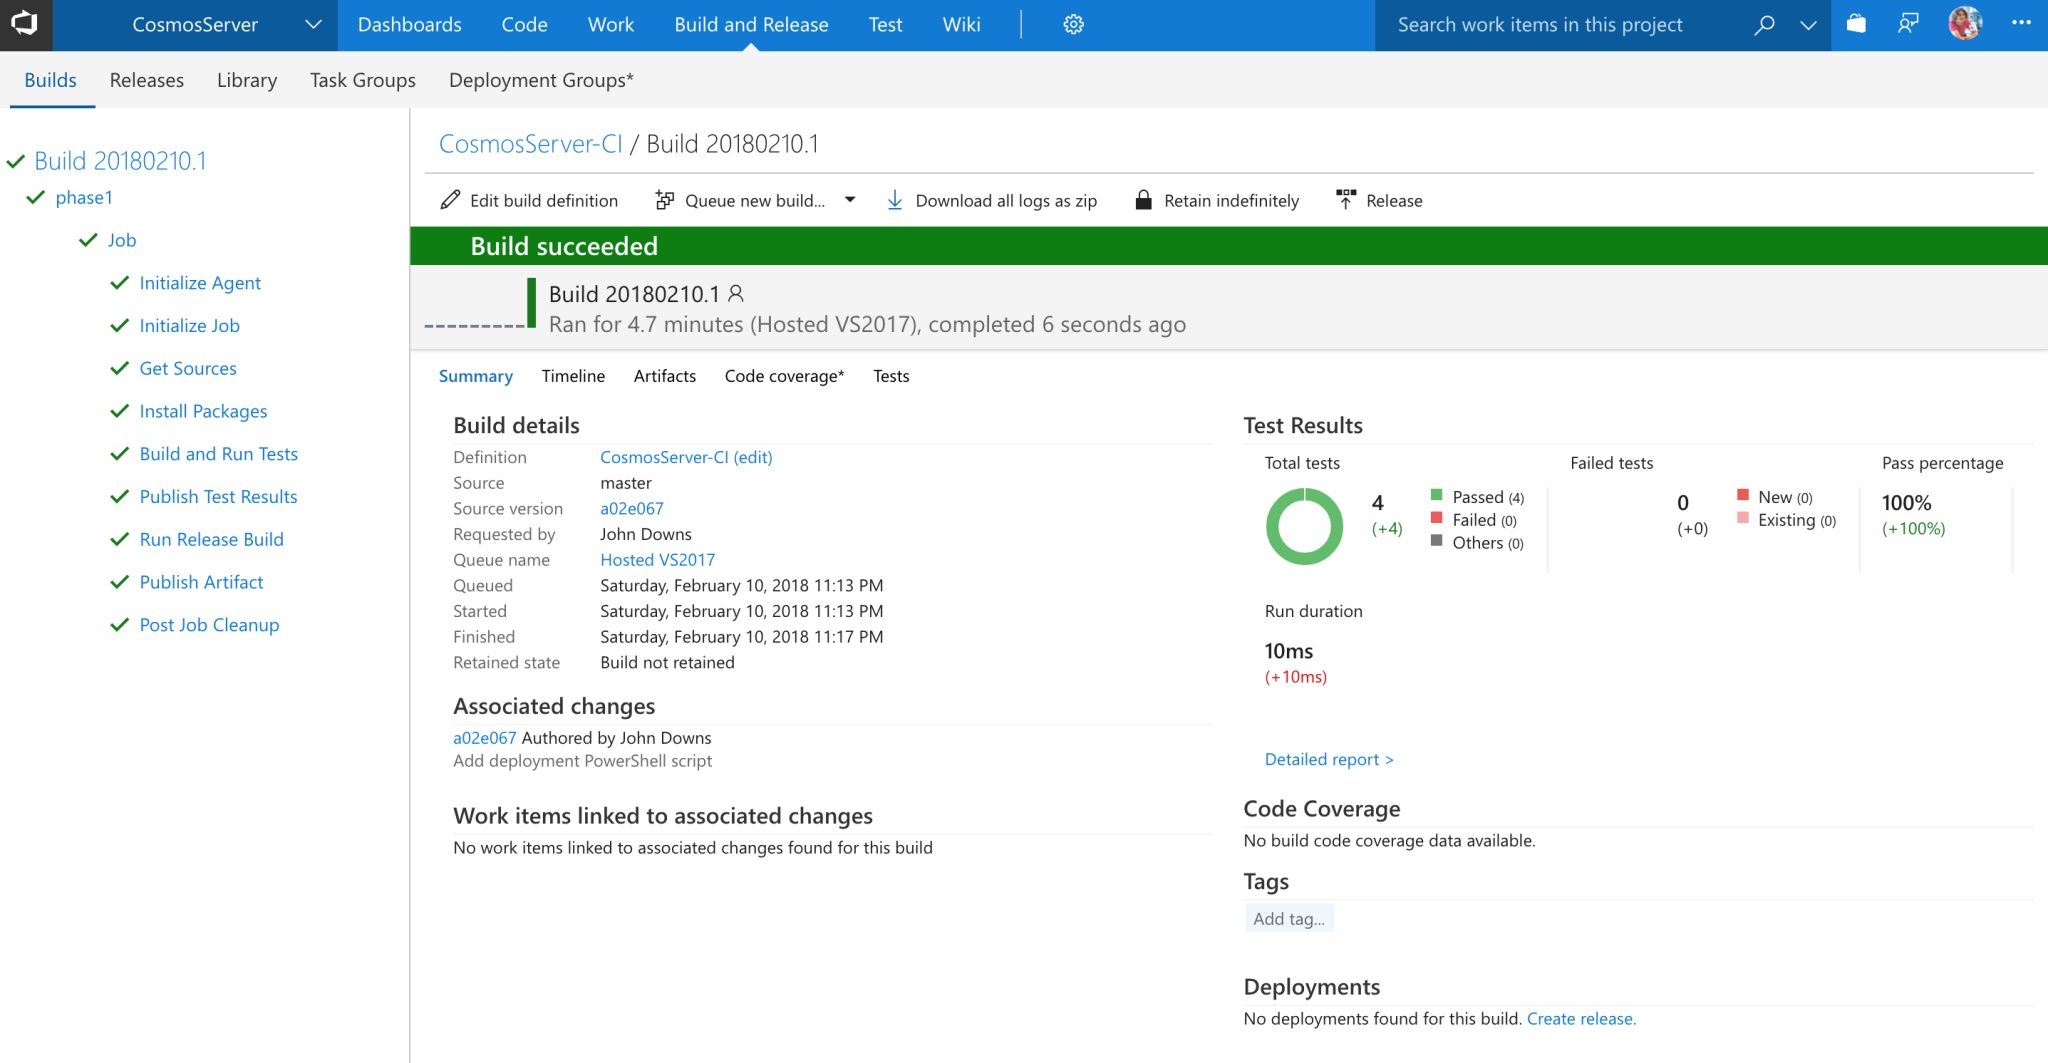
We can see that four tests ran and passed. If we click on the Artifacts tab, we can view the artifacts that were published:
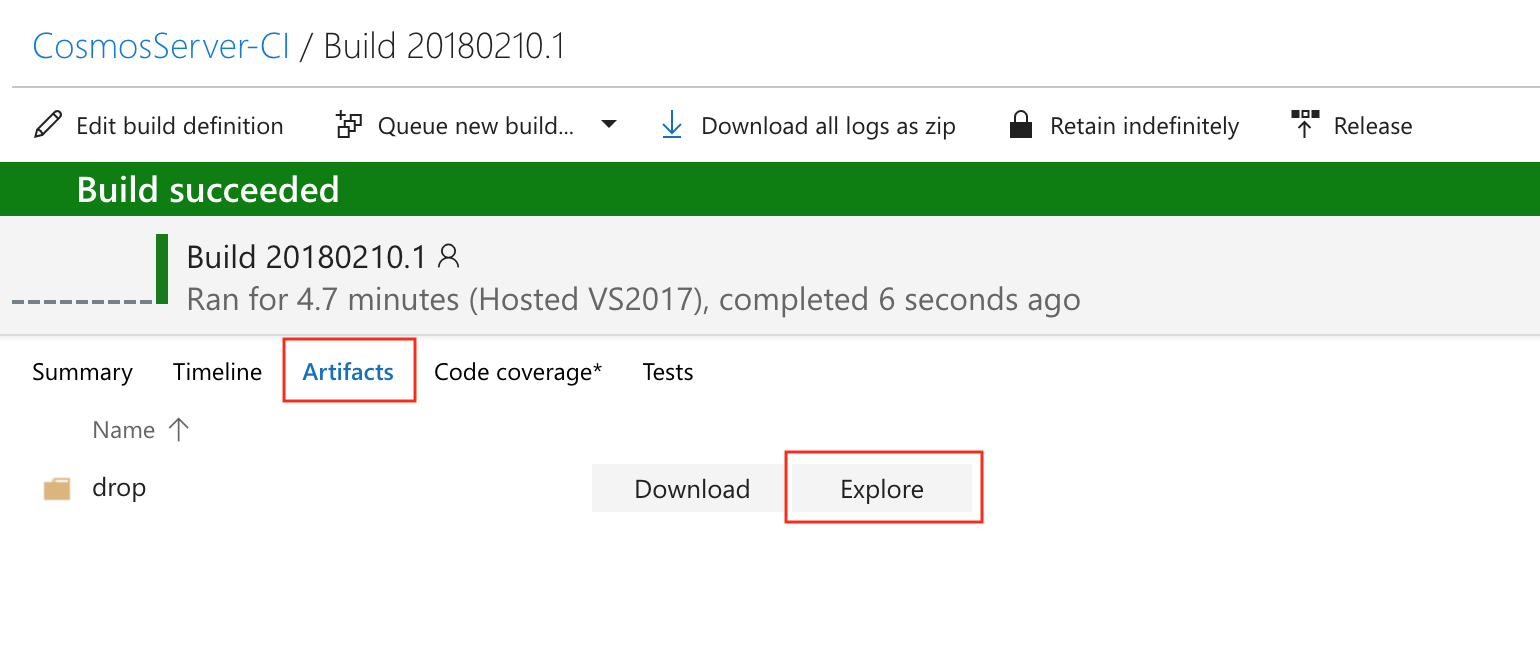
And by clicking the Explore button and expanding the drop folder, we can see the exact file that was created:
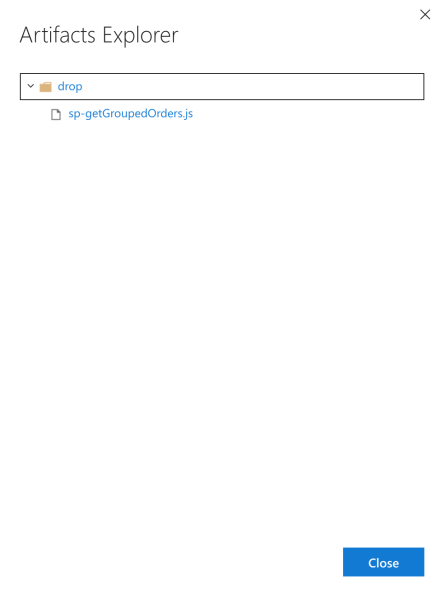
You can even download the file from here, and confirm that it looks like what we expect to be able to send to Cosmos DB. So, now we have our code being built and tested! The next step is to actually deploy it to Cosmos DB.
Deciding on a Release Process
Cosmos DB can be used in many different types of applications, and the way that we deploy our scripts can differ as well. In some applications, like those that are heavily server-based and have initialisation logic, we might provision our database, collections, and scripts through our application code. In other systems, like serverless applications, we want to provision everything we need during our deployment process so that our application can immediately start to work. This means there are several patterns we can adopt for installing our scripts.
Pattern 1: Use Application Initialisation Logic
If we have an Azure App Service, Cloud Service, or another type of application that provides initialisation lifecycle events, we can use the initialisation code to provision our Cosmos DB database and collection, and to install our stored procedures, triggers, and UDFs. The Cosmos DB client SDKs provide a variety of helpful methods to do this. For example, the .NET and .NET Core SDKs provide this functionality. If the platform you are using doesn’t have an SDK, you can also use the REST API provided by Cosmos DB.
This approach is also likely to be useful if we dynamially provision databases and collections while our application runs. We can also use this approach if we have an application warmup sequence where the existence of the collection can be confirmed and any missing pieces can be added.
Pattern 2: Initialise Serverless Applications with a Custom Function
When we’re using serverless technologies like Azure Functions or Azure Logic Apps, we may not have the opportunity to initialise our application the first time it loads. We could check the existence of our Cosmos DB resources whenever we are executing our logic, but this is quite wasteful and inefficient. One pattern that can be used is to write a special ‘initialisation’ function that is called from our release pipeline. This can be used to prepare the necessary Cosmos DB resources, so that by the time our callers execute our code, the necessary resources are already present. However, this presents some challenges, including the fact that it necessitates mixing our deployment logic and code with our main application code.
Pattern 3: Deploying from VSTS
The approach that I will adopt in this post is to deploy the Cosmos DB resources from our release pipeline in VSTS. This means that we will keep our release process separate from our main application code, and provide us with the flexibility to use the Cosmos DB resources at any point in our application logic. This may not suit all applications, but for many applications that use Cosmos DB, this type of workflow will work well.
There is a lot more to release configuration than I’ll be able to discuss here – that could easily be its own blog series. I’ll keep this particular post focused just on installing server-side code onto a collection.
Defining the Release Process
As with builds, it’s helpful to think through the process we want the release to follow. Again, we’ll think first about the start and end points. When we start the release pipeline, we will have the build that we want to release (which will include our compiled JavaScript script). For now, I’ll also assume that you have a resource group containing a Cosmos DB account with an existing database and collection, and that you know the account key. In a future post I will elaborate how some of this process can also be automated, but this is outside of the scope of this series. Once the release process finishes, we expect that the collection will have the server-side resource installed and ready to use.
VSTS doesn’t have built-in support for Cosmos DB. However, we can easily use a custom PowerShell script to install Cosmos DB scripts on our collection. I’ve written such a script, and it’s available for download here. The script uses the Cosmos DB API to deploy stored procedures, triggers, and user-defined functions to a collection.
We need to include this script into our build artifacts so that we can use it from our deployment process. So, download the file and save it into a deploy folder in the project’s source repository. Now that we have that there, we need to tell the VSTS build process to include it as an artifact, so open the build.yaml file and add this to the end of the file, being careful to align the spaces and indentation with the sections above it:
Commit these changes, and then run a new build.
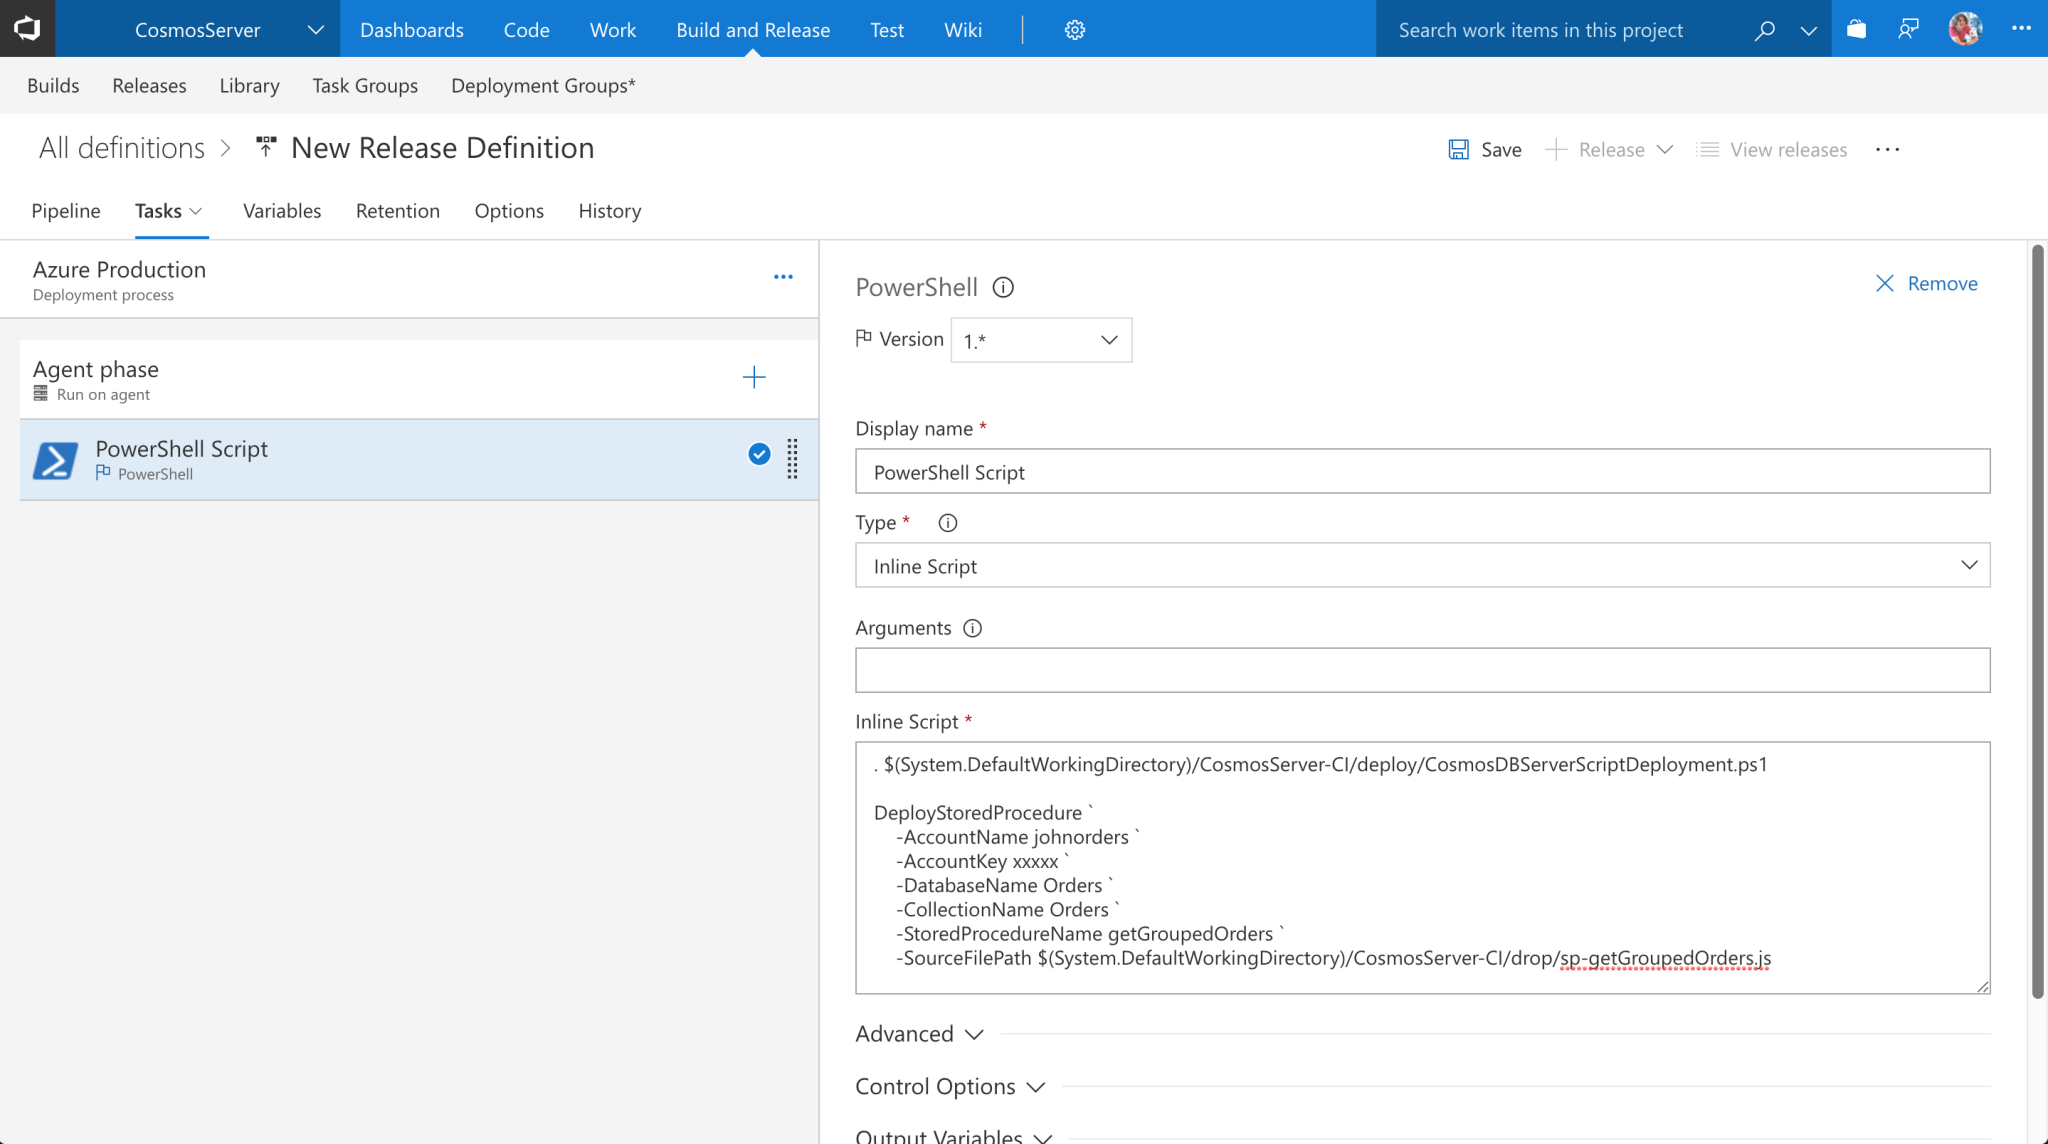
Now we can set up a release definition in VSTS and link it to our build configuration so it can receive the build artifacts. We only need one step currently, which will deploy our stored procedure using the PowerShell script we included as a build artifact. Of course, a real release process is likely to do a lot more, including deploying your application. For now, though, let’s just add a single PowerShell step, and configure it to run an inline script with the following contents:
This inline script does the following:
- It loads in the PowerShell file from our build artifact, so that the functions within that file are available for us to use.
- It then runs the
DeployStoredProcedurefunction, which is defined in that PowerShell file. We pass in some parameters so the function can contact Cosmos DB:AccountName– this is the name of your Cosmos DB account.AccountKey– this is the key that VSTS can use to talk to Cosmos DB’s API. You can get this from the Azure Portal – open up the Cosmos DB account and click theKeystab.DatabaseName– this is the name of the database (in our case,Orders).CollectionName– this is the name of the collection (in our case again,Orders).StoredProcedureName– this is the name we want our stored procedure to have in Cosmos DB. This doesn’t need to match the name of the function inside our code file, but I recommend it does to keep things clear.SourceFilePath– this is the path to the JavaScript file that contains our script.
Note that in the script above I’ve assumed that the build configuration’s name is CosmosServer-CI, so that appears in the two file paths. If you have a build configuration that uses a different name, you’ll need to replace it. Also, I strongly recommend you don’t hard-code the account name, account key, database name, and collection name like I’ve done here – you would instead use VSTS variables and have them dynamically inserted by VSTS. Similarly, the account key should be specified as a secret variable so that it is encrypted. There are also other ways to handle this, including creating the Cosmos DB account and collection within your deployment process, and dynamically retrieving the account key. This is beyond the scope of this series, but in a future blog post I plan to discuss some ways to achieve this.
After configuring our release process, it will look something like this:
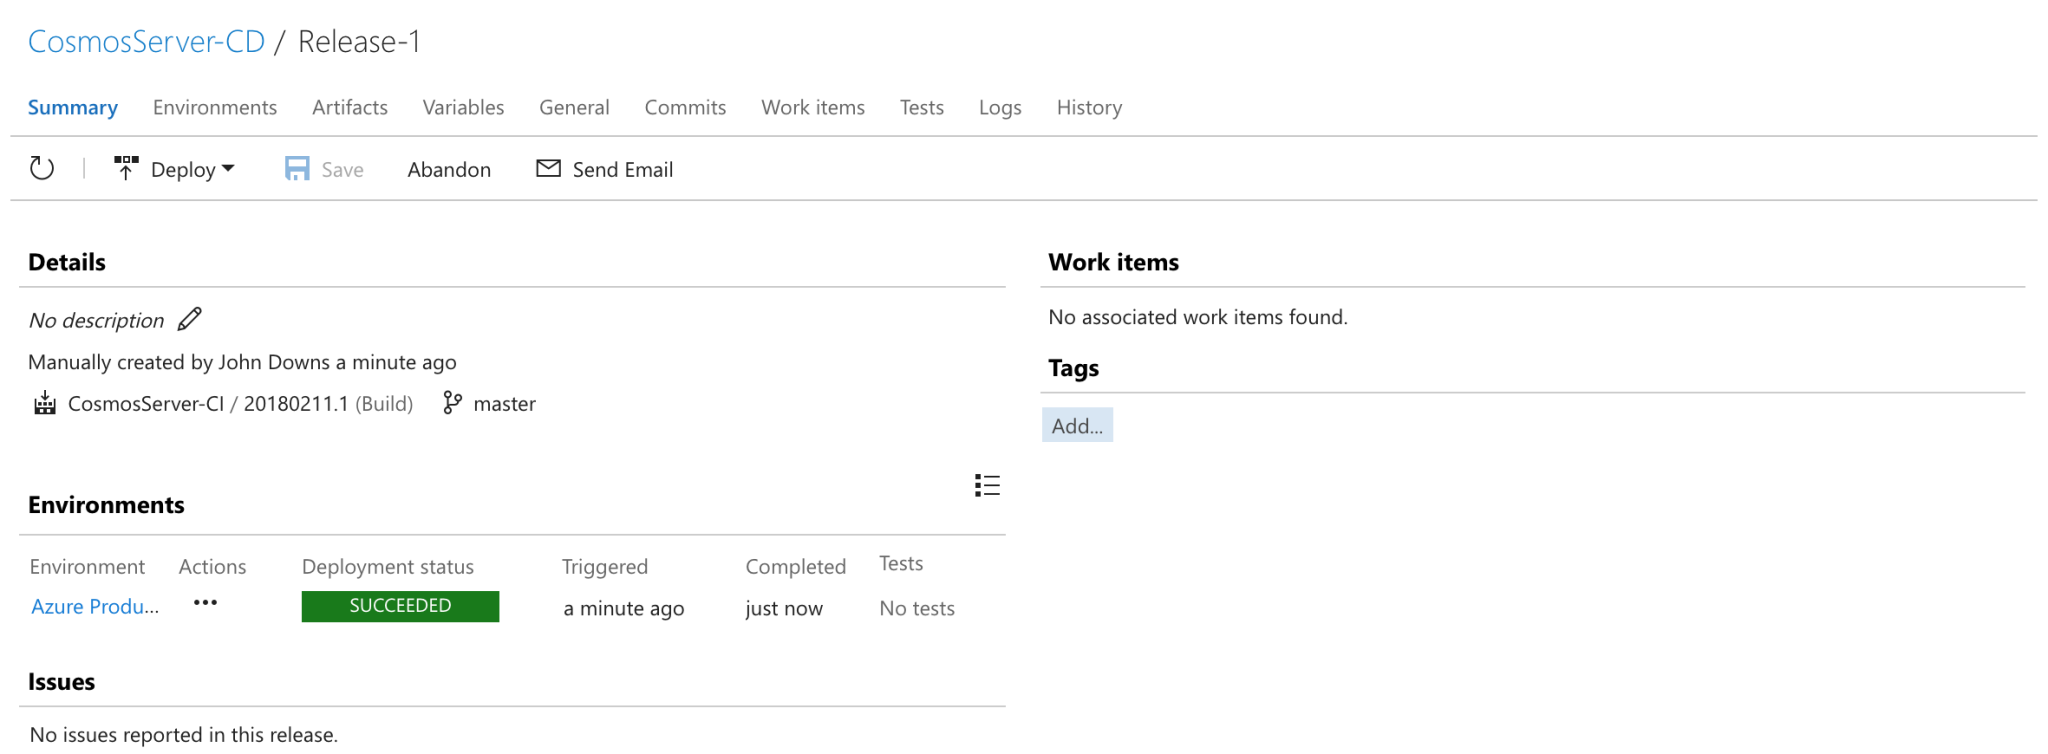
Now that we’ve configured our release process we can create a new release and let it run. If everything has been configured properly, we should see the release complete successfully:
And if we check the collection through the Azure Portal, we can see the stored procedure has been deployed:
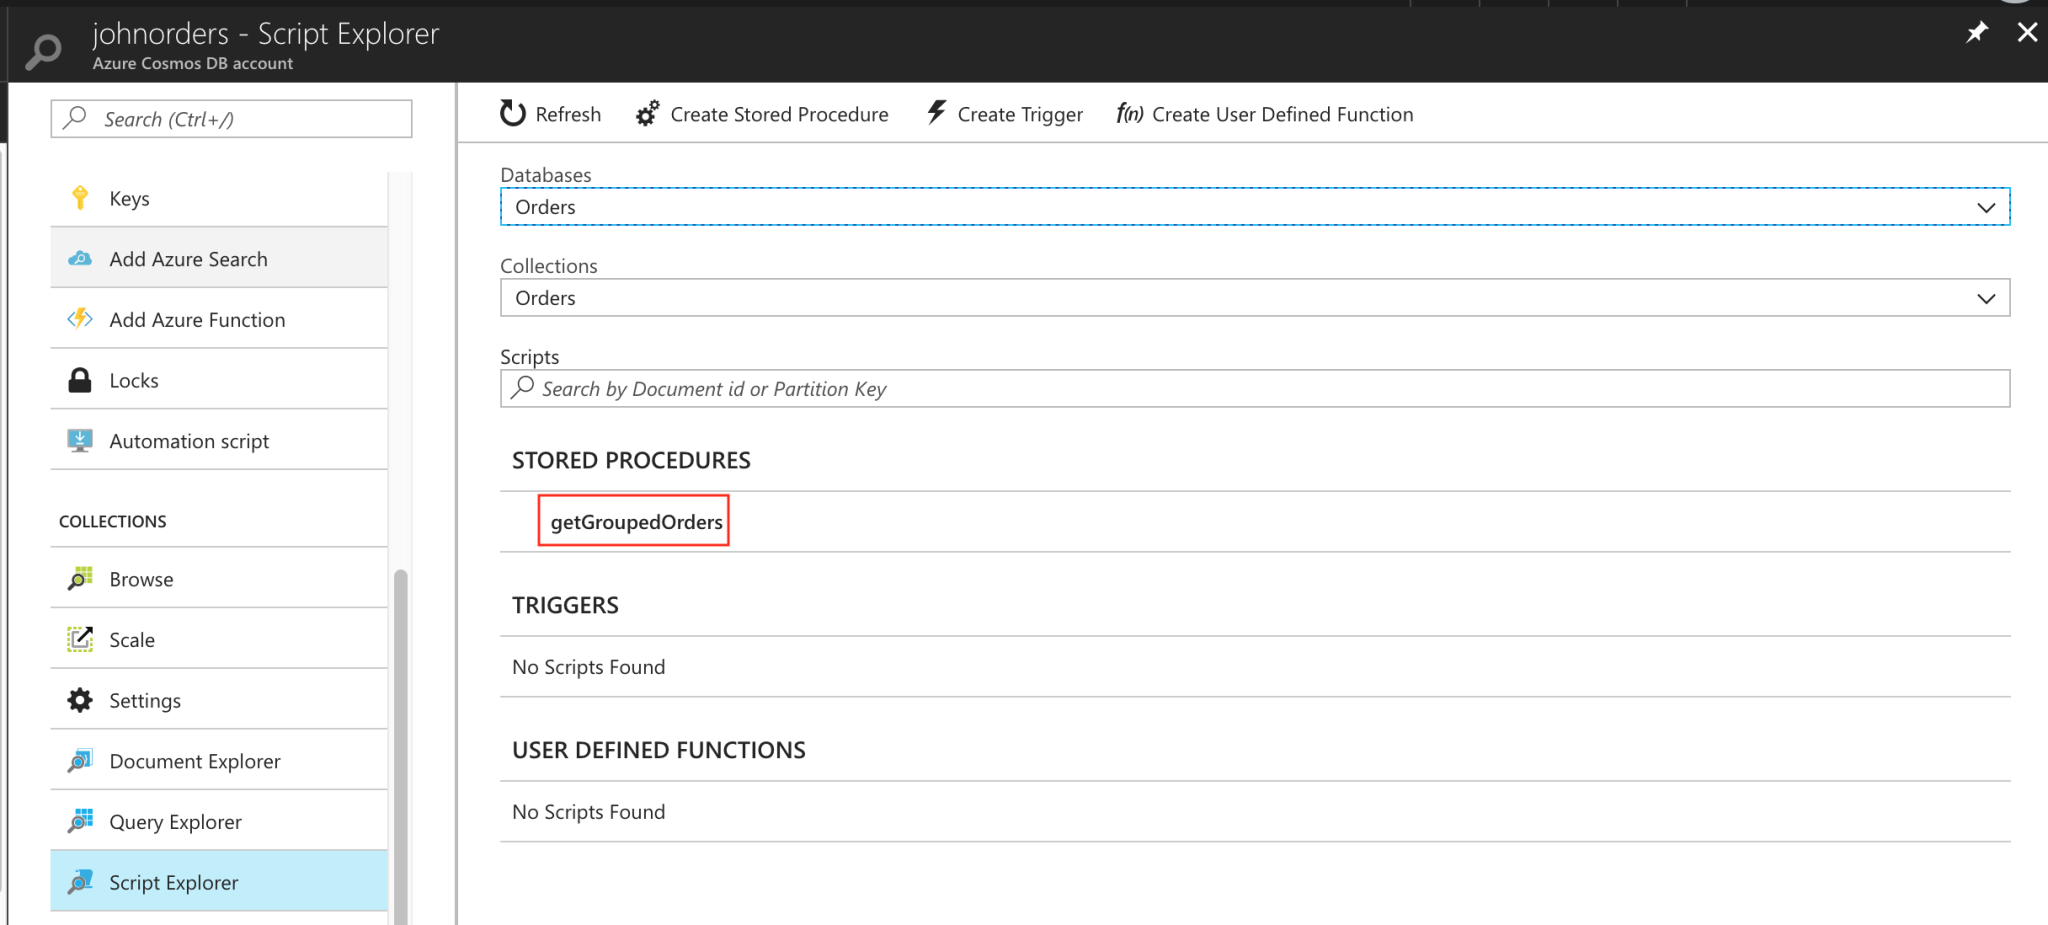
This is pretty cool. It means that whenever we commit a change to our stored procedure’s TypeScript file, it can automatically be compiled, tested, and deployed to Cosmos DB – without any human intervention. We could now adapt the exact same process to deploy our triggers (using the DeployTrigger function in the PowerShell script) and UDFs (using the DeployUserDefinedFunction function). Additionally, we can easily make our build and deployments into true continuous integration (CI) and continuous deployment (CD) pipelines by setting up automated builds and releases within VSTS.
Summary
Over this series of posts, we’ve explored Cosmos DB’s server-side programming capabilities. We’ve written a number of server-side scripts including a UDF, a stored procedure, and two triggers. We’ve written them in TypeScript to ensure that we’re using strongly typed objects when we interact with Cosmos DB and within our own code. We’ve also seen how we can unit test our code using Jasmine. Finally, in this post, we’ve looked at how our server-side scripts can be built and deployed using VSTS and the Cosmos DB API.
I hope you’ve found this series useful! If you have any questions or similar topics that you’d like to know more about, please post them in the comments below.
Key Takeaways
- Having an automated build and release pipeline is very important to ensure reliable, consistent, and safe delivery of software. This should include our Cosmos DB server-side scripts.
- It’s relatively easy to adapt the work we’ve already done with our build scripts to work on a build server. Generally it will simply be a matter of executing
npm installand thennpm run buildto create a releasable build of our code. - We can also run our unit tests by simply executing
npm run test. - Test results from Jasmine can be published into VSTS using the
jasmine-tfs-reporterpackage. Other integrations are available for other build servers too. - Deploying our server-side scripts onto Cosmos DB can be handled in different ways for different applications. With many applications, having server-side code deployed within an existing release process is a good idea.
- VSTS doesn’t have built-in support for Cosmos DB, but I have provided a PowerShell script that can be used to install stored procedures, triggers, and UDFs.
- You can view the code for this post on GitHub.
