In my last post we explored PowerApps and the associated development tools available like PowerApps desktop studio and PowerApps web studio. Without writing a single line of code we created our first basic three screen PowerApp and were able to perform CURD (create, update, read, delete) operations on our SharePoint data source.
In this, we will try an create a App from SharePoint list. we’ll create an app from a “Roster” SharePoint list.
First, we will see how PowerApps is integrated into SharePoint Online. Second, we will try to customize the app from the basic app created by PowerApp.
Lets get going…
To start here:
- Login on to our SharePoint Online site.
- Go to the list, “Roster”in our case.
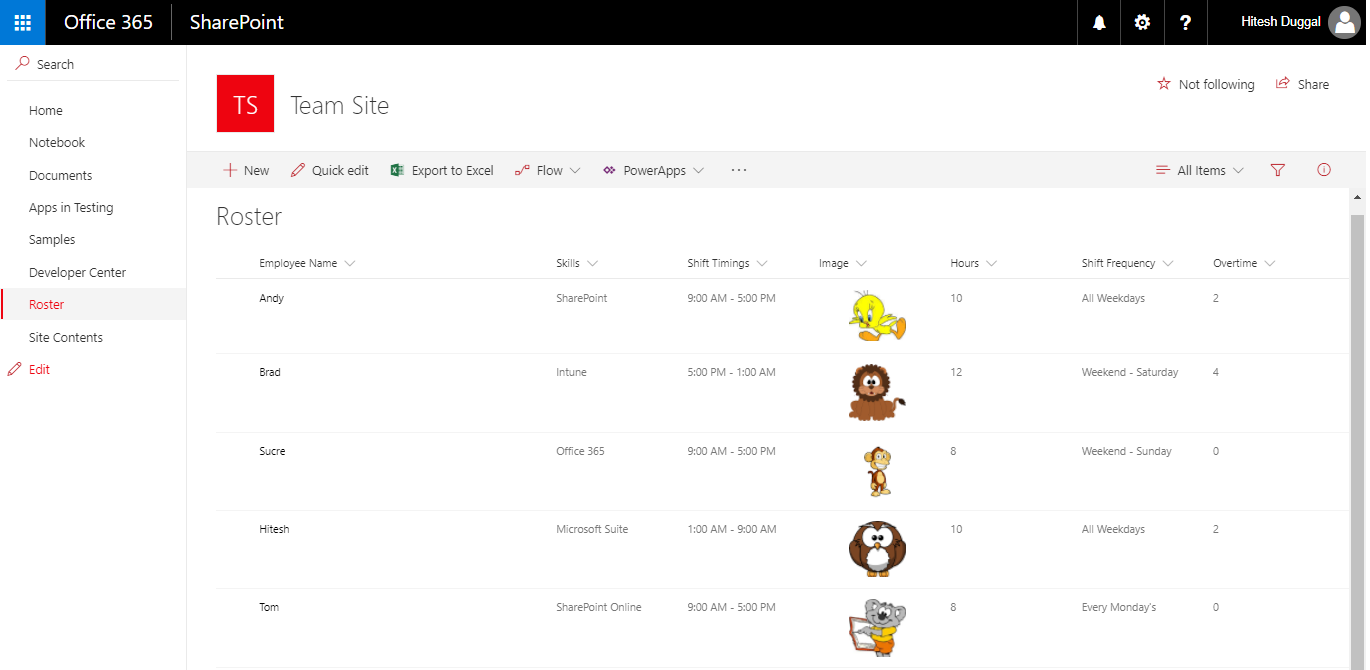
- List has columns like Employee Name, Skills, Shift Timings (Choice) , Image (Picture), Hours (Number), Shift Frequency, Overtime (Calculated).
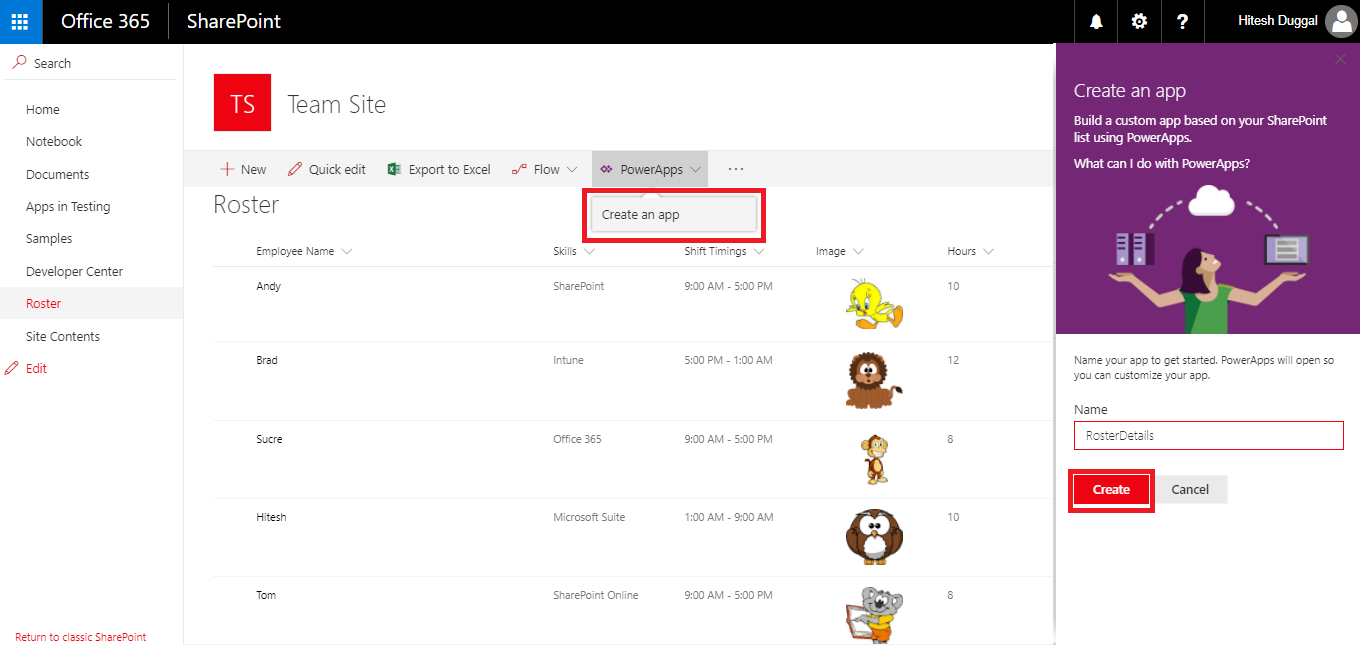
To build an app, click PowerApps and then Create an app. In the right hand pane, enter a name of the app “RosterDetails”, then click Create.
Things to note:
- The App will open an PowerApp web studio.
- It will use our SharePoint list as our datasource
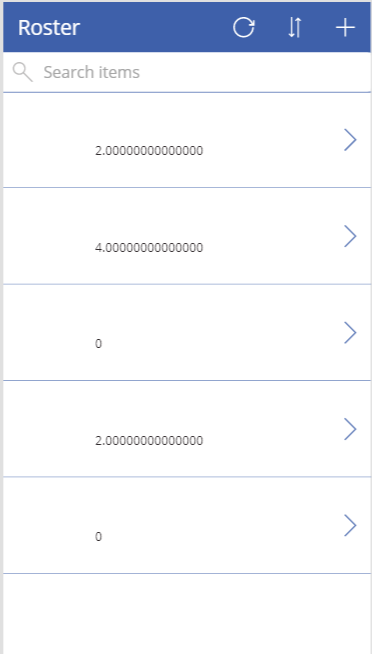
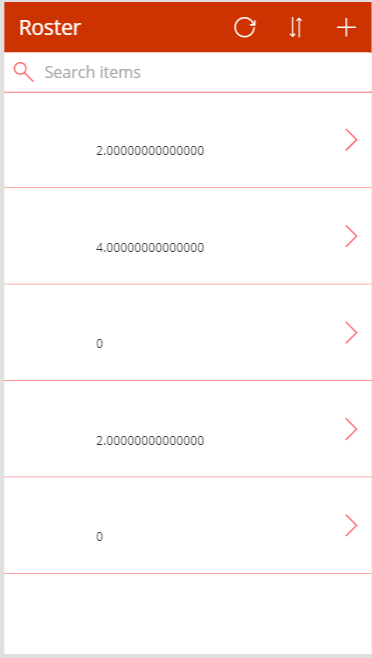
So, after much of hard work!!! Yes I know… I get my Roster App as below, which to be honest looks very funny… and not very useful.
Lets make it better presentable…
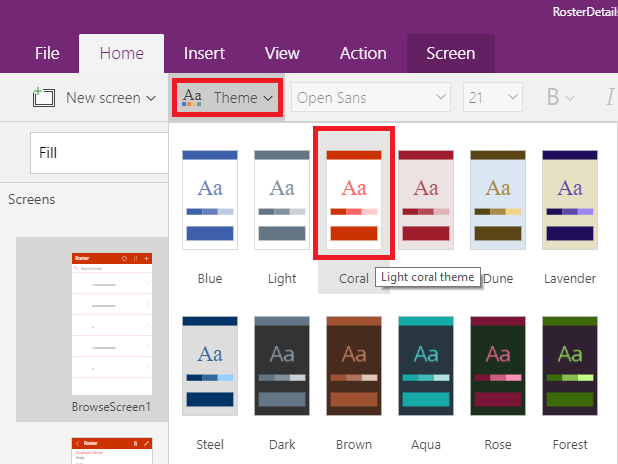
Lets try quickly changing the theme:
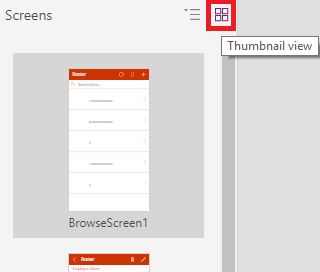
- From left pane ‘Screens’, select thumbnail view and select ‘BrowseScreen1’
- Click Home -> Theme and select ‘Coral’ (thats my choice, we can chose any we want…)
Lets add more information on browse screen:
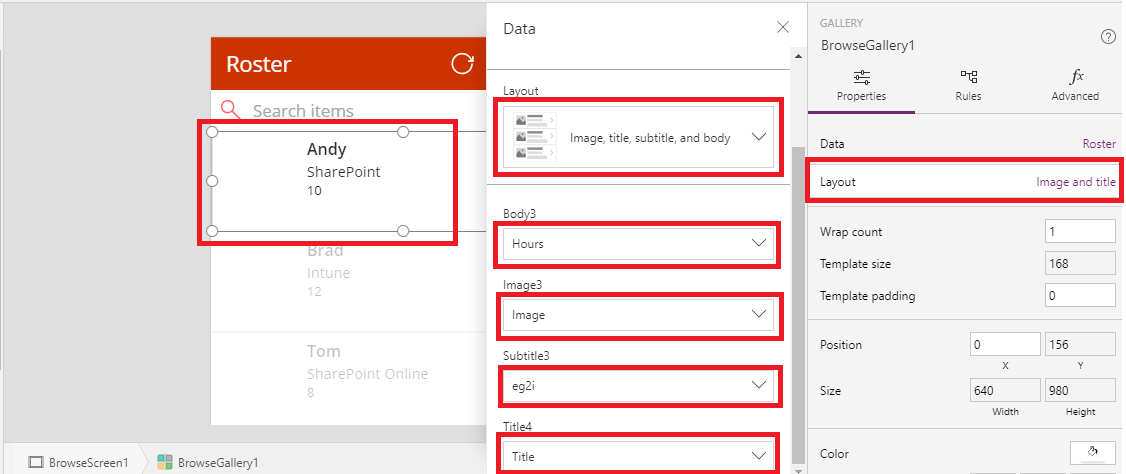
- On the middle section, select browse gallery -> Layouts -> and select Layout as Image, title, subtitle and body
- We set the values respective to reach property like Title 4 as ‘Title’, Body3 as ‘Hours’ and so on…
Small Confession to make…
I added the Images in picture library on SharePoint and linked it with my custom list ‘Roster’… but GUESS WHAT… PowerApp didn’t loaded the images.
But, when I linked the Image column with public URL for the image, it works. And yes… I did tried absolute URL but no luck…
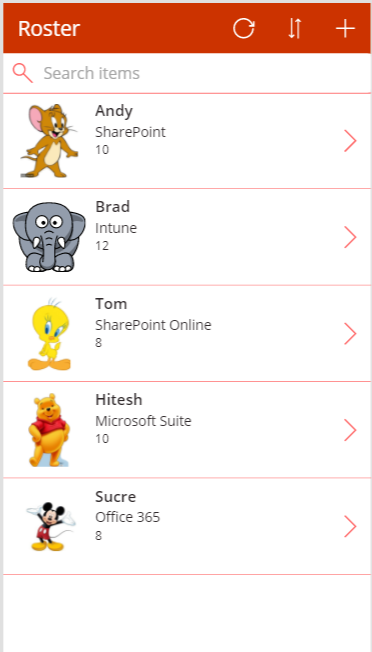
So, after updating my custom list, my RosterDetails App look like:
Time for updating Detail screen
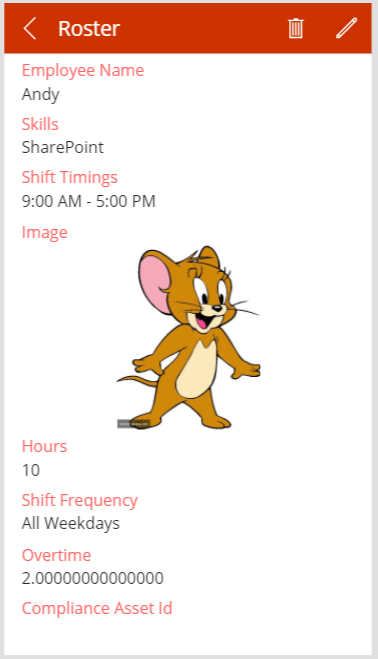
You know what, I really like this view, but I don’t want to show field Compliance Assest Id and Overtime field looks to be having too many 000000000000000, so we need to fix it.
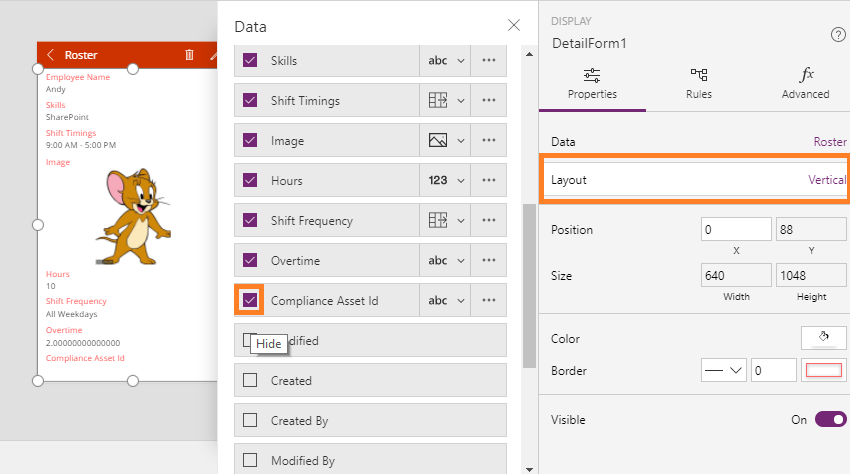
- We select the DetailForm on detailscreen
- Click Layouts on right -> Uncheck the checkbox next to Compliance Assest Id field.
- The field is no more on the view.
- On the same screen press ‘…’ next to Overtime field -> click Advanced options -> click Unlock to change properties
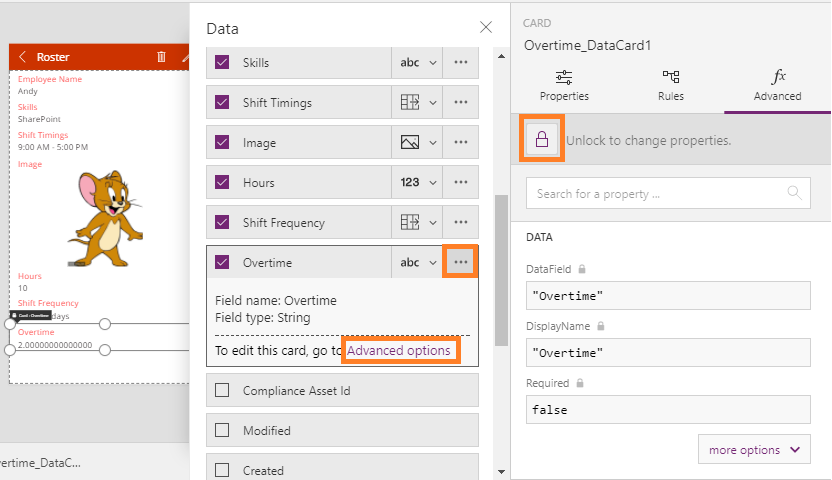
- Unlockling the card will make this card as ‘Custom card’, do this will make all the properties of the field editable
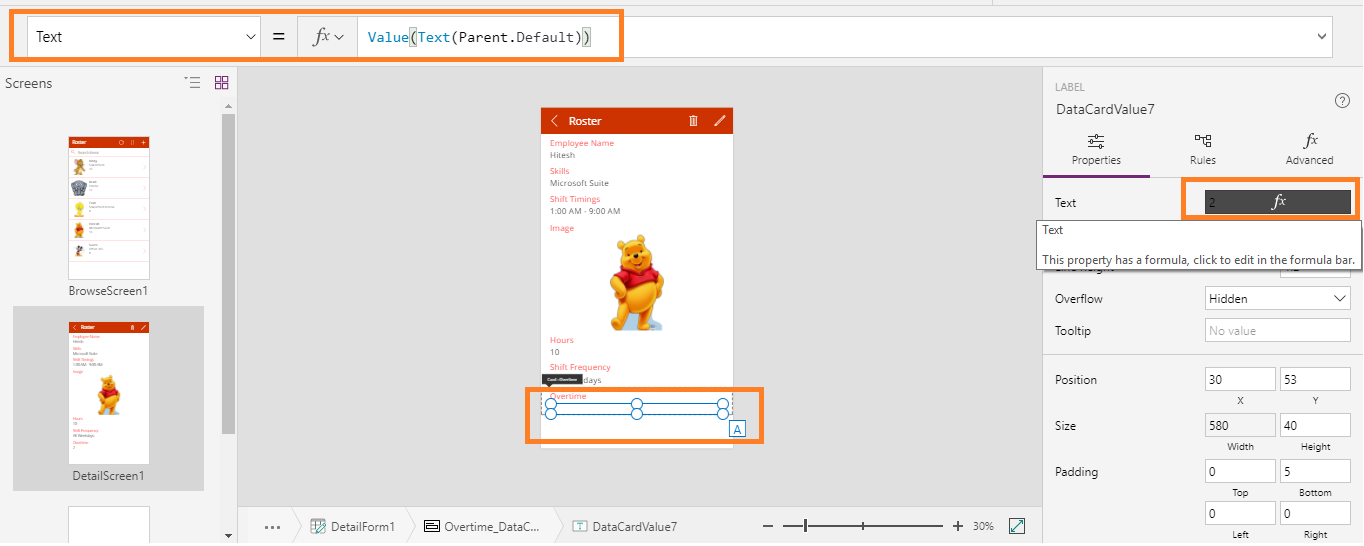
- Click next to label showing the overtime value, then on the right panel, click Text property and we update the function next to Text property from
Parent.Default ——–> Value(Parent.Default)
So, in order to get rid of ‘0’ decimals, we used function Value which converts a string to a number.
Point to note:
- I tried using formula as Text(Parent.Default,”#.00″), but it doesn’t do anything, but if use the formula as Text(2.0000000,”#.00″) it would give us 2.00
- ‘[$-en-US]’ the language placeholder can appear anywhere in the custom format but only once. While writing a formula, if we do not provide a language placeholder, the format string is ambiguous from a global standpoint, the authoring tool will automatically insert the language tag for your current language.[$-en-US] is assumed if this placeholder is not present when your app is run.NOTE: In a future version, the syntax of this placeholder may change to avoid confusion with a similar, but different, placeholder supported by Excel.
Time to make changes to Edit Screen
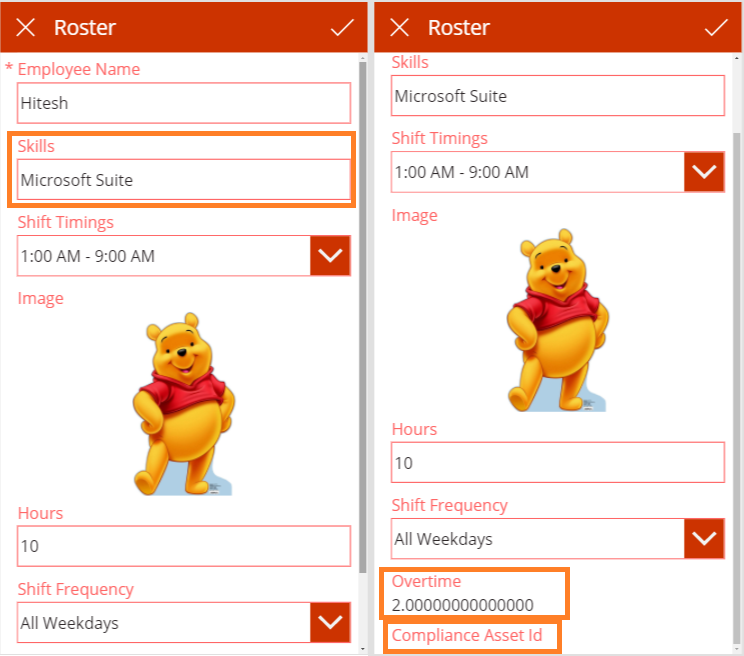
- Skills can be more then one so, lets change skills to have multi-line input field.
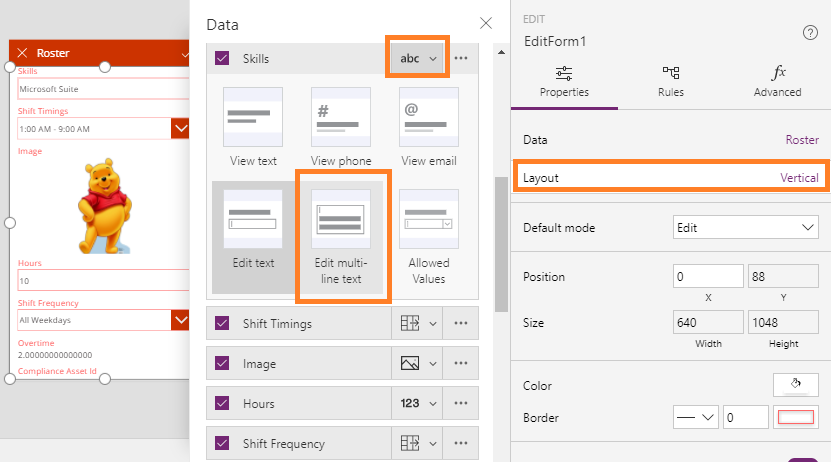
To do this, we just select Edit form -> click Layouts -> click ‘…’ next to Skills -> select Edit multi-line text.
- Overtime needs to be same as detail screen
We will follow exactly the same steps as we did for Browse Screen.
- Remove Compliance Assest Id
We will follow exactly the same steps as we did for Browse Screen.
And, yes we are done!!!
Conclusion
We created an PowerApp from SharePoint in no time, updated all the three views with minimum effort and got ourself a fine looking App which displays all the records, add and allow edit of the items in SharePoint.
References
- https://powerapps.microsoft.com/en-us/tutorials/formula-reference/#t
- https://powerapps.microsoft.com/en-us/guided-learning
