What is PowerApps?
PowerApps is a set of services and apps, that enable power users to build line of business application rapidly. It can connect to the cloud services and data sources that we may be already using.
Why PowerApps?
PowerApps gives power user ability to quickly build apps that suit specific needs. They can share apps instantly with Team across the web, tablets, and mobile devices. To list down, few of the advantages of PowerApps are:
-
Simple and fast – capable of producing an app in minutes that pulls in data from Excel or a cloud service.
-
Can be integrated with Microsoft Flow, making it possible to trigger workflows from within apps.
-
Robust and enterprise-grade, so can be used for complex requirements.
What you need to get started?
We can chose from two options:
-
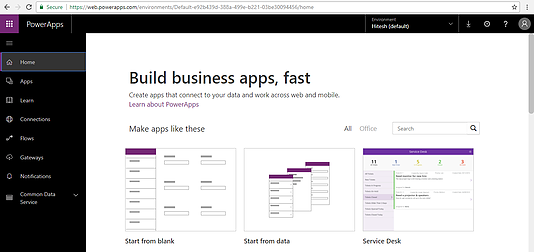
PowerApps Studio for web
-
Go to the url: https://web.powerapps.com
-
You need to use your tenant account which would be something like xxx@yyy.onmicrosoft.com
- Choose from any of the start option
-
PowerApps Studio for Windows
-
Go to the url: https://powerapps.microsoft.com/en-us/downloads/
-
Download the App for windows.
-
You need to login using your tenant account which would be something like xxx@yyy.onmicrosoft.com
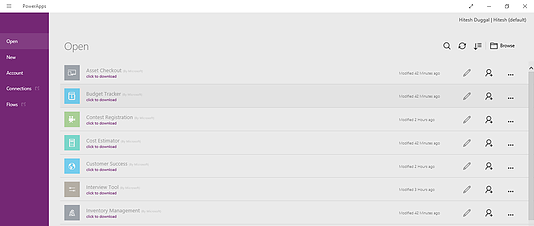
We would need to use web.powerapps.com to configure and manage data connections and on-premises gateways, and to work with the Common Data Service.
Few points to note:
After we create an app, we can administer it in the admin center.
We run apps in a browser from Microsoft Dynamics 365 or by using PowerApps Mobile, which is available for Windows, iOS, and Android devices.
PowerApps components:
- web.powerapps.com – manage and share the apps we build
- PowerApps Studio – build powerful apps with easy to use visual tools
- PowerApps Mobile – run apps on Windows, iOS, and Android devices
- PowerApps admin center – administer PowerApps environments and other components
PowerApps Studio
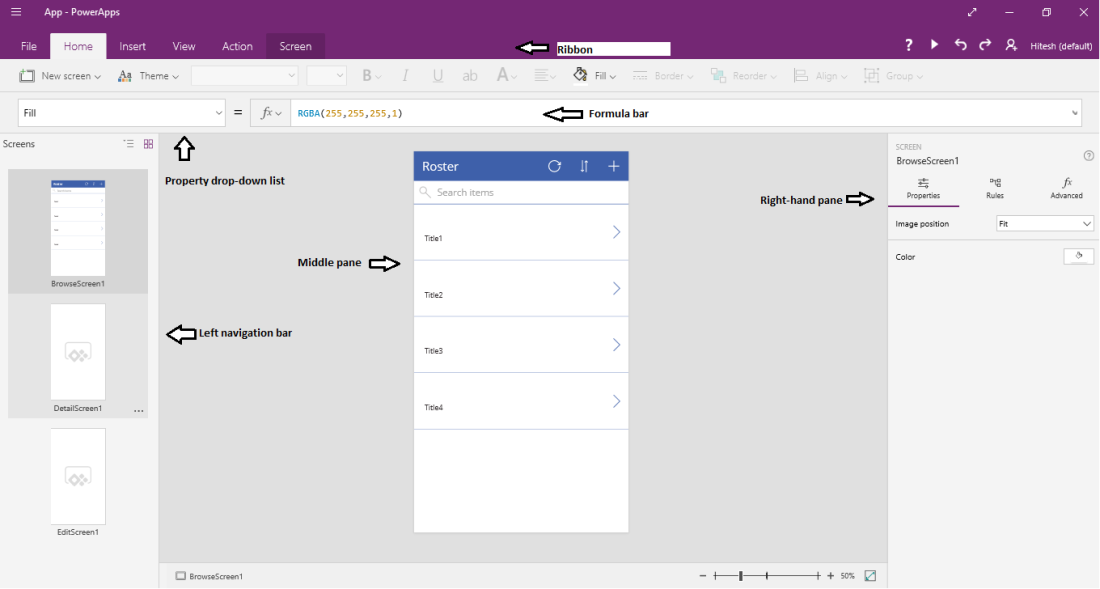
PowerApps Studio has three panels and a ribbon, which gives the view same as creating a PowerPoint presentation:
- Left navigation bar: shows thumbnail
- Middle pane: shows the screen that you’re working on
- Right-hand pane: shows options such as layout and data sources
- Property drop-down list: where you select the properties that formulas apply to
- Formula bar: where you add formulas
- Ribbon: where you add controls and customize design elements
PowerApps Mobile
PowerApps Mobile for Windows, iOS, and Android provides an environment where instead of going to separate app stores, we stay in PowerApps and have access to all the apps that we have created and that others have shared with us.
Admin center
The PowerApps admin center is the centralized place to administer PowerApps for an organization. This is where we define different environments, data connections, and other elements. The admin center is also where we create Common Data Service databases, and manage permissions and data policies.
Lets create our first App
Ok, now time to create our first PowerApp… so, lets fire up PowerApps desktop studio. So, for this demo, we will use data source as SharePoint and layout as phone layout
- Click New -> SharePoint -> Phone layout

Connect to a data source
On the next screen we need to specify the connection for SharePoint, where we will enter SharePoint Url and click Go.

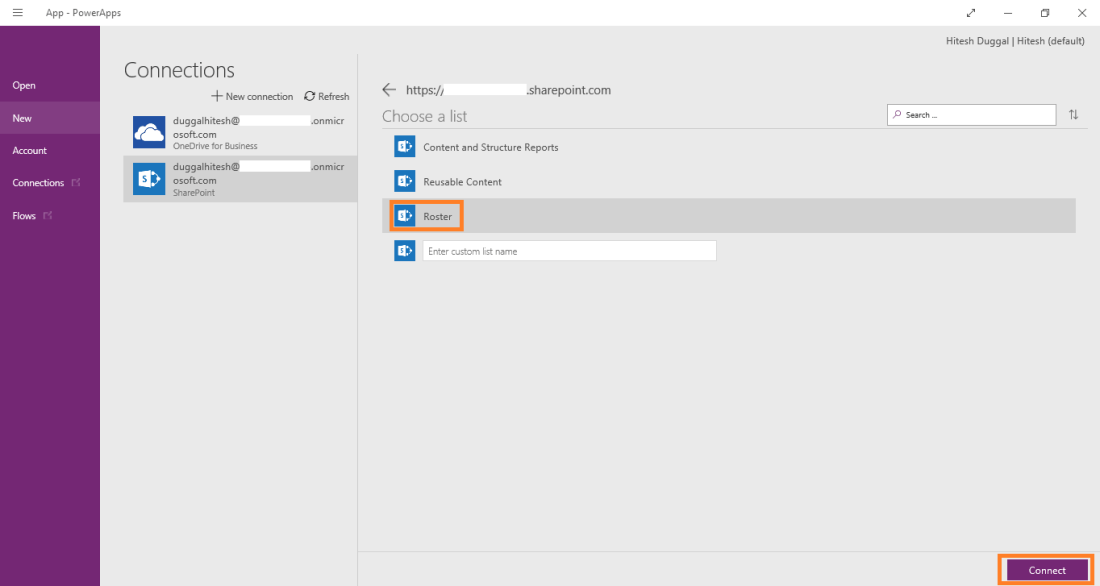
On the next screen, we can select the list on the specified SharePoint site and select the respective list, in our example we will chose the list “Roster” and click Connectafter which PowerApps then start generating the app.
The generated app is always based on a single list and we can add more data to the app later. An app with default screen is built for us, which we can see in action by click play icon  .
.
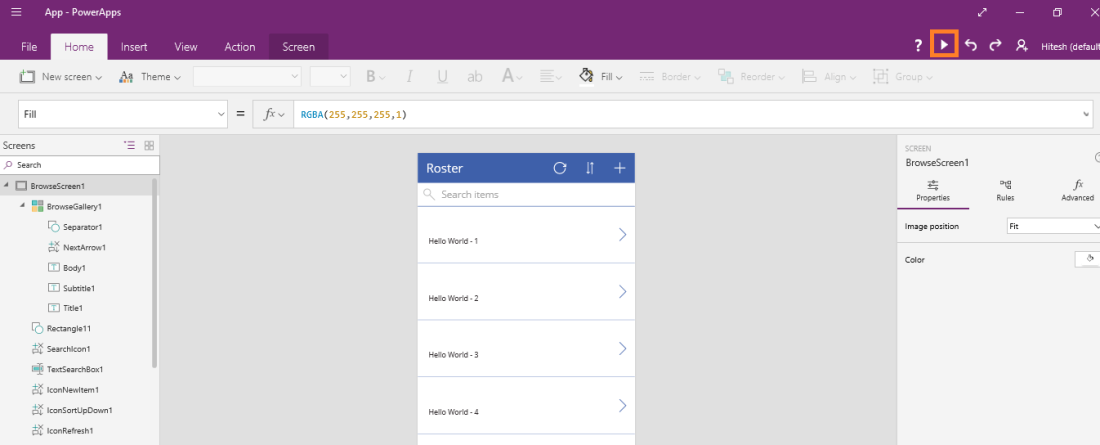
Our app in action
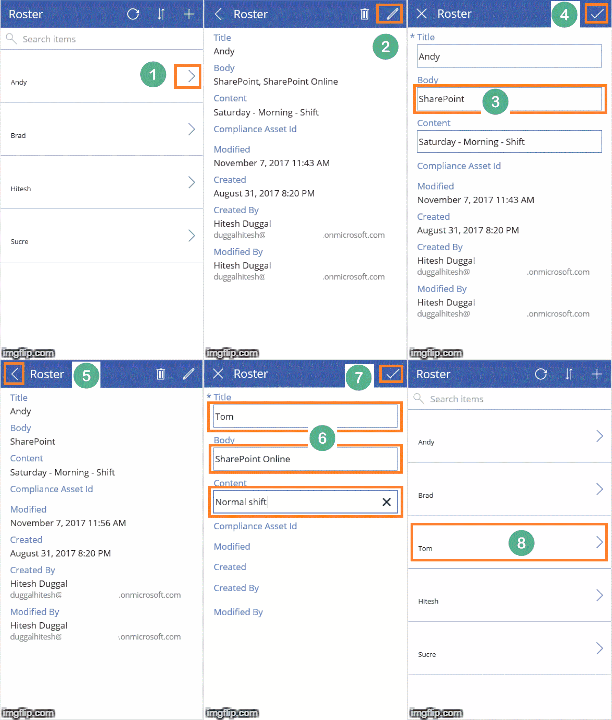
Our three screen roster app opens in PowerApps Studio. All apps generated from data have the same set of screens:
- The browse screen: On this, we can browse, sort, filter, and refresh the data pulled in from the list, as well as add items by clicking the (+) icon.
- The details screen: On this, we view detail about an item, and can choose to delete or edit the item.
- The edit/create screen: On this, we edit an existing item or create a new one.
Conclusion
So, in this post, we tried exploring PowerApps and the development tool available like PowerApps desktop studio and PowerApps web studio. Without writing a single line of code we created our first basic three screen PowerApp and were able to perform CURD (create, update, read, delete) operations on our SharePoint data source.
In the next post we will try creating PowerApp from SharePoint list.
