Deployment Setup
This is Part 3 of my “Intro to AWS Amplify”. If you haven’t already, you can find the previous articles in the series below:
| Part | Description |
|---|---|
| Part 1: Preparation | This article provides an introduction and instructions on creating the required AWS environment. |
| Part 2: App Setup | This section outlines the steps to set up out new Amplify application and host it in a repository. |
Overview
By now you should have your react application bootstrapped and the amplify project initialized and committed to a git repository. If you take a look at your project, you should see something similar to the below (the example below is taken from Github). 
In this part of the series, we will configure Amplify Deploy which will run our builds, deployment, and testing steps for us.
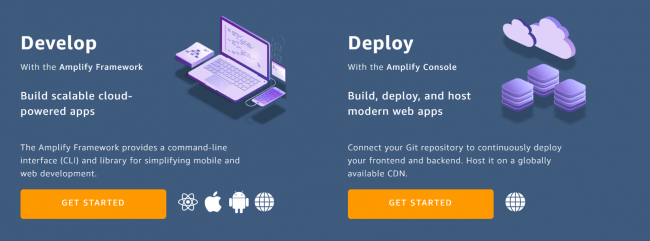
Step 1: The first step is to open the Amplify management console available here. If it’s your first time using AWS Amplify, you will see the getting started dashboard as shown below. Simply click on the “GET STARTED” button under “Deploy”. 
Step 2: The next step is to connect your Git repository to your AWS Amplify environment. This will allow Amplify to clone the repository and be triggered whenever a commit occurs. Select your Repository service to provide from the list shown below and click “Next”. You will then be automatically requested to allow AWS Amplify access to your repository (this may require you to log in to your account). For the example in this workshop, we have used a GitHub repository. 
Step 3: Once access to your account has been granted, the next step is to select the repository from the list and define the branch you wish to follow. We will be creating two separate deployments, one to deploy our production environment based on our “Master” branch and a second one to deploy from our test branch. To start off with, go ahead and select the “Master” branch and click “Next”. 
Step 4: At this stage, we need to tell it which Amplify environment we wish to use in conjunction with our “Master” branch. By default, Amplify will populate the list of available environments from our repository (this is why we created the three separate environments in the last part). Go ahead and select the “prod” environment.

Step 5: Assuming you’ve never used Amplify Deploy before, you’ll need to go ahead and create an IAM role that it can use. Click the “Create new role” button, and select “Amplify” from the list of services presented. This defines which AWS service the request will be originating from.

Step 6: By default, the Amplify console automatically selects the “AdministratorAccess” policy to apply to our new role. While this is OK for the purposes of our workshop, It’s highly advisable that you define your own fine-grained policy when using Amplify in a production environment. As this will be a short-lived environment, simply go ahead and access the policy and click “Next: Tags”. 
Step 7: Just go ahead and click “next”. No need to worry about giving our new IAM role Tags in this workshop example. 
Step 8: Once you review the settings and create the new role, you can go back to our previous tab and click the “Refresh existing roles” button. Then select the new role from the list (“amplifyconsole-backend-role” if you followed the instructions and accepted the default values). Given we haven’t defined and build settings as of yet, we can simply accept the defaults and click “Next”. 
Step 9: All we need to do now is give our variables a quick review and click “Save and deploy”. Note that this will take a couple of minutes to complete and it’s usually helpful to wait at this point before configuring the next branch, in case something goes wrong.

Step 10: After a few minutes you should see that our new pipeline has completed the deployment of our “Master” branch into our “prod” environment. This console provides the URL we can use to visit our site as well as the verification screenshots of our new application across a range of screen sizes. Once you’ve confirmed that the deployment has succeeded, go ahead and browse back to the “Amplify Deploy All Apps” page. The easiest way to achieve this is to click on our application name, on the top left of the Amplify Deploy pane. 
Step 11: OK, so we have a successfully deployed “Master” branch so now it’s time to add another pipeline for your testing branch. From this page, simply click on the “Connect branch” button located on the top right of the page. 
Step 12: Save deal as when we configured our “master” back in step 3, only this time we don’t need to provide access to our Git repository first (because AWS Amplify already has access). Go ahead and select the “test” branch and the “test” environment. If you don’t see a test branch, simply go ahead and create one and push the change to your git repository and then refresh the page.
NOTE: I have experienced situations where the “Next” doesn’t want to become selectable. If this happens, simply click “Cancel” and then restart the process from step 11. If it occurs a second time forcing a refresh of the whole page seams to fix it. 
Step 13: Same as last time, make sure all the details are correct and then click “Save and deploy”. 
Step 14: At this stage, our new “test” pipeline will go through the process of downloading and deploying our workload. You should wait for the pipeline to succeed before proceeding to the next step. 
Step 15: So we now have a Production environment running, deployed off our “Master” branch and a testing environment deployed off our “test” branch. This problem is, we’d prefer it if the public didn’t have access to our testing environment so let’s go ahead and configure a simple username and password prompt on it. As shown below, from the left-hand menu, click on “Access Control”. 
Step 16: Now, simply click on the “Manage access” button (top right-hand side of the page) and we’re presented with a page where we can define a username and password for each of our branches, or a single one for all deployments. For our purposes, we just want to password protect our testing environment so:
- Select “Restricted – password required” from the “Access settings dropdown.
- enter a username in the first column. For our example, we are using “tester” as our username.
- Enter and verify a password. Go ahead and click “Save” once your down.

Step 17: Back on our “Amplify Deploy” page, under the “test” application pipeline, you will see the URL of the application. Go ahead and click it to validate the password protection. 
Step 18: The page should open in a new tab and prompt for a username and password. Go ahead and enter the details you defined in step 16 and click “Sign in”.

Step 19: And voila! our application…. isn’t it wonderful. 
What did we just do?
OK so we have some running React boilerplate running, why did we need to go through so many steps to get there?
So firstly, we’ve provided AWS Amplify with access to our Git Repository and will allow it to trigger events as well as access the current version of our source code. From there, we’ve configured two separate deployment pipelines… The first is to handle our Production deployments and the other is for our testing deployment. Whenever we make a commit to either of those branches, Amplify we automatically trigger a deployment for us.
You might have noticed that we didn’t setup a pipeline for our “dev” branch. the reason for this is to allow us to use that branch (as well as the dev amplify environment) as our personal development branch that we can use to build out our features without constantly triggering automated deployments. Once we have completed our new feature, we can simply merge it into our testing branch and have it picked up by the appropriate pipeline.
Next Steps
It’s at this stage that we are ready to start building out the functionality of our new application. You can move onto the next stage where we can add some functionality to the application.