In the last post, I described why you might want to define your build definition as a YAML file using the new YAML Build Definitions feature in VSTS. In this post, we will walk through an example of a simple VSTS YAML build definition for a .NET Core application.
Application Setup
Our example application will be a blank ASP.NET Core web application with a unit test project. I created these using Visual Studio for Mac’s ASP.NET Core Web application template, and added a blank unit test project. The template adds a single unit test with no logic in it. For our purposes here we don’t need any actual code beyond this. Here’s the project layout in Visual Studio:
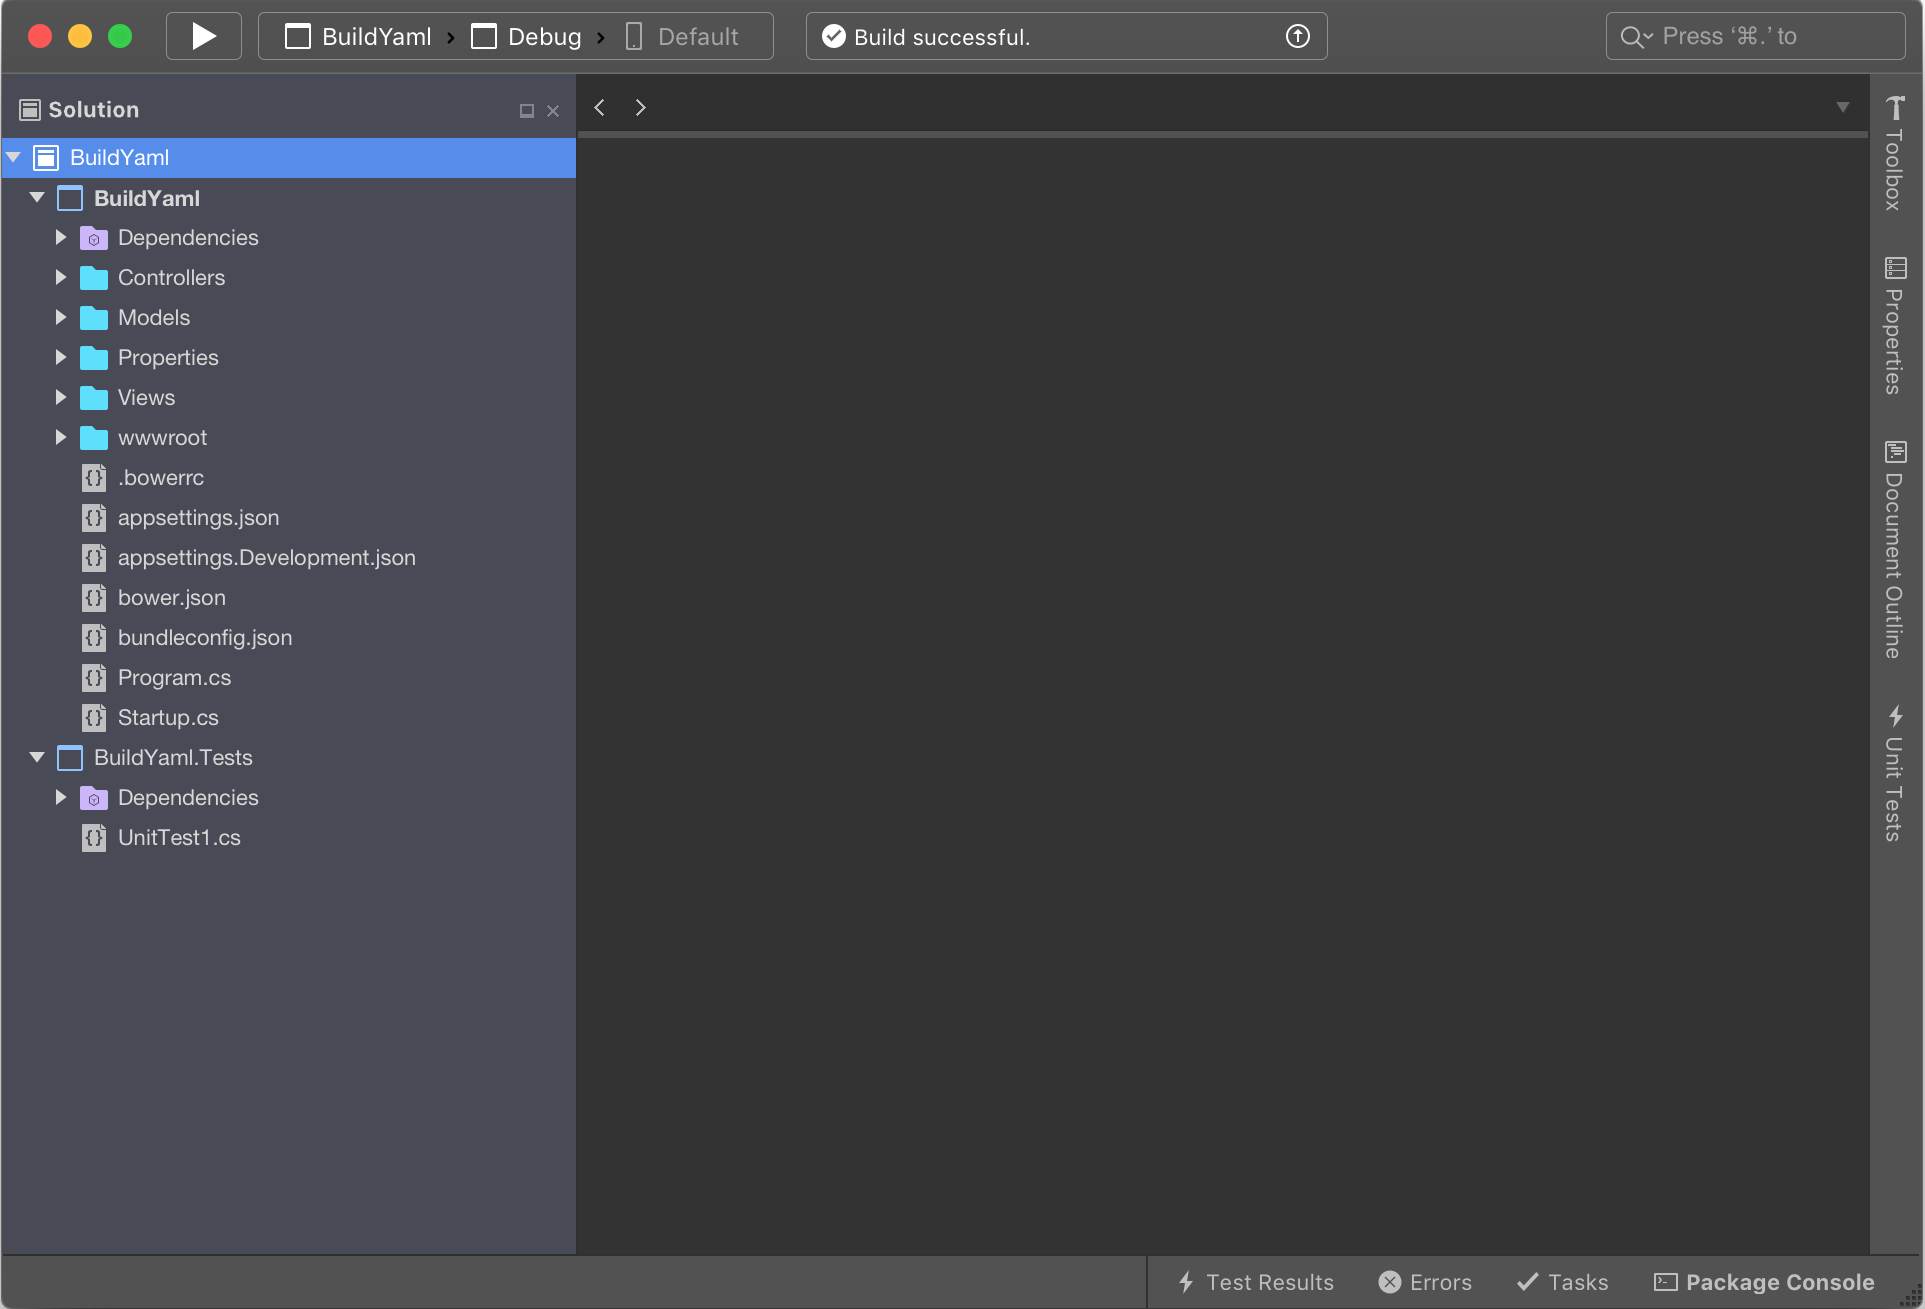
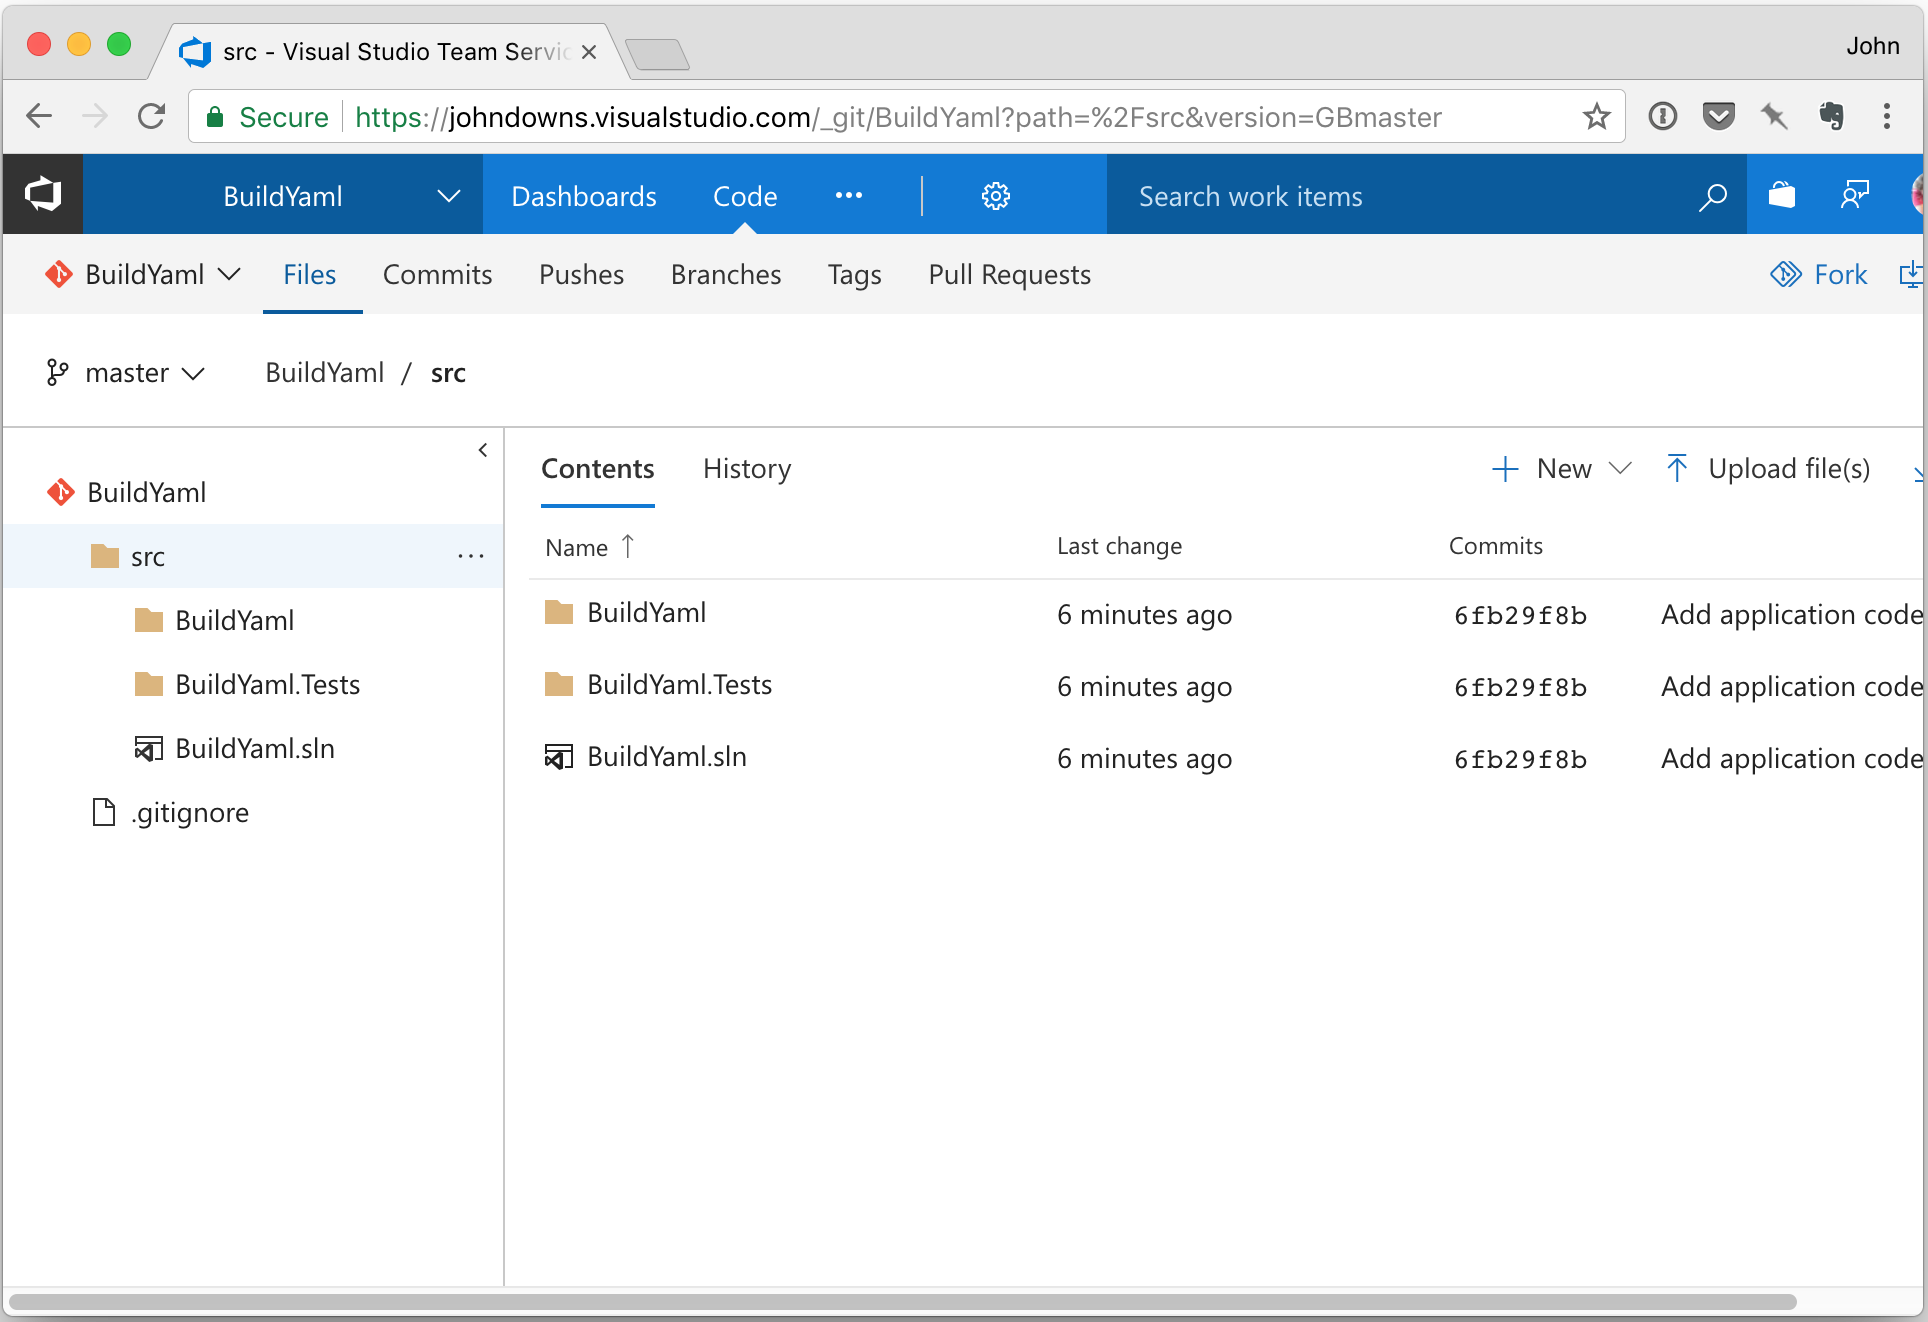
I set up a project on VSTS with a Git repository, and I pushed my code into that repository, in a /src folder. Once pushed, here’s how the code looks in VSTS:
Enable YAML Build Definitions
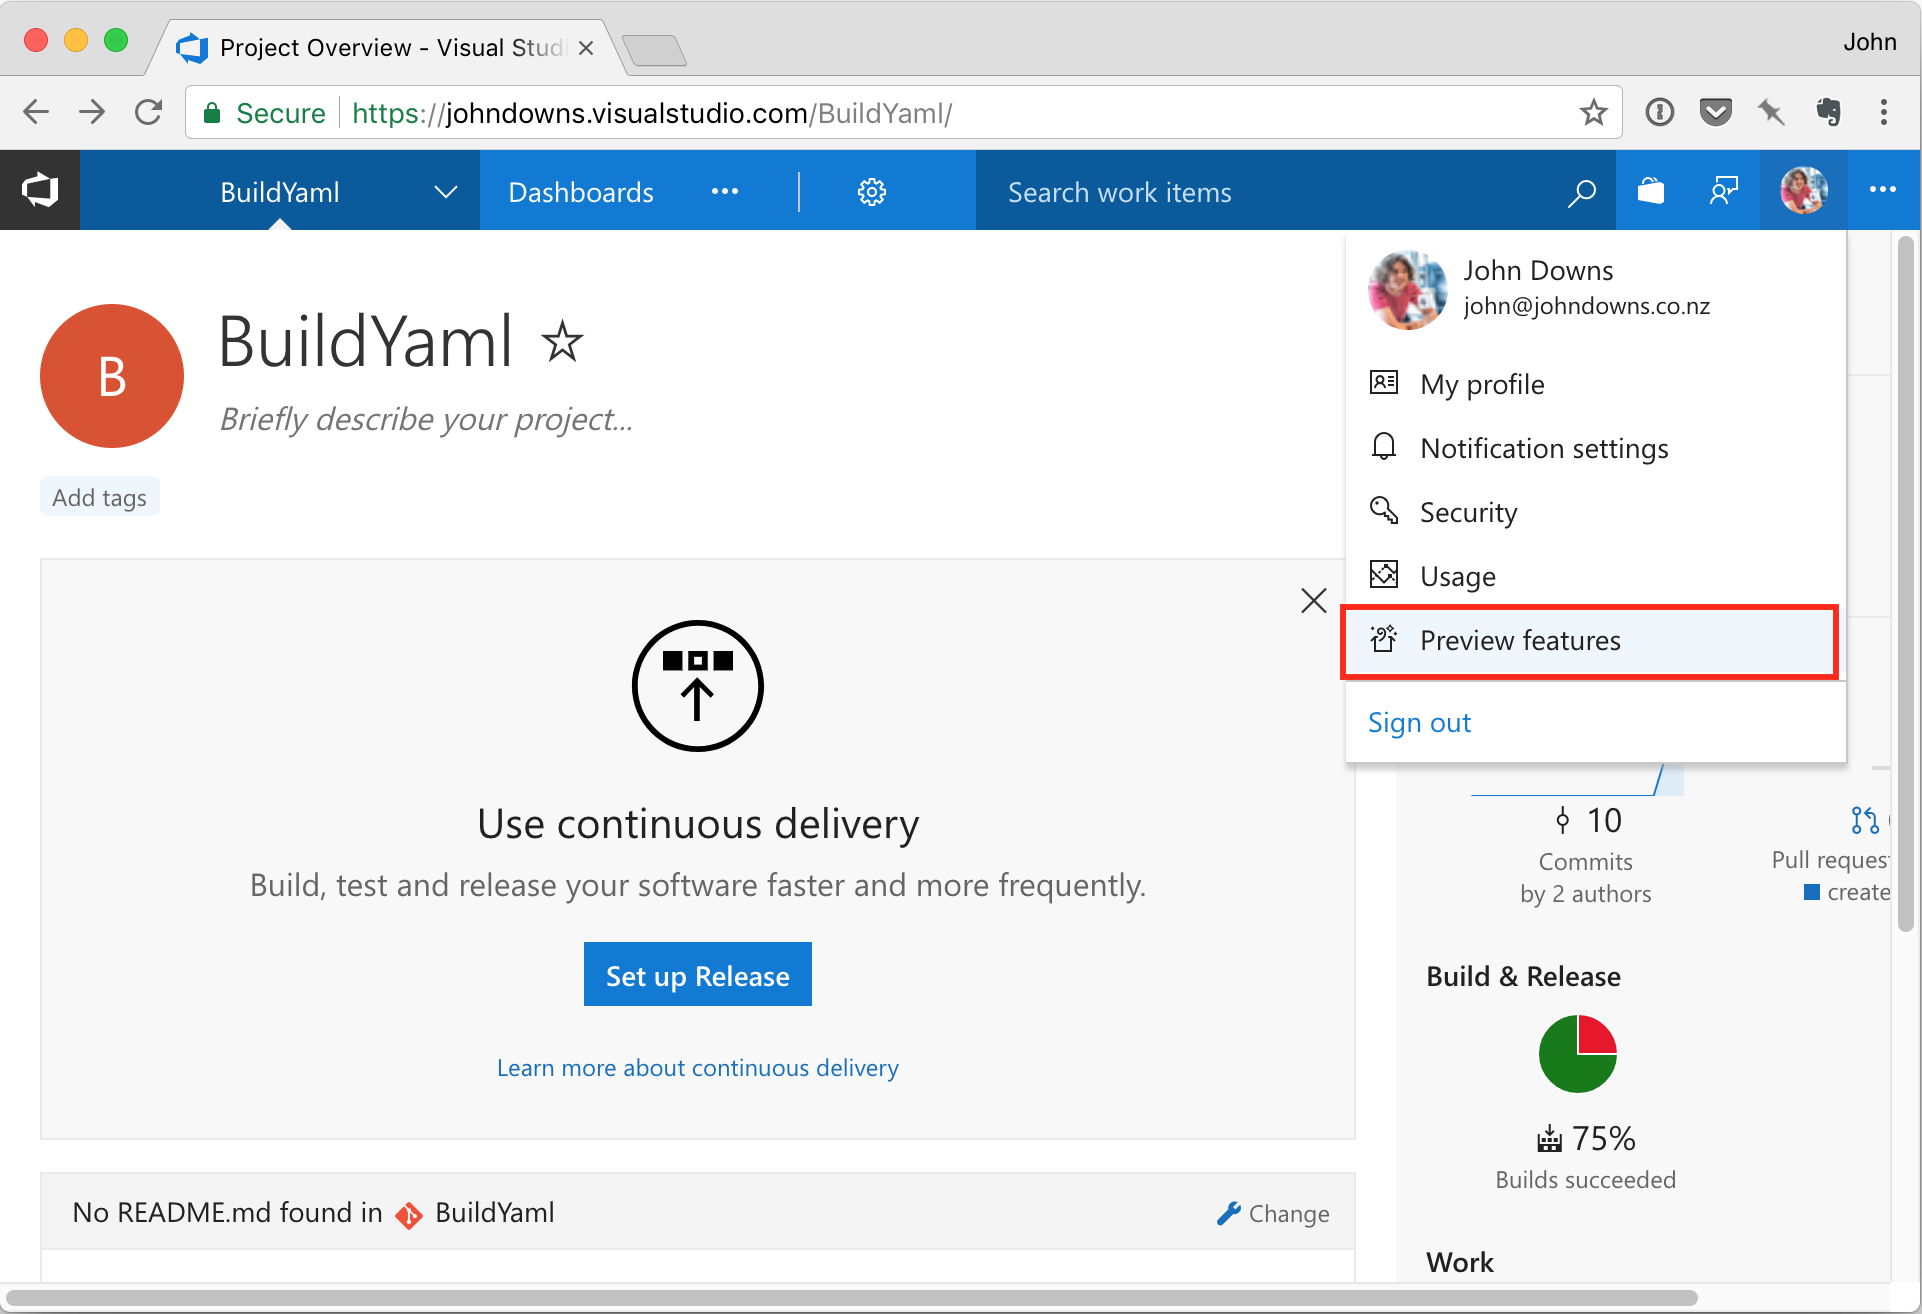
As of the time of writing (November 2017), YAML build definitions are currently a preview feature in VSTS. This means we have to explicitly turn them on. To do this, click on your profile picture in the top right of the screen, and then click Preview Features.
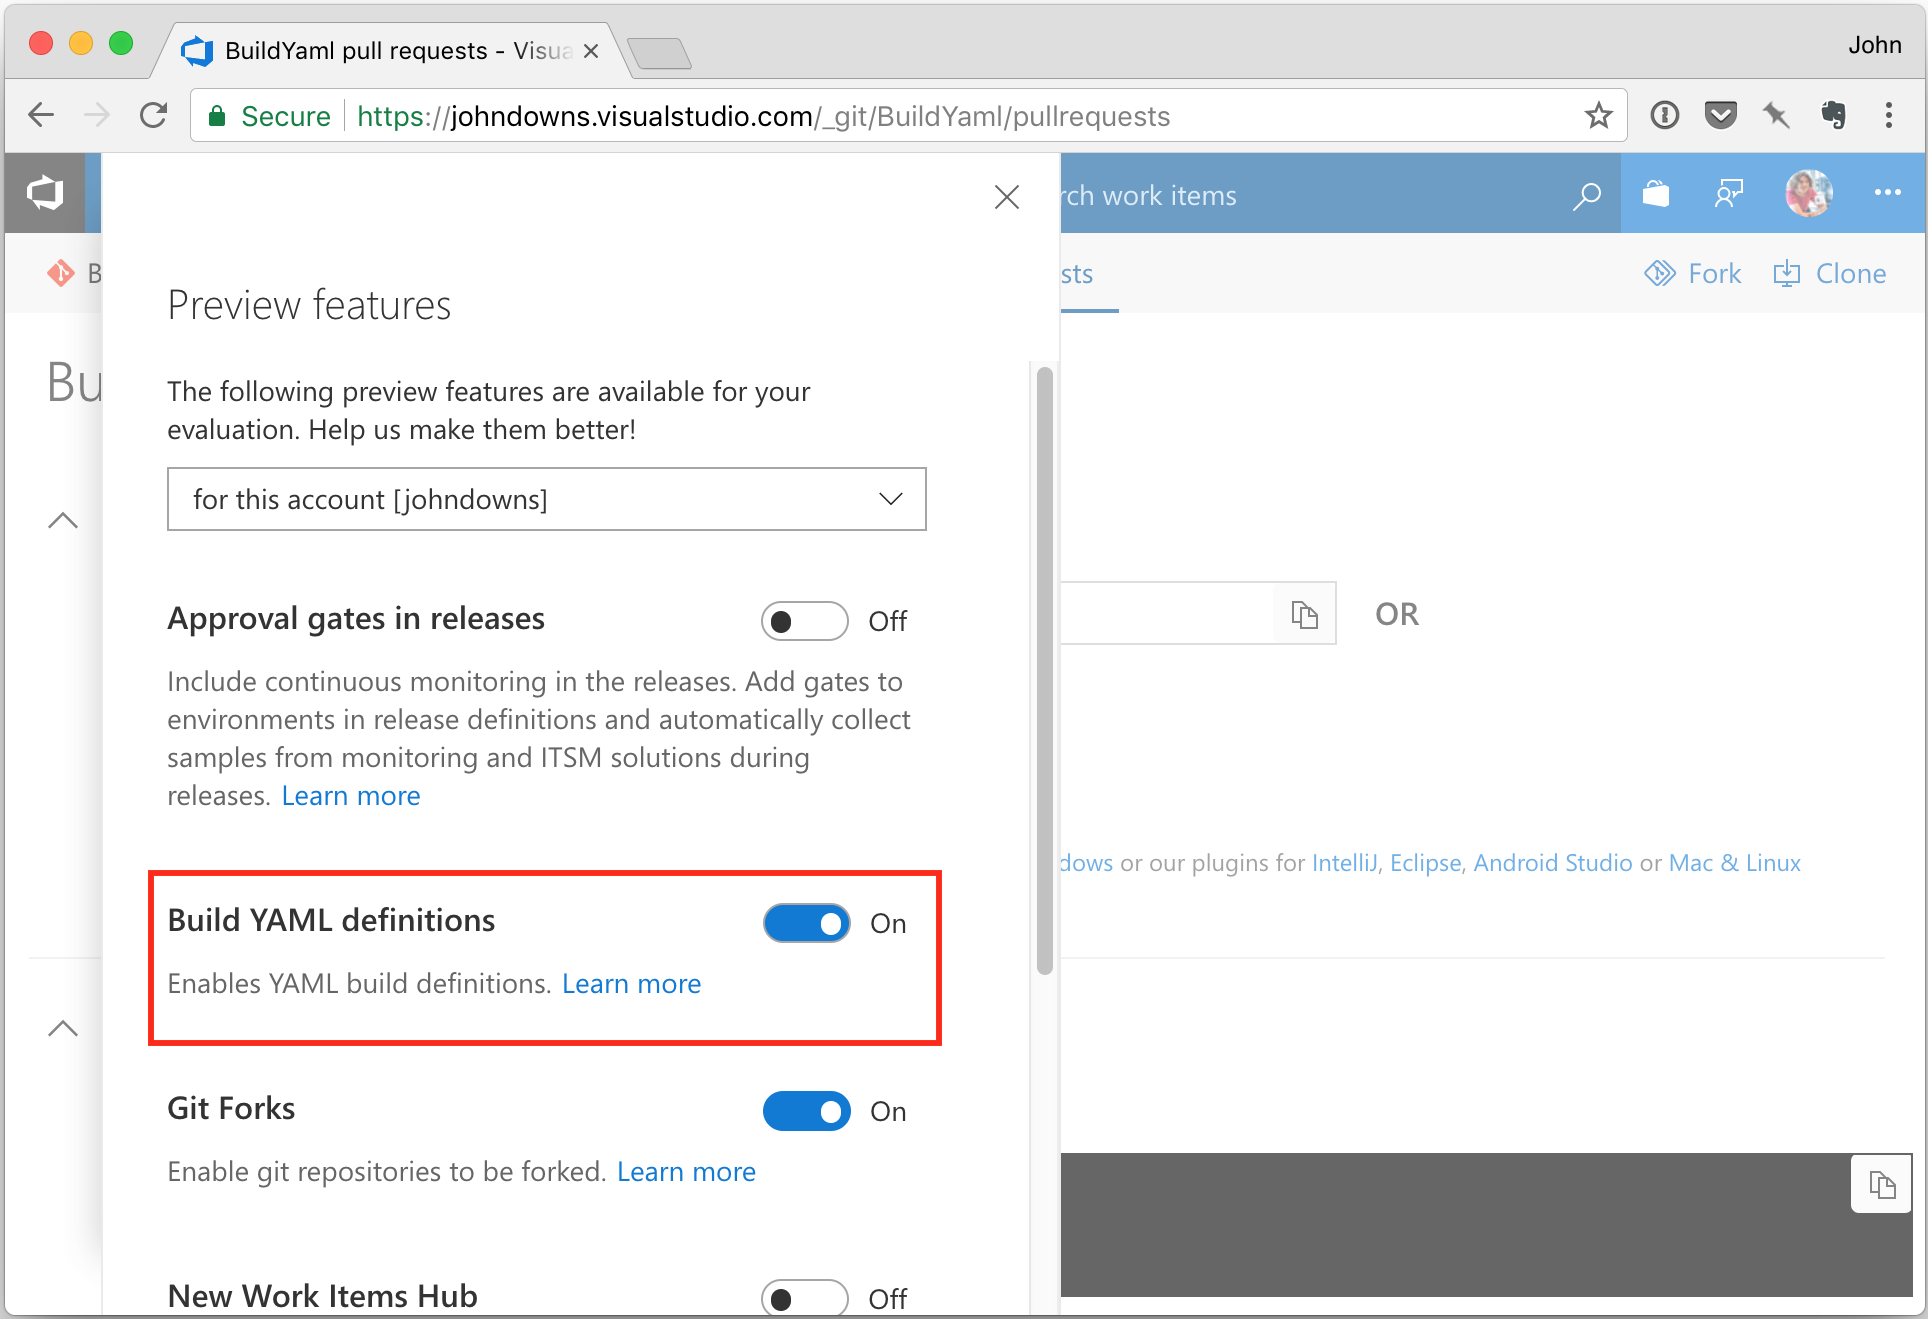
Switch the drop-down to For this account [youraccountname], and turn the Build YAML Definitions feature to On.
Design the Build Process
Now we need to decide how we want to build our application. This will form the initial set of build steps we’ll run. Because we’re building a .NET Core application, we need to do the following steps:
- We need to restore the NuGet packages (
dotnet restore). - We need to build our code (
dotnet build). - We need to run our unit tests (
dotnet test). - We need to publish our application (
dotnet publish). - Finally, we need to collect our application files into a build artifact.
As it happens, we can actually collapse this down to a slightly shorter set of steps (for example, the dotnet build command also runs an implicit dotnet restore), but for now we’ll keep all four of these steps so we can be very explicit in our build definition. For a real application, we would likely try to simplify and optimise this process.
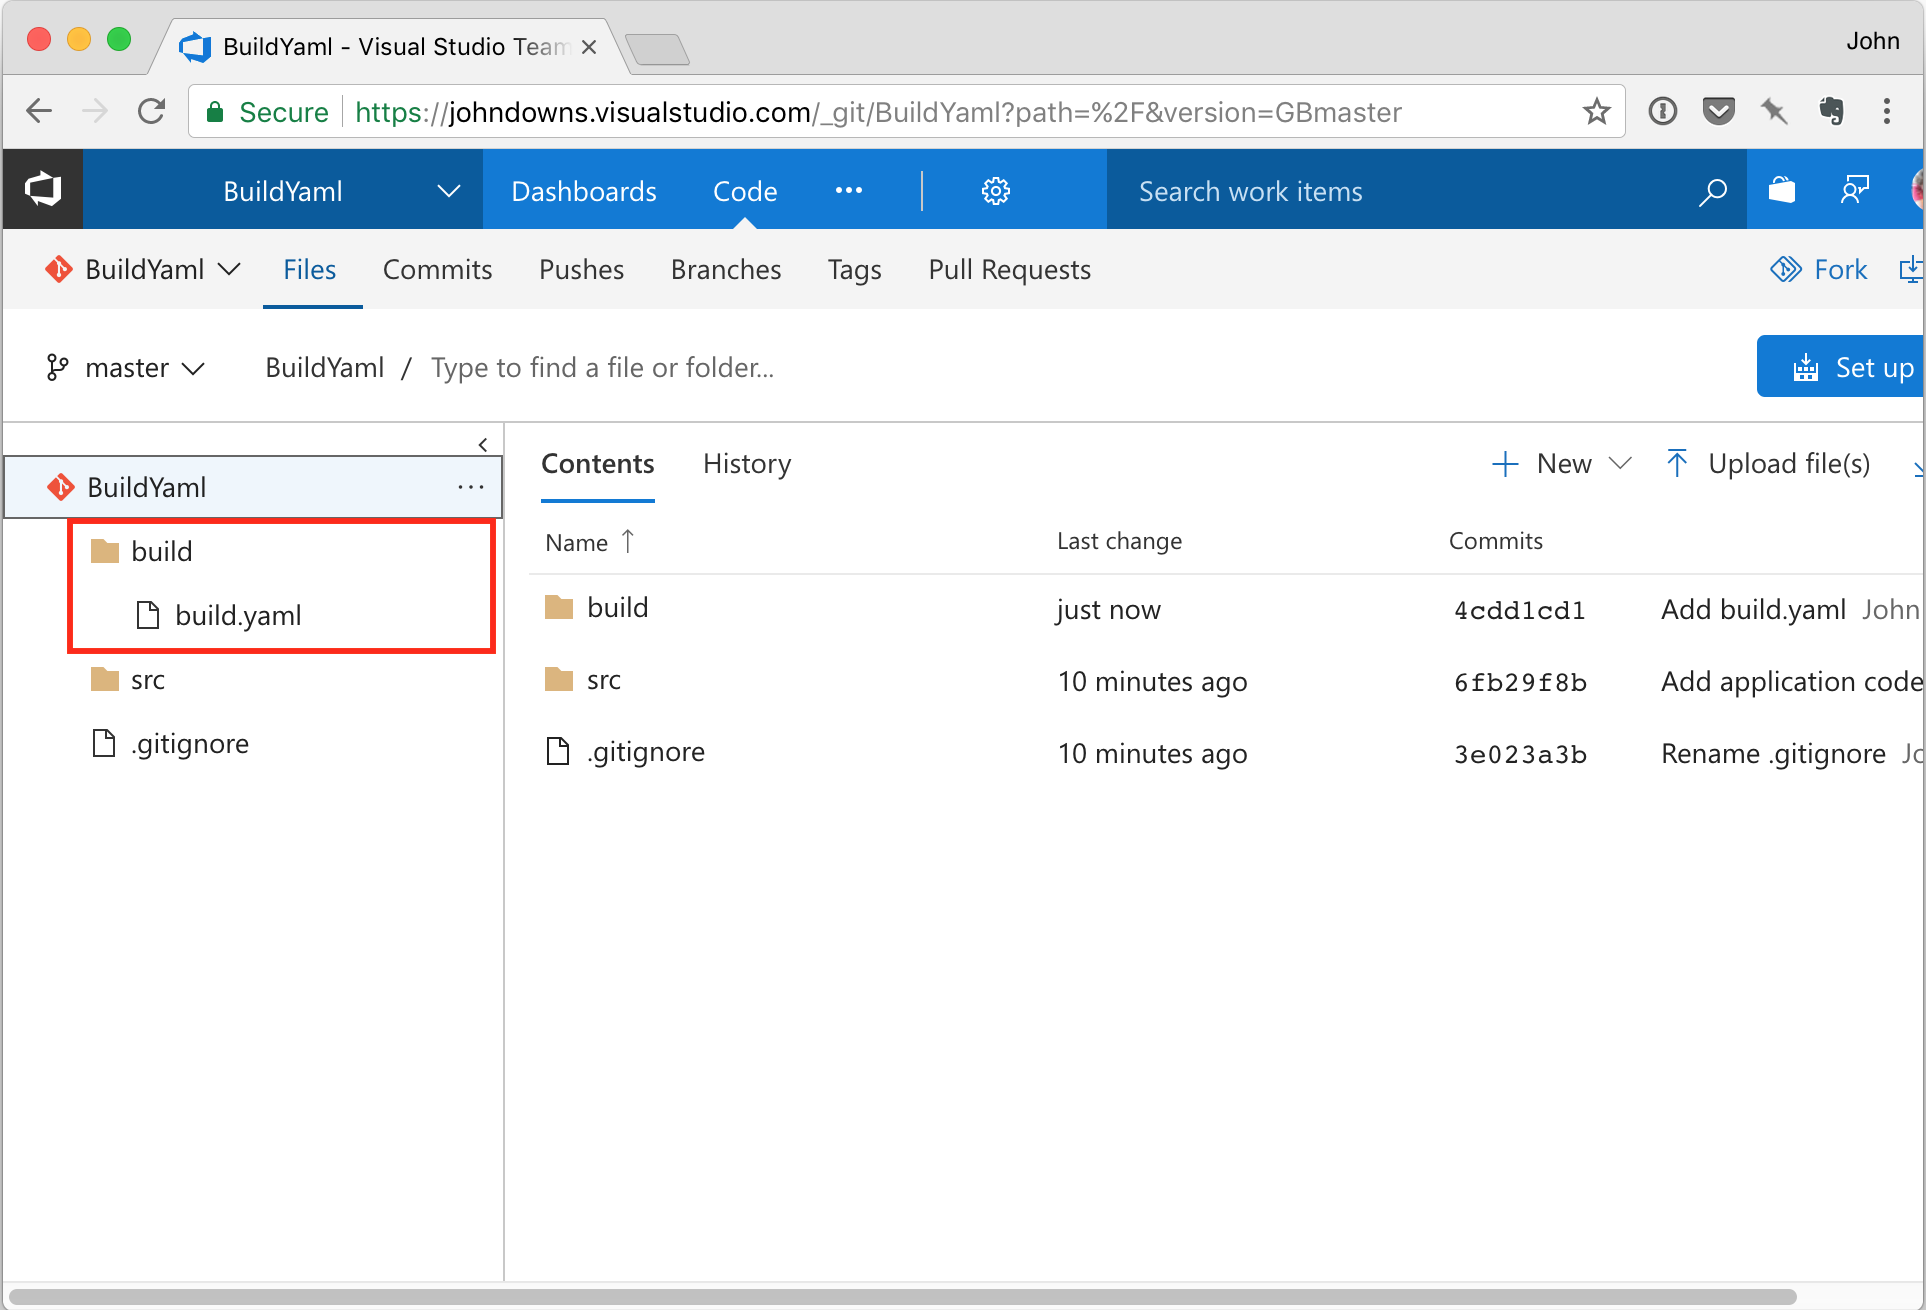
I created a new build folder at the same level as the src folder, and added a file in there called build.yaml.
VSTS also allows you to create a file in the root of the repository called .vsts-ci.yml. When this file is pushed to VSTS, it will create a build configuration for you automatically. Personally I don’t like this convention, partly because I want the file to live in the build folder, and partly because I’m not generally a fan of this kind of ‘magic’ and would rather do things manually.
Once I’d created a placeholder build.yaml file, here’s how things looked in my repository:
Writing the YAML
Now we can actually start writing our build definition!
In future updates to VSTS, we will be able to export an existing build definition as a YAML file. For now, though, we have to write them by hand. Personally I prefer that anyway, as it helps me to understand what’s going on and gives me a lot of control.
First, we need to put a steps: line at the top of our YAML file. This will indicate that we’re about to define a sequence of build steps. Note that VSTS also lets you define multiple build phases, and steps within those phases. That’s a slightly more advanced feature, and I won’t go into that here.
Next, we want to add an actual build step to call dotnet restore. VSTS provides a task called .NET Core, which has the internal task name DotNetCoreCLI. This will do exactly what we want. Here’s how we define this step:
Let’s break this down a bit. Also, make sure to pay attention to indentation – this is very important in YAML.
- task: DotNetCoreCLI@2 indicates that this is a build task, and that it is of type DotNetCoreCLI. This task is fully defined in Microsoft’s VSTS Tasks repository. Looking at that JSON file, we can see that the version of the task is 2.1.8 (at the time of writing). We only need to specify the major version within our step definition, and we do that just after the @ symbol.
displayName: Restore NuGet Packages specifies the user-displayable name of the step, which will appear on the build logs.
inputs: specifies the properties that the task takes as inputs. This will vary from task to task, and the task definition will be one source you can use to find the correct names and values for these inputs.
command: restore tells the .NET Core task that it should run the dotnet restore command.
projects: src tells the .NET Core task that it should run the command with the src folder as an additional argument. This means that this task is the equivalent of running dotnet restore src from the command line.
The other .NET Core tasks are similar, so I won’t include them here – but you can see the full YAML file below.
Finally, we have a build step to publish the artifacts that we’ve generated. Here’s how we define this step:
This uses the PublishBuildArtifacts task. If we consult the definition for this task on the Microsoft GitHub repository, we can see This task accepts several arguments. The ones we’re setting are:
pathToPublishis the path on the build agent where thedotnet publishstep has saved its output. (As you will see in the full YAML file below, I manually overrode this in thedotnet publishstep.)artifactNameis the name that is given to the build artifact. As we only have one, I’ve kept the name fairly generic and just called itdeploy. In other projects, you might have multiple artifacts and then give them more meaningful names.artifactTypeis set tocontainer, which is the internal ID for theArtifact publish location: Visual Studio Team Services/TFSoption.
Here is the complete Build.yaml file:
Set up a Build Configuration and Run
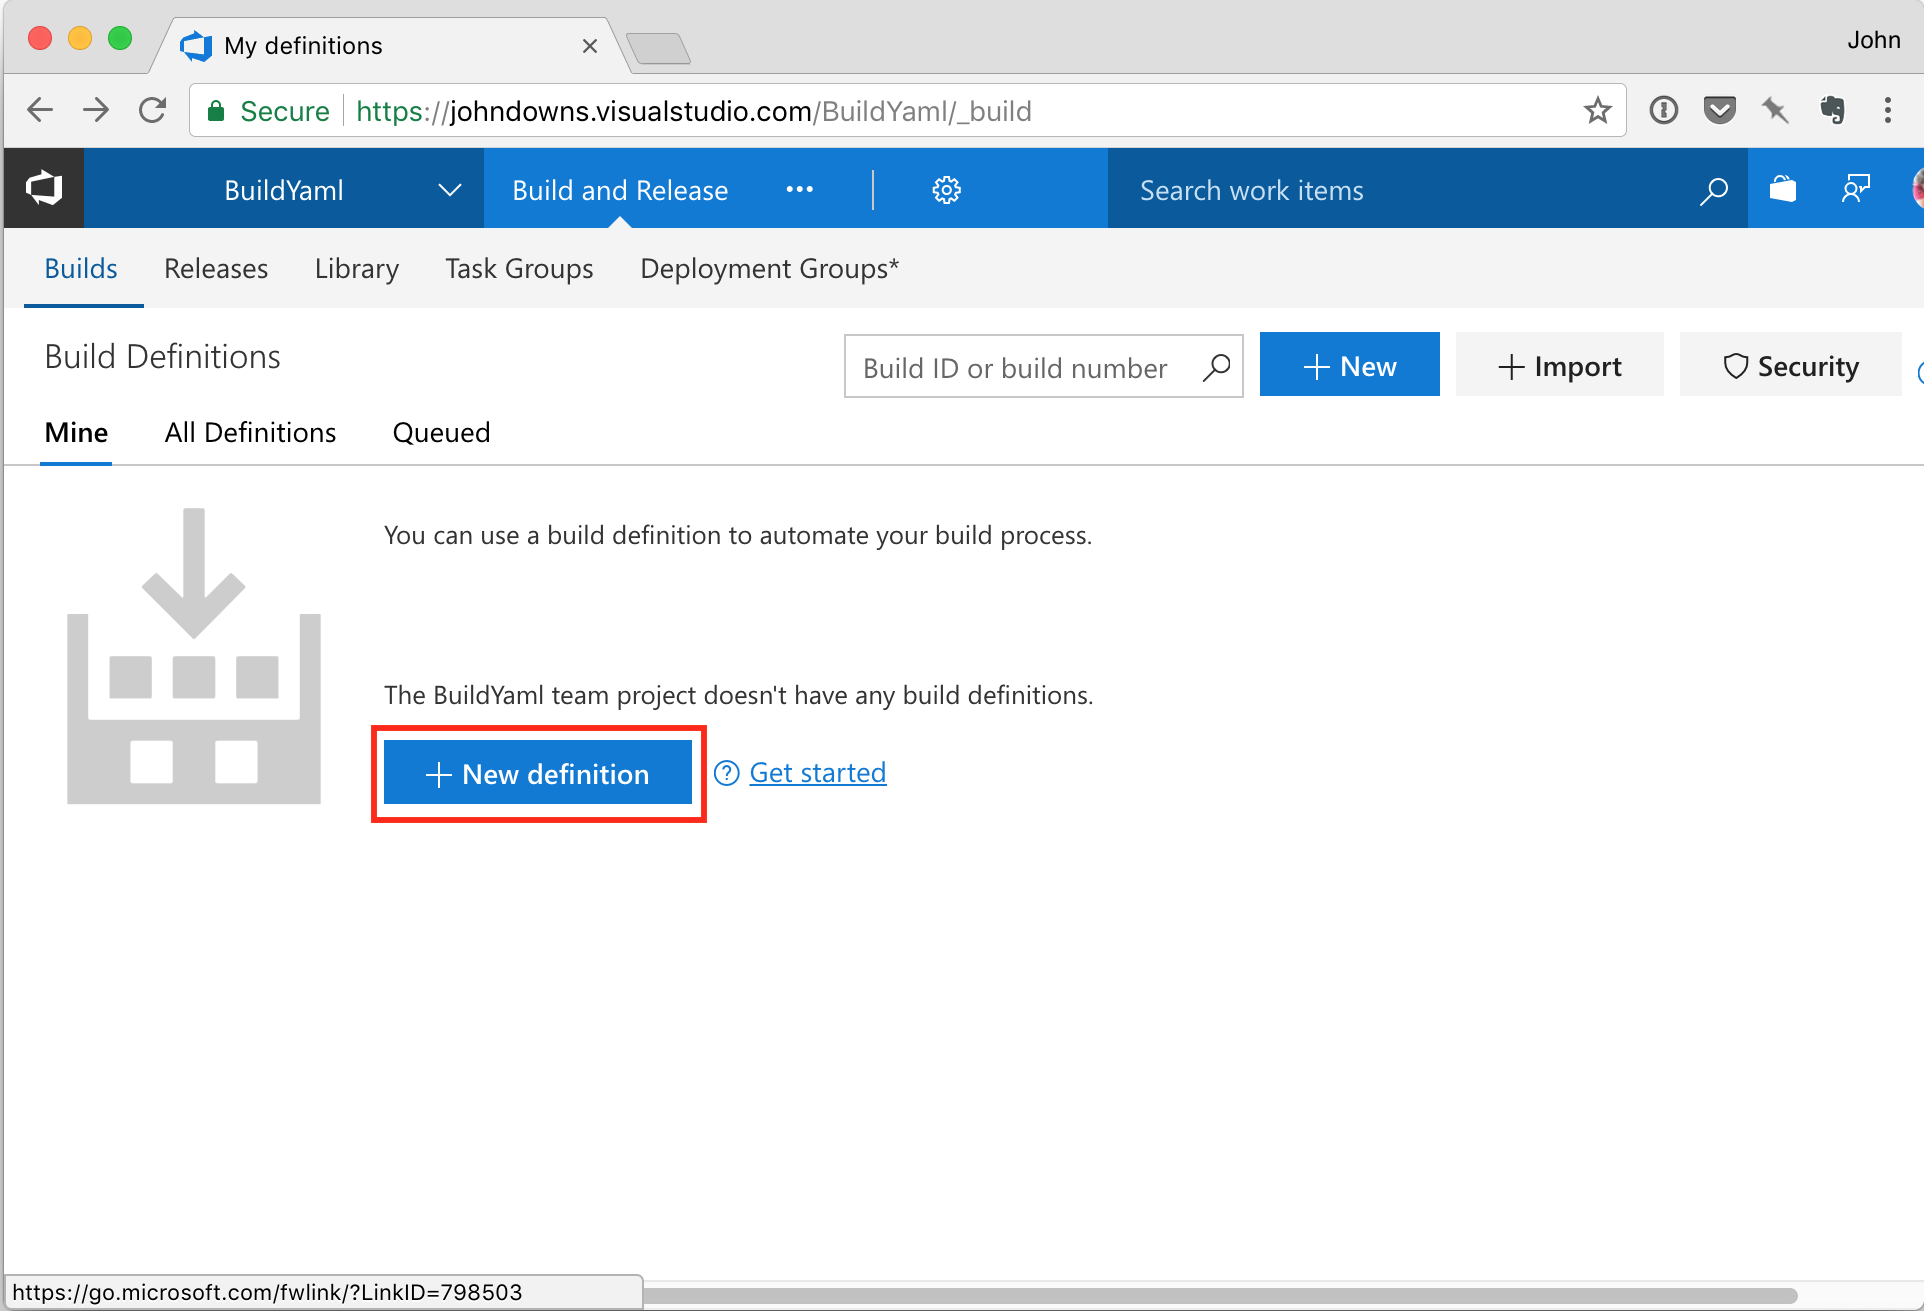
Now we can set up a build configuration in VSTS and tell it to use the YAML file. This is a one-time operation. In VSTS’s Build and Release section, go to the Builds tab, and then click New Definition.
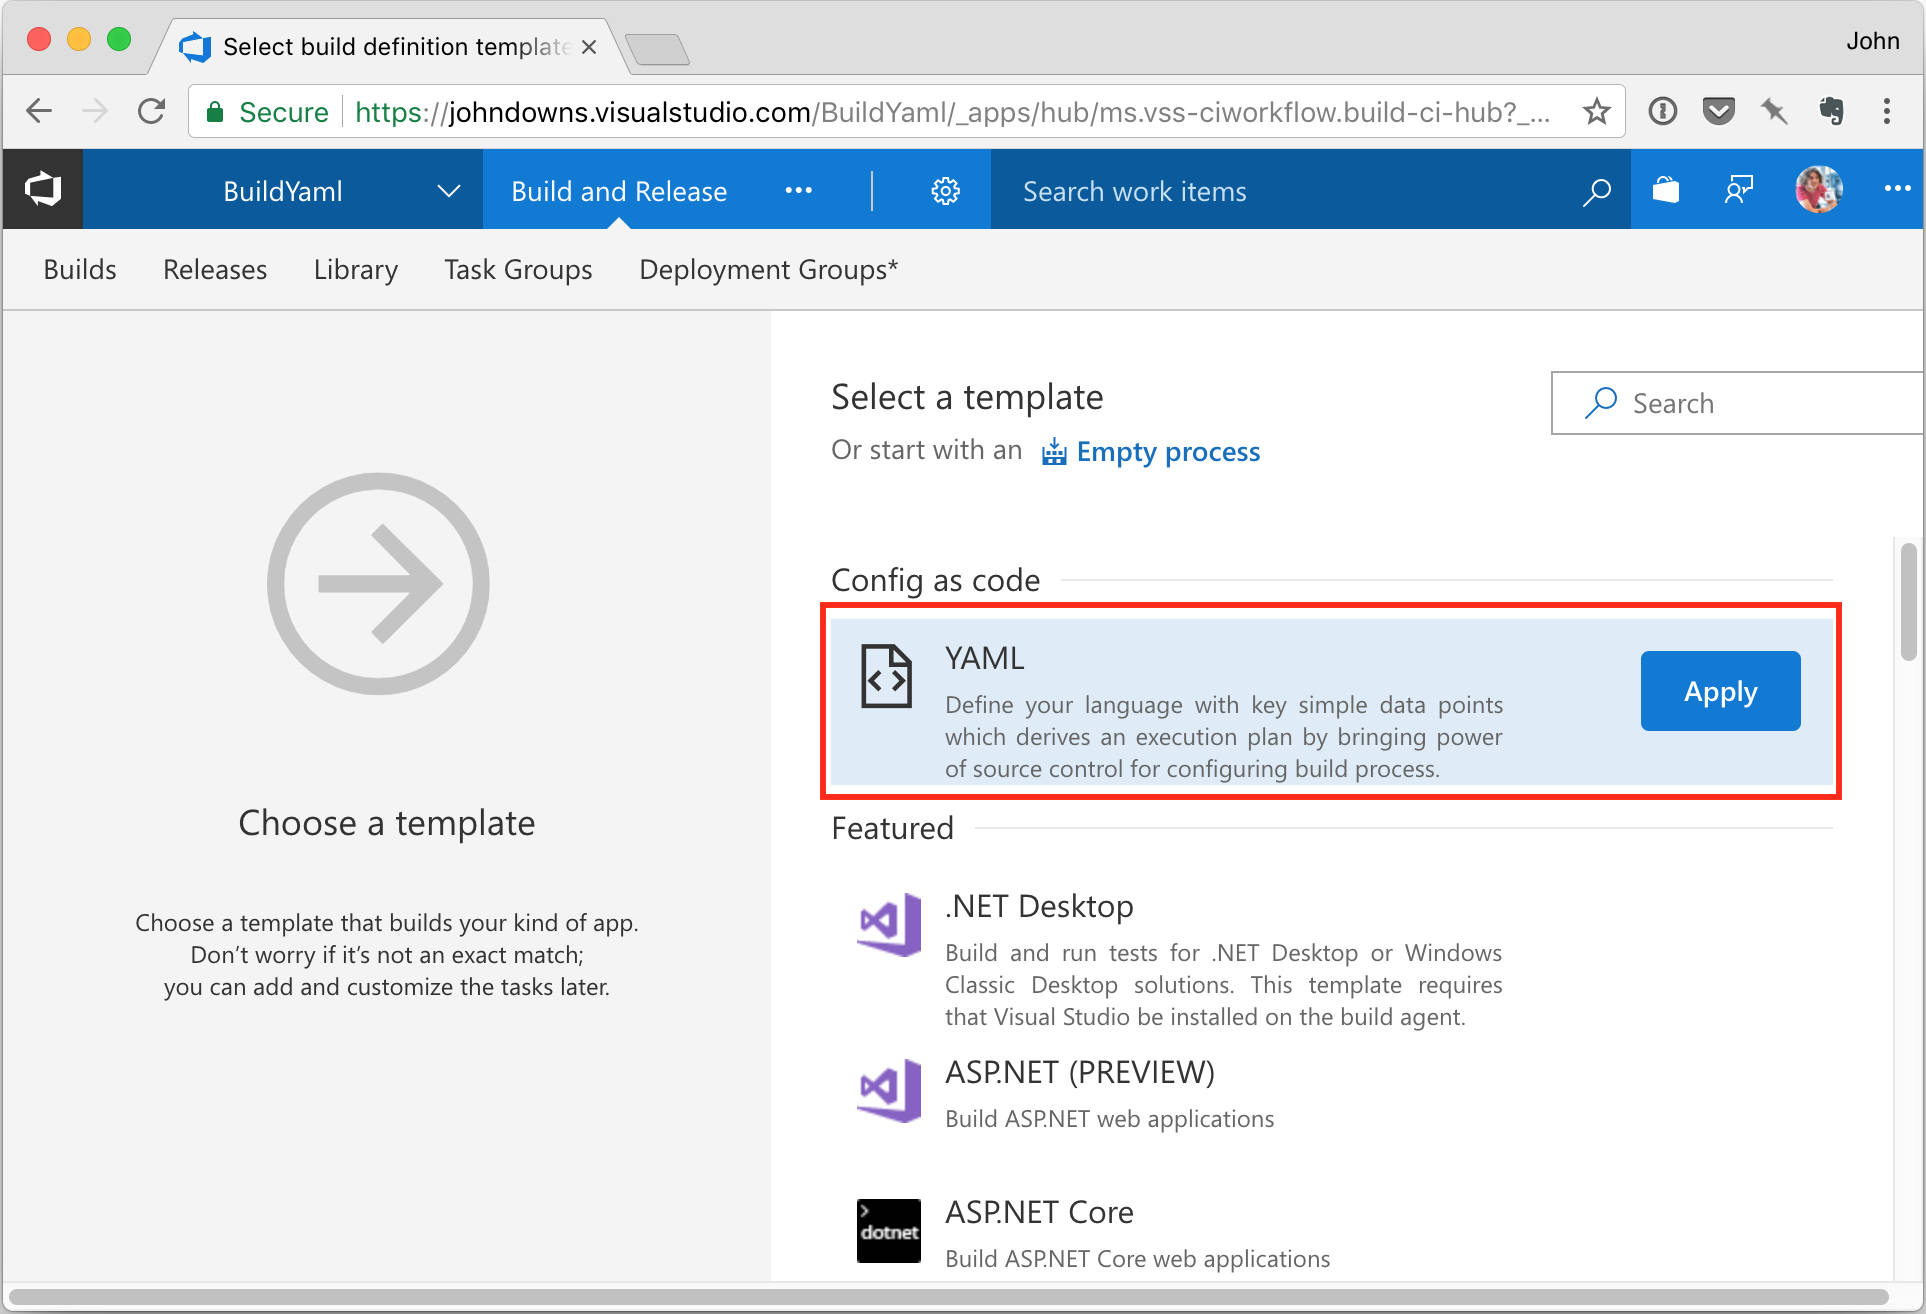
You should see YAML as a template type. If you don’t see this option, check you enabled the feature as described above.
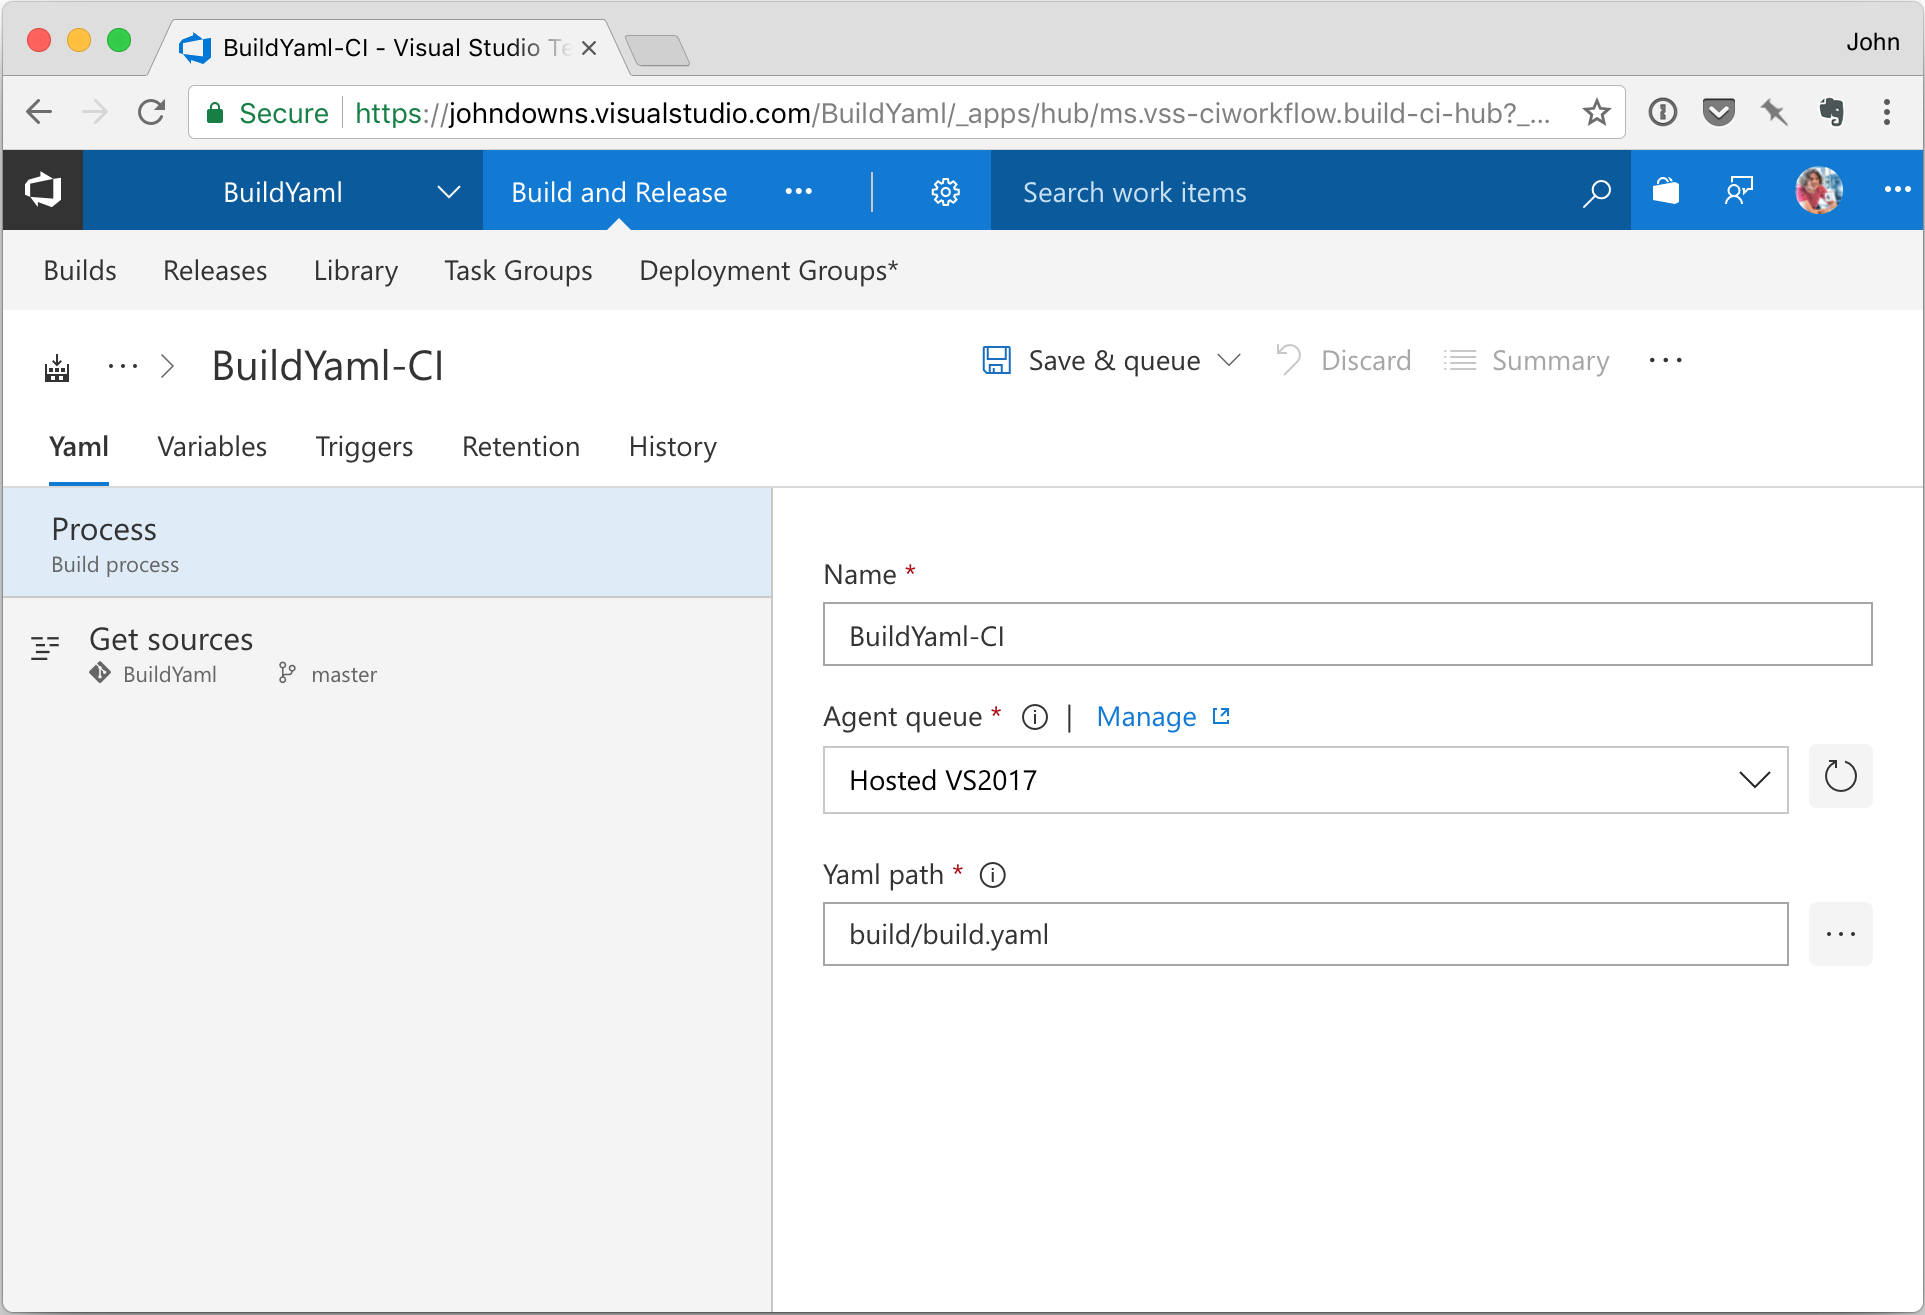
We’ll configure our build configuration with the Hosted VS2017 queue (this just means that our builds will run on a Microsoft-managed build agent, which has Visual Studio 2017 installed). We also have to specify the relative path to the YAML file in the repository, which in our case is build/build.yaml.
Now we can save and queue a build. Here’s the final output from the build:
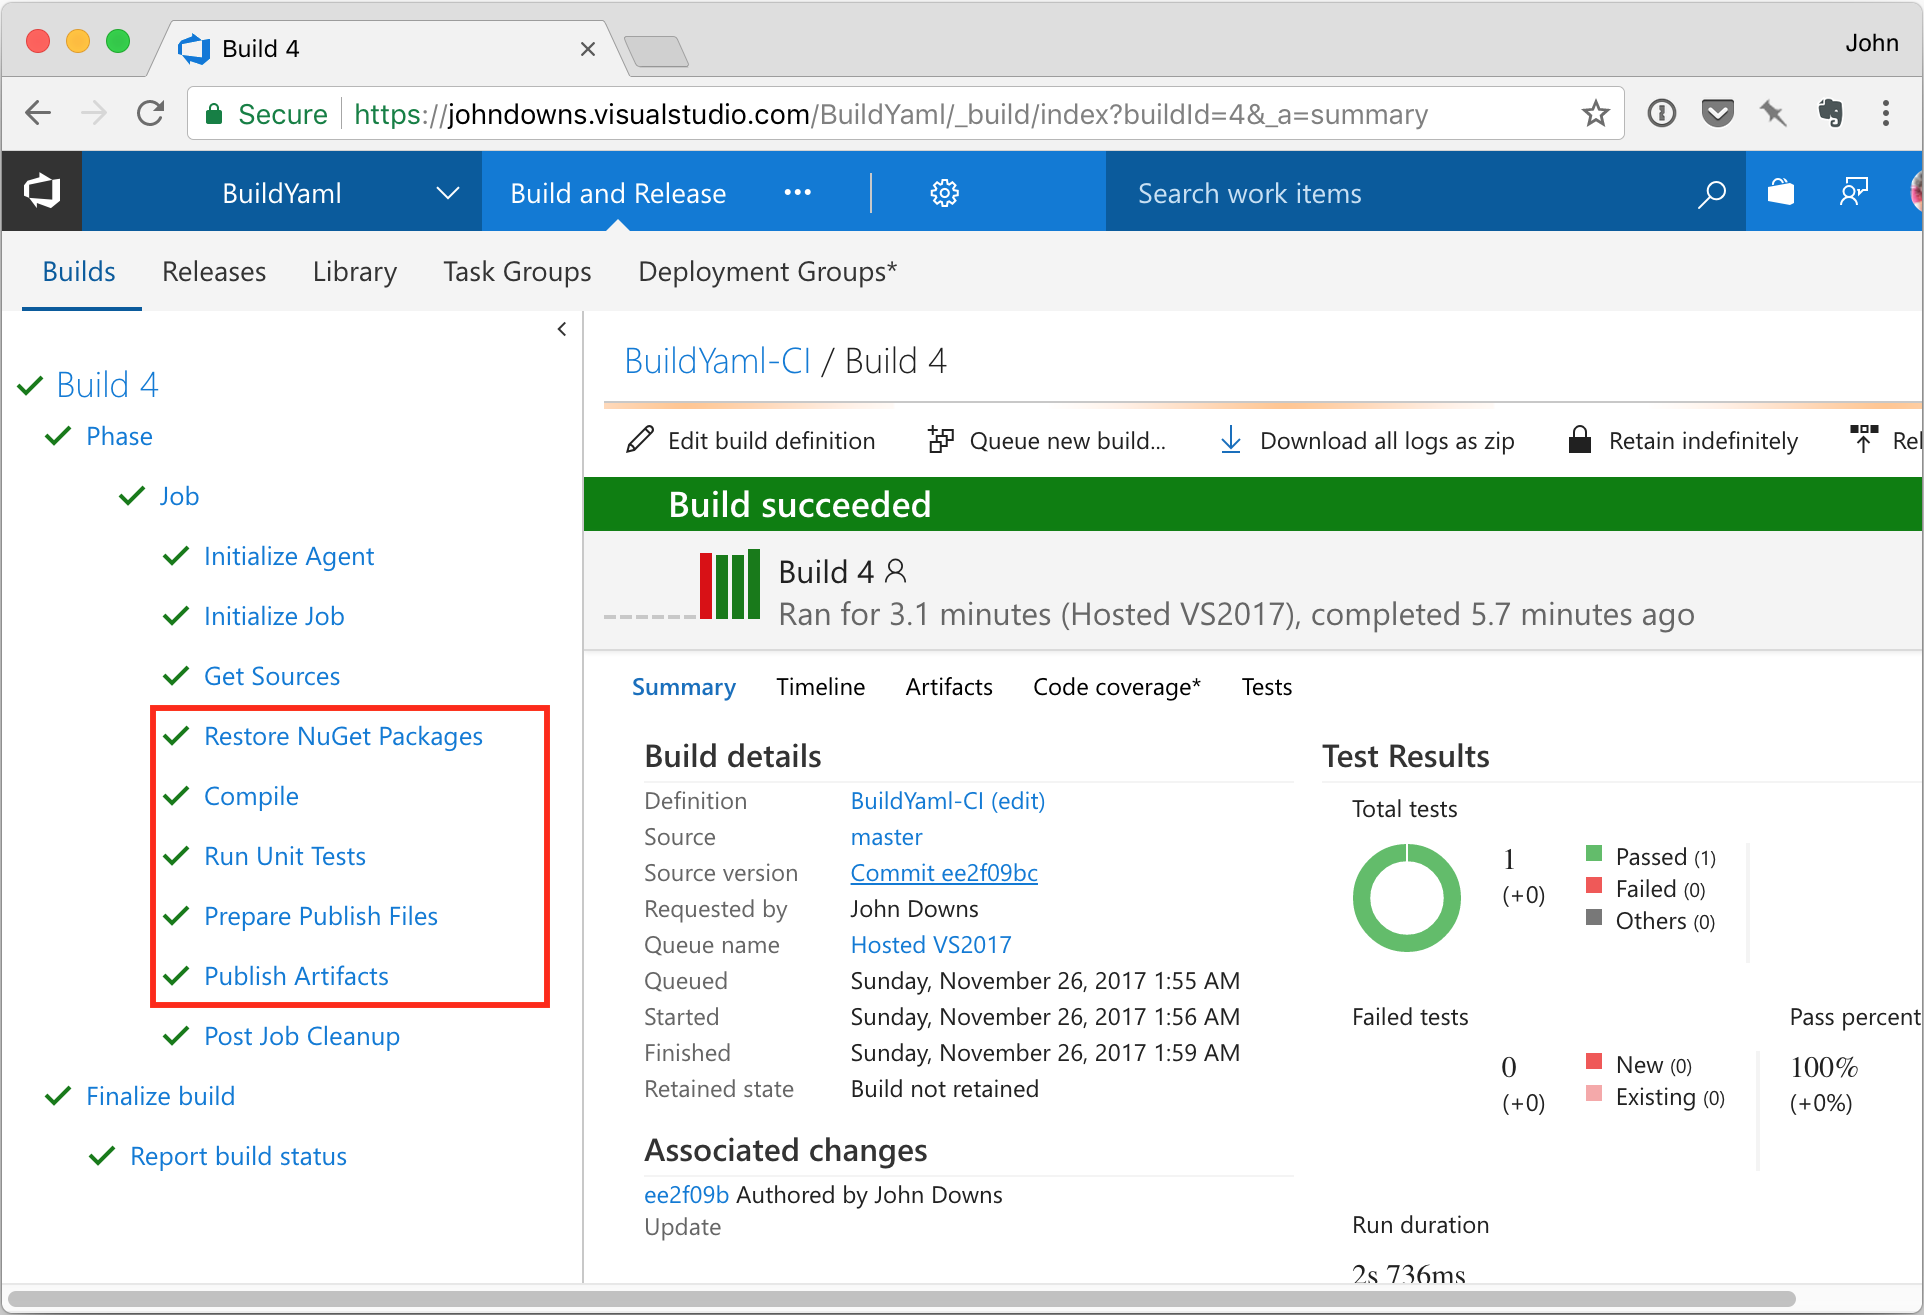
(Yes, this is build number 4 – I made a couple of silly syntax errors in the YAML file and had to retry a few times!)
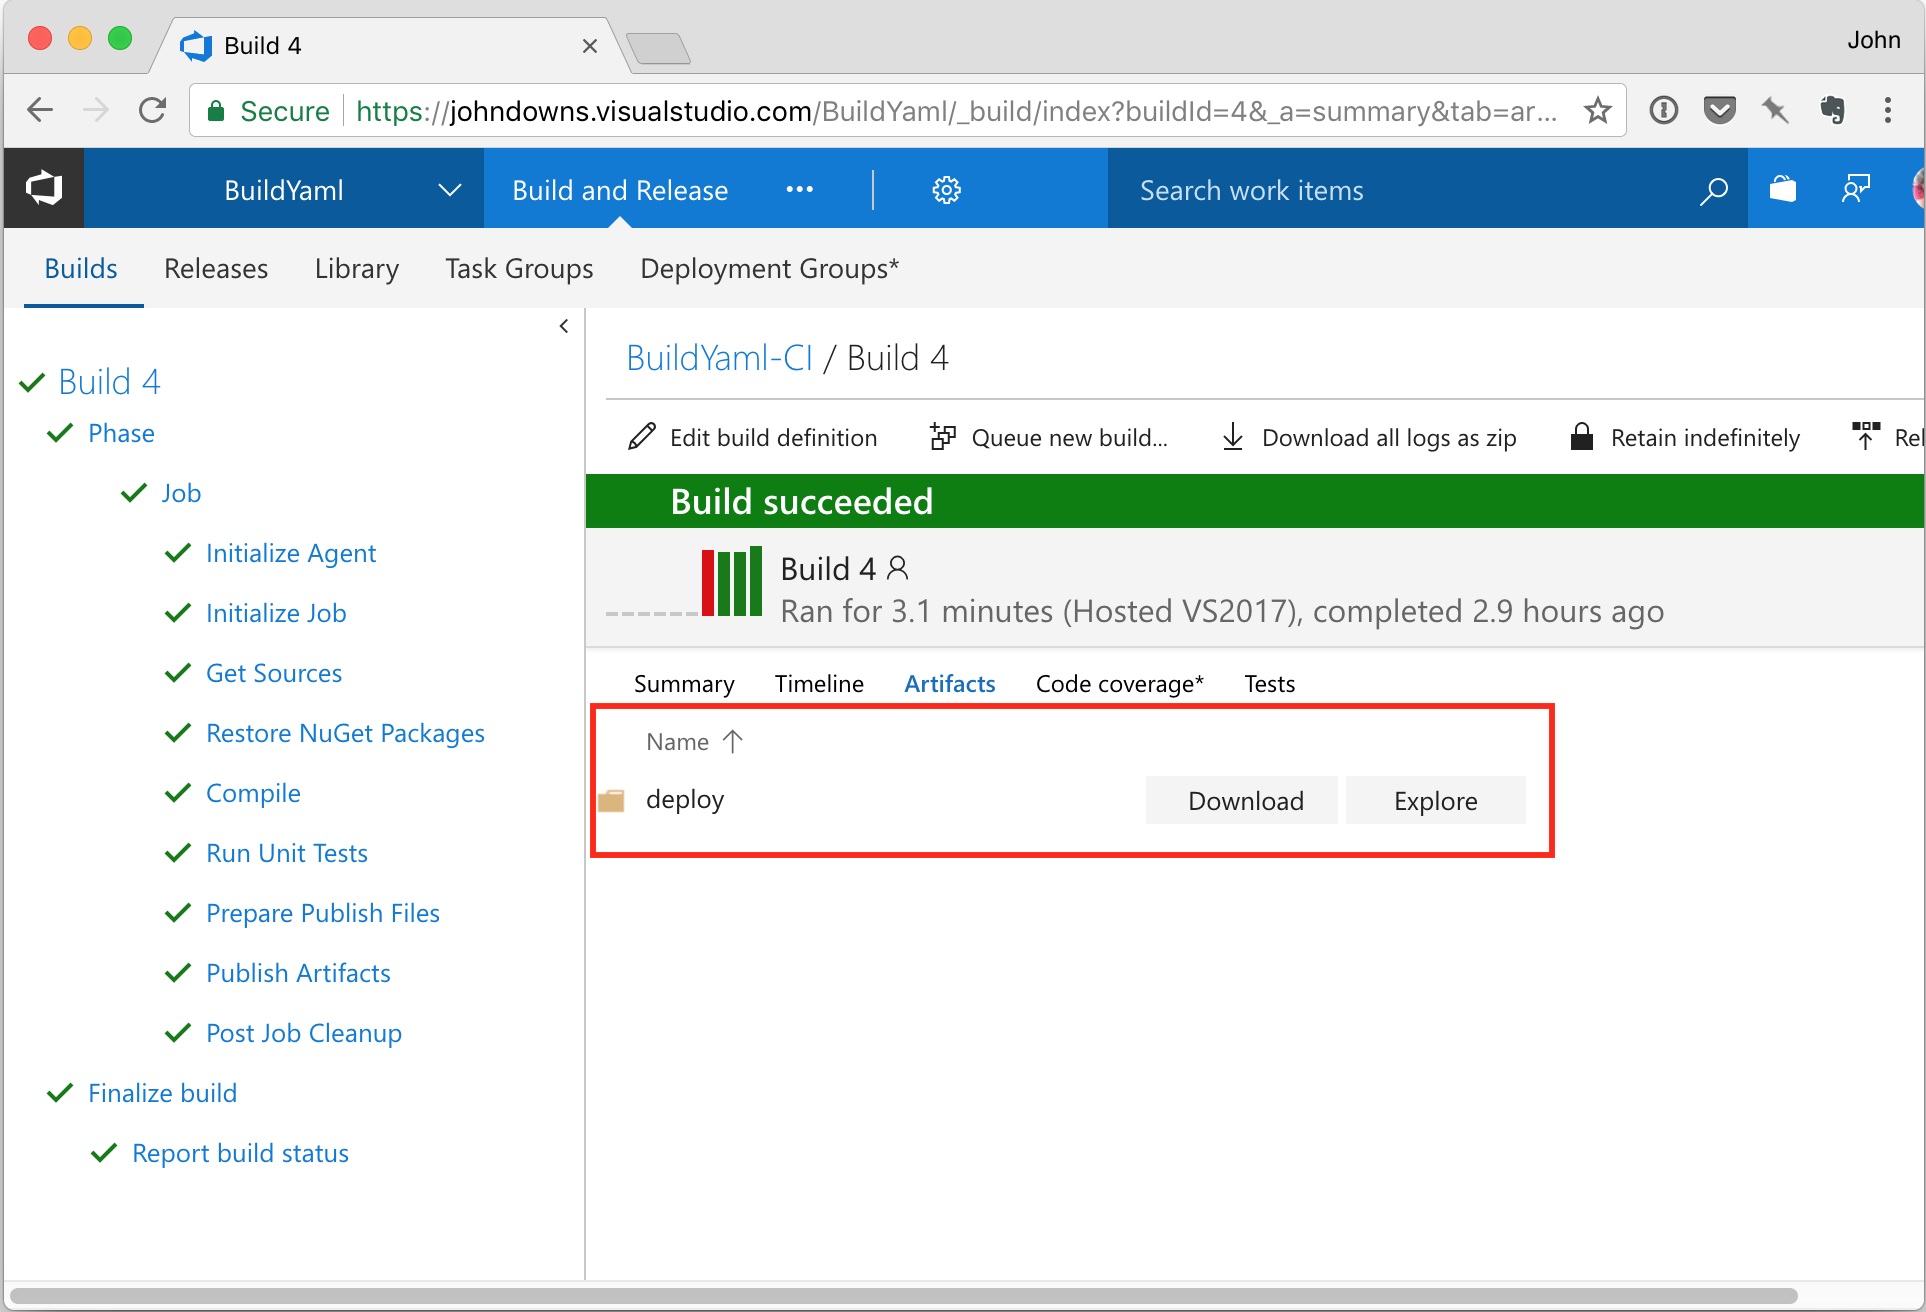
As you can see, the tasks all ran successfully and the test passed. Under the Artifacts tab, we can also see that the deploy artifact was created:
Tips and Other Resources
This is still a preview feature, so there are still some known issues and things to watch out for.
Documentation
There is a limited amount of documentation available for creating and using this feature. The official documentation links so far are:
- Get started configuring your CI Build in code using YAML
- How to use YAML builds
- YAML getting started (this is a lot more detailed, and covers some more advanced scenarios)
In particular, the properties for each task are not documented, and you need to consult the task’s task.json file to understand how to structure the YAML syntax. Many of the built-in tasks are defined in Microsoft’s GitHub repository, and this is a great starting point, but more comprehensive documentation would definitely be helpful.
Examples
There aren’t very many example templates available yet. That is why I wrote this article. I also recommend Marcus Felling’s recent blog post, where he provides a more complex example of a YAML build definition.
Tooling
As I mentioned above, there is limited tooling available currently. The VSTS team have indicated that they will soon provide the ability to export an existing build definition as YAML, which will help a lot when trying to generate and understand YAML build definitions. My personal preference will still be to craft them by hand, but this would be a useful feature to help bootstrap new templates.
Similarly, there currenly doesn’t appear to be any validation of the parameters passed to each task. If you misspell a property name, you won’t get an error – but the task won’t behave as you expect. Hopefully this experience will be improved over time.
Error Messages
The error messages that you get from the build system aren’t always very clear. One error message I’ve seen frequently is Mapping values are not allowed in this context. Whenever I’ve had this, it’s been because I did something wrong with my YAML indentation. Hopefully this saves somebody some time!
Releases
This feature is only available for VSTS build configurations right now. Release configurations will also be getting the YAML treatment, but it seems this won’t be for another few months. This will be an exciting development, as in my experience, release definitions can be even more complex than build configurations, and would benefit from all of the peer review, versioning, and branching goodness I described above.
Variable Binding and Evaluation Order
While you can use VSTS variables in many places within the YAML build definitions, there appear to be some properties that can’t be bound to a variable. One I’ve encountered is when trying to link an Azure subscription to a property.
For example, in one of my build configurations, I want to publish a Docker image to an Azure Container Registry. In order to do this I need to pass in the Azure service endpoint details. However, if I specify this as a variable, I get an error – I have to hard-code the service endpoint’s identifier into the YAML file. This is not something I want to do, and will become a particular issue when release definitions can be defined in YAML, so I hope this gets fixed soon.
Summary
Build definitions and build scripts are an integral part of your application’s source code, and should be treated as such. By storing your build definition as a YAML file and placing it into your repository, you can begin to improve the quality of your build pipeline, and take advantage of source control features like diffing, versioning, branching, and pull request review.

Another example YAML build definition, which I found helpful for reference, is here: https://github.com/Microsoft/vsts-agent/blob/master/.vsts.ci.yml
Another example YAML build definition, which I found helpful for reference, is here: https://github.com/Microsoft/vsts-agent/blob/master/.vsts.ci.yml
Hi,
What version of Core your app uses? 1.x or 2.x?
Also do you have experience packing Service Fabric apps into sfpkg using YAML-based build?
The version of .NET Core doesn’t really matter for this. The task ID (DotNetCoreCLI@2) contains a version number (2) but that just refers to the task version, not to the .NET Core version. You can use any version of .NET Core supported by your build agent.
I haven’t personally packaged Service Fabric applications, but it shouldn’t be any different – to start with, I suggest building up the build configuration using the UI, and then exporting it to a YAML file.
Yes, it’s a good advise to create release configuration in the UI first. But my Instance is locked down and I’m using special template. So have to deal with yaml directly.
Unfortunately the doc https://docs.microsoft.com/en-us/azure/service-fabric/service-fabric-package-apps#create-an-sfpkg doesn’t suggest anything else other than BCL API. And MSBuild community tasks don’t support Core 2.x as of now.
One suggestion I can offer is to set up your own VSTS tenant (it’s free for up to five users) to try configuring the build configuration.
Re the Service Fabric task – unfortunately I really don’t know much about Service Fabric packages sorry, but hopefully if you can set up your own tenant you can try experimenting with this to find something that works. Good luck!
I got it working, blogged about it [here](https://wordpress.com/post/blog.abatishchev.ru/581)
Do I need a certain TFS build agent version to run this yml build in TFS 2019? iT is not working with version 2.144.0