
Introduction
Microsoft Identity Manager is fantastic for keeping data consistent between connected systems. Often however you want to know what a previous value of an attribute was. FIM/MIM however can only tell you the current value and the Management Agent it was received on and when.
In the past where I’ve had to provide a solution to either make sure an attribute has a unique value forever (e.g email address or loginID (don’t reuse email addresses or loginID)) or just attribute value history I’ve used two different approaches;
- Store previous values in an SQL Table and have an SQL MA that flows out the values
- Store historical values in a Multi-Valued attribute on the user object in the Metaverse
Both are valid approaches but often fall down when you want to quickly get a report on that metadata.
Recently we had a similar request to be able to know when Employees EndDates were updated in HR. Specifically useful for contractors who have their contracts extended. Instead of stuffing the info into a Multi-Valued attribute or an SQL DB this time I used Power BI. This provides the benefit of being able to quickly develop a graphical report and embed it in the FIM/MIM Portal.
Such a report looks like the screenshot below. 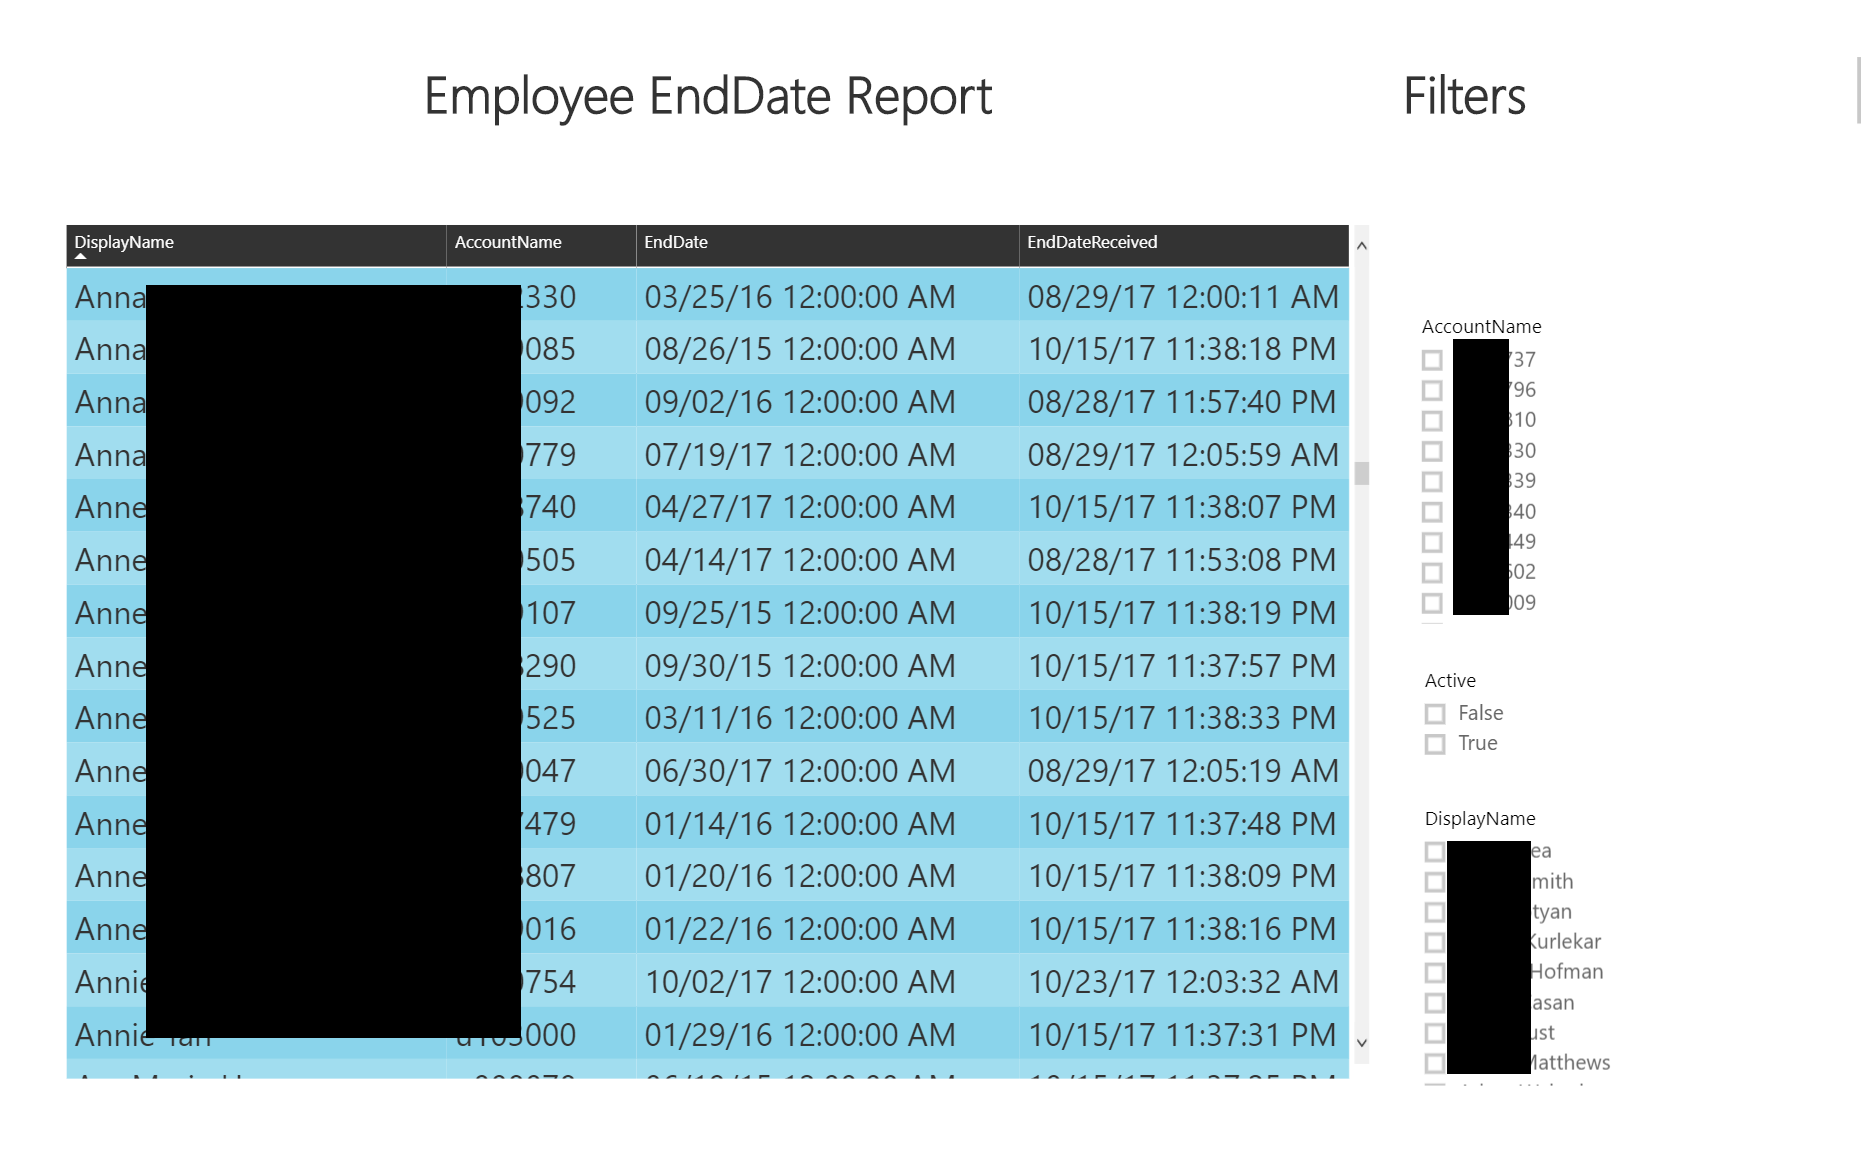
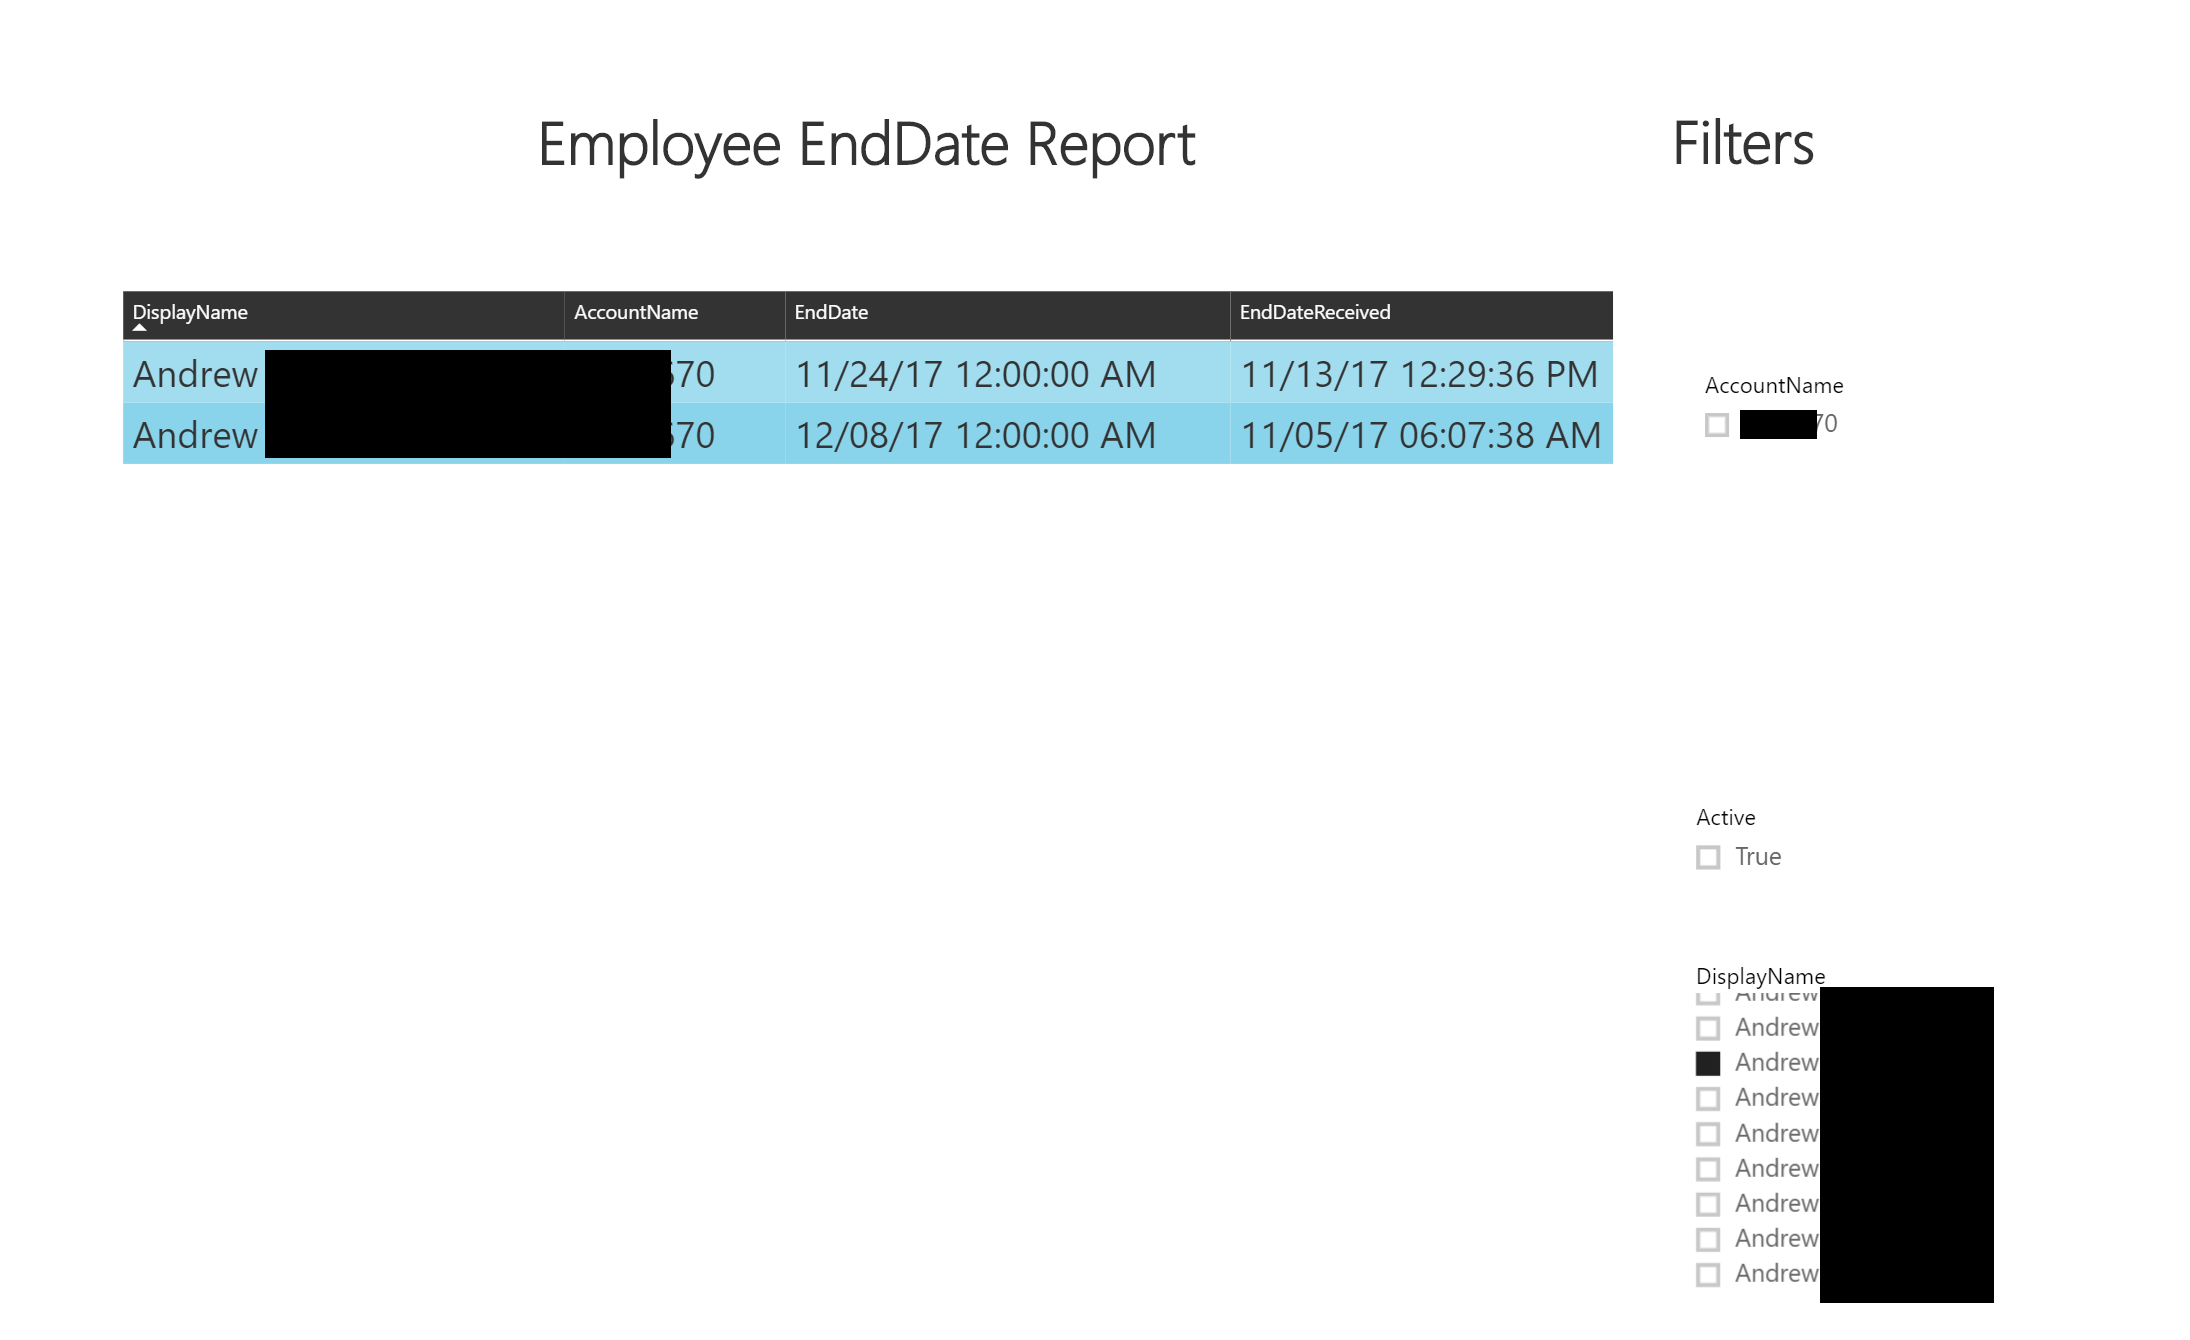
Using the filters on the right hand side of the report you can find a user (by EmployeeID or DisplayName), select them and see attribute value history details for that user in the main part of the report. As per the screenshot below Andrew’s EndDate was originally the 8th of December (as received on the 5th of November), but was changed to the 24th of November on the 13th of November.
In this Post I describe how I quickly built the solution.
Overview
The process to do this involves;
- creating a Power BI Application
- creating a Power BI Dataset
- creating a script to retrieve the data from the MV and inject it into the Power BI Dataset
- creating a Power BI Report for the data
- embedding the Report in the MIM Portal
Registering a Power BI Application
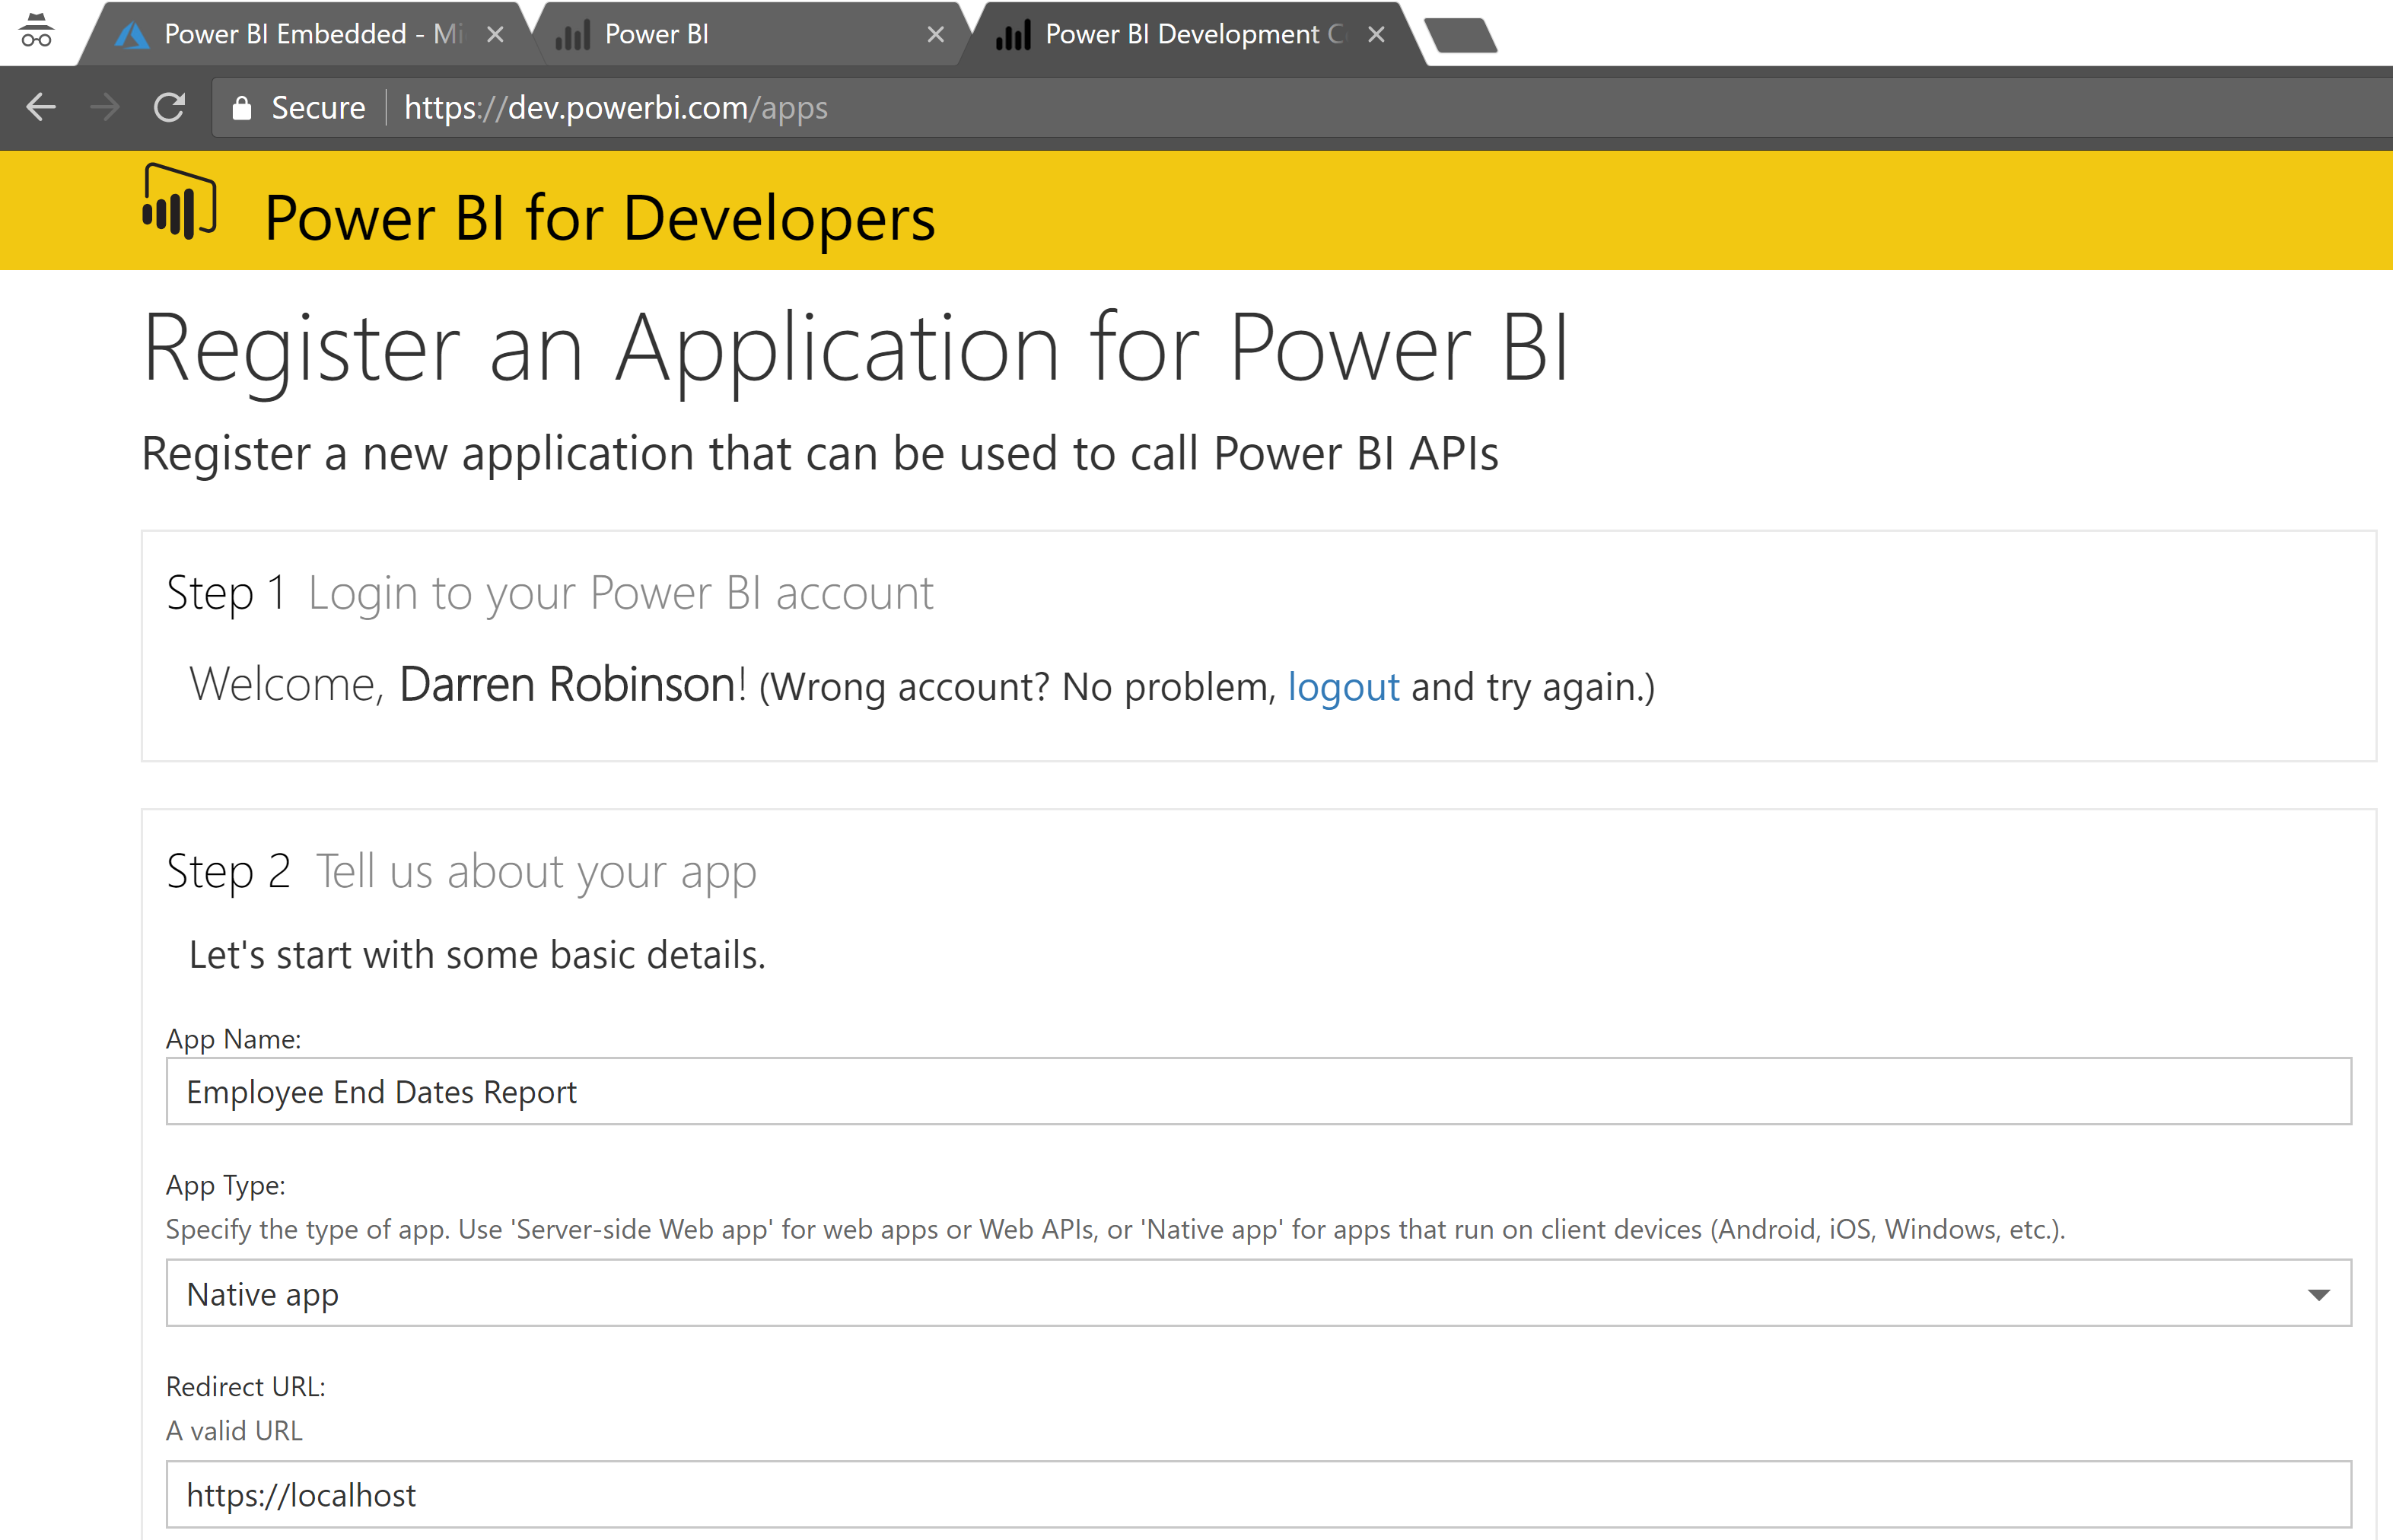
Head over to Power BI for Developers and Register an Application for Power BI. Login to Power BI with an account for the tenant you’ll be reporting data for. Give your Application a name and choose Native Application. Set the Redirect URL to https://localhost
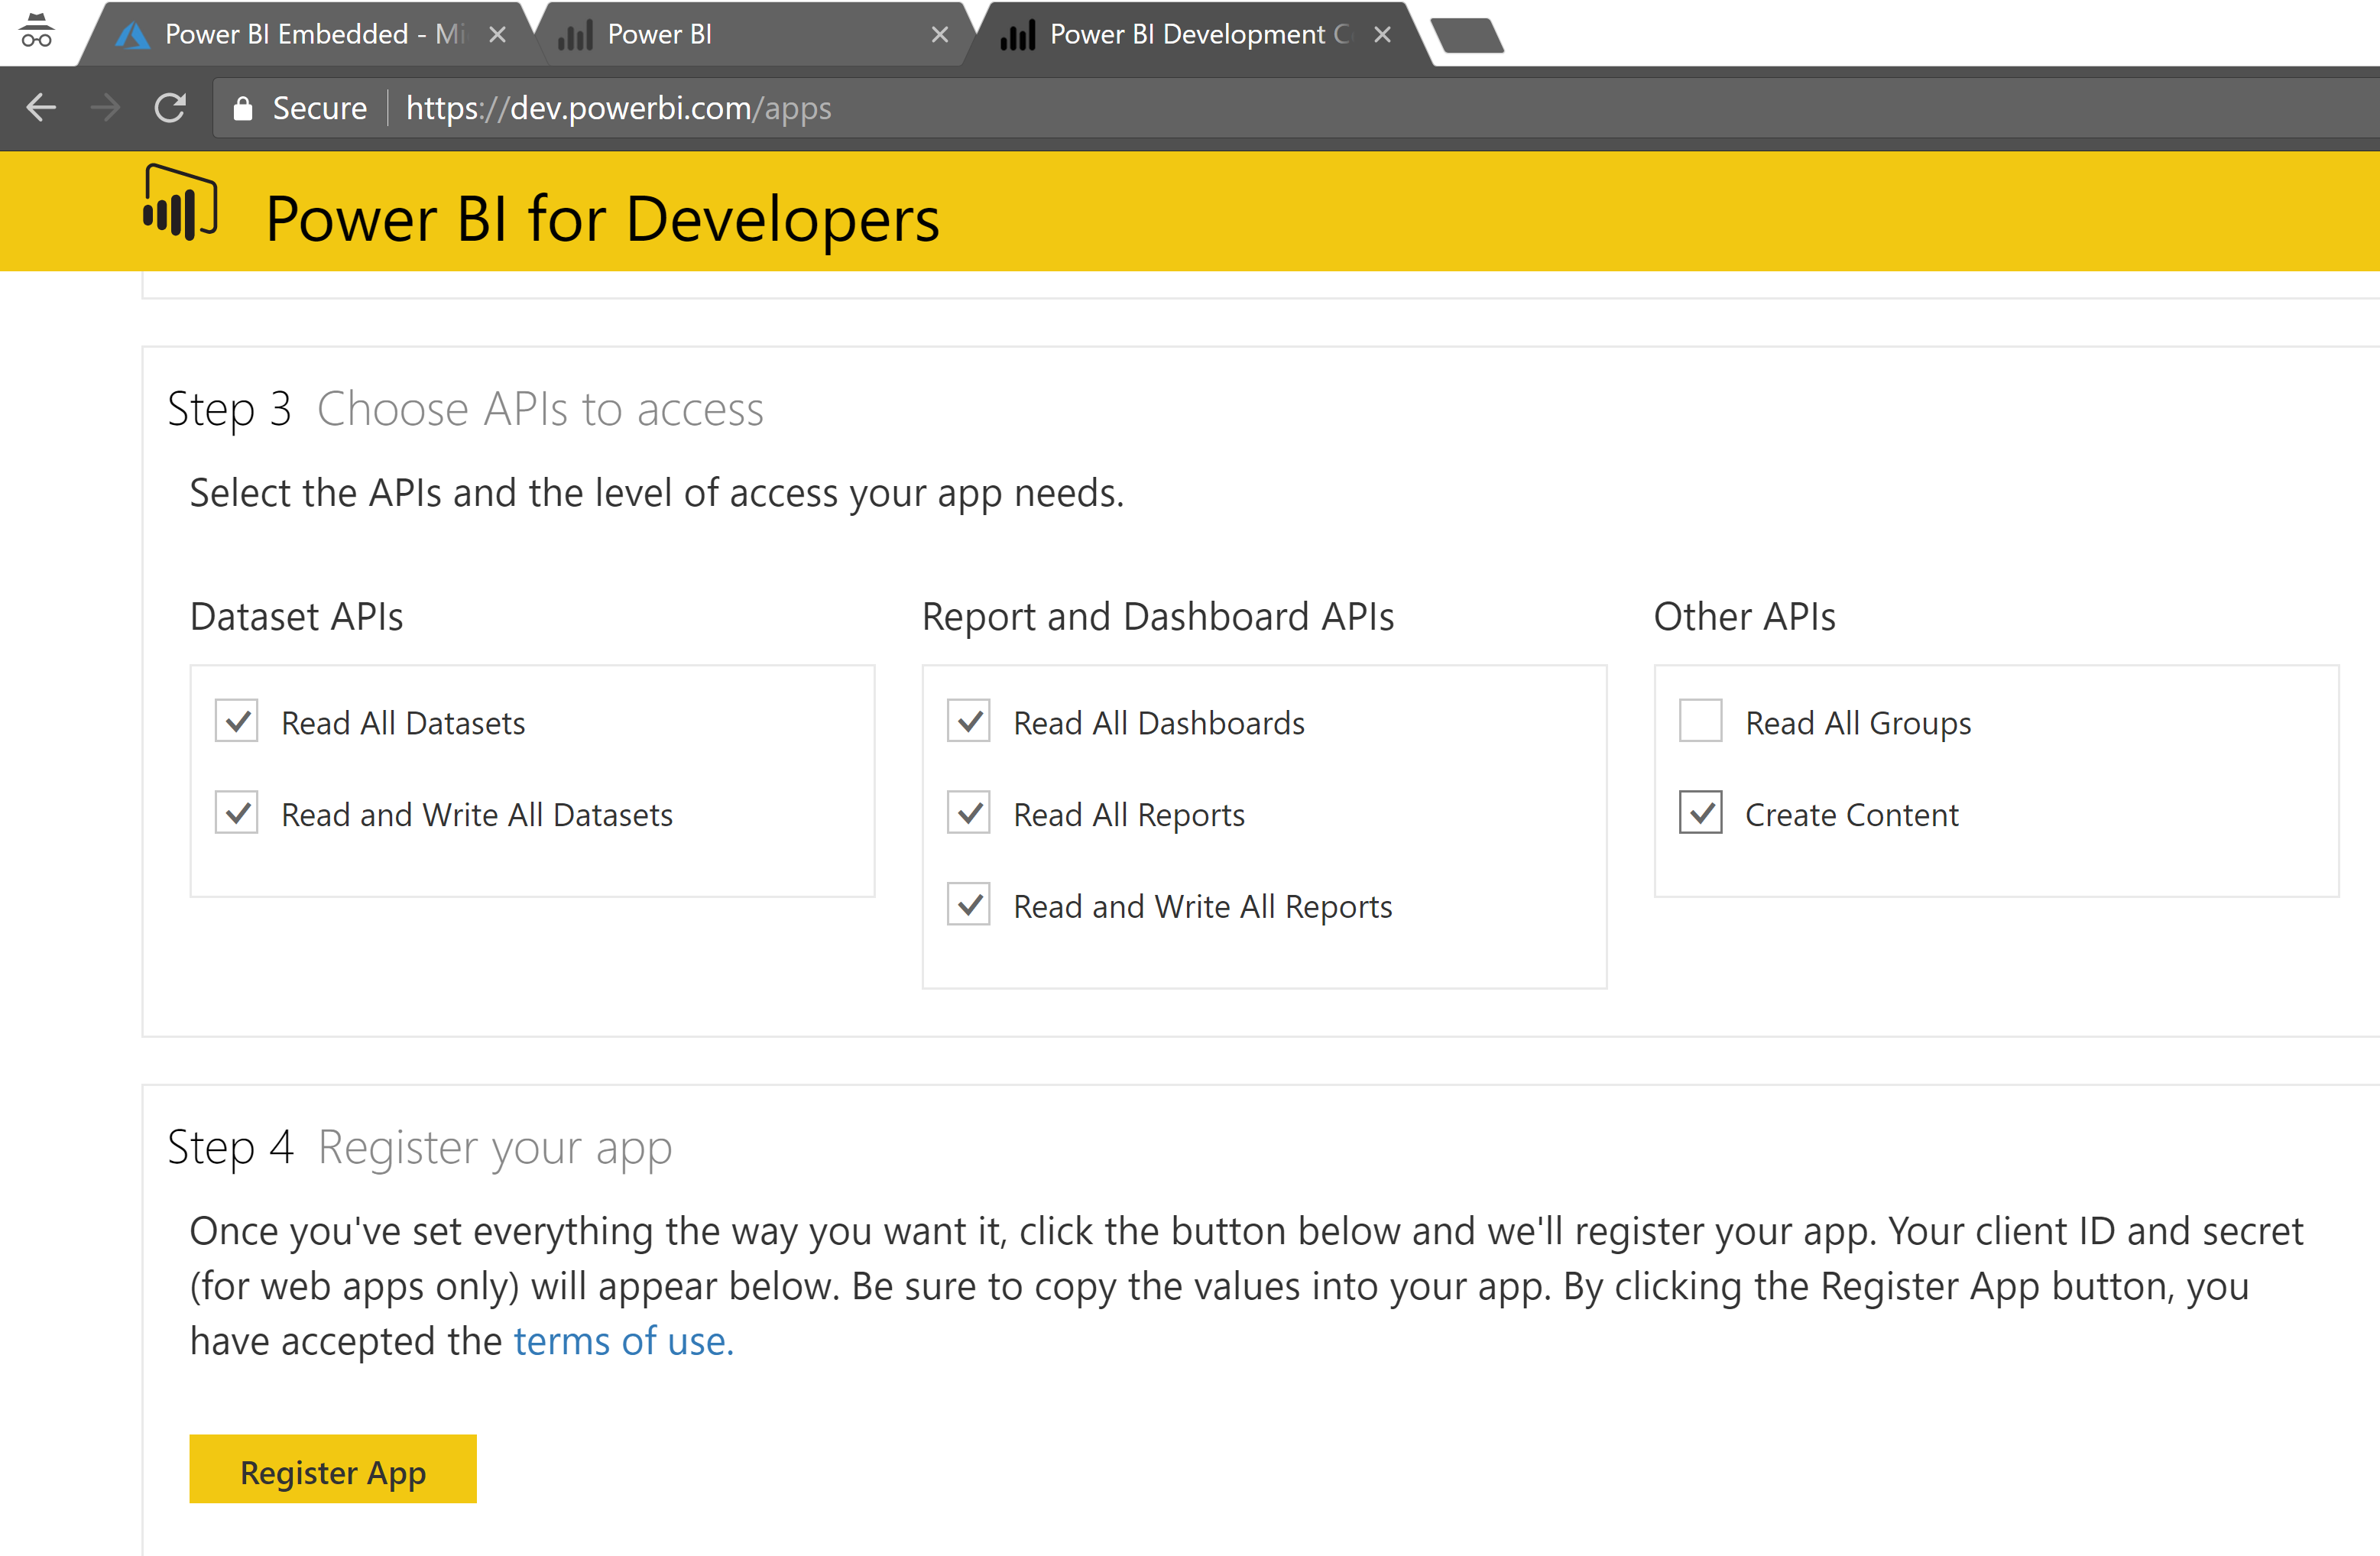
Choose the permissions for you Application. As we’ll be writing data into Power BI you’ll need a minimum of Read and Write all Datasets. Select Register App.
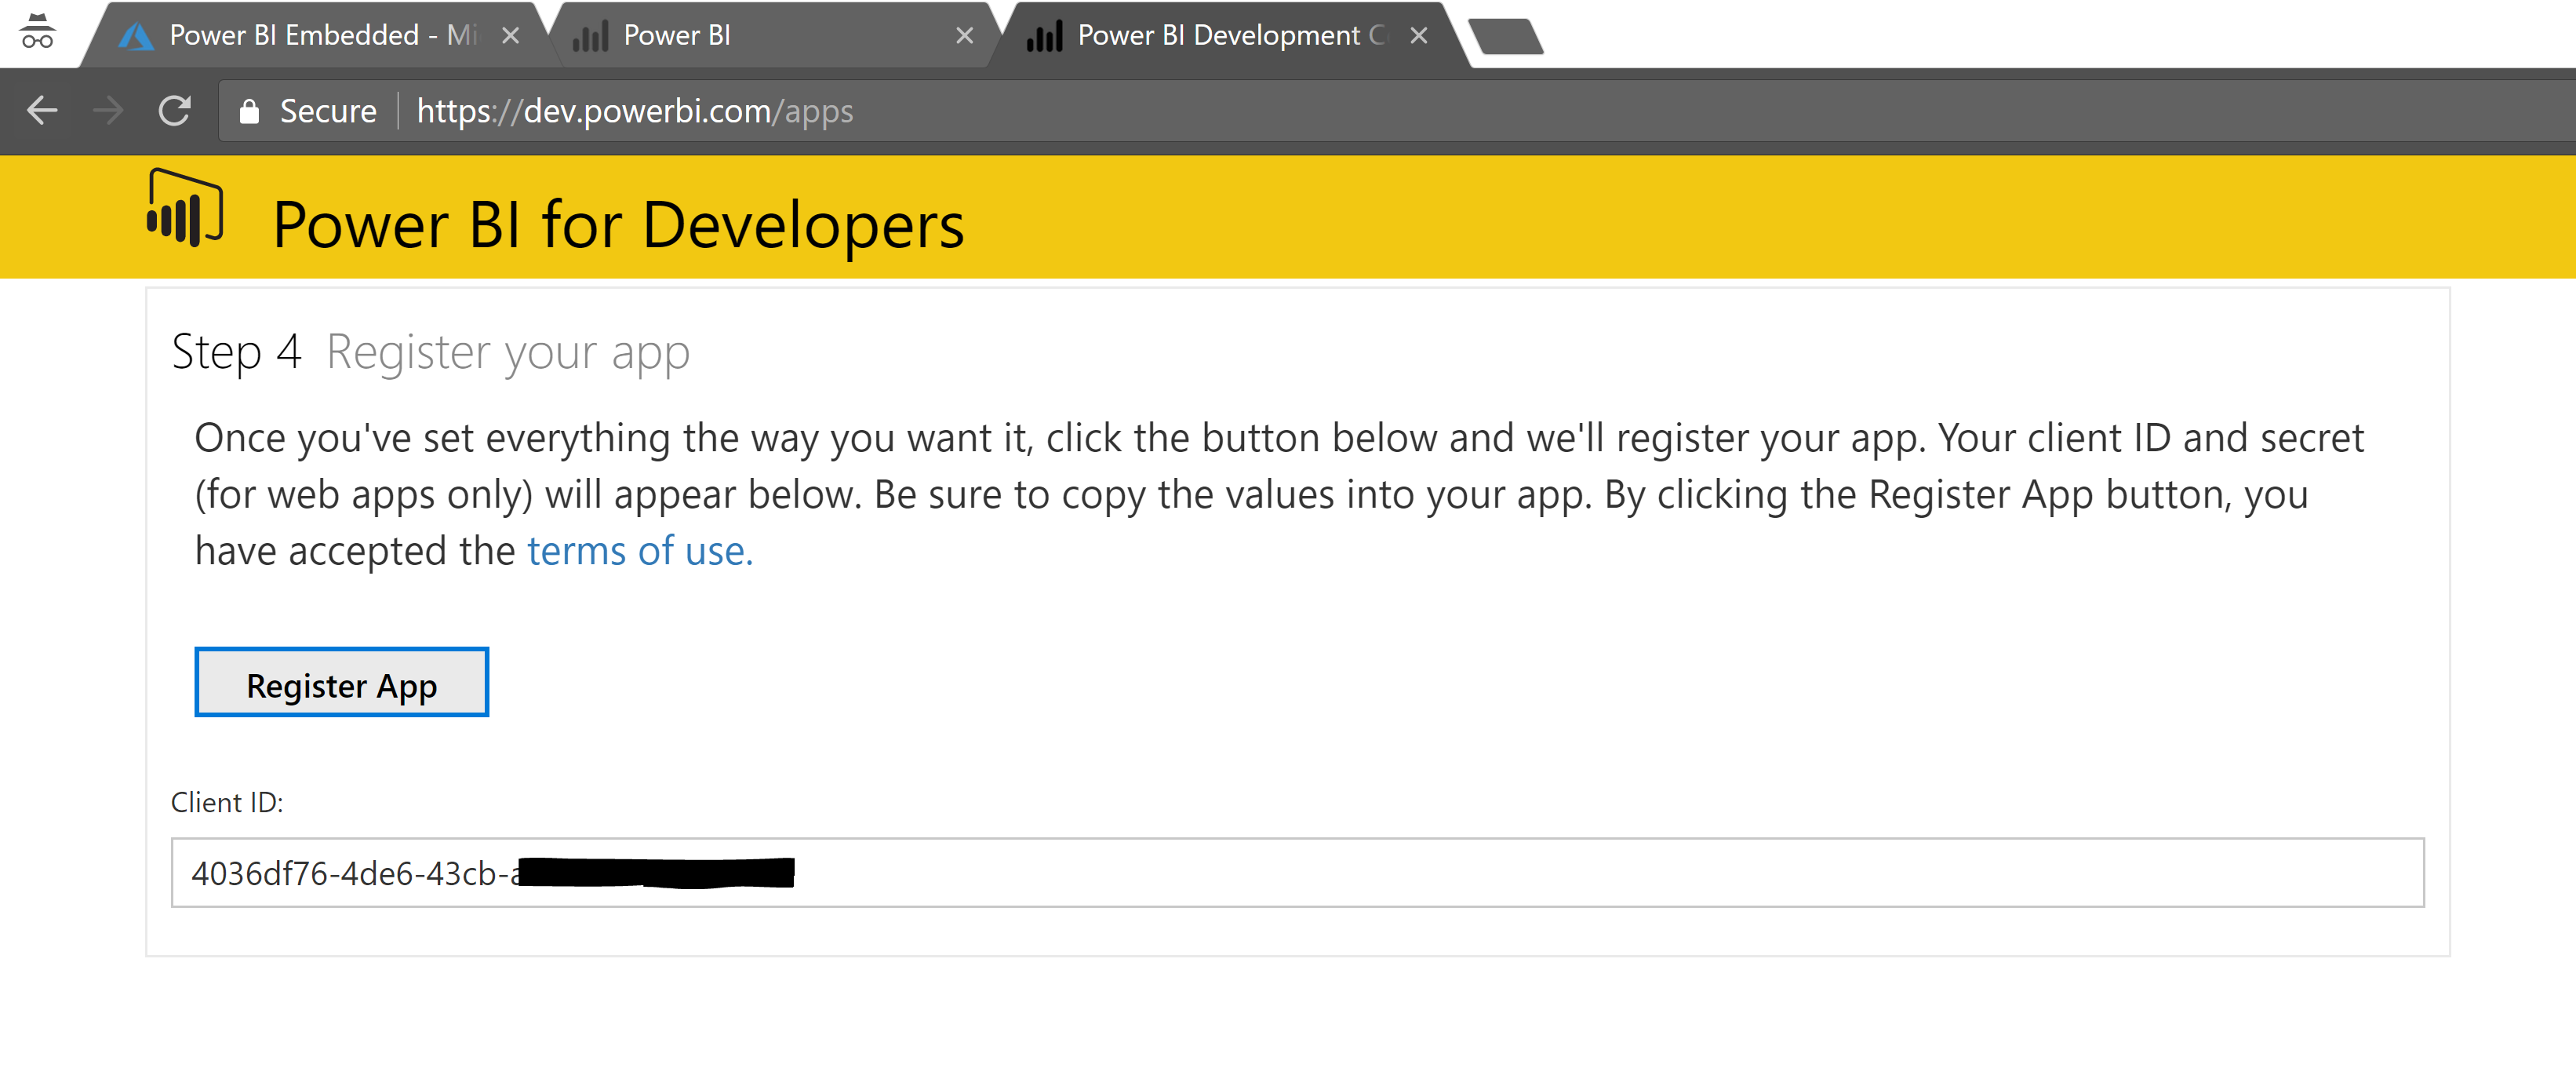
Record your Client ID for your Application. We’ll need this to connect to Power BI.
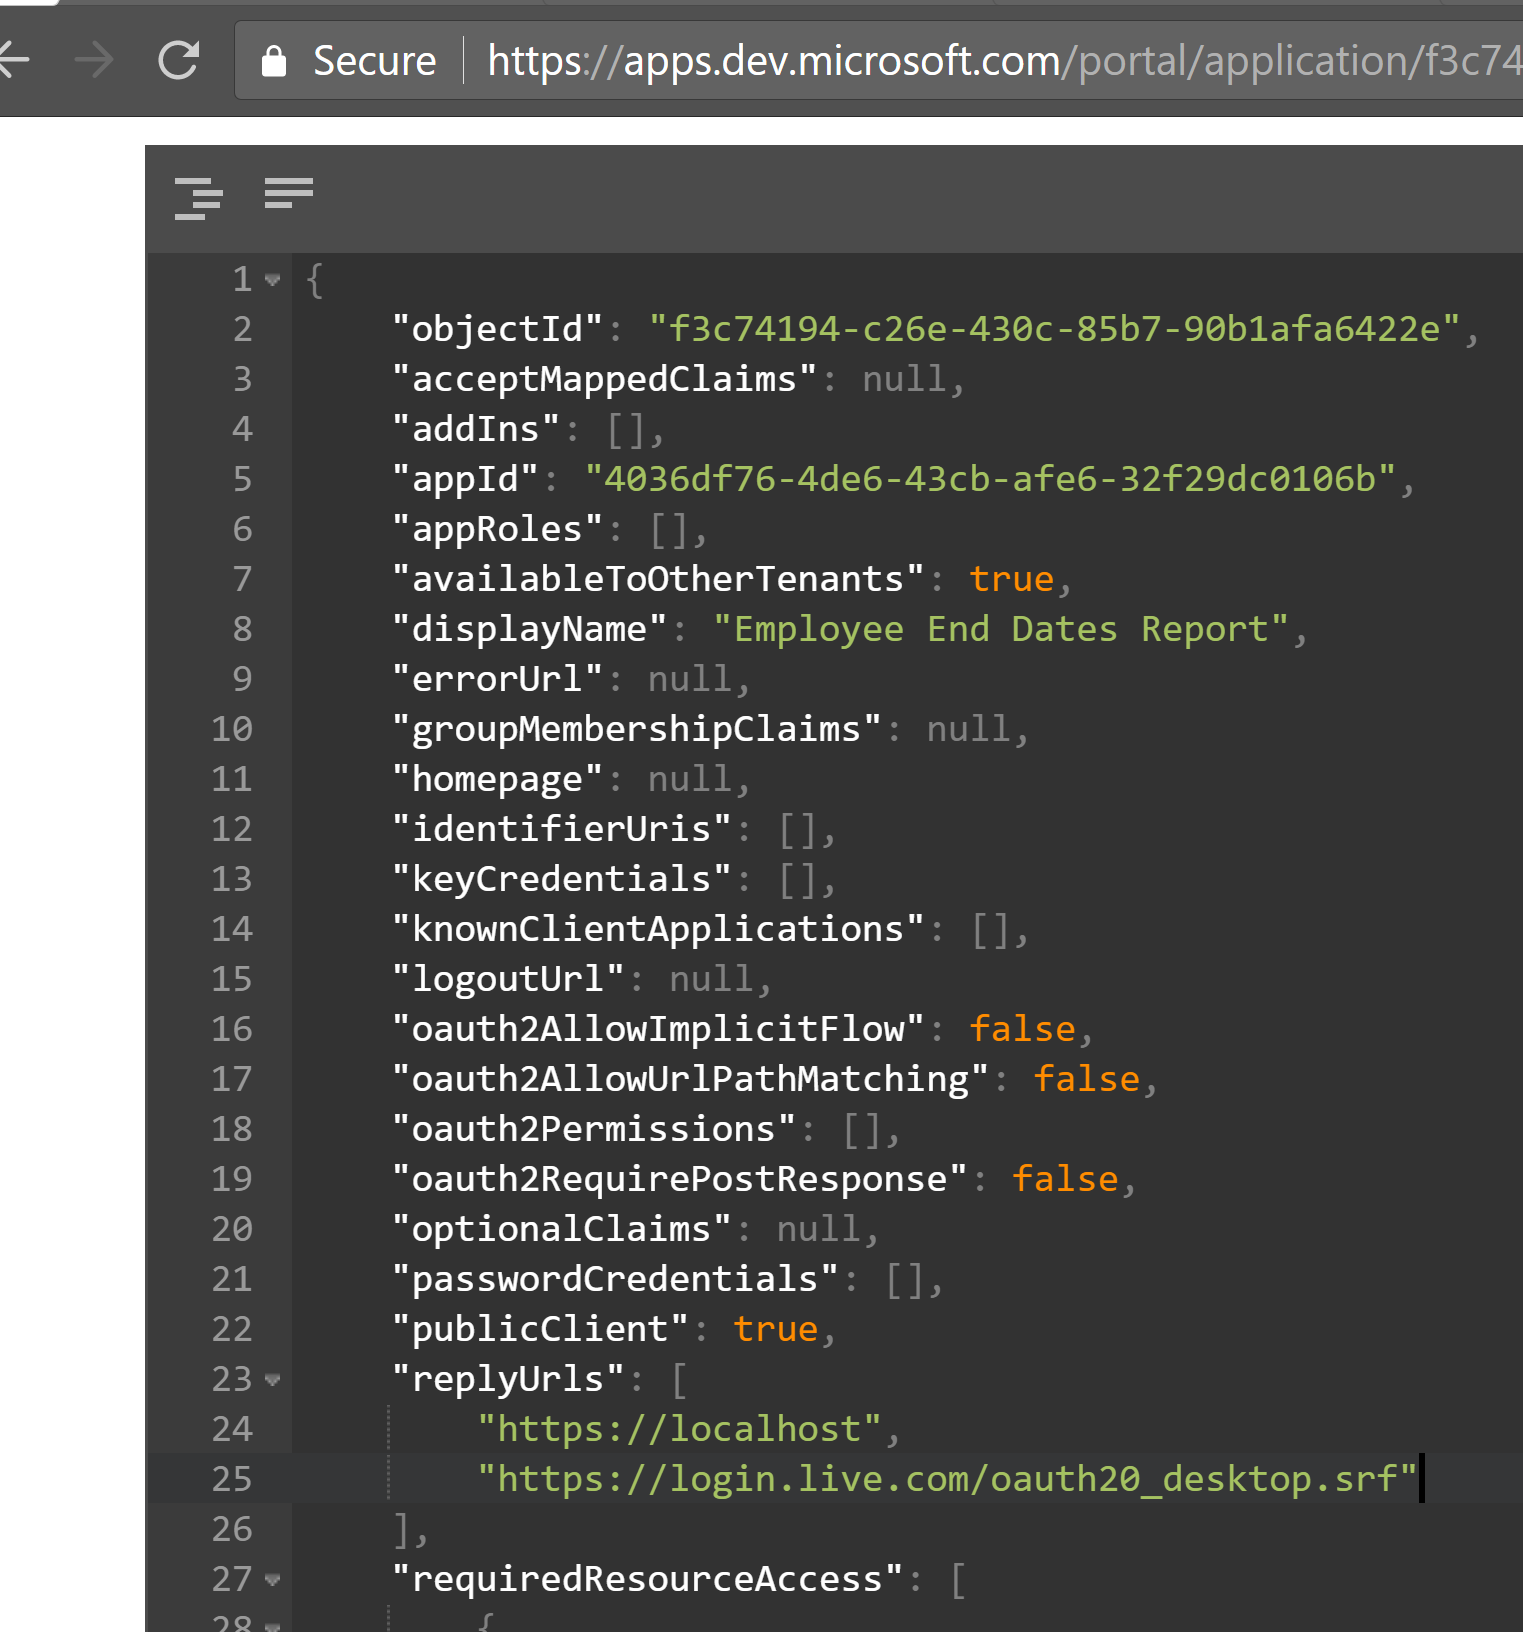
We need to authenticate to Power BI the first time using a UI to provide Authorization for our Application. In order to do that we need to add another Reply URL to our application. Head to the Apps Dev Portal, select your application and Edit the Application Manifest. Add an additional Reply URL for https://login.live.com/oauth20_desktop.srf as shown below.
The following PowerShell commands will then allow us to Authenticate utilizing the Power BI PowerShell module. If you don’t have the Power BI PowerShell Module installed un-comment Install-Module PowerBIPS -RequiredVersion 1.2.0.9 -Force to install the PowerShell Power BI PowerShell Module.
Update for your Client ID for the App you registered in the previous steps.
# Install-Module PowerBIPS -RequiredVersion 1.2.0.9 -Force
Import-Module PowerBIPS -RequiredVersion 1.2.0.9
# PowerBI App
$clientID = "4036df76-4de6-43cb-afe6-1234567890"
$authtoken = Get-PBIAuthToken -ClientId $clientID
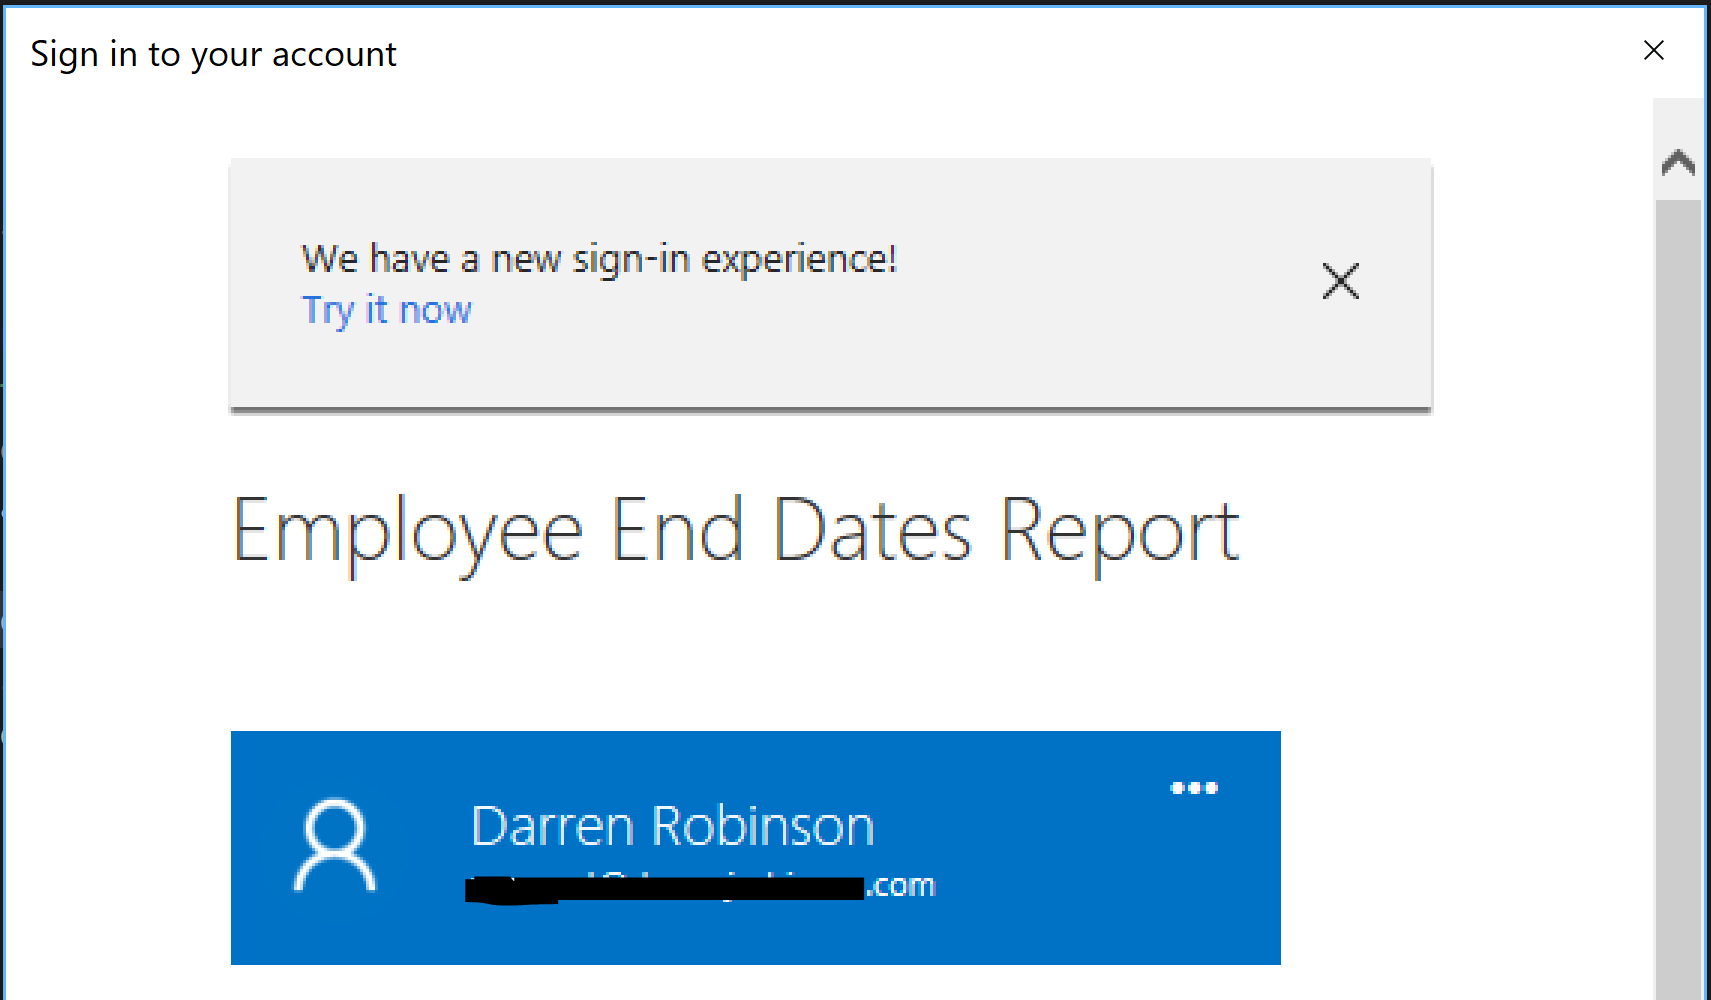
Sign in with an account for the Tenant where you created the Power BI App.
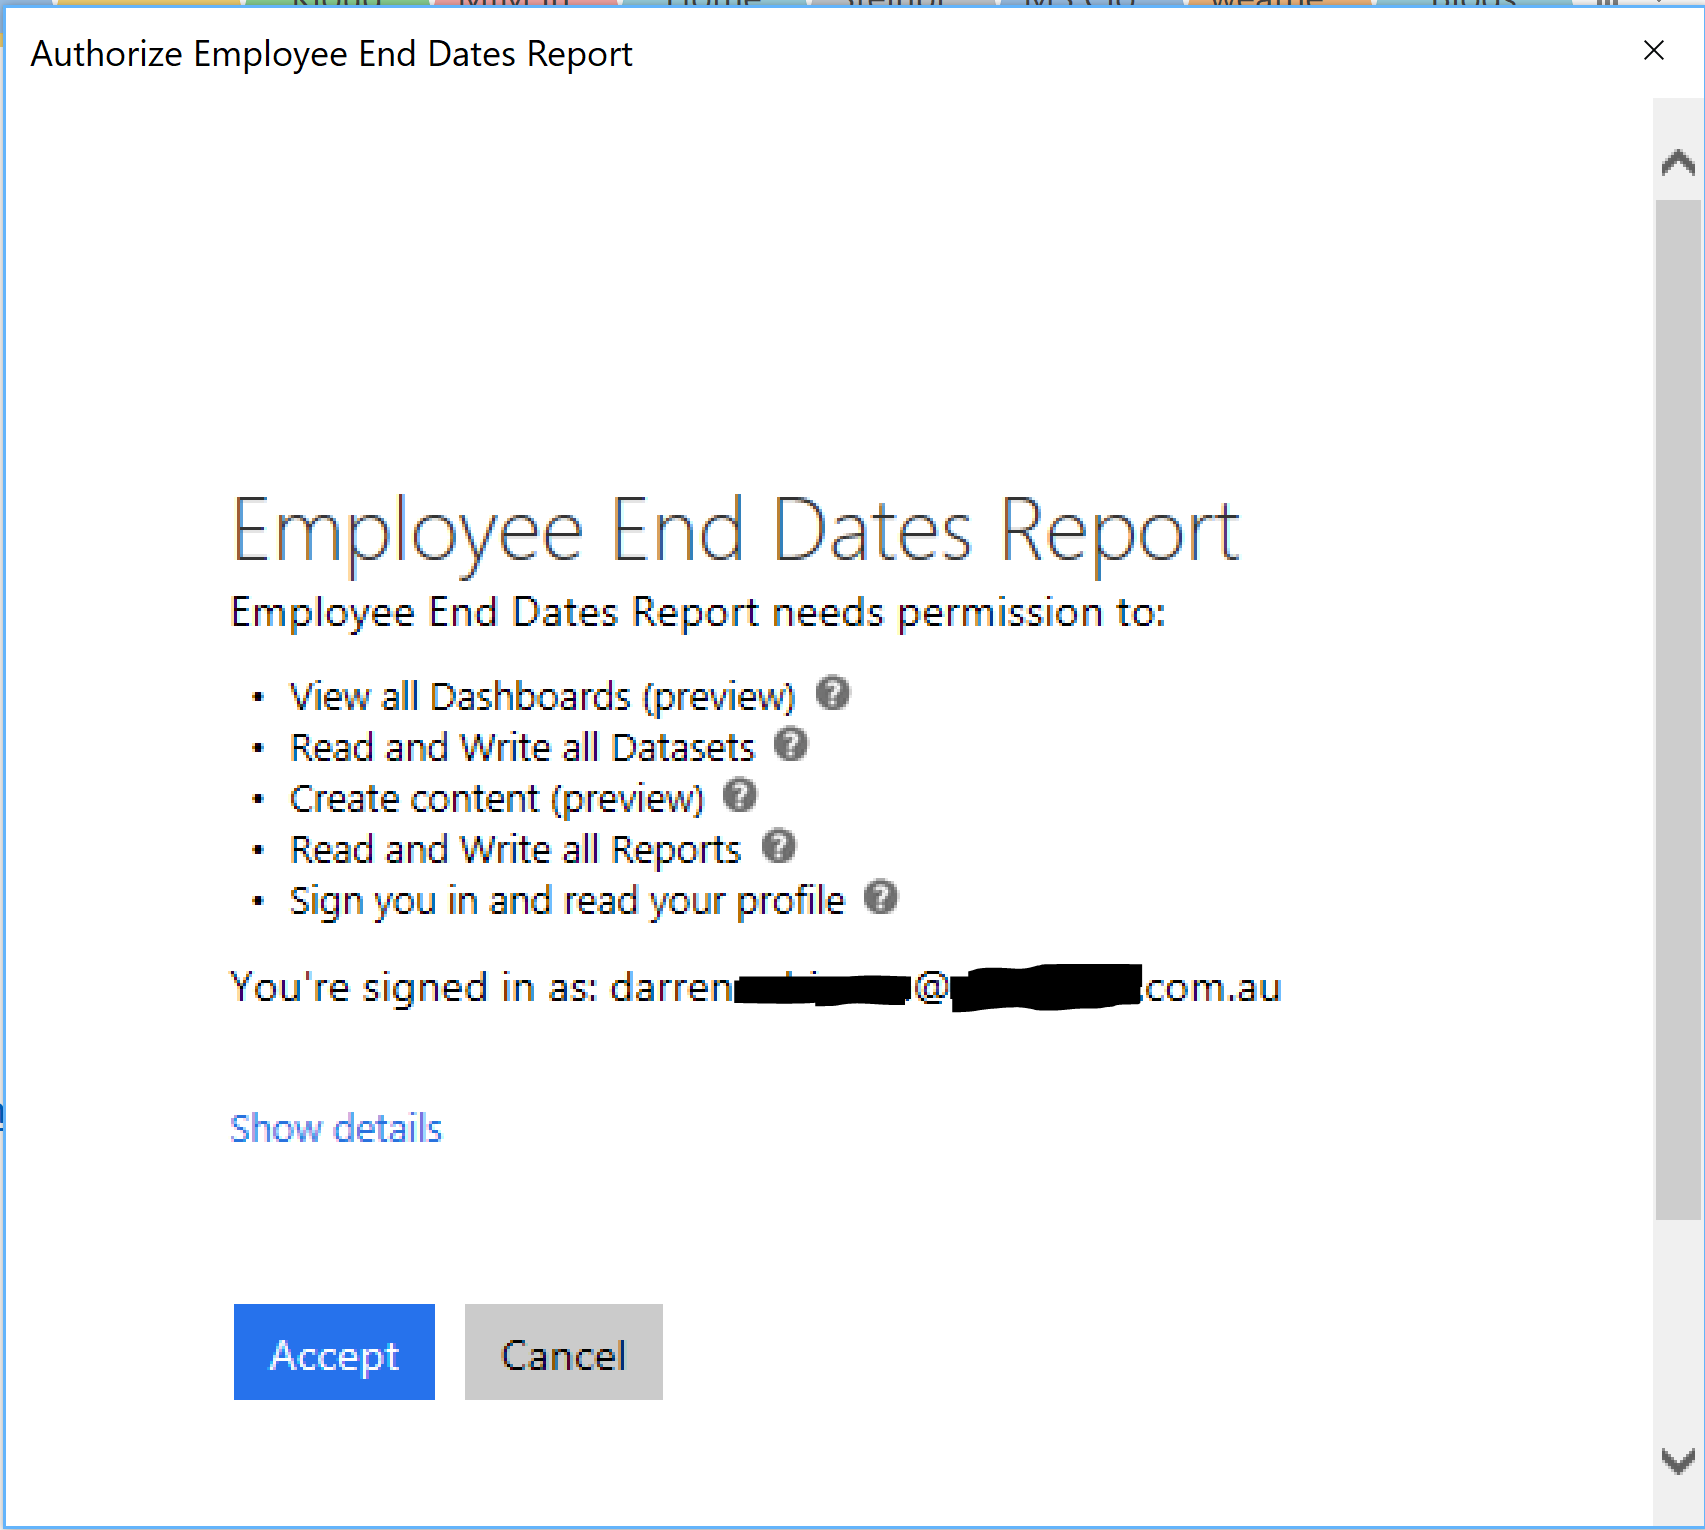
Accept the permissions you chose when registering the Power BI App.
Creating the Power BI Dataset
Now we will create the Power BI Table (Dataset) that we will use when we insert the records.
My table is named Employee and the DataSet EmployeeEndDateReport. I’m keeping the table slim to enough info for our purpose. Date added to the dataset, employees Accountname, Displayname, Active state, EndDate and EndDateReceived. The following script will create the Dataset.
Populating the Dataset
With our table created, lets populate the table with employees that have an EndDate. As this is the first time we run it, we set a watermark date to add people from. I’ve gone with the previous year. I then query the MV for Employees with an EndDate within the last 365 days, build a PowerShell Object with the columns from our table and insert them into Power BI. I also set a watermark of the last time we had an EndDate Received from the MA and output that to the watermark file. This is so next time we can quickly get only users that have an EndDate that was received since the last time we ran the process.
NOTE: for full automation you’ll need to change line 6 for your secure method of choice of providing credentials to scripts.
Create a Power BI Report
Now in Power BI select your Data Set and design your report. Here is a sample one that I’ve put together. I simply selected the columns from the dataset and updated the look and feel. I then added in a column (individually for AccountName, DisplayName and Active) and chose it as Filter so that I have various ways of filtering whoever I’m looking for.

Once you have run the process for a while and you have changed values for the attribute you are keeping history for, you will see when you select a user with changed values, you will see the history.

Summary
To complete the solution you’ll want to automate the script that queries the MV for changes (probably after each run from the MA that provides the attribute you are recording history for), and you’ll want to embed the report in the MIM Portal. In this post here I detail how to do that step by step.
