Overview
When having to deploy resources within Azure you can easily log in to the Azure Portal and start deploying resources, however with the number of components needed to build a working solution this can quickly become time consuming. You may also need to deploy the same solution in a Development, Test, and Production environment and then make some changes to the environment along the way.
There is a lot of talk about DevOps and Infrastructure as Code (IaC) in the IT industry at the moment. A significant part of DevOps is automation. Let’s see how we can automate our deployments using automation and Infrastructure as Code.
There are a range of different tools available for these tasks. For this example we will use the following.
ARM Template
Our starting point is to create an ARM Template (JSON format) for our environment. The resources being deployed for this example are:
- VNET and subnet
- Internal Load Balancer
- Availability Set
- Storage Account (for diagnostics)
-
2 x Virtual Machines (using Managed Disks) assigned to our LB.
Information for Managed Disks can be found here – https://docs.microsoft.com/en-au/azure/storage/storage-managed-disks-overview
The ARM Template and parameters file are available here
The two files used are:
- ARM Template – VSTSDemoDeploy.json
- Parameters file – VSTSDemoParameters.json
More information for authoring ARM Templates can be found here – https://docs.microsoft.com/en-us/azure/azure-resource-manager/resource-manager-template-best-practices
Create our Local Git Repo
Launch a command prompt and change to the root of C drive which is where we want to clone our VSTSDemo folder to.
Run the following command
[code language=”text”]
git clone https://github.com/gneedham/VSTSDemo
[/code]

You will now see a VSTSDemo folder in the root of C drive. Open the folder and delete the .git folder (it may be hidden)
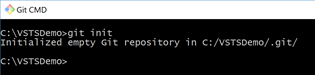
Our next step is to initiate our local folder as a Git project.
Enter the following Git command from the VSTSDemo folder
[code language=”text”]
git init
[/code]
Building the Pipeline with VSTS
If you do not already have an account for VSTS then you can sign up for a free account here – https://www.visualstudio.com/team-services/
Now we need to create a project in VSTS, if not signed in already sign in.
Click New Team Project.
Give your project a name, fill in the description, set the version control to Git and the Work item process to Agile, click Create.
Once your Project has finished creating expand “or push an existing repository from command line”
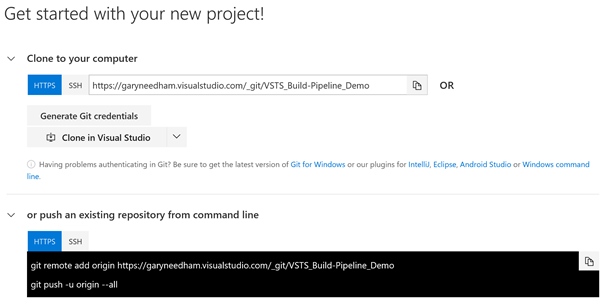
This gives us the commands that we need to run. Before running them we need to check the status of our local repository. From the command line run this command from the VSTSDemo directory
[code language=”text”]
git status
[/code]
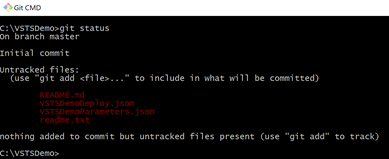
We can see that our branch has untracked files, so we need to add them to our repo, to do this run
[code language=”text”]
git add .
[/code]
Now we need to send our commit, to do this run
[code language=”text”]
git commit -m "Initial check-in."
[/code]
We can now run the commands supplied by VSTS at our command prompt. First run
[code language=”text”]
git remote add origin https://xxxxxx.visualstudio.com/_git/yyyyy
[/code]
Where xxxxx is your VSTS account name and yyyyy is your VSTS Project name
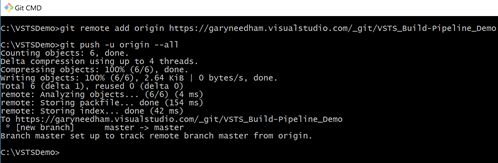
Now run
[code language=”text”]
git push -u origin –all
[/code]
Sign in to VSTS when/if prompted
You will see something like the below when completed if successful.
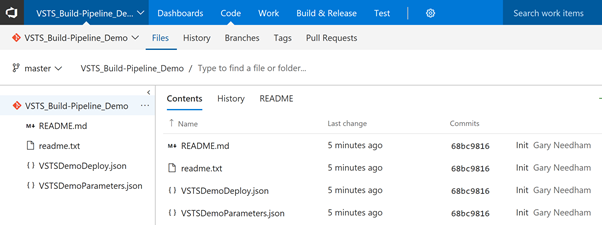
Refresh your VSTS page and you will now see that Code has been committed.
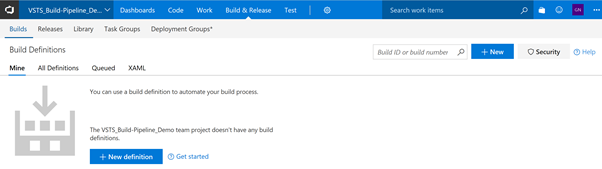
Now we need to create the build definition, click on Build & Release. Now click New definition, then empty process.
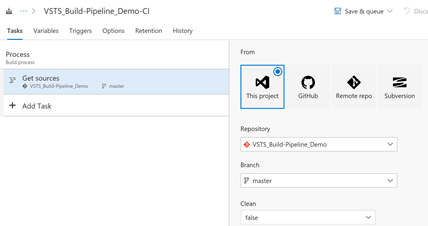
Check that the sources are correct.
When deploying we will also need to deploy the Resource Group that will contain the resources. To do this click on Add Task. Select Azure Resource Group Deployment and click Add.
Click the tick box next to the Azure Resource Group Deployment and fill in the required settings.
- Azure Subscription – will need to click the Authorize button
- Resource Group
- Location
- Template – VSTSDemoDeploy.json
- Template Parameters – VSTSDemoParameters.json
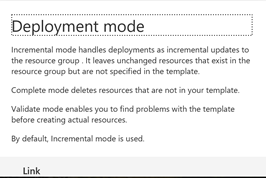
- Deployment Mode – Incremental
An important note around the Deployment Mode see the description below. Choose carefully!
Now click on the Triggers tab and enable Continuous Integration
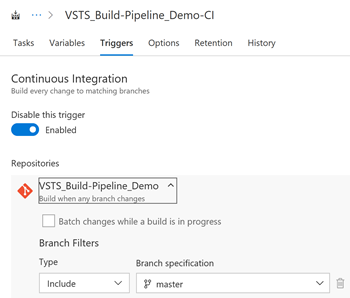
Click Save.
We now have a build pipeline. Let’s use it to deploy our environment. From the Build & Release page click on the Build Definition
Click Queue new build
Click OK on the Queue build page.
You will see the below when the build begins.
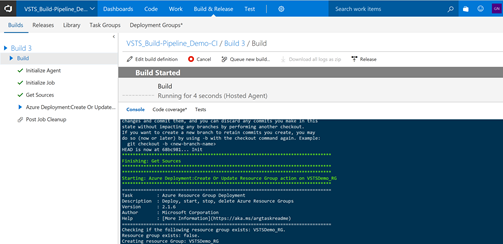
Wait for the build to finish.
Let’s log in to the Azure Subscription and take a look at our new resources.
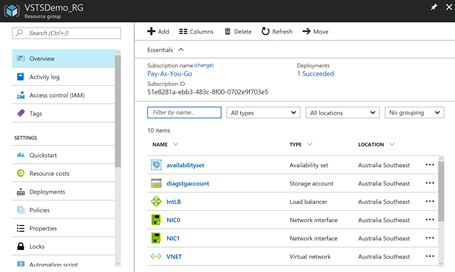
Looks like everything is there.
Make a change – Scale Up
Now let’s make a change by increasing the size of the VM’s.
From within VSTS click on the Code tab and edit our VSTSDemoParameters file. Let’s change the Virtual Machine Size to something bigger – Standard A2 for instance. Click Commit when done.
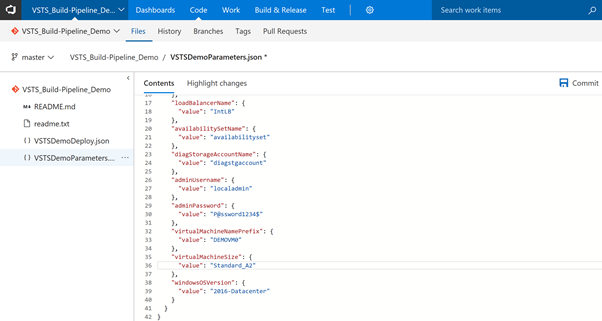
Add a meaningful comment and click Commit.
We can see that a new build has started. That is our Continuous Integration and deployment working, it will build any changes we make automatically. Your VM’s will restart once the build starts as they are resizing.
Wait for the build to finish.
Let’s check our VM’s from the Azure Portal to see the new size.
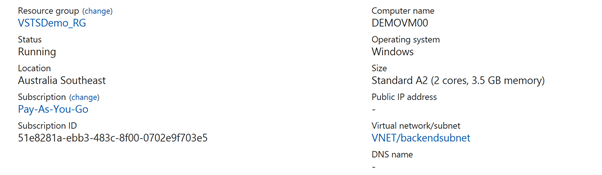
Our instance sizes are now Standard A2.
Make another change – Scale Out
Instead of using larger VM sizes this time we need to increase the number of VM’s from 2 to 4.
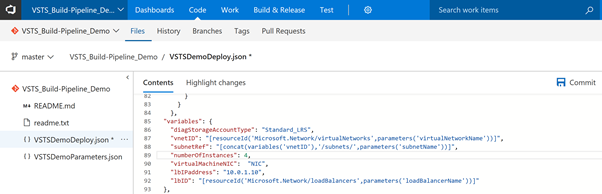
From within VSTS click on the Code tab and edit our VSTSDemoDeploy file. Let’s change the numberOfInstances variable from 2 to 4. Click Commit when finished, which will kick off a new build.
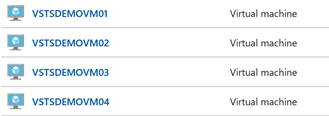
Once the build finishes check your Azure Subscription and you should now have 4 VM’s instead of 2.
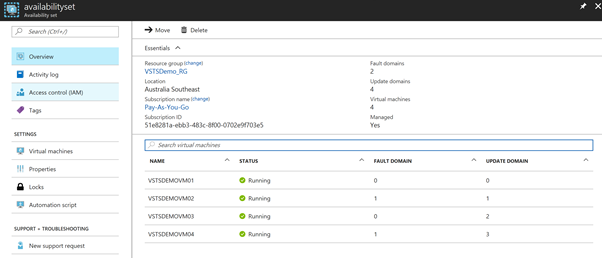
If we check our Availability Set all VM’s are members.
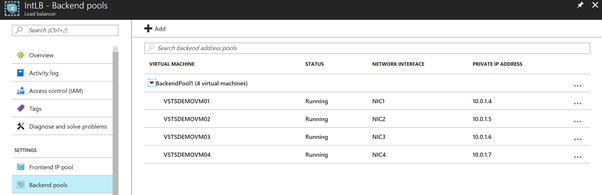
Lastly, we can check our Load Balancer Backend Pools, all VM’s are members.
Conclusion
VSTS and ARM Templates can make deployments of your environments a lot quicker and easier, it also makes managing additional deployments along the life cycle of your application an easier task. This method can be used to deploy any resources that are deployable using ARM Templates, whether IaaS or PaaS.