Update Oct 2019: See this post for simplifying oAuth Authentication to Microsoft Graph using PowerShell and the MSAL (Microsoft Authentication Libraries)
Background
Microsoft Graph is the evolvement of API’s into Microsoft Cloud Services. For me not being a developer, a key difference is interacting with with Graph API using OAuth 2.0 via PowerShell. Through a number of my previous posts I’ve interacted with the Graph API using client libraries such as the Microsoft.IdentityModel.Clients.ActiveDirectory library. This post details using PowerShell to talk directly to Graph API and managing Authentication and Authorization using OAuth 2.0 and Azure WebApp.
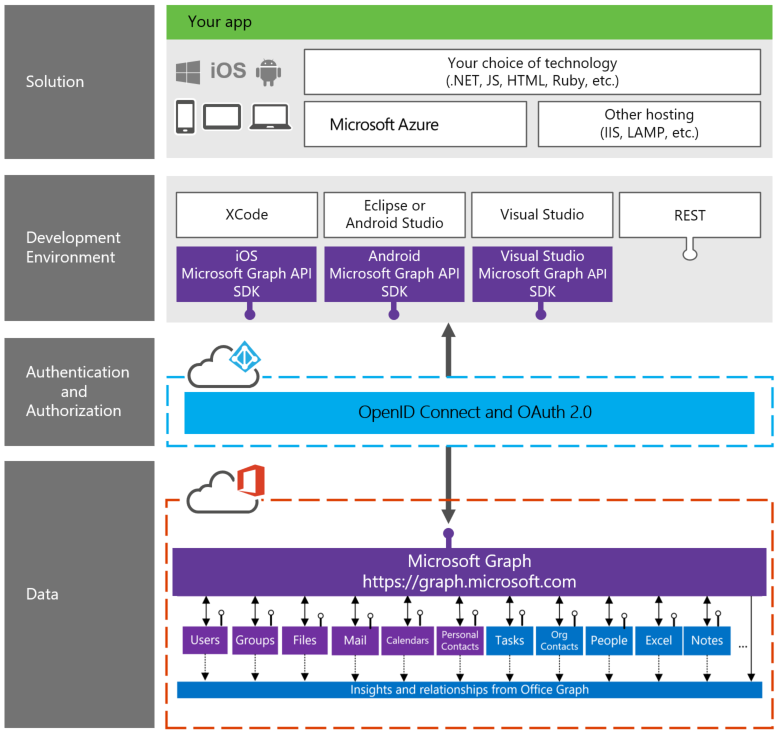
Leveraging the Graph API opens up access to the continually evolving Azure services as shown in the graphic below. Source graph.microsoft.io

Getting started with the Graph API, PowerShell and OAuth 2.0
The key difference between using a client library and going direct is you need to register and configure an Azure WebApp. It is super simple to do. Jump on over to the Office 365 App Registration Tool here. Sign in with an account associated with the Azure Tenant you are going to interact with. Depending on what you’re doing you’ll need to select the appropriate access.
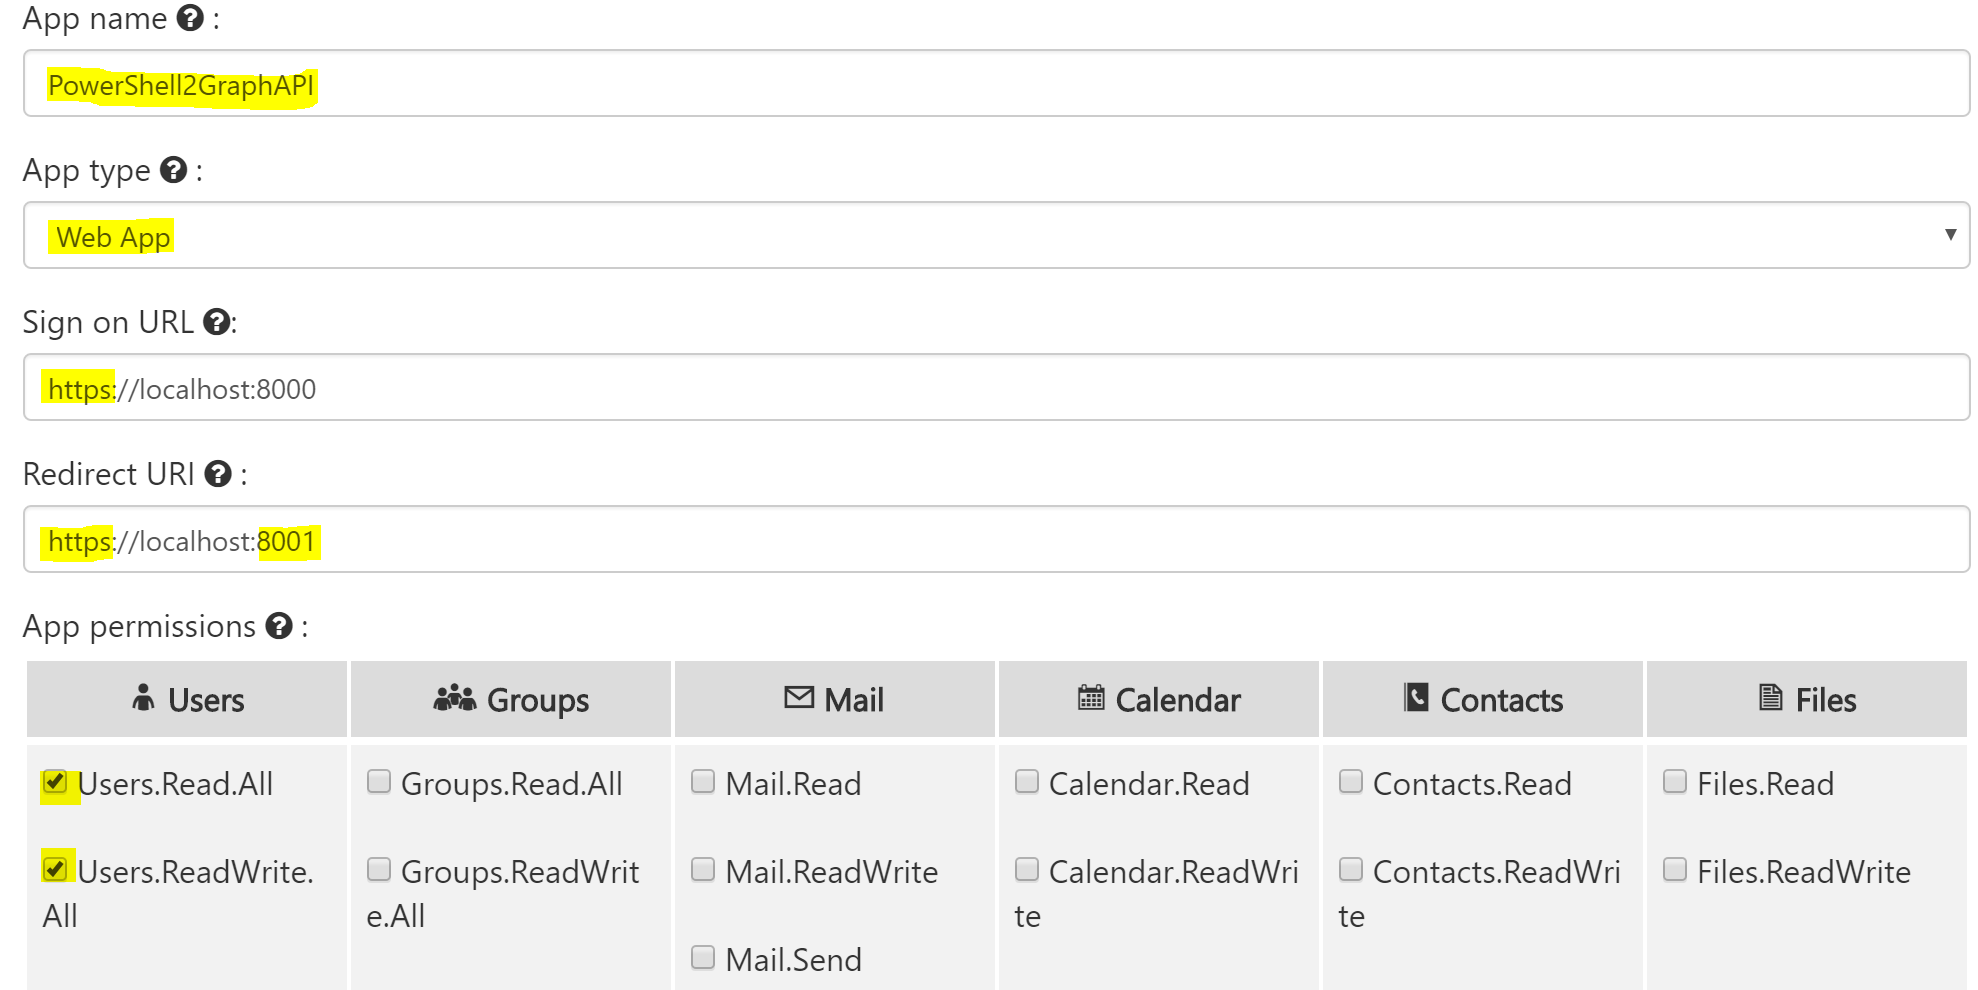
Here’s the settings I selected for access to user profiles. Give the WebApp a name. This is the name that you’ll see in the OAuth Authorization step later on. I’ve highlighted the other key settings. Don’t worry about the SignIn and RedirectURL’s other than configuring HTTPS as we’ll be using PowerShell to access the WebApp.

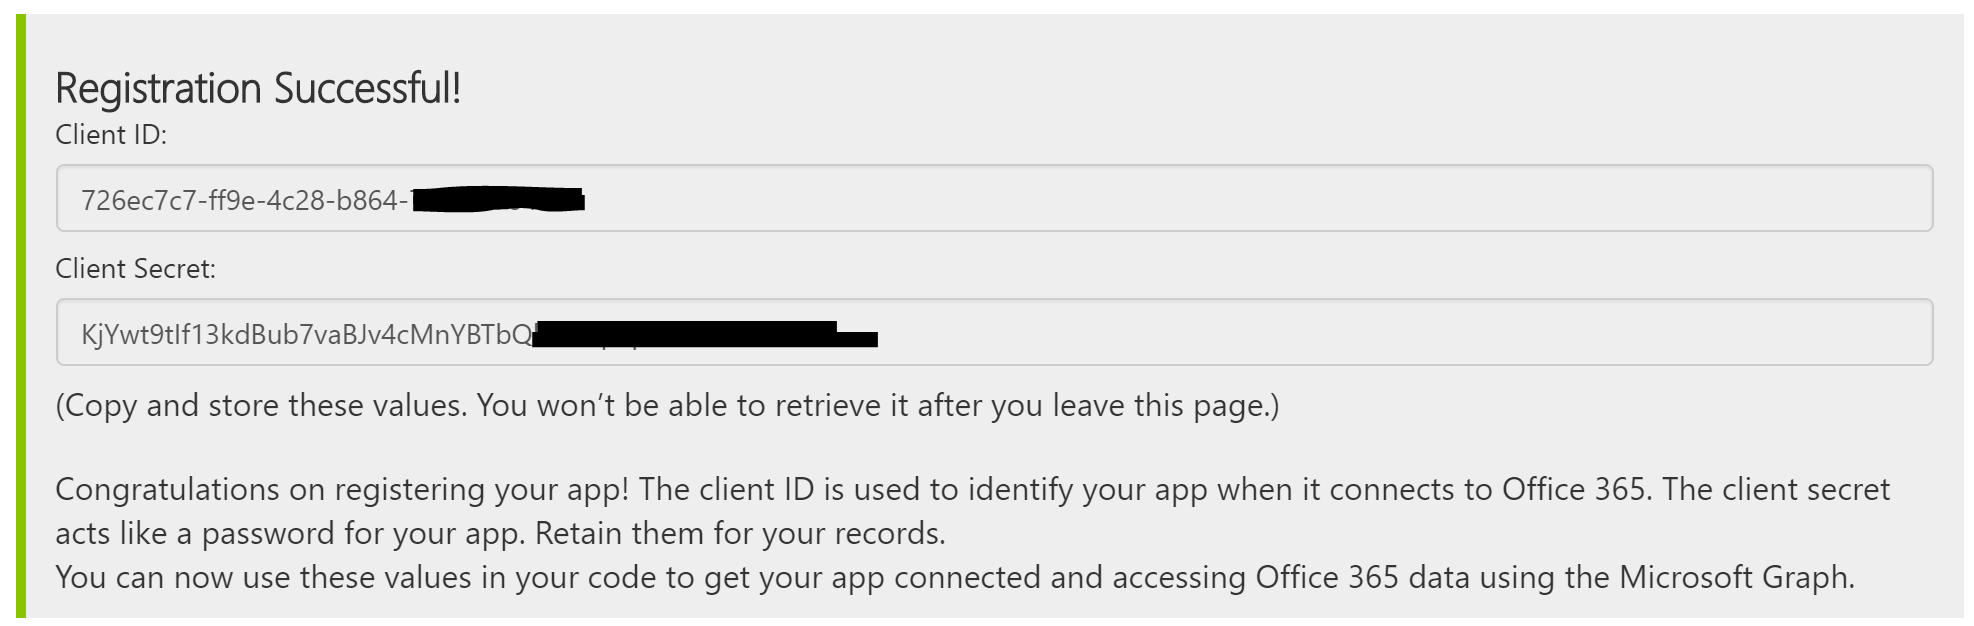
Once you’ve registered the WebApp successfully you’ll get a Client ID and Client Secret. RECORD/WRITE THESE DOWN NOW as you won’t get access to your Client Secret again.
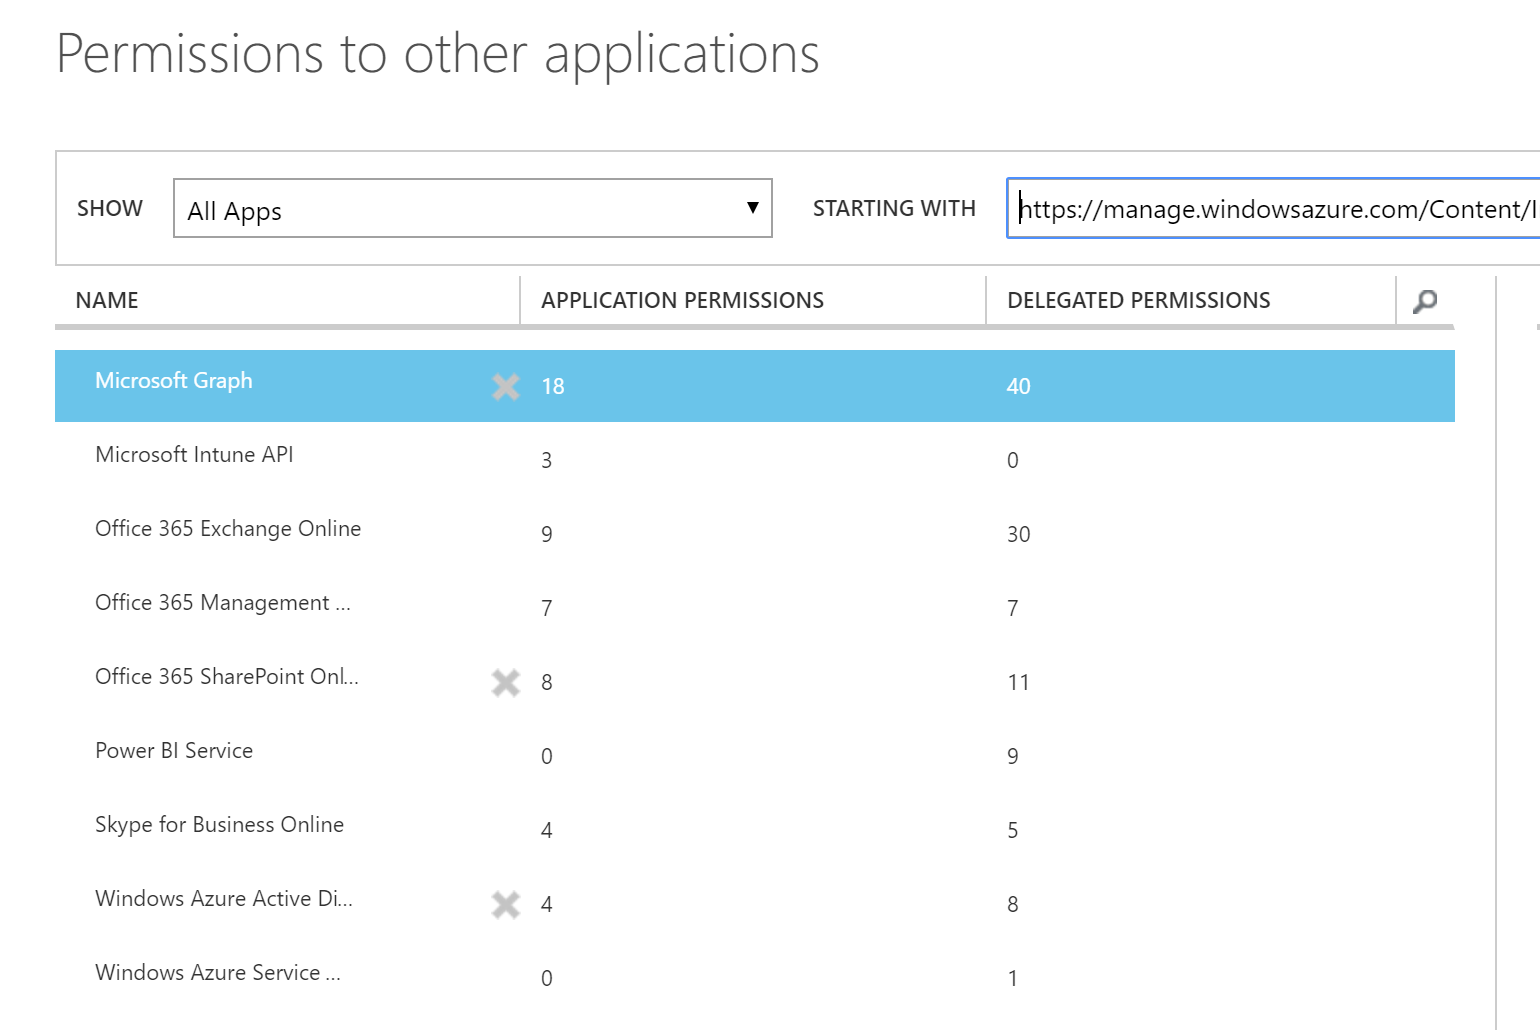
If you want to change what your WebApp has access to after creating it you can access it via the Classic Azure Portal. Select your Active Directory => Select Applications => Select the WebApp you created earlier => Select Configure => (scroll to the bottom) Select Add Application. Depending on what you have in your subscription you can add access to your services as shown below.
Authenticating & Authorizing
In order to access the Graph API we need to get our Authorization Code. We only need to do this the first time.
This little script (modify with your Client ID and your Client Secret obtained earlier when we registered our WebApp) will prompt you to authenticate.
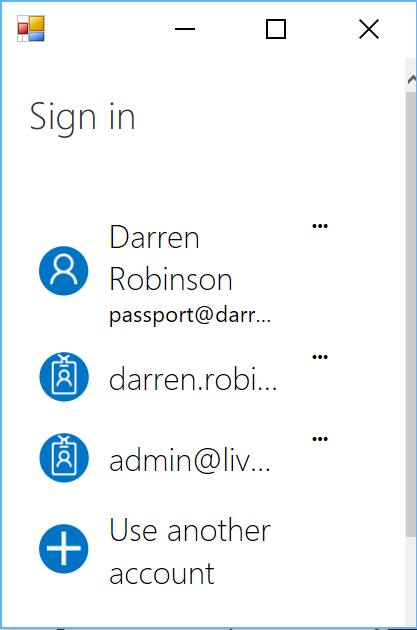
Using the account associated with the Web App you registered in the previous step authenticate.
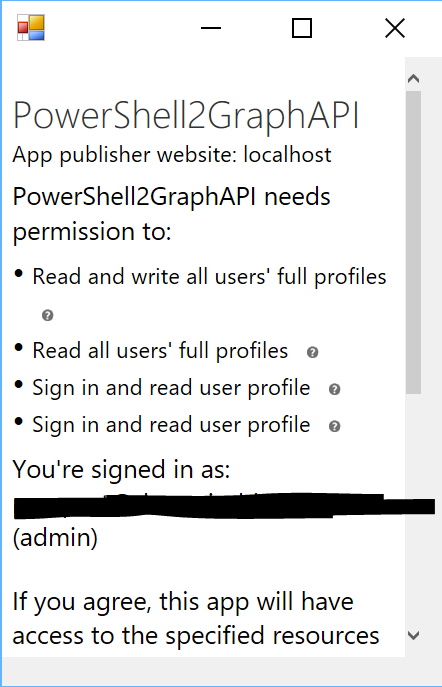
You’ll be requested to authorize your application.
You will then have your AuthCode.

One thing to note above is admin_consent. This is from the URL passed to get the Authorization Code. &prompt=admin_consent is giving Admin Consent to all entities configured on the WebApp over just access for and to a single user.
Accessing the Graph API with OAuth 2.0 Access Token
Using your ClientID, ClientSecret and AuthCode you can now get your access token. I tripped up here and was getting Invoke-RestMethod : {“error”:”invalid_client”,”error_description”:”AADSTS70002: Error validating credentials.
AADSTS50012: Invalid client secret is provided. Tracing back my steps and looking at my “Client Secret” I noticed the special characters in it that I hadn’t URL Encoded. After doing that I was successfully able to get my access token.
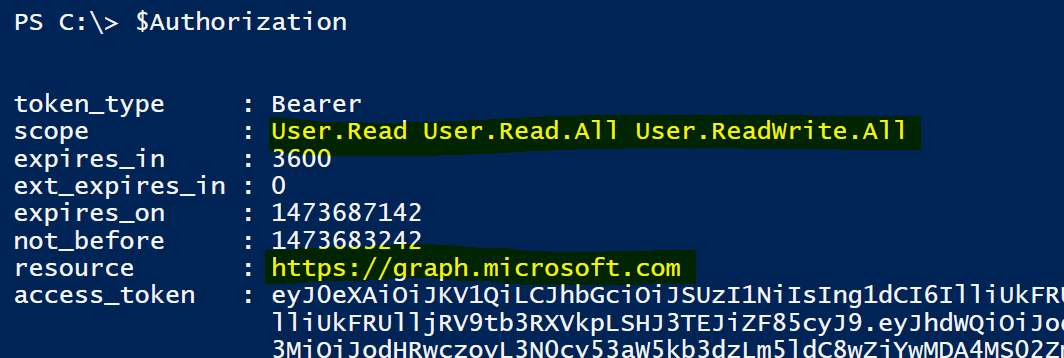
Looking at our AuthZ we can see that the Scope is what was selected when registering the WebApp.
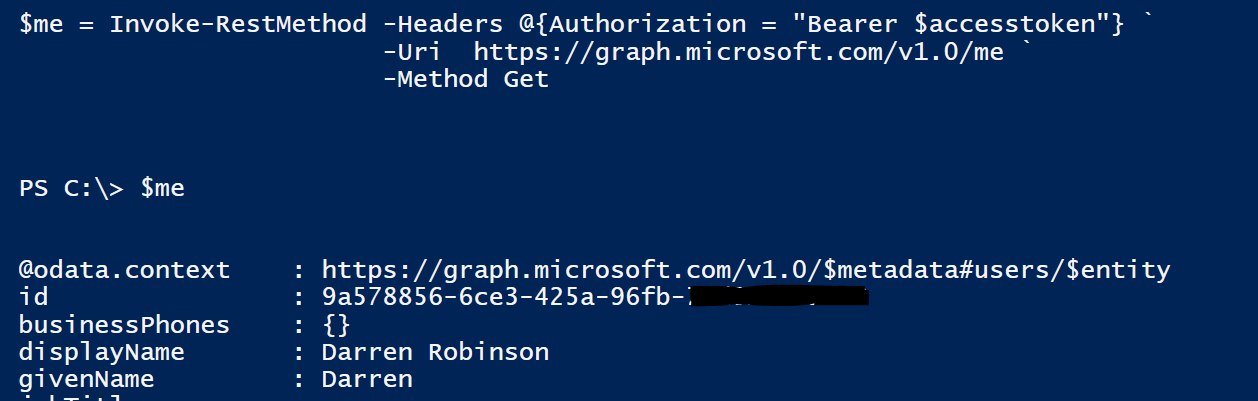
Now using the Access Token I can query the Graph API. Here is getting my AAD Object.
Summary
In my case I now can access all users via the API. Here is what’s available. Using the Access Token and modifying the Invoke-RestMethod URI and Method (including -Body if you are doing a Post/Patch action) you are ready to rock and roll and all via PowerShell.
Your Access Token is valid for an hour. Before then you will need to refresh it. Just run the $Authorization = Invoke-RestMethod ….. line again.
Follow Darren on Twitter @darrenjrobinson
When I create a Web App per the instructions, I don’t receive a ‘secret.’ What field should I consider to be the ‘secret?’ I have an Application ID and an Object ID.
Hey Ted. I see the images weren’t displaying so I’ve fixed that. Hopefully it makes sense now seeing it. Also checkout this update post I did that makes it easier to get started. https://blog.darrenjrobinson.com/a-quick-start-guide-to-leveraging-the-azure-graph-api-with-powershell-and-oauth-2-0/
You really don’t know how you saved my life! I had the same issue with the client secret and I didn’t think that could be related with the encoding! Thanks!
Thank you! I was having tons of issues, mostly mine, following along to instructions to be able to grab information from graph. This blog post was very straight forward and easy to follow along.