It’s very easy to spin up new servers in Azure but what if one of those machines starts playing up? Gone are the days of F8’s, booting into safe mode or console access. Over the last couple of weeks I lost the ability to RDP into several virtual machines. Some of these machines were still pingable but no RDP, others didn’t respond at all. From within the portal the VM would still show a status of “Running”.
On the first machine I had an issue with I followed the “Troubleshoot” option in the portal and selected “I can’t connect to my Windows VM”.
- Resource health reported all good
- Boot diagnostics showed a black screen on some or just a spinning wheel on others (the latter might mean it’s stuck in a reboot loop).

Not really helpful.
To get VMs working again I had to use 1 of the 2 methods listed below. Having said that…..I did not get a 100% score on all broken VMs.
Option 1)
Use Redeploy.
This option is available through the portal and as part of the afore mentioned portal “Troubleshoot” option.
This will migrate the virtual machine to a new Azure host. The virtual machine will be restarted and any data on the temporary drive will be lost. While the redeployment is in progress, the virtual machine will be unavailable.
Once the portal shows the VM status “Running” test to see if you now can RDP into the VM.
Option 2)
Sit down, take a deep breath and delete the VM from the portal. Don’t worry, you’re not deleting the whole machine but merely the “config” file. The VM’s storage and NIC will still be there. Wait till the portal reports that the VM (let’s call it ‘FaultyServer’) is deleted and then perform the following steps:
- In the portal open the settings for a working Azure VM and attach the OS disk from ‘FaultyServer’ to this machine (Disks > Attach existing)
This will add the OS disk from ‘FaultyServer’ as drive E: to the working VM. - Now open the registry editor, highlight “HKEY_LOCAL_MACHINE” and select “Load hive” from the menu.
- Browse to E:\windows\system32\config and open SYSTEM.
- Give the new hive a name ie “BadServer”.
- Next make the following changes to the registry:
HKEY_LOCAL_MACHINE\BadServer\Select\Current Change 1 to 2 HKEY_LOCAL_MACHINE\BadServer\Select\Default Change 1 to 2 HKEY_LOCAL_MACHINE\BadServer\Select\Failed Change 0 to 1 HKEY_LOCAL_MACHINE\BadServer\Select\LastKnownGood Change 2 to 3 - Next make the following change to the registry:
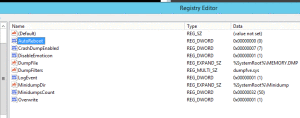
HKEY_LOCAL_MACHINE\BadServer\ControlSet\Control\CrashControl Change to 0 - Highlight “HKEY_LOCAL_MACHINE” and select “Unload hive” from the menu.
- Open the settings for the working VM and detach the ‘FaultyServer’ disk from this machine (Disks > Detach)
- Once the portal reports that the disk has been detached, give it a couple of minutes before continuing with the next section.
After the changes have been made to the ‘FaultyServer’s OS disk, the VM can be recreated using the following PowerShell command:
$vm = New-AzureRmVMConfig -VMName VMNAME -VMSize INSTANCE_SIZE
$nic = Get-AzureRmNetworkInterface -Name (NAME_OF_NIC) -ResourceGroupName RESOURCE_GROUP
$nicId = $nic.Id
$vm = Add-AzureRmVMNetworkInterface -VM $vm -Id $nicId
$vm = Set-AzureRmVMOSDisk -VM $vm -VhdUri "URI_OF_DISK" -name "DISKNAME" -CreateOption attach -Windows
New-AzureRmVM -ResourceGroupName RESOURCE_GROUP -Location LOCATION -VM $vm
Wait for the rebuild to finish and test connectivity again.


Hello,
only to correct an error in step 6: the correct registry key is
HKEY_LOCAL_MACHINE\BadServer\ControlSet001\Control\CrashControl\AutoReboot
Marco
Also, on step 7, the correct procedure is:
7.Highlight “BadServer” under “HKEY_LOCAL_MACHINE” and select “Unload hive” from the menu.
Awesome post, it saved me the work of completely reinstalling a server!
Thank you for detailing recovery option 2, awesome!