In most of our posts on the topic of IoT to date we’ve focussed on how to send data emitted from sensors and devices to centralised platforms where we can further process and analyse this data. In this post we’re going to have a look at how we can reverse this model and control our ‘things’ remotely by utilising cloud services. I’m going to demonstrate how to remotely control a light emitting diode (LED) strip with a Windows Phone using Microsoft Azure Mobile Services.
To control the RGB LED strip I’m going to use an Arduino Uno, a breadboard and some MOSFETs (a type of transistor). The LED strip will require more power than the Arduino can supply, so I’m using a 9V battery as a power supply which needs to be separated from the Arduino power circuit, hence why we’re using MOSFET transistors to switch the LEDs on and off.
The Arduino Uno will control the colour of the light by controlling three MOSFETs – one each for the red, blue and green LEDs. The limited programmability of the Arduino Uno means we can’t establish an Azure Service Bus relay connection, or use Azure Service Bus queues. Luckily Azure Mobile Services allow us to retrieve data via plain HTTP.
A Windows Phone App will control the colour of the lights by sending data to the mobile service. Subsequently the Arduino Uno can retrieve this data from the service to control the colour by using a technique called ‘pulse width modulation‘ on the red, green and blue LEDs. Pulse width modulation allows us to adjust the brightness of the LEDs by quickly turning on and off a particular LED colour, thus artificially creating a unique colour spectrum.
For the purpose of this example we won’t incorporate any authentication in our application, though you can easily enforce authentication for your Mobile Service with a Microsoft Account by following these two guides:
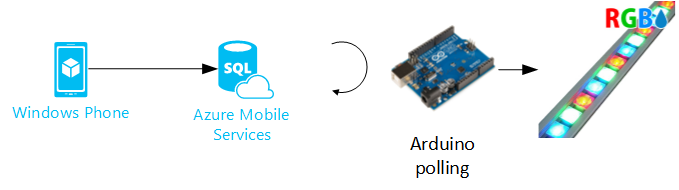
A diagram showing our overall implementation is shown below.
Mobile service
We will first start by creating an Azure Mobile Service in the Azure portal and for the purpose of this demonstration we can use the service’s free tier which provides data storage up to 20MB per subscription.
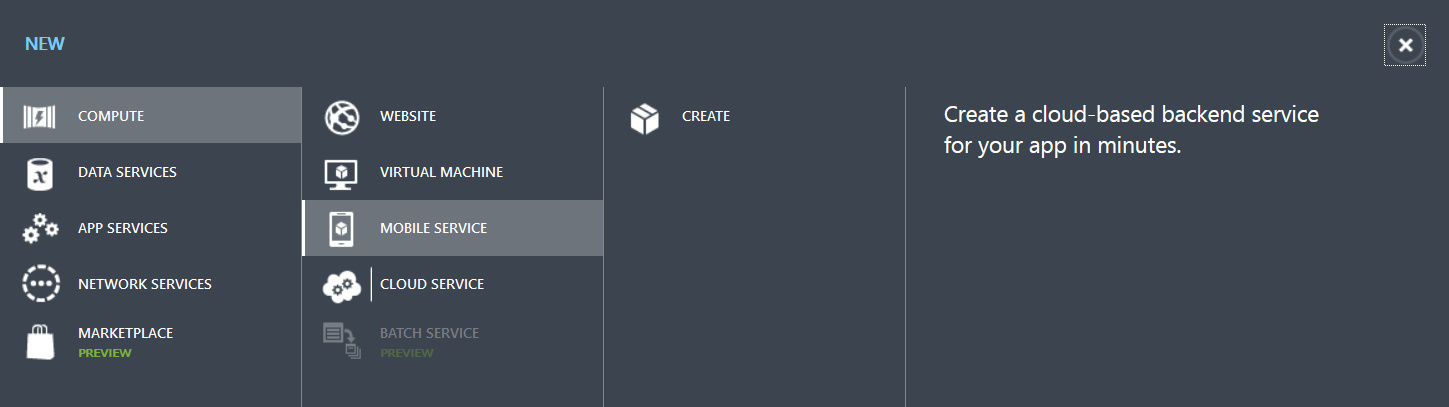
Navigate to the Azure portal and create a new service:
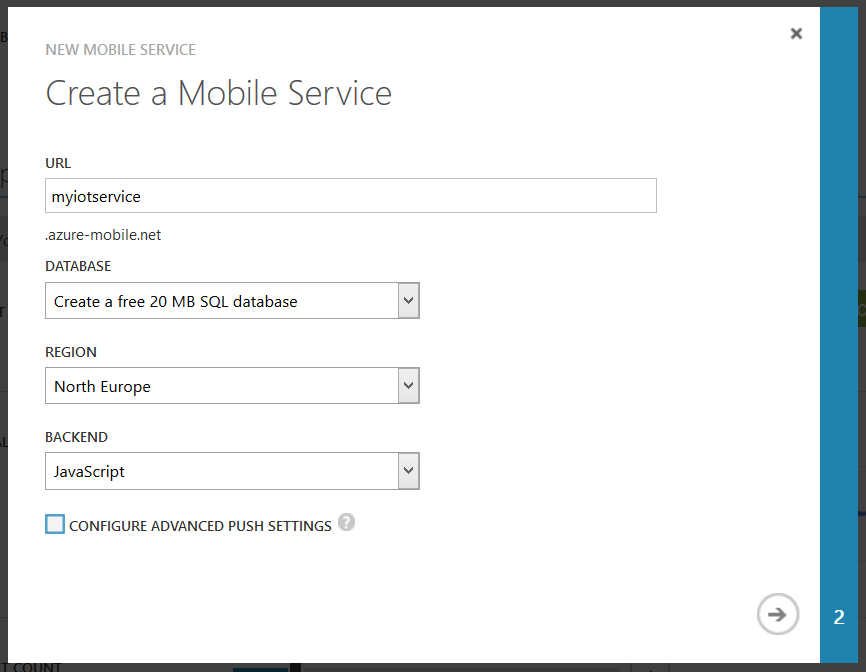
Next, choose a name for your Mobile Service, your database tier and geographic location. We’ll choose a Javascript backend for simplicity in this instance.

In this example we’ll create a table ‘sensordata’ with the following permissions:
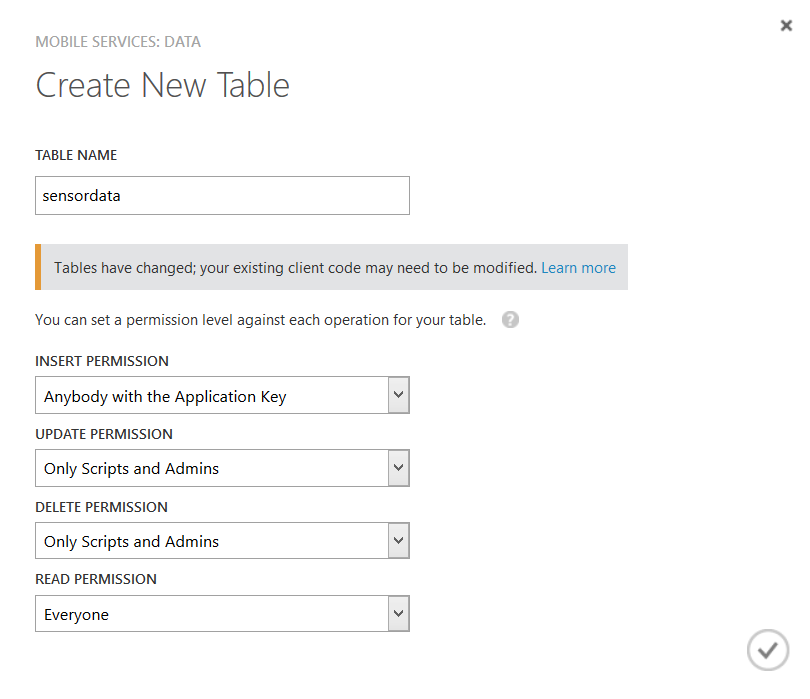
These permissions allows us to insert records from our Windows Phone app with the application key, and have the Arduino Uno retrieve data without any security. We could make the insertion of new data secure by demanding authentication from our Windows Phone device without too much effort, but for the purpose of this demo we stick to this very basic form of protection.
In the next section we’re going to create a Windows Phone application to send commands to our mobile service.
Windows Phone Application
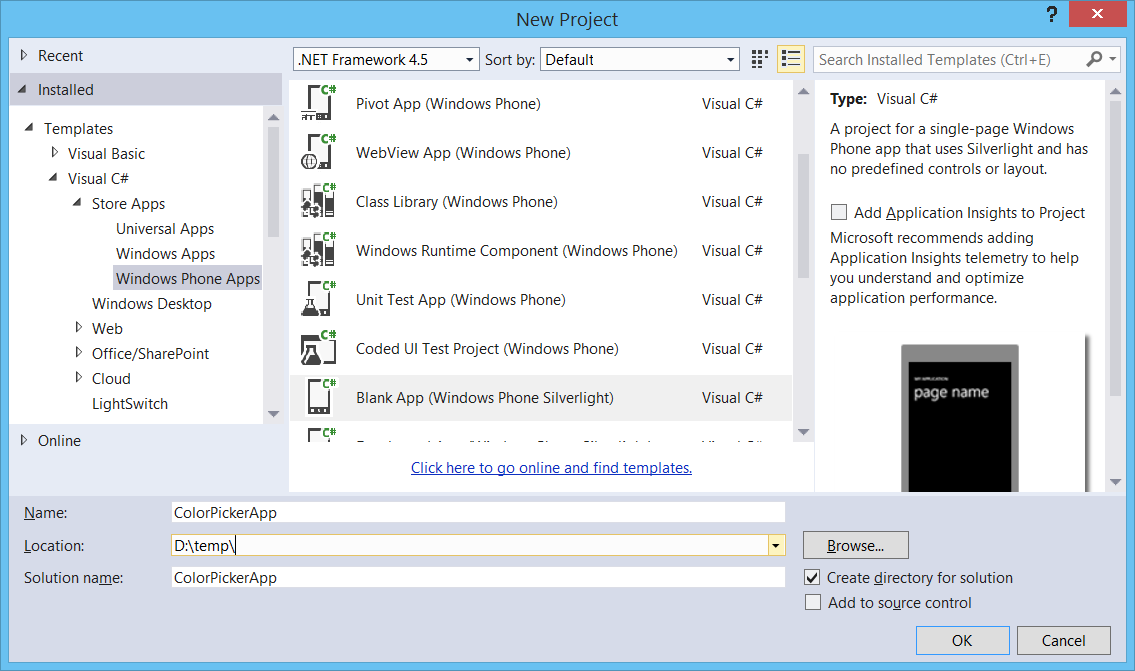
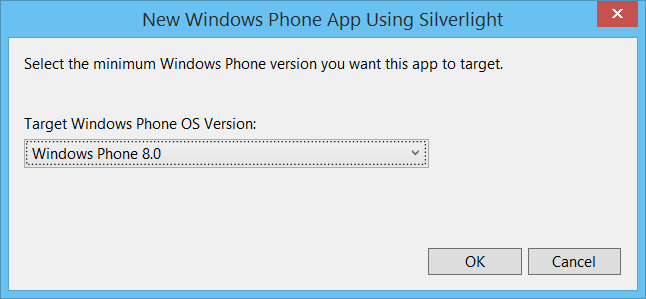
To control the colour in a user friendly way we will use a colour picker control from the Windows Phone Toolkit, which can be installed as a NuGet package. This toolkit is not compatible with Windows Phone 8.1 yet, so we’ll create a Windows Phone Silverlight project and target the Windows Phone 8.0 platform as shown below.
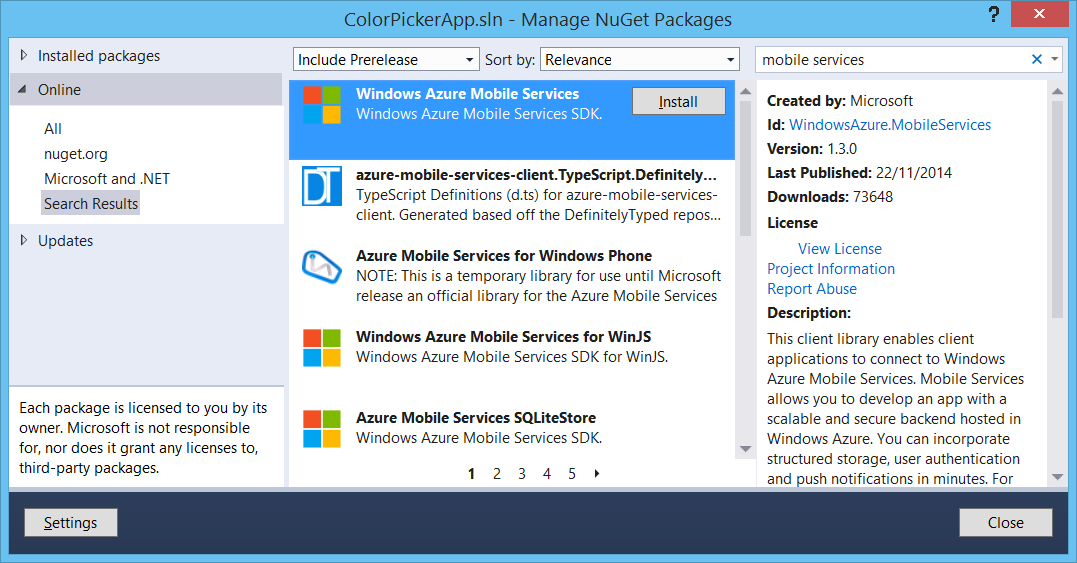
Next, we’ll install the ‘Windows Phone Toolkit’ NuGet package as well as the mobile services NuGet package:

For the purpose of this demo we won’t go through all the colour picker code in detail here. Excellent guidance on how to use the colour picker can be found at on the Microsoft Mobile Developer Wiki.
The code that sends the selected colour to our mobile service table is as follows.
The event data consists of colour data in the RGB model, separated by semicolons.
The complete working solution can be found in this Github repository. Make sure you point it to the right Azure Mobile Service and change the Application Key before you use it!
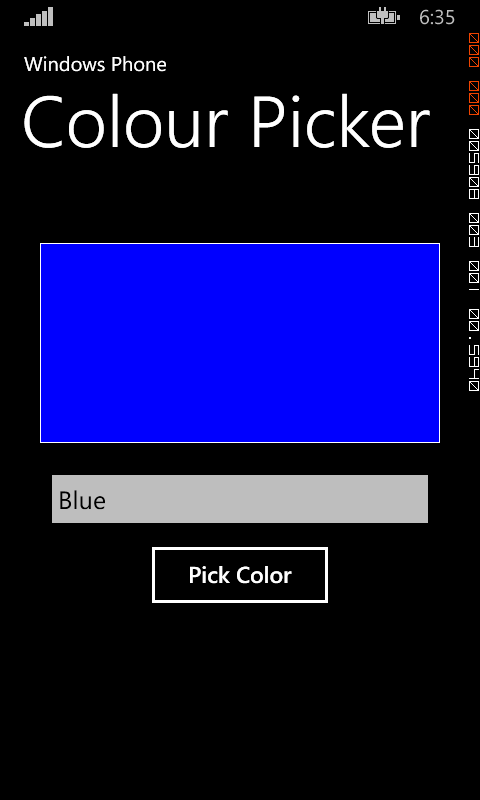
Run the application and pick a colour on the phone as shown below.
Now that we have a remote control that is sending out data to the Mobile Service it’s time to look at how we can use this information to control our LED strip.
Arduino sketch
In order to receive commands from the Windows Phone App we are going to use OData queries to retrieve the last inserted record from the Azure Mobile Servicewhihch exposes table data via OData out of the box. We can easily get the last inserted record in JSON format via a HTTP GET request to a URL similar to the following:
https://myiotservice.azure-mobile.net/tables/sensordata?$top=1&$orderby=__createdAt%20desc
When we send a HTTP GET request, the following HTTP body will be returned:
[code language=”JavaScript” gutter=”false”]
[
{
"id":"A086CE3F-5FD3-45B6-A967-E0928E3C5A96",
"DeviceId":"PhoneEmulator",
"SensorId":"ColorPicker",
"EventType":"RGB",
"EventData":"0;0;255"
}
]
[/code]
Notice how the colour is set to blue in the RGB data.
The Arduino schematics for the solution:
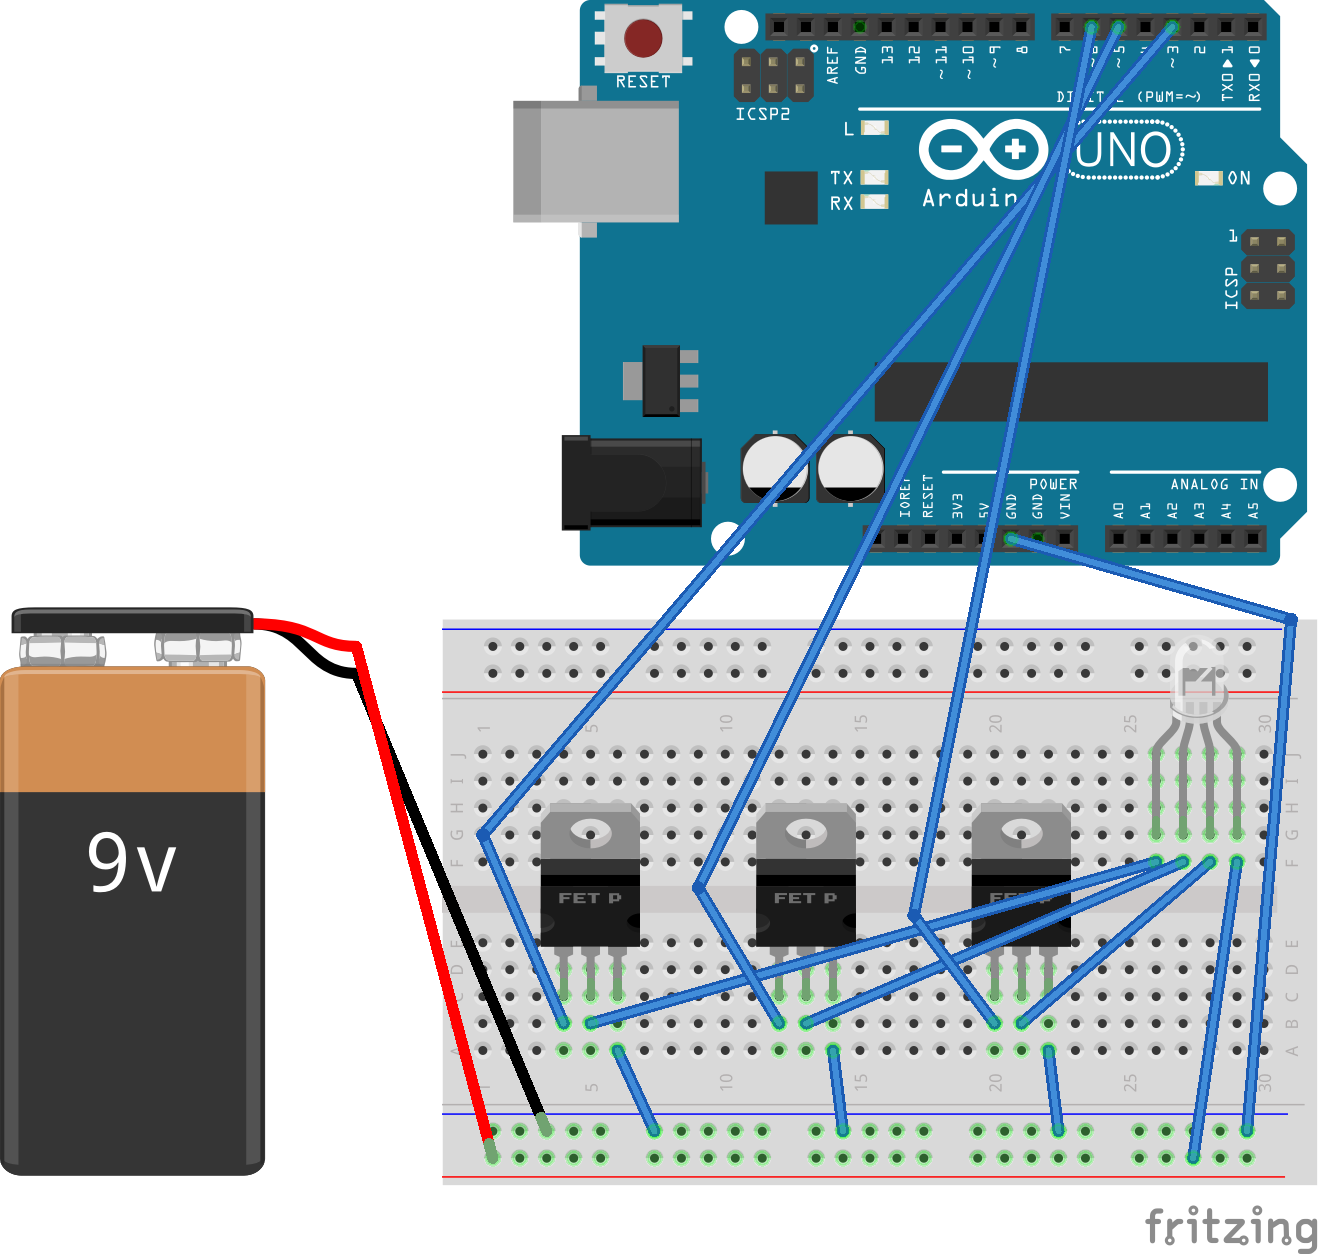
For illustrative purposes I’ve drawn a single LED. In reality I’m using a LED strip that needs more voltage than the Arduino can supply, hence the 9V battery is attached and MOSFET transistors are used. Don’t attach a 9V battery to a single LED or it will have a very short life…
The complete Arduino sketch:
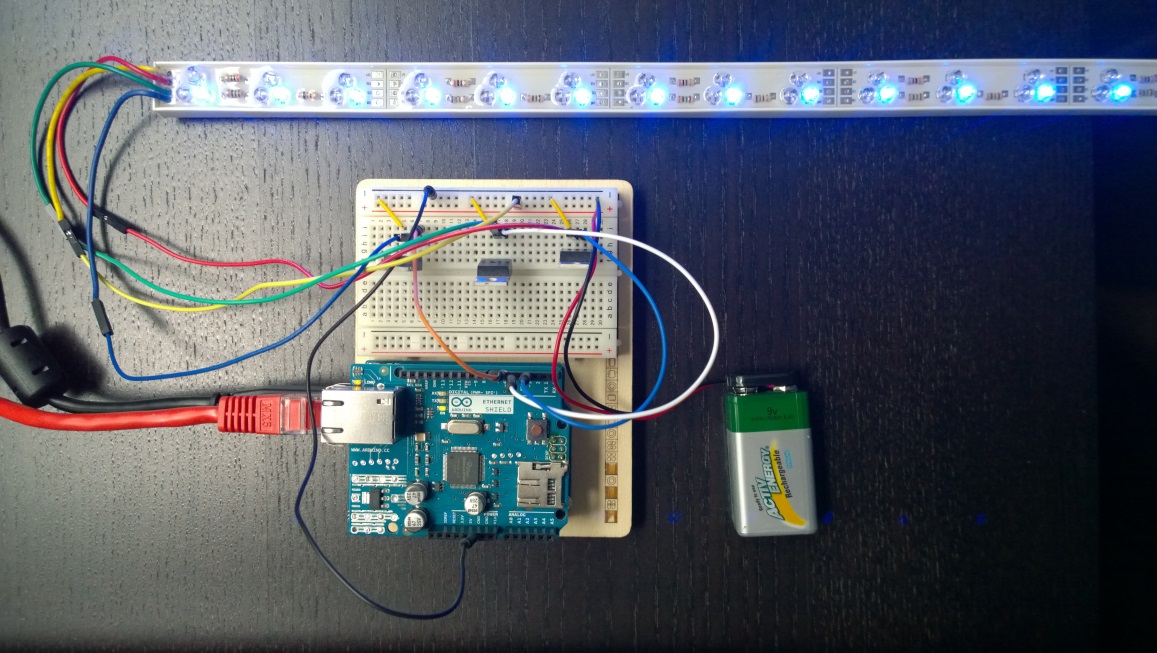
When we run the sketch the JSON data will be retrieved, and the colour of the LED strip set to blue:
In this article I’ve demonstrated how to control a low end IoT device that does not have any HTTPS/TLS capabilities. This scenario is far from perfect, and ideally we want to take different security measures to prevent unauthorised access to our IoT devices and transport data. In a future article I will showcase how we can resolve these issues by using a much more powerful device than the Arduino Uno with an even smaller form factor: the Intel Edison. Stay tuned!
Great write up!