This blog post shows you how to install a wordpress website in a sub-folder on your Azure website. Now somebody would ask why would I need to do that, and that is a good question, so let me start with the reasons:
Why do it this way?
Assume that you have a website and you want to create a blog section. This is a very common practice and most companies nowadays have a blog section of the website (which replaces the old “news” page). To do that, we would need to either develop a section of our website for blogging, or use a standard blogging engine -something like wordpress-. Let’s say we agreed to use wordpress as it is quick and easy and it is becoming the DE-facto engine for blogging. So how do we install it?
Well we could have a sub-domain. Say my website is hasaltaiar.com.au, I could create a sub-domain call it blog.hasaltaiar.com.au, and point this sub-domain to a wordpress website. This would work and it is good. However, it is not the best option, ask me why. Did you ask? never-mind I will answer :). Google and other search engines split the domain authority when requests come into sub-domains. This means that in maintain a better ranking and higher domain authority it is advised that you have your blog as a sub-module of your app rather than a sub-domain. And this is why we are talking about having the wordpress blog installed in a sub-folder.
The Database
To install a wordpress website, we need a MySql database. Azure gives you ONE free MySql database. You could create it from Azure store (Marketplace). There is a good tutorial on how to do that here. If you have exhausted your quota and have already created a MySql db before, you could either pay for a new database with Azure marketplace, or get a free one outside of Azure. I had this issue when I was creating this blog, as we had used the ONE free MySql database for another website, so I went to ClearDb website and created a new free account with a free MySql Database. This is the same provider for the MySql databases on Azure Marketplace, so you would get a similar service and free. One way or another, we will assume that you have a MySql database for this website. Have the connection details to this MySql database handy as we will need them later for installation.
Changes to Azure Website Configuration
In order to be able to install a wordpress website, you need to make two small changes to your azure website. These are:
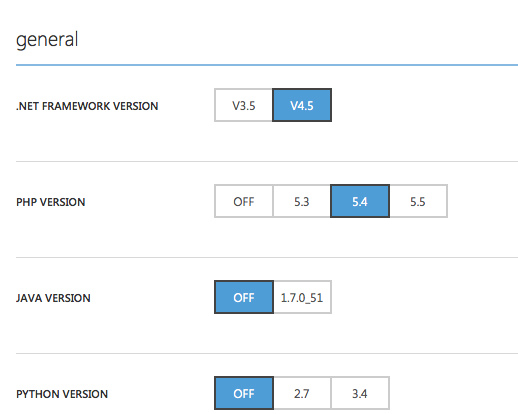
1. You need to enable IIS to run php. Azure websites support multiple languages out-of-the-box, you just need to enable the languages that you need. By default, it is configured to run .NET 4.5, you could enable any other languages that you would need like Java, Php, Python, etc. We need to enable Php 5.4 or 5.5 as in the screenshot below.
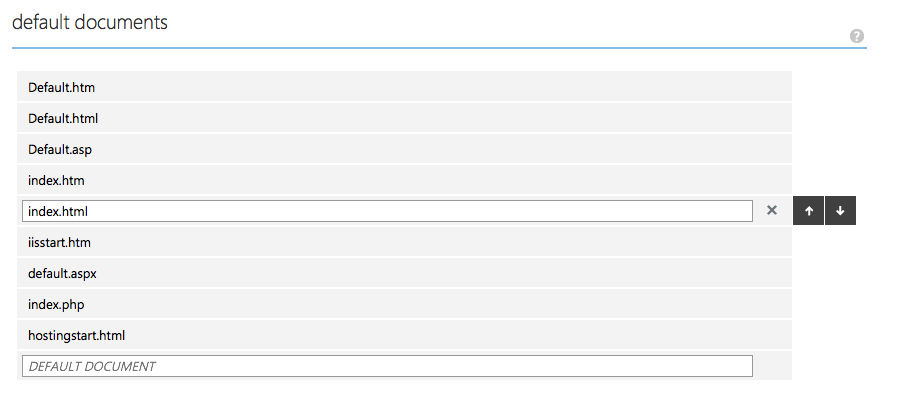
2. We also need to ensure that our Azure website has a list (or at least one doc) for the default document type(s). This is also part of the configuration of your Azure website and it tells IIS what type of document to look for when a user navigate to any path/folder. You could have anything in this list (as long as they are valid docs) and in any order you want them. The important line for us in this case is the index.php, which is the default page for wordpress websites.
WordPress Install
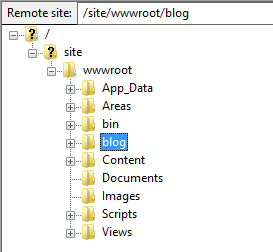
You need to download the latest version of WordPress from wordpress.org. At the time of writing this blog post, the latest version is 4.0.1. Once you have the files downloaded, you could change the folder name to be blog and upload it directly to your website. This means that you would have this folder under your azure website /your-website/blog. The files could sit under your wwwroot folder as in the screenshot below.
When the file upload completes, we can navigate to the your-website-root/blog/wp-admin. This will start the wordpress website. WordPress engine will detect that this is the first time it runs, and it will prompt you with the installation wizard. The installation wizard is very simple, only few steps to set the website title, url, language, etc. The main step is adding the database details. These details can be obtained from the database that you created in the earlier step above. Just copy the database connection details here and you should be set. After adding the connection details, you will see a webpage saying the installation is complete and it would ask you to login (with your newly created credentials) to customise your blog.
That’s it, simple and easy. The method shown above could save you from having to maintain two different websites and would give you the flexibility of having your own, self-hosted wordpress site. I hope you find this useful and I would love to hear your thoughts and feedback.


Hi, I’ve followed your steps, but the index.php file downloads instead of executing. Is there something else I need to do to enable PHP on the server?
Make sure that PHP is enabled on your server/”webApp plan”, and index.php is moved up in the default page names for IIS
Thanks for this article, it’s just what I am looking for. The trouble is, when I try uploading the blog dir to wwwroot I get permission denied – any ideas?
Hi Sarah,
If you are not able to upload any files, then I would suspect that you have folder permission issues. Please ensure that the account that you are using has enough permission for that folder.
What application are you using to upload the files? and what account are you using?
I would suggest using a good FTP tool like (FileZilla) and get your website FTP credentials (username/password) from the provisioning profile. This should work fine.
Let me know how you go.
Cheers
Has
I should mention that it uploads half of the files before throwing this error
Would the new WordPress install require a new database apart from the one the web app (which is also a wordpress installation) is using?
Thanks JKM, that’s really more of a WordPress question, and it’s not specific to Azure. The answer is up to you, when installing wordpress, you could choose to create a new database or use an existing one. So if you already have a database (and you don’t have a limit on the size), then you could just use the same database. Make sure to use a prefix for your tables in order to make it easy for you to migrate this wordpress install if you needed to do so in the future.