Out of the box, FIM 2010’s methodology for handling which UI elements are visible on the FIM homepage are limited to “are you an administrator” or “are you not”. This is governed by the Usage Keyword “BasicUI”. This guide will demonstrate how you can create additional Usage Keywords tied to sets which will allow for granular control over which navigation bar and homepage elements are visible to a user.
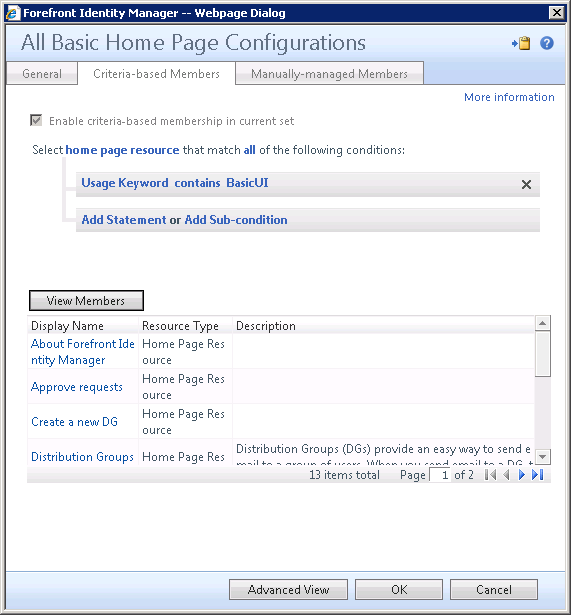
Before we get in to how to create a Usage Keyword, let’s understand what it actually is. A usage keyword is basically a set. The set targets resources where the “Usage Keyword” multivalued attribute is equal to a string you define. The best way to understand this is to have a look at the membership to the existing sets for the “BasicUI” Usage Keyword.
So all we have here, is a bunch of resources which have the string “BasicUI” populated on the “Usage Keyword” multivalued attribute which is bound to them. As you can probably tell from the membership list, these resources are all links on the Home Page. So of course where we have a grouping of resources, we can use an MPR to control access to them. This is essentially how Usage Keywords work.
Now that we have an understanding of the concept, let’s build it.
In this example I have a pre-existing criteria based set of users called “_SET: Kloud Users” which contains users that belong to the KLOUD Active Directory domain. I would like to grant these users access to the navigation bar resource “Security Groups (SGs)”.
The first step towards achieving this, is to create the Usage Keyword in the context of the navigation bar resource
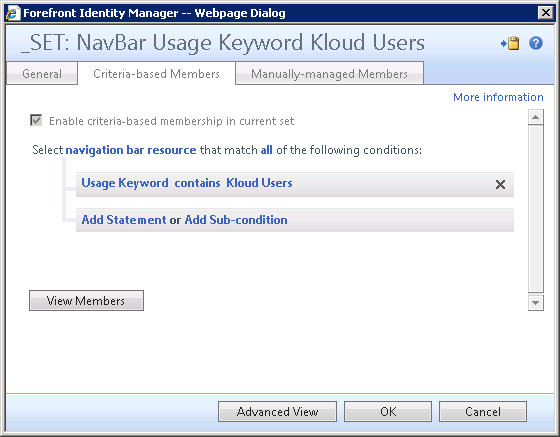
- Create a new set. You can name this set whatever you like in-line with your naming conventions. I will call mine “_SET: NavBar Usage Keyword Kloud Users”
- Create membership criteria. Select navigation bar resource that matches the following condition “Usage Keyword contains Kloud Users”
- Click finish
You now have a usage keyword of “Kloud Users” which applies to the navigation bar resource. We will now create another couple of sets. We will repeat the above steps, replacing “navigation bar resources” with “home page resource” and “search scope”. If you follow along with me, create these sets and call them “_SET: Homepage Usage Keyword Kloud Users” and “_SET: Search Scope Usage Keyword Kloud Users”
Now that we have our Usage Keywords in place, we need to make them do something. We can of course achieve this using MPRs.
- Create a new request type MPR. Again, you can name this MPR whatever you like in-line with your naming conventions. I will call mine “_MPR: NavBar Read Usage Keyword Kloud Users”
- On the “Requestors and Operations” tab, select the set of users that you would like your newly created usage Keyword to apply to. In my example, I would like my “Kloud Users” keyword to relate to the “_SET: Kloud Users” set.
- Again on the “Requestors and Operations” tab, tick the boxes for “Read resource” and “Grants permission” then click next
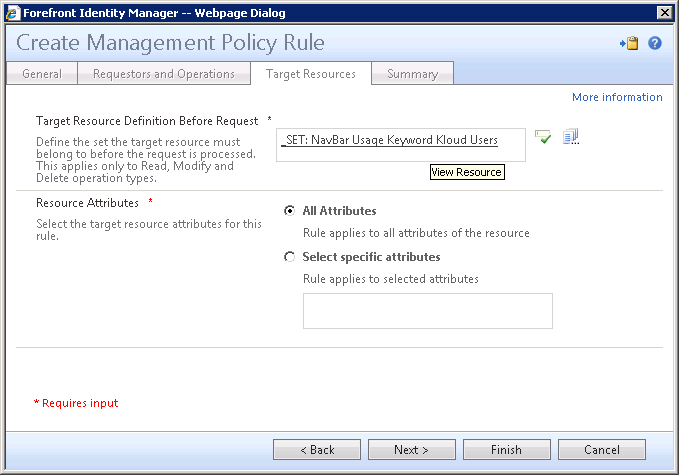
- On the “Target Resources” tab, define the set we created earlier as the “Target Resource Definition Before Request” and select “All Attributes” then click finish.
So now our Usage Keyword for the navigation bar resource is ready to go. As we wish to apply this to the homepage resources and search scopes, we must repeat the MPR creation steps for each resource, replacing the “Target Resource Definition Before Request” with the relevant set. I now have three sets and three MPRs as follows:
_SET: NavBar Usage Keyword Kloud Users
_SET: Homepage Usage Keyword Kloud Users
_SET: Search Scope Usage Keyword Kloud Users
_MPR: NavBar Read Usage Keyword Kloud Users
_MPR: Homepage Read Usage Keyword Kloud Users
_MPR: Search Scope Read Usage Keyword Kloud Users
The final step is now to employ our newly defined usage keyword. As mentioned, my desire is to make the “Security Groups (SGs)” navigation bar item visible to all users which are part of the “_SET: Kloud Users” set.
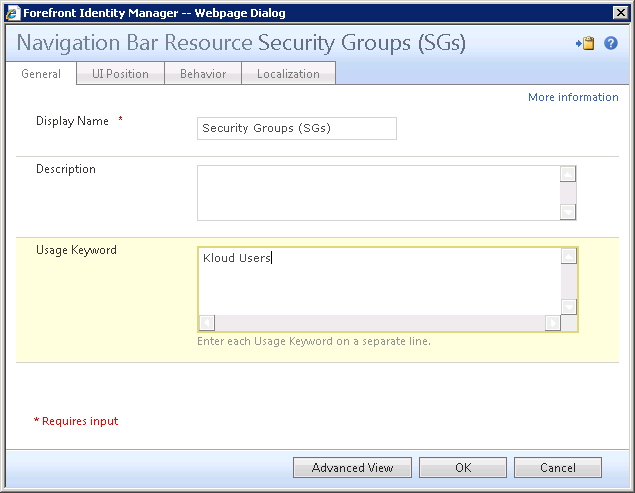
- From the administration menu, select “Navigation Bar Resource”
- In the “Usage Keyword” box, enter your newly created usage keyword “Kloud Users”
- Click next, then finish
- Perform an iisreset
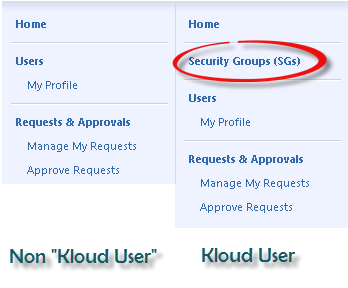
That’s all there is to it, all that remains now is to log in as a user which belongs to the set you’ve targeted to ensure they can in fact see the element you’ve granted them access to read. The screenshot below shows what the navigation bar looks like to a member of the KLOUD domain versus a user not in KLOUD domain.
You will find when editing search scopes and home page resources that they too have a field for “Usage Keyword”. If you have followed through with me, you will now be able to use your new usage keyword to control the visibility of these elements.

Thanks for a clear,simple and comprehensive explanation 🙂