There’s recently been some interest in the space of accelerating Office 365 SharePoint Online traffic for organisations and for good reason. All it takes is a CEO to send out an email to All Staff with a link to a movie hosted in SharePoint Online to create some interest in better ways to serve content internally. There are commercial solutions to this problem, but they are, well… commercial (read expensive). Now that the basic functionality has been proven using existing Windows Server components, what would it take to put into production? A quick refresh; in the last post I demonstrated an cloud routing layer, that took control of the traffic and added in compression and local caching, both at the router and also at the end point by utilising BranchCache to share content blocks between users. That’s a pretty powerful service and can provide a significantly better browsing experience for sites with restricted or challenged internet connections. The router can be deployed either in a branch office, within the corporate LAN or as an externally hosted service.
Deployment
The various deployment options offer trade-offs between latency and bandwidth savings which are important to understand. The Cloud Accelerator actually provides four services:
- SSL channel decryption, and re-encryption using a new certificate
- Compression of uncompressed content
- Generation of BranchCache content hashes
- Caching and delivery of cached content
For the best price performance consider the following
- Breaking the SSL channel, compression and generating BranchCache hashes are all CPU intensive workloads, best done on cheap CPUs and on elastic hardware.
- Delivering data from cache is best done as close to the end user as possible
With these considerations in mind we end up with an architecture where the Cloud Accelerator roles are split across tiers in some cases. First an elastic tier runs all the hard CPU grunt work during business hours and scales back to near nothing when not required. Perfect for cloud. This, with BranchCache enabled on the client is enough for a small office. In a medium sized office or where the workforce is transient (such as kiosk based users) it makes sense to deploy a BranchCache Server in the branch office to provide a permanent source of BranchCache content enabling users to come and go from the office. In a large office it makes sense to deploy the whole Cloud Accelerator inline again with the BranchCache server role deployed on it. This node will re-break the SSL channel again and provide a local in-office cache for secure cacheable content, perfect for those times when the CEO sends out a movie link! 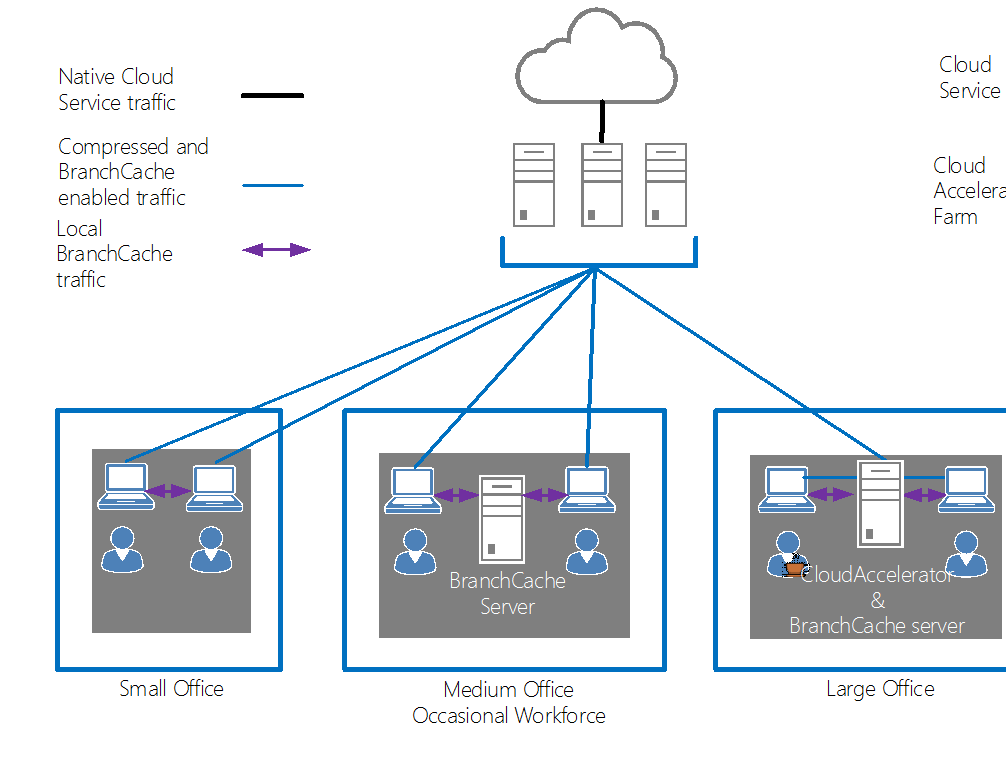
Scaling Out
The Cloud Accelerator I originally used is operating on a single server in Azure Infrastructure as a Service (IaaS). The process of generating BranchCache hashes on the server as the content passes through is CPU intensive and will require more processors to cope with scale. We could just deploy a bigger server but it’s a more economical solution (and a good opportunity) to use the Auto Scaling features within Azure IaaS offering. To create a multi-server farm requires a couple of other configuration changes to ensure the nodes work together effectively. Application Request Routing Farm One thing that’s obvious when working with ARR, is that it’s built to scale. In fact it is running underneath some very significant content delivery networks and is integral to such services as Azure WebSites. Configuration settings in ARR reveal that it is designed to operate both as part of a horizontally scaled farm and also as a tier in a multi layered caching network. We’ll be using some of those features here. First the file based request cache that ARR uses is stored on the local machine. Ideally in a load balanced farm, requests that have been cached on one server could be used by other servers in the farm. ARR supports this using a “Secondary” cache. The Primary cache is fast local disk but all writes go asynchronously to the Secondary cache too and if content is not found on the Primary then the Secondary is checked before going to the content source. To support this feature we need to attach a shared disk that can be used across all farm nodes. There are two ways to do this in Azure. One way is to attach a disk to one server and share it to the other servers in the farm via the SMB protocol. The problem with this strategy is the server that acts as the file server is then a single point of failure for the farm which requires some fancy configuration to get peers to cooperate by hunting out SMB shares and creating one if none can be found. That’s an awful lot of effort for something as simple as a file share. A much better option is to let Azure handle all that complexity by using the new Azure Files feature (still in Preview at time of writing) Azure Files After signing up for Azure Files, new storage accounts created in a subscription carry an extra “.file.core.windows.net” endpoint. Create a new storage endpoint in an affinity group. The affinity group is guidance to the Azure deployment fabric keep everything close together. We will use this later to put our virtual machines in to keep performance optimal.
New-AzureAffinityGroup -Name o365accel -Location “Southeast Asia” New-AzureStorageAccount -AffinityGroup o365accel -StorageAccountName o365accel -Description “o365accel cache” -Label “o365accel”
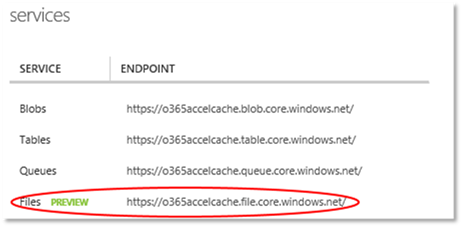
Download the Azure Files bits from here taking care to follow instructions and UnBlock the PowerShell zip before extracting it and then execute the following: # import module and create a context for account and key import-module .\AzureStorageFile.psd1 $ctx=New-AzureStorageContext <storageaccountname> <storageaccountkey> # create a new share $s = New-AzureStorageShare “Cache” -Context $ctx This script tells Azure to create a new fileshare called “Cache” over my nominated storage account. Now we have a file share running over the storage account that can be accessed by any server in the farm and they can freely and safely read and write files to it without fear of corruption between competing writers. To use the fileshare, one further step is required; to attach it to windows, and there is a bit of a trick here. Attaching mapped drive fileshares is a user based activity rather than a system based one. So we need to map the drive and set the AppPool to run as that user.
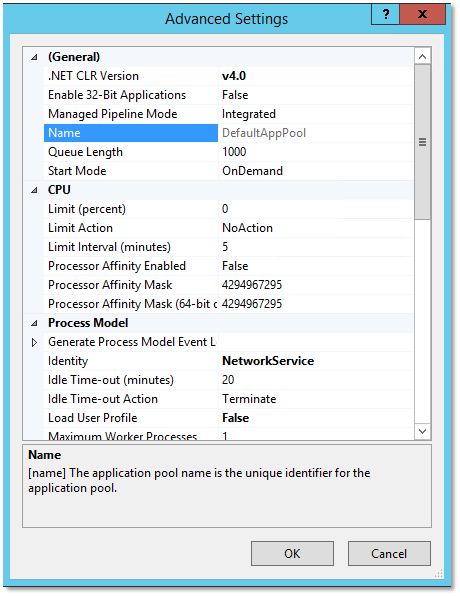
- Change the Identity of the DefaultAppPool to run as Network Service
- Create a folder called C:\Batch and grant Write access for Network Service account (this is so the batch file can out put success/failure results)
- Create a batch file C:\Batch\MapDrive.bat which contains cmdkey /add:o365accelcache.file.core.windows.net /user:<storageaccountname> /pass:<storageaccountkey>
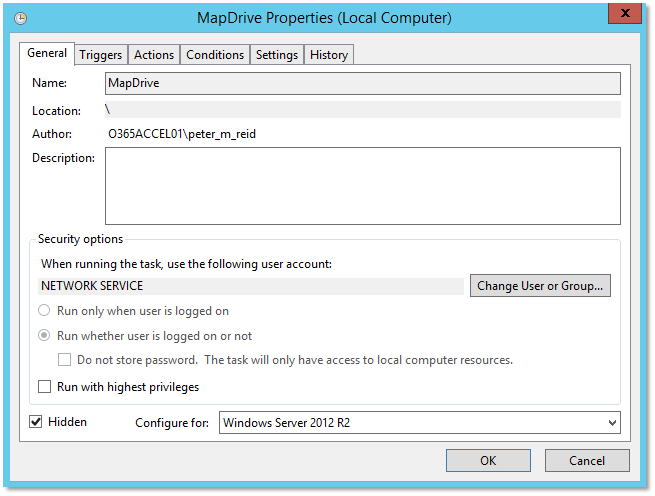
- Now set up a Scheduled Task to run in the C:\Batch directory run as “Network Service” at System Start Up to run the MapDrive.bat command. This will add the credentials for accessing the file share
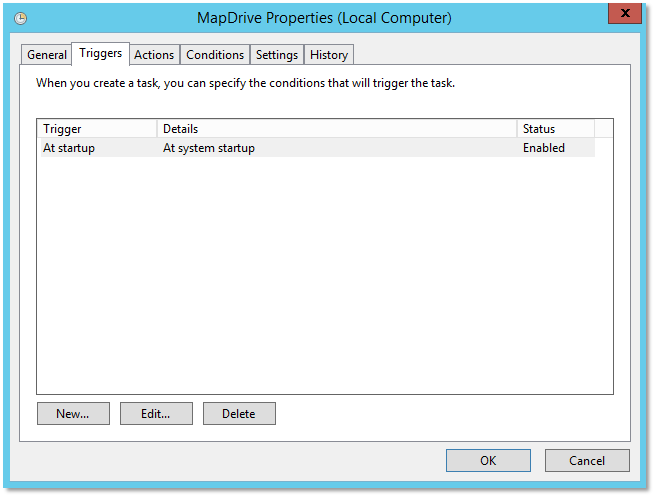
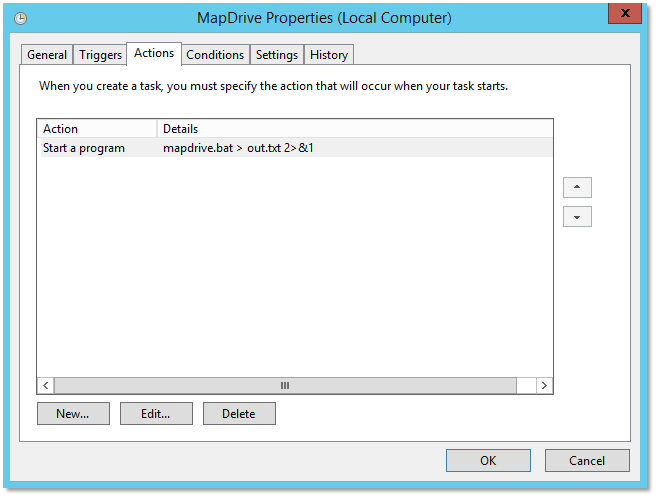
-
Now we just need to reconfigure the ARR to use this new location as a secondary cache. Start IIS and Add a Secondary drive like this:

- And reboot to kick off the scheduled task and restart the AppPool as the Network Service account.
BranchCache Key
A BranchCache Content Server operates very well as a single server deployment but when deployed in a farm the nodes need to agree on and share the key used to hash and encrypt the blocks sent to clients. If reinstalling the servers independently this would require the export (Export-BCSecretKey) and import (Import-BCSecretKey) across the farm of the shared hashing key. However, in this case it’s not necessary because we are going to make the keys the same by another method. Cloning all the servers from a single server template.
Preparation
In preparation for creating a farm of servers the certificates used to encrypt the SSL traffic will need to be available for reinstalling into each server after the cloning process. The easiest way to do this is to get those certificates onto the server now and then we can install and delete them as server instances are created and deployed into the farm.
- Create a folder C:\Certs and copy the certs into that folder
We’ll provision a set of machines from the base image and configure them using remote PowerShell. To enable remote PowerShell log onto our server and at an elevated PowerShell window (Run As Administrator) execute the following:
- Enable-PSRemoting -Force
Cloning
Azure supports the cloning of existing machines through “sysprep”ing and capturing the running machine that has been preconfigured.
- Remote Desktop connect to the Azure virtual server and run C:\Windows\System32\Sysprep\sysprep.exe
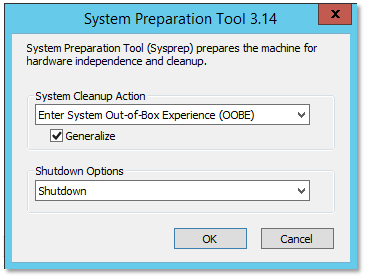
This will shut down the machine and save the server in a generic state so new replica servers can be created in its form. Now click on the server and choose Capture which will delete the virtual machine and take that snapshot.
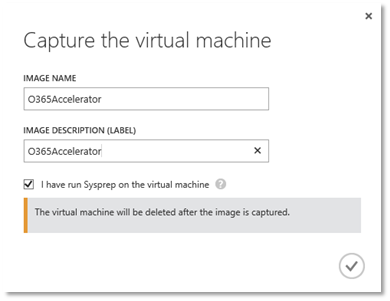
The image will appear in your very own Virtual Machine gallery, right alongside the other base machines and pre built servers. Now create a new Cloud Service in the management console or PowerShell ensuring to choose the new Affinity Group for it to sit within. This will keep our servers, and the fileshare deployed close together for performance.
New-AzureService -AffinityGroup o365accel -ServiceName o365accel
Now we can create a farm of O365 Accelerators which will scale up and down as load on the services does. This is a much better option than trying to guess the right sized hardware appliance from a third party vendor)
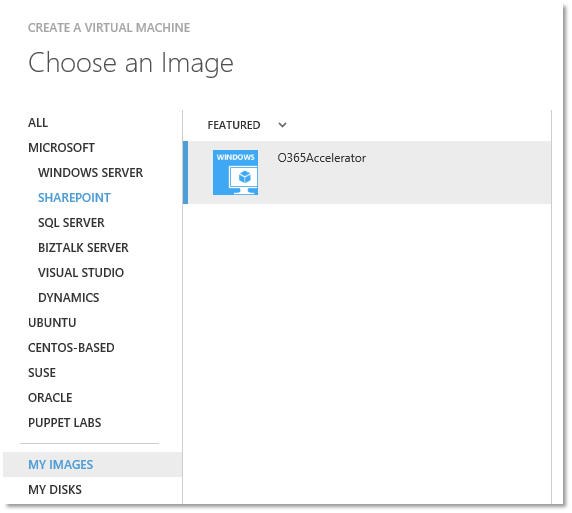
Now we could just go through this wizard a few times and create a farm of O365Accelerator servers, but this repetitive task is a job better done by scripting using Azure Powershell cmdlets. The following script does just that. It will create n machine instances and also configure those machines by reinstalling the SSL certificates through a Remote Powershell session. https://gist.github.com/petermreid/816e6a6e4aced5f6d0e8
After running this script multiple server instances will be deployed into the farm all serving content from a shared farm wide cache.
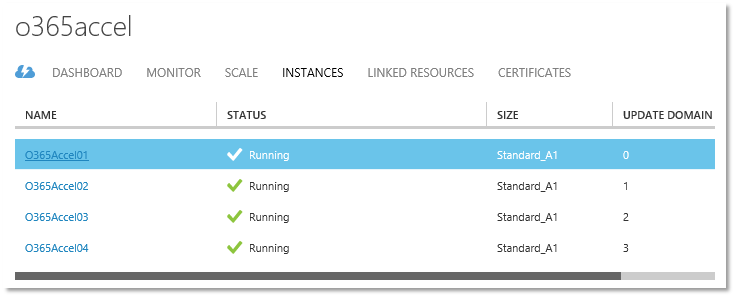
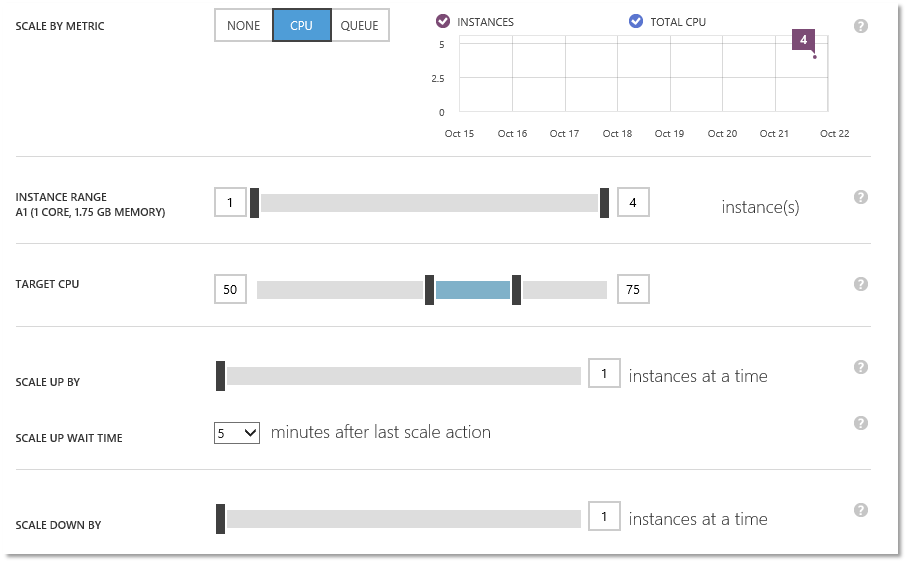
As a final configuration step, we use the Auto Scale feature in Azure to scale back the number of instances until required. The following setup uses the CPU utilisation on the servers to adjust up and down the number of servers from an idle state of 1 to a maximum of 4 servers thereby giving a very cost effective cloud accelerator and caching service which will automatically adjust with usage as required. This configuration says every 5 minutes have a look at the CPU load across the farm, if its greater than 75% then add another server, if its less than 50% remove a server.
Try doing that with a hardware appliance! Next we’ll load up the service and show how it operates under load and delivers a better end user experience.


Really enjoying this series of posts – latency a key factor against me moving everything to Office365
Thanks for the positive feedback Richard!