In the Part 1 blog here, we discussed an approach for the Group creation process and important considerations for provisioning groups. In this blog, we will look at getting a Graph App ID and App secret for invoking the graph service and then implementation of the group provisioning process.
MS Graph App Set up
Before we start creating groups we will need to set up a Graph App that will be used to create the group in the Office 365 tenancy. The details are in this blog here on how to create a Microsoft Graph app.
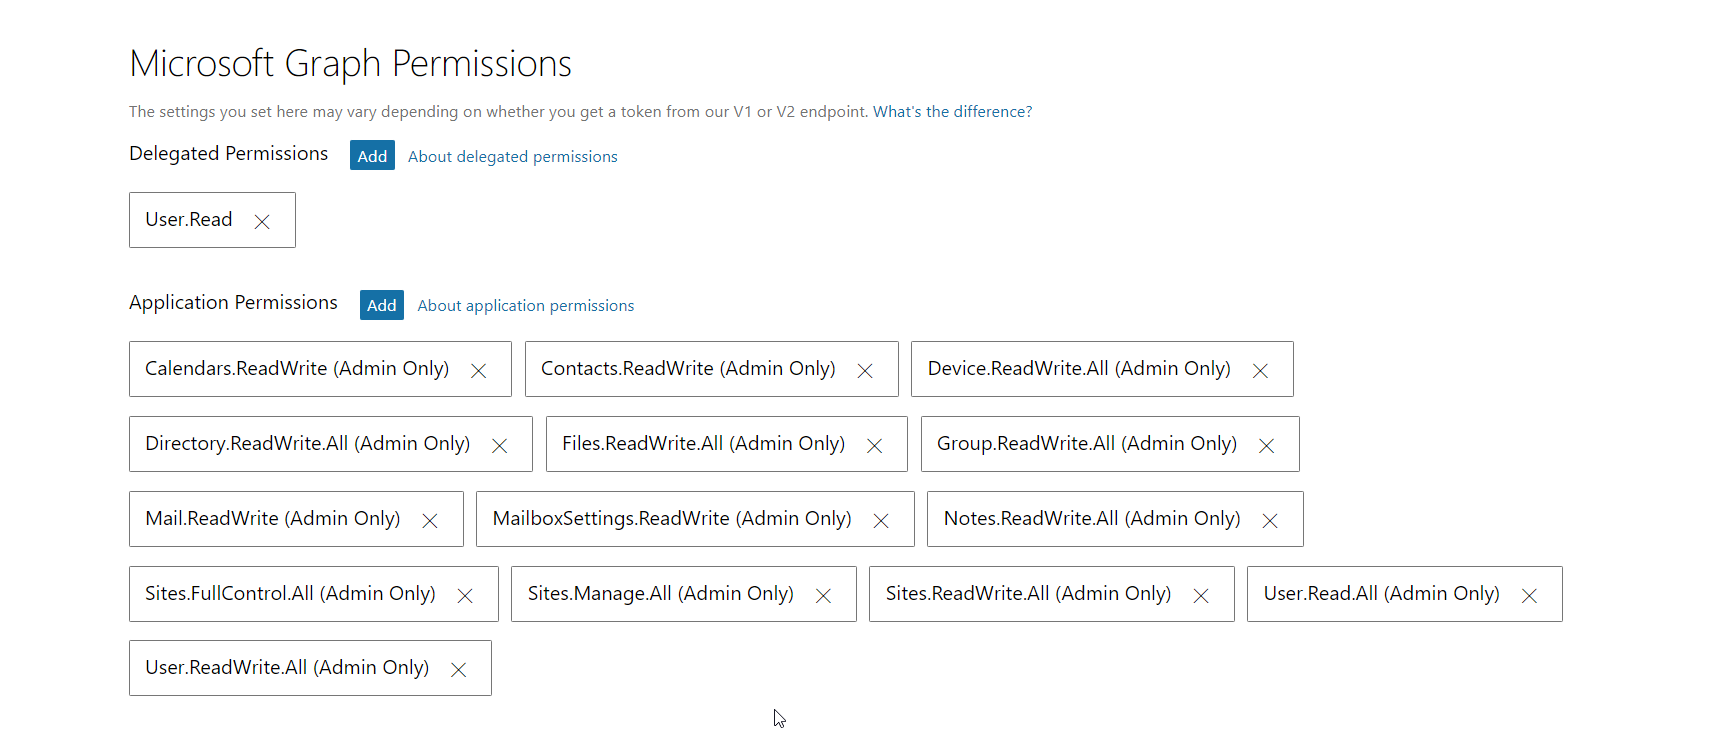
Regarding the permissions, below are the settings that are necessary to allow creating groups through the graph service.

Creating a Group
As discussed in Part 1 here, below are the broad level steps for automating group creation using a SharePoint inventory list, Microsoft Flow and Azure Function
1. Create a SharePoint list, with the metadata necessary for Group and SharePoint assets provisioning
We can use a SharePoint list to act as a trigger to create groups with the custom metadata necessary for provisioning the groups such as Owners and metadata necessary for creating site assets for SharePoint sites. As a best practice, I recommend you create multiple master lists to manage the details separately if there are too many to manage. In our case, we have created three separate lists for managing the Group details.
1. Group details and metadata
2. Owners and Team Members List
3. Site Assets configuration list
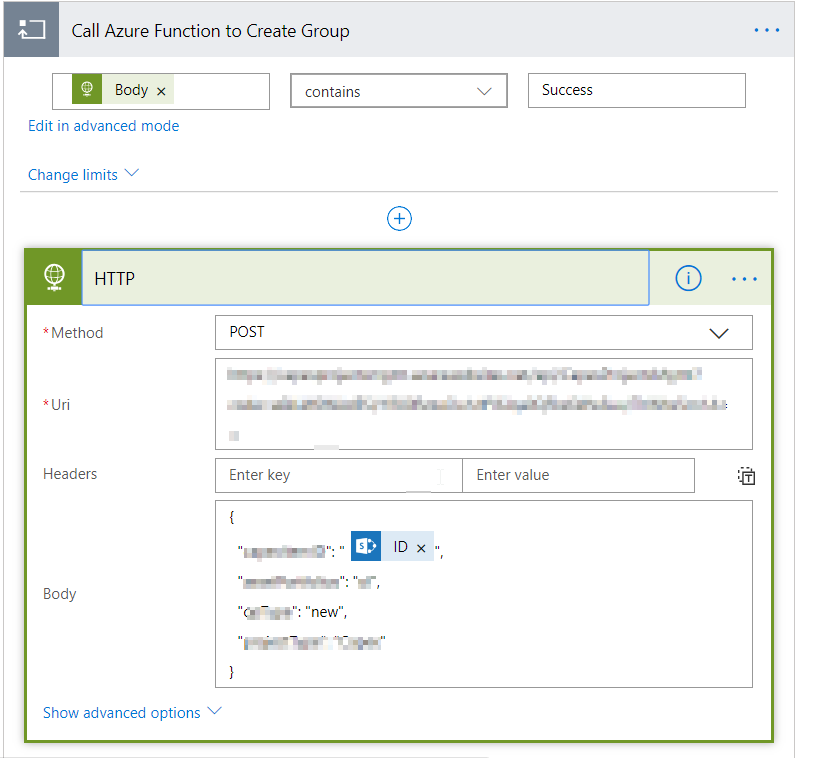
2. Create a Microsoft flow. The flow will validate a new or existing group and pick the unique Group Alias from the list which will allow us to find the group if it exists.
The flow will act as a trigger to start the provisioning process and call the Azure function passing the appropriate metadata as shown below. The flow also allows error handling scenarios as described in the Part 1 blog here
Note: The GroupAlias is the unique name of the Group and is not necessarily the SharePoint URL. For example, in the case where a group was created and subsequently deleted, the unique alias could be used again but the Site URL will be different (unless cleared from the SharePoint recycle bin).

3. Create the Group in an Azure Function using SharePoint Online CSOM
In order to create the group, we will need to authenticate to the Graph service using the Graph App created earlier. For authenticating the app through Azure AD, please install the NuGet Package for Microsoft.IdentityModel.Clients.ActiveDirectory.
After authenticating, we will create the group using the UnifiedGroup Utility provided through the SharePoint Online CSOM.
Below is a quick snapshot of the code. Note the inclusion of Graph module of the OfficeDevPnP class.
Note: One important bit to note is that, in the above code owners and members email array is the same. If the owners and members email array differ, then the group provisioning delays significantly. Also, it is important to keep the other parameters same as during creation in the below method because it might reset the other properties to default otherwise. For eg. if isPrivate is not set, then the group becomes public.
4. After the group is created, we can fetch the details of the group as below.
5. The group provisioning generally takes about 2-3 mins to provision. However, if there are multiple hits, then one request might override the second request causing the group creation to fail. In such cases, we can sequence the Azure Functions to run by modifying the host.json file. A quick blog covering this can be found here.
Provisioning SharePoint Assets in Azure Function after Group Creation
1. For provisioning of the SharePoint assets, we might have to wait for the Office 365 AD sync to finish granting access to the Admin account.
Sometimes, the AD sync process takes much longer, so to grant direct access to the SharePoint Site Collection using tenant admin, we could use the below code. Recommendation: Only proceed with the below code approach if the access fails for more than few mins.
Note: As a best practice, I would recommend using a Service Account when working on the SharePoint Site. We could also use an App as suggested in the Site Scripting blog here.
2. Once you have access, you can use the normal SharePoint CSOM to do the activities that are pertaining to SharePoint asset provisioning such as Libraries, Site Pages content, Lists, etc.
3. After you’re done, you can return the success from the Azure function as below.
Note: Use HttpStatusCode.Accepted instead of HttpStatusCode.Error in case there is error handling in the Flow or else Flow will trigger another instance of the flow when the Azure Function fails
Conclusion:
Above we saw how we can have a SharePoint Inventory list and create groups using Flow and Azure Functions. For a quick reference, below are the links to the other related blogs.
Part 1 – Automation and Creation of Office 365 groups approach
How to create a Microsoft Graph App
Sequencing calls in Azure Functions
