This article will provide an introduction to working with AdaptiveCards and the Bot Framework. AdaptiveCards provide bot developers with an option to create their own card templates to suit variety of different scenarios. I’ll also show you a couple of tricks with node.js that will help you design smart.
Before I run through the example, I want to point you to some great resources from adaptivecards.io which will help you build and test your own AdaptiveCards:
- The schema explorer provides a breakdown of the constructs you can use to build your AdaptiveCards. Note that there are limitations to the schema so don’t expect to do all the things you can do with regular mark-up.
- The schema visualizer is a great tool to enable you (and your stakeholders) to give the cards a test drive.
There are many great examples online (start with GitHub), so you can go wild with your own designs.
In this example, we’re going to use an AdaptiveCard to display an ‘About’ card for our bot. Schemas for AdaptiveCards are JSON payloads. Here’s the schema for the card:
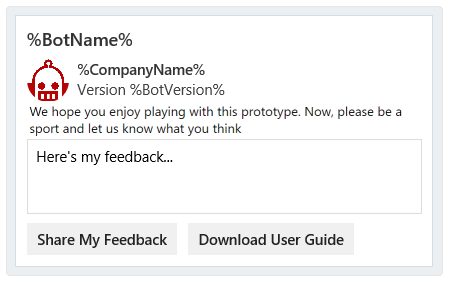
This generates the following card (go play in the visualizer):

We’ve got lots of %placeholders% for information the bot will insert at runtime. This information could be sourced, for example, from a configuration file collocated with the bot, or from a service the bot has to invoke.
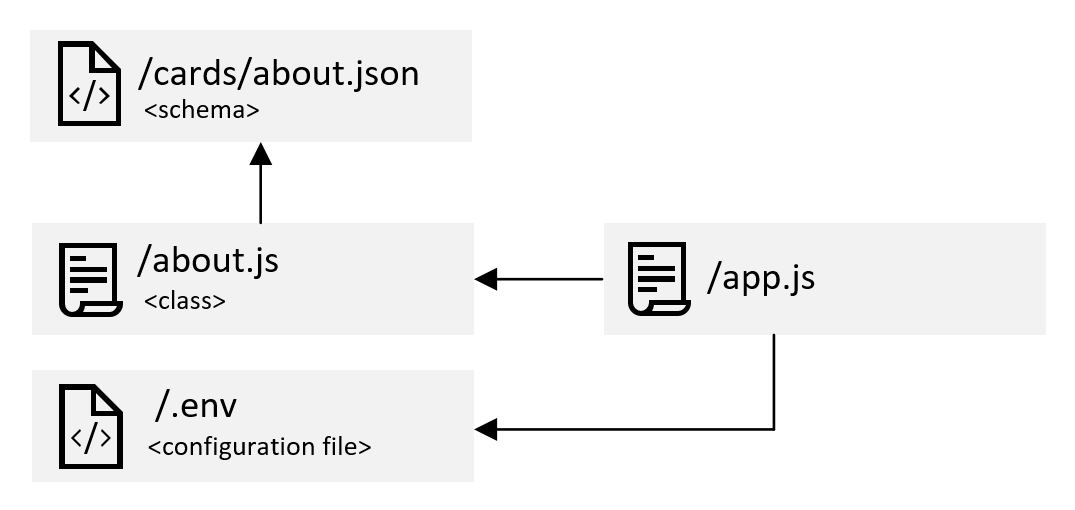
Next, we need to define the components that will play a role in populating our About card. My examples here will use node.js. The following simple view outlines what we need to create in our Visual Studio Code workspace:

The about.json file contains the schema for the AdaptiveCard (which is the code in the script block above). I like to create a folder called ‘cards’ in my workspace and store the schemas for each AdaptiveCard there.
The Source Data
I’m going to use dotenv to store the values we need to plug into our AdaptiveCard at runtime. It’s basically a config file (.env) that sits with your bot. Here we declare the values we want inserted into the AdaptiveCard at runtime:
This is fine for the example here but in reality you’ll probably be hitting remote services for records and parsing returned JSON payloads, rendering carousels of cards.
The Class
about.js is the object representation of the card. It provides attributes for each item of source data and a method to generate a card schema for our bot. Here we go:
The constructor simply offloads incoming arguments to class properties. The toCard() method reads the about.json schema and recursively does a find/replace job on the class properties. A card is created and the updated schema is assigned to the card’s content property. The contentType attribute in the JSON payload tells a handling function that the schema represents an AdaptiveCard.
The Bot
In our bot we have a series of event handlers that trigger based on input from the user via the communication app, or from a cognitive service, which distils input from the user into an intent.
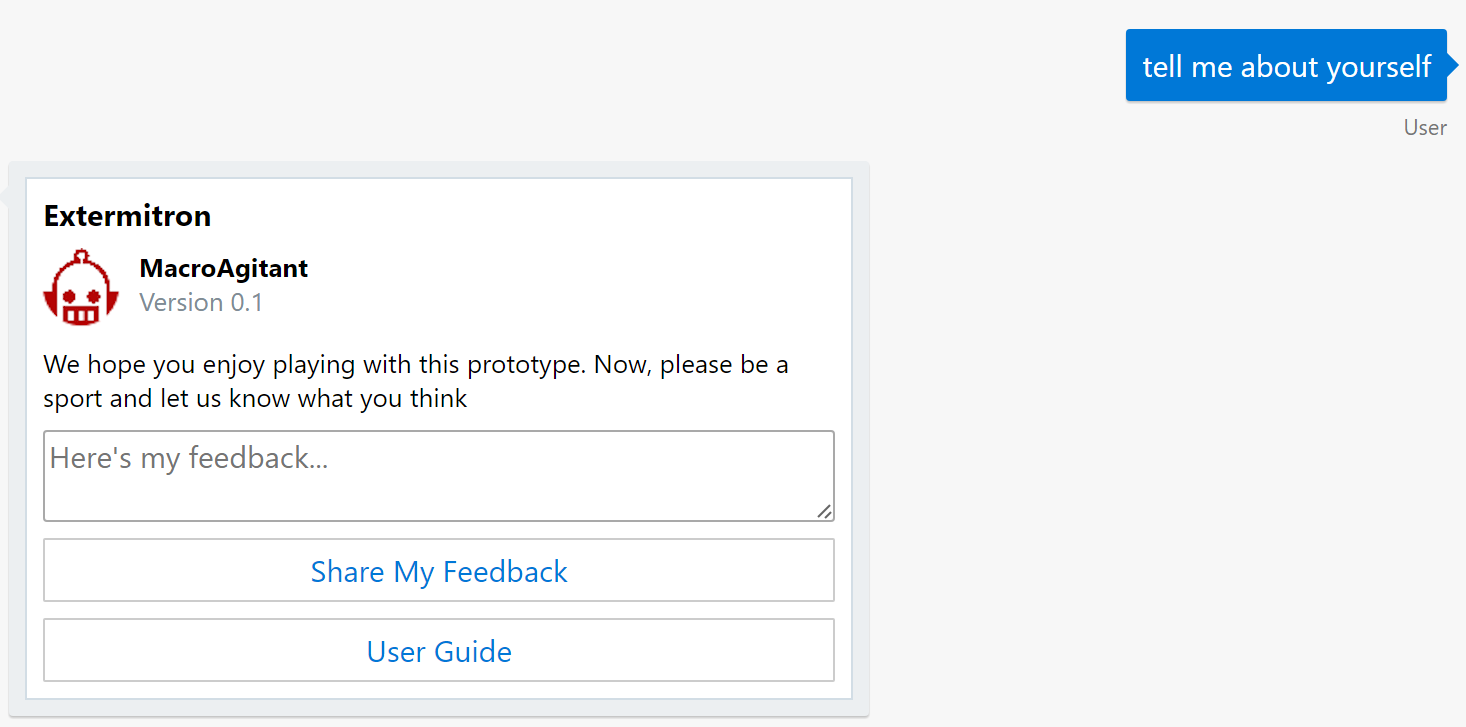
For this example, let’s assume that we have an intent called Show.Help. Utterances from the user such as ‘tell me about yourself’ or quite simply ‘help’ might resolve to this intent.
So we need to add a handler (function) in app.js that responds to the Show.Help intent (this is called a triggerAction). The handler deals with the dialog (interaction) between the user and the bot so we need it to both generate the About card and handle any interactions the card supports (such as clicking the Submit Feedback button on the card).
Note that the dialog between user and bot ends when the endDialog function is called, or when the conditions of the cancelAction are met.
Here’s the code for the handler:
The function starts with a check to see if a dialog is in session (i.e. a message was received). If not (the else condition), it’s a new dialog.
We instantiate an instance of the About class and use the toCard() method to generate a card to add to the message the bot sends back to the channel. So you end up with this:

And there you have it. There are many AdaptiveCard examples online but I couldn’t find any for Node.js that covered the manipulation of cards at runtime. Now, go forth and build fantastic user experiences for your customers!
