Back in November I wrote a post that demonstrated how we can integrate Salesforce and SharePoint Online using the MuleSoft platform and the MuleSoft .NET Connector. In this post I hope to achieve the same thing using the recently released into preview Azure App Services offering.
Azure App Services
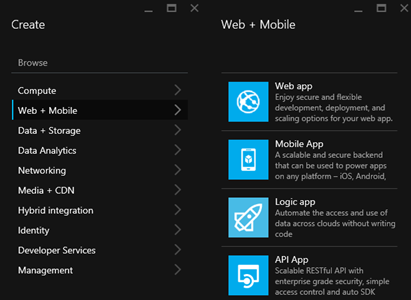
Azure App Services rebrands a number of familiar service types (Azure Websites, Mobile Services, and BizTalk Services) as well as adding a few new ones to the platform.
- Web Apps – Essentially a rebranding of Azure websites.
- Mobile Apps – Built on the existing Azure Mobile Services with some additional features such as better deployment and scalability options
- Logic Apps – A new service to the platform that allows you to visually compose process flows using a suite of API Apps from both the Marketplace and custom built.
- API Apps – A special type of Web App that allows you to host and manage APIs to connect SaaS applications, on-premise applications or implement custom business logic. The Azure Marketplace provides a number of API Apps ready built that you can deploy as APIs in your solution.
Microsoft have also published a number of Apps to the Azure Marketplace to provide some ready-to-use functionality within each of these service types. A new Azure SDK has also been released that we can use to build & deploy our own custom App Services. Further details on the Azure App Service can be found on the Azure Documentation site here.
Scenario Walkthrough
In this post we will see how we can create a Logic App that composes a collection of API Apps to implement the same SaaS integration solution as we did in the earlier post. To recap, we had the following integration scenario:
- Customers (Accounts) are entered into Salesforce.com by the Sales team.
- The team use O365 and SharePoint Online to manage customer and partner related documents.
- When new customers are entered into Salesforce, corresponding document library folders need to be created in SharePoint.
- Our interface needs to poll Salesforce for changes and create a new document library folder in SharePoint for this customer according to some business rules.
- The business logic required to determine the target document library is based on the Salesforce Account type (Customer or Partner)
Azure Marketplace
As a first step, we should search the Azure Marketplace for available connectors that suit our requirements. A quick search yields some promising candidates…
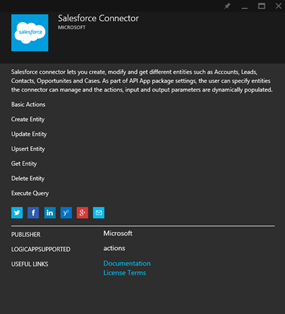
Salesforce Connector – Published by Microsoft and supports Account entities and executing custom queries. Supported as an action within Logic Apps. Looking good.
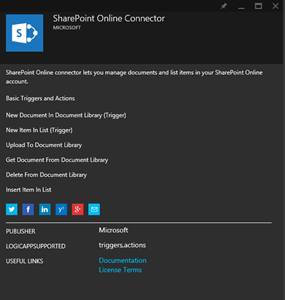
SharePoint Online Connector – Published by Microsoft and supports being used as an action or trigger in Logic Apps. Promising, but upon further inspection we find that it doesn’t support creating folders within a document library. Looks like we’ll need to create our own custom API App to perform this.
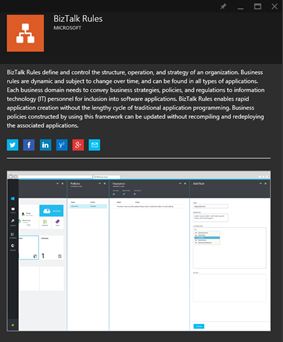
Business Rules API – Again published by Microsoft and based on the BizTalk Business Rules Engine. Supports being used as an action in Logic Apps however only supports XML based facts which as we’ll see doesn’t play well with the default messaging format used in Logic Apps (JSON). Looks like we’ll either need to introduce additional Apps to perform the conversion (json > xml and xml > json) or create a custom API App to perform our business rules as well.
So it appears we can only utilize one of the out-of-the-box connectors. We will need to roll up our sleaves and create at least two custom API Apps to implement our integration flow. As the offering matures and community contributions to the Marketplace is supported, hopefully we will be spending less time developing services and more time composing them. But for now let’s move on and setup the Azure App Services we will need.
Azure API Apps
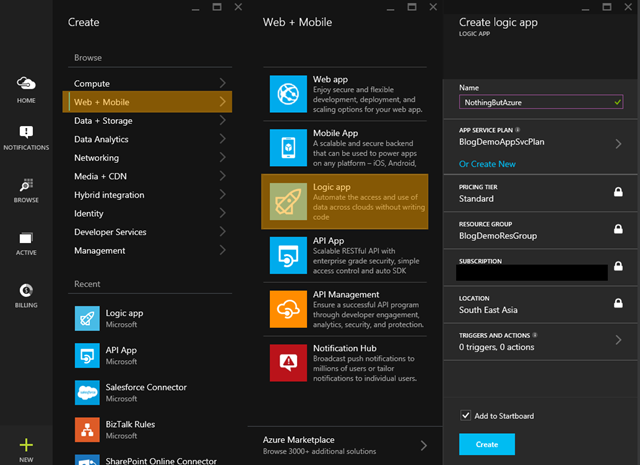
As we are creating our first Azure App Service we need to first create a Resource Group and create a Azure App Service Plan. Service plans allow us to apply and manage resource tiers to each of our apps. We can then modify this service plan to scale up/down resources shared across all the apps consistently.
We start by adding a new Logic App and creating a new Resource Group and Service Plan as follows:
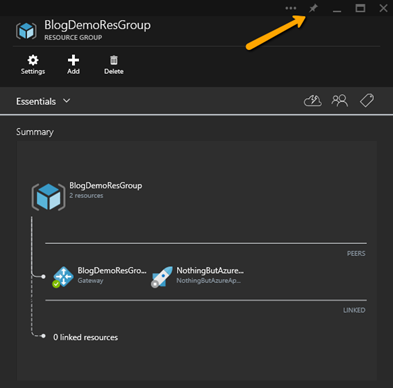
Navigate to the newly created Resource Group. You should see two new resources in your group, your Logic App and an API Gateway that was automatically created for the resource group.
Tip: Pin the Resource Group to your Home screen (start board) for easy access as we switch back and forth between blades.
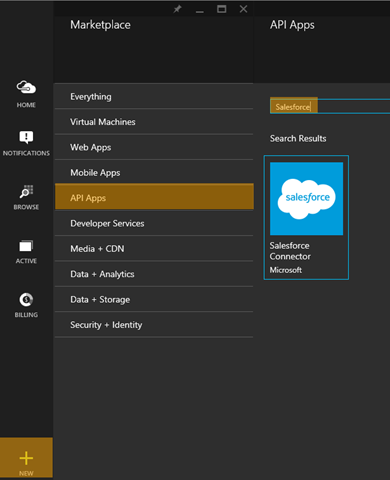
Next, add the Salesforce Connector API App from the Marketplace …
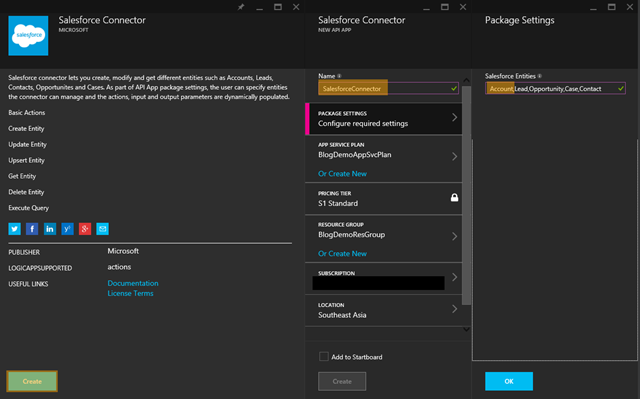
… and add it to our Resource Group using the same Service Plan as our Logic App. Ensure that in the package settings we have the Account entity configured. This is the entity in Salesforce we want to query.
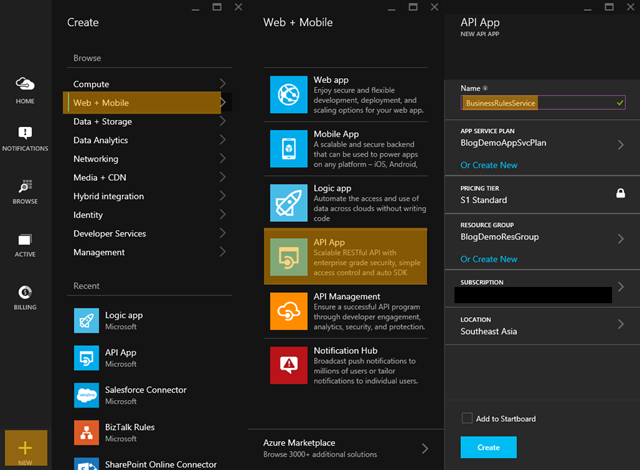
Now we need to provision two API App Services to host our custom API’s. Let’s add an API App Service for our custom BusinessRulesService API first, ensuring we select our existing Resource Group and Service Plan.
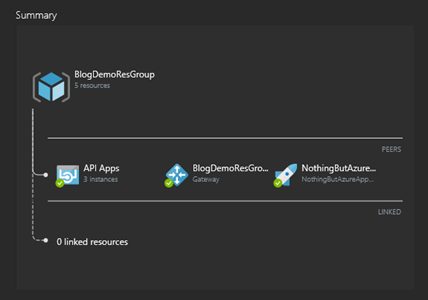
Then repeat for our custom SharePointOnlineConnector API App Service, again selecting our Resource Group and Service Plan. We should now see three API Apps added to our resource group
Developing Custom API Apps
Currently, only the Salesforce Connector API has been deployed (as we created this from the Marketplace). We now need to develop our custom APIs and deploy them to our API App services we provisioned above.
You will need Visual Studio 2013 and the latest Azure SDK for .NET (2.5.1 or above) installed.
Business Rules Service
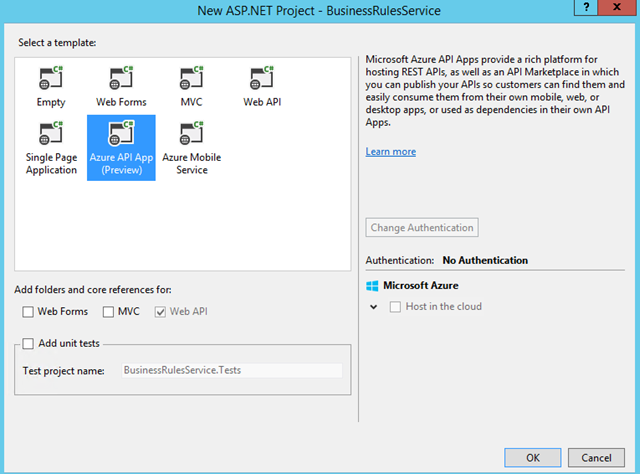
In Visual Studio, create a new ASP.NET Web Application for the custom BusinessRulesService and choose Azure API App (Preview)
Add a model to represent the SharePoint document library details we need our business rules to spit out
[code language=”csharp”]
public class DocumentLibraryFolder
{
public string DocumentLibrary { get; set; }
public string FolderName { get; set; }
}
[/code]
Add an Api Controller that implements our business rules and return an instance of our DocumentLibraryFolder class.
[code language=”csharp”]
public class BusinessRulesController : ApiController
{
[HttpGet]
public DocumentLibraryFolder Get(string accountType, string accountName)
{
System.Diagnostics.Trace.TraceInformation("Enter: Get");
DocumentLibraryFolder docLib = new DocumentLibraryFolder();
try
{
// Check for customer accounts
if (accountType.Contains("Customer"))
docLib.DocumentLibrary = "Customers";
// Check for partner accounts
if (accountType.Contains("Partner"))
docLib.DocumentLibrary = "Partners";
// Set folder name
docLib.FolderName = accountName;
}
catch (Exception ex)
{
System.Diagnostics.Trace.TraceError(ex.ToString());
}
return docLib;
}
}
[/code]
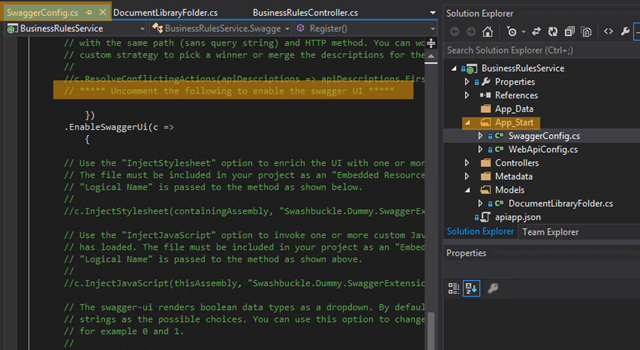
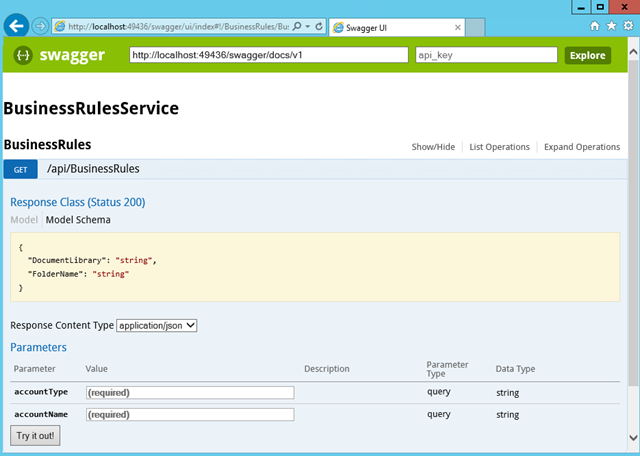
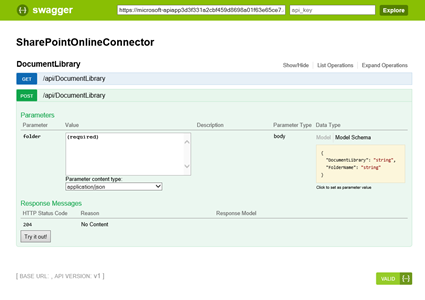
With the implementation done, we should test it works locally (how else can we claim “it works on my machine” right!). The easiest way to test an API App is to enable the swagger UI and use its built in test harness. Navigate to App_Start\SwaggerConfig.cs and uncomment the lines shown below.
Run your API App and navigate to /swagger
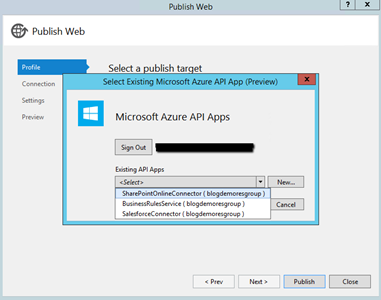
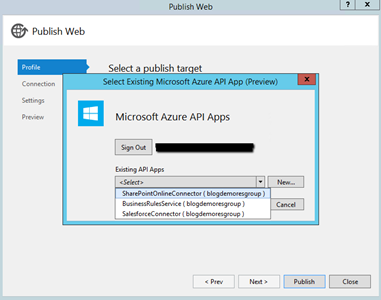
Once we have confirmed it works, we need to deploy the API to the Azure API App service we provisioned above. Right click the BusinessRulesService project in Solution Explorer and select Publish. Sign-in using your Azure Service Administration credentials and select the target API App service from the drop down list.
Click Publish to deploy the BusinessRulesService to Azure
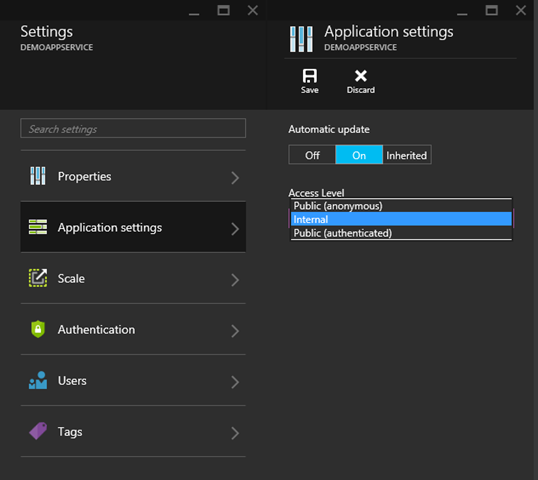
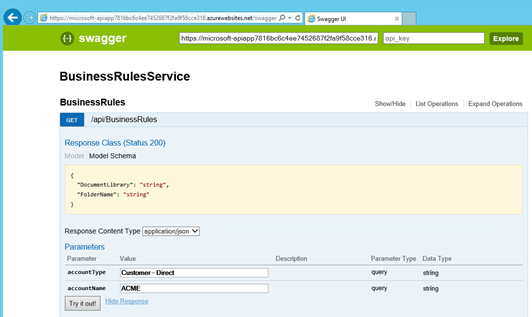
Tip: Once deployed it is good practice to test your API works in Azure. You could enable public access and test using the swagger UI test harness as we did locally, or you could generate a test client app in Visual Studio. Using swagger UI is quicker as long as you remember to revoke access once testing has completed as we don’t want to grant access to this API outside our resource group.
Grant public (anonymous) access in the Application Settings section of our API App and test the deployed version using the URL found on the Summary blade of the AP App.
Custom SharePoint Online Connector
Since the out-of-the-box connector in the Marketplace didn’t support creating folders in document libraries, we need to create our own custom API App to implement this functionality. Using the same steps as above, create a new ASP.NET Web Application named SharePointOnlineConnector and choose the Azure API App (Preview) project template.
Add the same DocumentLibraryFolder model we used in our BusinessRulesService and an Api Controller to implement the connection to SharePoint and creation of the folder in the specified document library
[code language=”csharp”]
public class DocumentLibraryController : ApiController
{
#region Connection Details
string url = "url to your sharepoint site";
string username = "username";
string password = "password";
#endregion
[HttpPost]
public void Post([FromBody] DocumentLibraryFolder folder)
{
using (var context = new Microsoft.SharePoint.Client.ClientContext(url))
{
try
{
// Provide client credentials
System.Security.SecureString securePassword = new System.Security.SecureString();
foreach (char c in password.ToCharArray()) securePassword.AppendChar(c);
context.Credentials = new Microsoft.SharePoint.Client.SharePointOnlineCredentials(username, securePassword);
// Get library
var web = context.Web;
var list = web.Lists.GetByTitle(folder.DocumentLibrary);
var root = list.RootFolder;
context.Load(root);
context.ExecuteQuery();
// Create folder
root.Folders.Add(folder.FolderName);
//root.Folders.Add(HttpUtility.HtmlEncode(folder.FolderName));
context.ExecuteQuery();
}
catch (Exception ex)
{
System.Diagnostics.Debug.WriteLine(ex.ToString());
}
}
}
}
[/code]
Deploy to our Resource Group selecting our SharePointOnlineConnector API App Service.
Grant public access and test the API is working in Azure using swagger UI once again.
Note: I did have some issues with the Microsoft.SharePoint.Client libraries. Be sure to use v16.0.0.0 of these libraries to avoid the System.IO.FileNotFoundException: msoidcliL.dll issue (thanks Alexey Shcherbak for the fix).
Azure Logic App
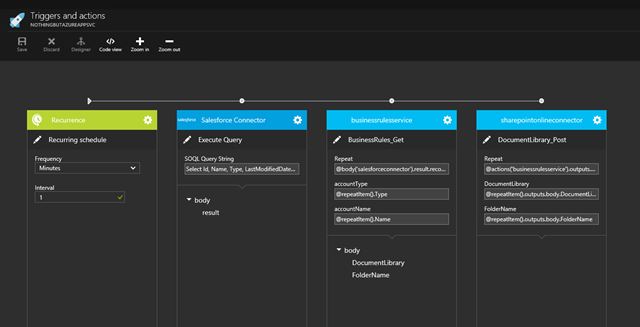
With all our App Services deployed, let’s now focus on composing them into our logic flow within an Azure Logic App. Open our Logic App and navigate to the Triggers and Actions blade. From the toolbox on the right, drag the following Apps onto the designer:
- Recurrence Trigger
- Salesforce Connector
- BusinessRulesService
- SharePointOnlineConnector
Note: Only API Apps and Connectors in your Resource Group will show up in the toolbox on the right hand side as well as the Recurrence Trigger and HTTP Connector.
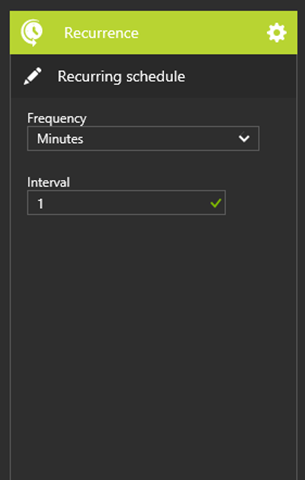
Configure Recurrence trigger
- Frequency: Minutes
- Interval: 1
Configure Salesforce Connector API
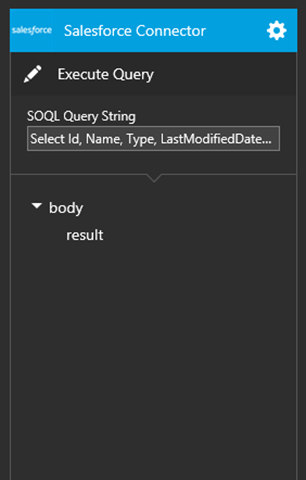
First we must authorise our Logic App to access our SFDC service domain. Click on Authorize and sign in using your SFDC developer credentials. Configure the Execute Query action to perform a select using the following SQL statement:
[code language=”sql”]
SELECT Id, Name, Type, LastModifiedDate FROM Account WHERE LastModifiedDate > YESTERDAY LIMIT 10
[/code]
The output of the Salesforce Connector API will be in json, the default messaging format used in logic apps. The structure of the json data will look something like this
[code language=”javascript”]
{
"totalSize": 10,
"done": true,
"records": [{
"attributes": {
"type": "Account",
"url": "/services/data/v32.0/sobjects/Account/00128000002l9m6AAA"
},
"Id": "00128000002l9m6AAA",
"Name": "GenePoint",
"Type": "Customer – Channel",
"LastModifiedDate": "2015-03-20T22:45:13+00:00"
},
{
"attributes": {
"type": "Account",
"url": "/services/data/v32.0/sobjects/Account/00128000002l9m7AAA"
},
"Id": "00128000002l9m7AAA",
"Name": "United Oil & Gas, UK",
"Type": "Customer – Direct",
"LastModifiedDate": "2015-03-20T22:45:13+00:00"
},
… repeats …
]
}
[/code]
Notice the repeating “records” section. We’ll need to let downstream APIs be aware of these repeating items so they can get invoked once for every repeating item.
Configure Business Rules API
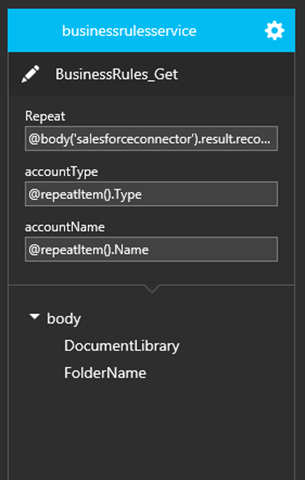
Setup a repeating item so that our Business Rules API gets called once for every account the Salesforce Connector outputs in the response body.
- Click on the Settings icon and select Repeat over a list
- Set Repeat to @body(‘salesforceconnector’).result.records
Note: Here @body(‘salesforceconnector’) references the body of the response (or output) of the API call. “result.records” is referencing the elements within the json response structure where “records” is the repeating collection we want to pass to the next API in the flow.
Configure call to the BusinessRules_Get action passing the Type and Name fields of the repeated item
- Set accountType to @repeatItem().Type
- Set accountName to @repeatItem().Name
The output of the BusinessRulesService will be a repeating collection of both inputs and outputs (discovered after much trial and error. Exception details are pretty thin as with most preview releases)
[code language=”javascript”]
{
"repeatItems": [{
"inputs": {
"host": {
"gateway": "https://blogdemoresgroupxxxxxxxxxxxxxxxxxxxxxxxxxxxxxxx.azurewebsites.net/",
"id": "/subscriptions/72608e17-c89f-4822-8726-d15540e3b89c/resourcegroups/blogdemoresgroup/providers/Microsoft.AppService/apiapps/businessrulesservice"
},
"operation": "BusinessRules_Get",
"parameters": {
"accountType": "Customer – Channel",
"accountName": "GenePoint"
},
"apiVersion": "2015-01-14",
"authentication": {
"scheme": "Zumo",
"type": "Raw"
}
},
"outputs": {
"headers": {
"pragma": "no-cache,no-cache",
"x-ms-proxy-outgoing-newurl": "https://microsoft-apiapp7816bc6c4ee7452687f2fa9f58cce316.azurewebsites.net/api/BusinessRules?accountType=Customer+-+Channel&accountName=GenePoint",
"cache-Control": "no-cache",
"set-Cookie": "ARRAffinity=451155c6c25a46b4af4ca2b73a70e702860aefb1d0efa48497d93db09e8a6ca1;Path=/;Domain=blogdemoresgroupxxxxxxxxxxxxxxxxxxxxxxxxxxxxxxx.azurewebsites.net,ARRAffinity=451155c6c25a46b4af4ca2b73a70e702860aefb1d0efa48497d93db09e8a6ca1;Path=/;Domain=blogdemoresgroupxxxxxxxxxxxxxxxxxxxxxxxxxxxxxxx.azurewebsites.net",
"server": "Microsoft-IIS/8.0",
"x-AspNet-Version": "4.0.30319",
"x-Powered-By": "ASP.NET,ASP.NET",
"date": "Sun, 19 Apr 2015 12:42:18 GMT"
},
"body": {
"DocumentLibrary": "Customers",
"FolderName": "GenePoint"
}
},
"startTime": "2015-04-19T12:42:18.9797299Z",
"endTime": "2015-04-19T12:42:20.0306243Z",
"trackingId": "9c767bc2-150d-463a-9bae-26990c48835a",
"code": "OK",
"status": "Succeeded"
}]
}
[/code]
We will need to again define the appropriate repeating collection to present to the next API. In this case it will need to be the “outputs.body” element of the repeatItems collection.
Configure SharePointOnline Connector API
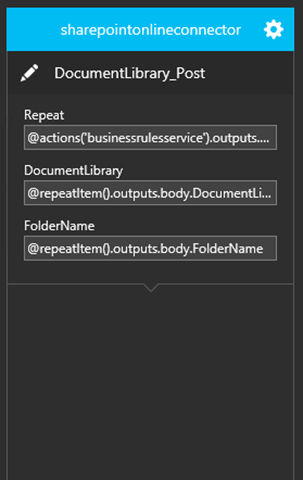
Setup a repeating item so that our SharePointOnline API gets called once for every item in the repeatItems collection.
- Click on the Settings icon and select Repeat over a list
- Set Repeat to @actions(‘businessrulesservice’).outputs.repeatItems
Configure call to the DocumentLibrary_POST action setting the following parameters
- Set DocumentLibrary to @repeatItem().outputs.body.DocumentLibrary
- Set FolderName to @repeatItem().outputs.body.FolderName
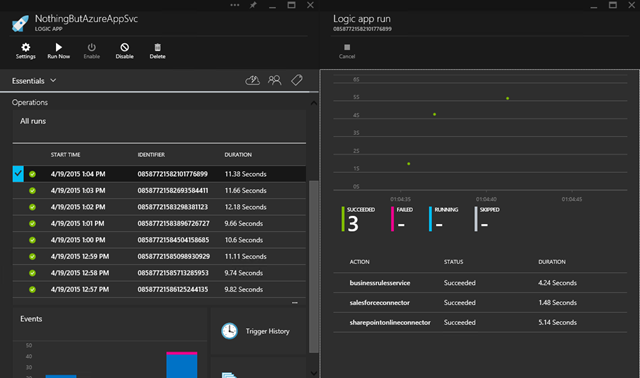
Save the Logic App and verify no errors are displayed. Close the Triggers and Actions blade so we return to our Logic App Summary blade.
Testing Our Solution
Ensure our Logic App is enabled and verify it is being invoked every 1 minute by the Recurrence trigger.
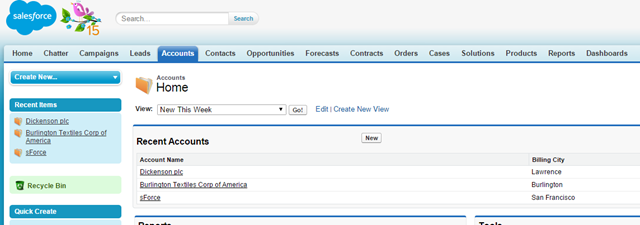
Open a browser and navigate to your Salesforce Developer Account. Modify a number of Accounts ensuring we have a mix of Customer and Partner Account types.
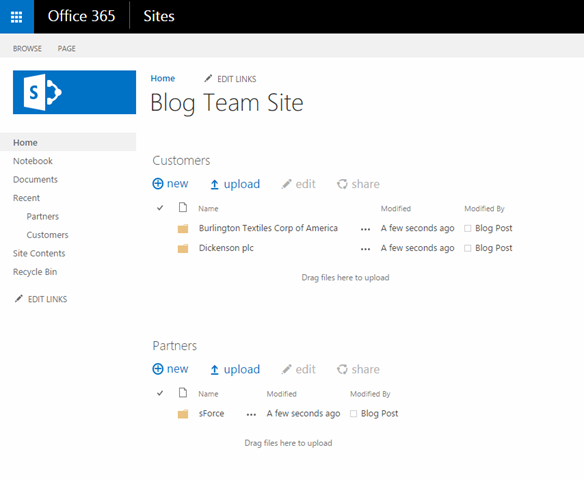
Open a browser and navigate to your SharePoint Online Developer Account. Verify that folders for those modified accounts appear in the correct document libraries.
Conclusion
In this post we have seen how we can compose logical flows using a suite of API Apps pulled together from a mix of the Azure Marketplace and custom APIs within a single integrated solution to connect disparate SaaS applications.
However, it is early days for Azure App Services and I struggled with its v1.0 limitations and poor IDE experience within the Azure Preview Portal. I would like to see a Logic App designer in Visual Studio, addition of flow control and expansion of the expression language to include support for more complex data types (perhaps even custom .NET classes). I’m sure as the offering matures and community contributions to the Marketplace are enabled, we will be spending less time developing services and more time composing them hopefully with a much better user experience.

Good first look and the example is immediately applicable to the sort of problems we face every day
Will definitely have a closer look