Azure Automation MS Flow Hybrid Workers SharePoint List upload CSV output

In this Blog I will discuss how to leverage SharePoint Lists as a front end using MS Flow to call Webhooks on Microsoft Azure Automation PowerShell scripts. These scripts execute via a hybrid worker to access On Premises resources. Results will be zipped and uploaded back to the SharePoint list.

Prerequisites

  • Azure Automation Subscription and Account
  • SharePoint Online / Site Collection
  • On-premises resource (Windows 2016 server) configured as Hybrid Worker
  • CredSSP needs to be enabled on hybrid Worker as Azure launches scripts as system account and some commands cannot use ‘-Credential’ )
  • Modules needed on Hybrid worker from elevated powershell run “Add-WindowsFeature RSAT-AD-PowerShell and “Install-Module SharePointPnPPowerShellOnline”
  • From Azure Import module from gallery SharePointPnPPowerShellOnline

Create SharePoint List

Create a SharePoint list as below this will be the input required for the script.… [Keep reading] “Azure Automation MS Flow Hybrid Workers SharePoint List upload CSV output”

Retrieve Office 365 audit logs using Office Management API and Azure Functions

For creating custom reports on Office 365 content, the best approach is to fetch the Audit data from Office 365 Management Audit log, store it in a custom database and then create reports through it. In an earlier blog here, we looked at steps to retrieve Office 365 Audit log data using PowerShell. In this blog, we look at a similar process to gather audit data by using Office 365 Management API in Azure Functions.… [Keep reading] “Retrieve Office 365 audit logs using Office Management API and Azure Functions”

Skype for Business Standard Edition – Unable to failback once DR is invoked

During the process of “Invoke-CsPoolFailover” the process changes the “PoolState” of the primary server from Active to FailedOver state, if this is not addressed after the restoration of the primary server the failback will not work.

Figure 1: Primary Server FailedOver State

In order to failback the pool back to the primary server the “PoolState” will need to be set back to Active. This can be done by running the following command:

PS C:\Set-CsRegistrarConfiguration -Identity “Service:Registrar:primaryfe.testdomain.com.au”[Keep reading] “Skype for Business Standard Edition – Unable to failback once DR is invoked”

DR Failover for Skype for Business Standard Edition

The article takes you through step by step of carrying out both health check and invoking disaster recovery (DR) a standard edition environment. The diagram below shows the layout of the environment where the DR was carried out on:

Figure 1 – Environment Overview

Before proceeding to test DR you need to make sure the appropriate registrar information is available/configured in the environment otherwise you will get the following error during Pool Failover process:

Please check that the pool <Prod_S4B> is healthy as conditions such as high CPU, low available memory
 or any disabled services can delay (or in some cases result in unsuccessful) fail over operations.… [Keep reading] “DR Failover for Skype for Business Standard Edition”

Use Azure AD Apps to connect with Office 365 and Cloud Services securely

Azure AD apps provide a faster and secure way to connect to the Office 365 tenancy and carry out automation tasks. There are many advantages of using Azure AD apps and could be used to authenticate for various Microsoft services such as Graph, Office 365 Management Api, SharePoint etc.

In this blog, we will look at the steps to set up an Azure AD app for Office 365 Management API, however the steps are mostly the same for other Office 365 services too.… [Keep reading] “Use Azure AD Apps to connect with Office 365 and Cloud Services securely”

Selectively prevent and secure content from External sharing using Labels and DLP policies in Office 365

In a recent project, we had a requirement to prevent specific selective content from shared externally while still allowing the flexibility of external sharing for all users. We were able to make it possible through Security and Compliance Center. There are few ways to achieve this, Auto-classify (see below conclusion section for more info), Selective apply via Labels and both.

Note: Till recently (Dec 2018), there was a bug in Office 365 which was preventing this DLP policy with Labels to work. This is fixed in the latest release so available for use.

In this blog, we will look at the process where business users can decide the content to be shared externally or not. This is a nifty feature, because there are cases when the content could be classified as secured even when they don’t have any sensitive info such as contracts (without business info) or invoices (with only business name). Also, there are cases when content could be public even when the document has sensitive info because the company has decided to make it public. So, at the end it is up to the discretion of the owner to decide the content’s privacy and hence this feature a great value in these scenarios.

Note: If you would like to auto classify the content using Sensitive info types, please refer to the great article here. This process leverages the machine learning capabilities of Office 365 engine to identify secure content and automatically apply the security policy on it.

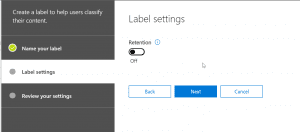
The first step is to create a Retention label (somehow this doesn’t work with Security labels, so must create retention label). After creating a label, publish the label to the selected locations, for our use case we will post it to SharePoint Sites only. While the label is published, we could go ahead and create a DLP policy to prevent sharing with external users (I was not able to make it work while set to Test with notification so put it to on state to test also). After this, when you apply the label to a document, after some time (takes about 1-2 min to affect), then the content is not able to be shared with external users. Lets’ look at each of the above steps in detail below.

Steps:

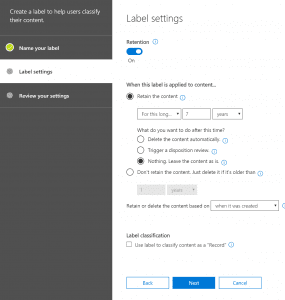
  1. First step is to create a retention label in Security and Compliance center. To my astonishment, the selective process doesn’t work with Security Labels but Retention Labels, so will create Retention Labels. If it is optional to apply a retention period to the content, then the retention period can be left, so not required for this exercise.


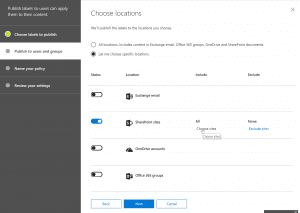
  2. Secondly, we will publish the label to SharePoint Sites, for our requirement. I haven’t tried the process with other sources such as Outlook and One Drive but should work the same when applied.
    Note: It takes about a day for the retention labels to publish to SharePoint sites, so please wait for that to become available. We can move to the next configuration step right away but will have to wait for the label to be published to stop sharing.
  3. Next, we could create a DLP policy for the content to be applied. For creating a DLP policy we need to follow the below configuration steps. Once created, we might have to turn it on in order to test it.
    SecurityAndCompliance_DLPPolicy1
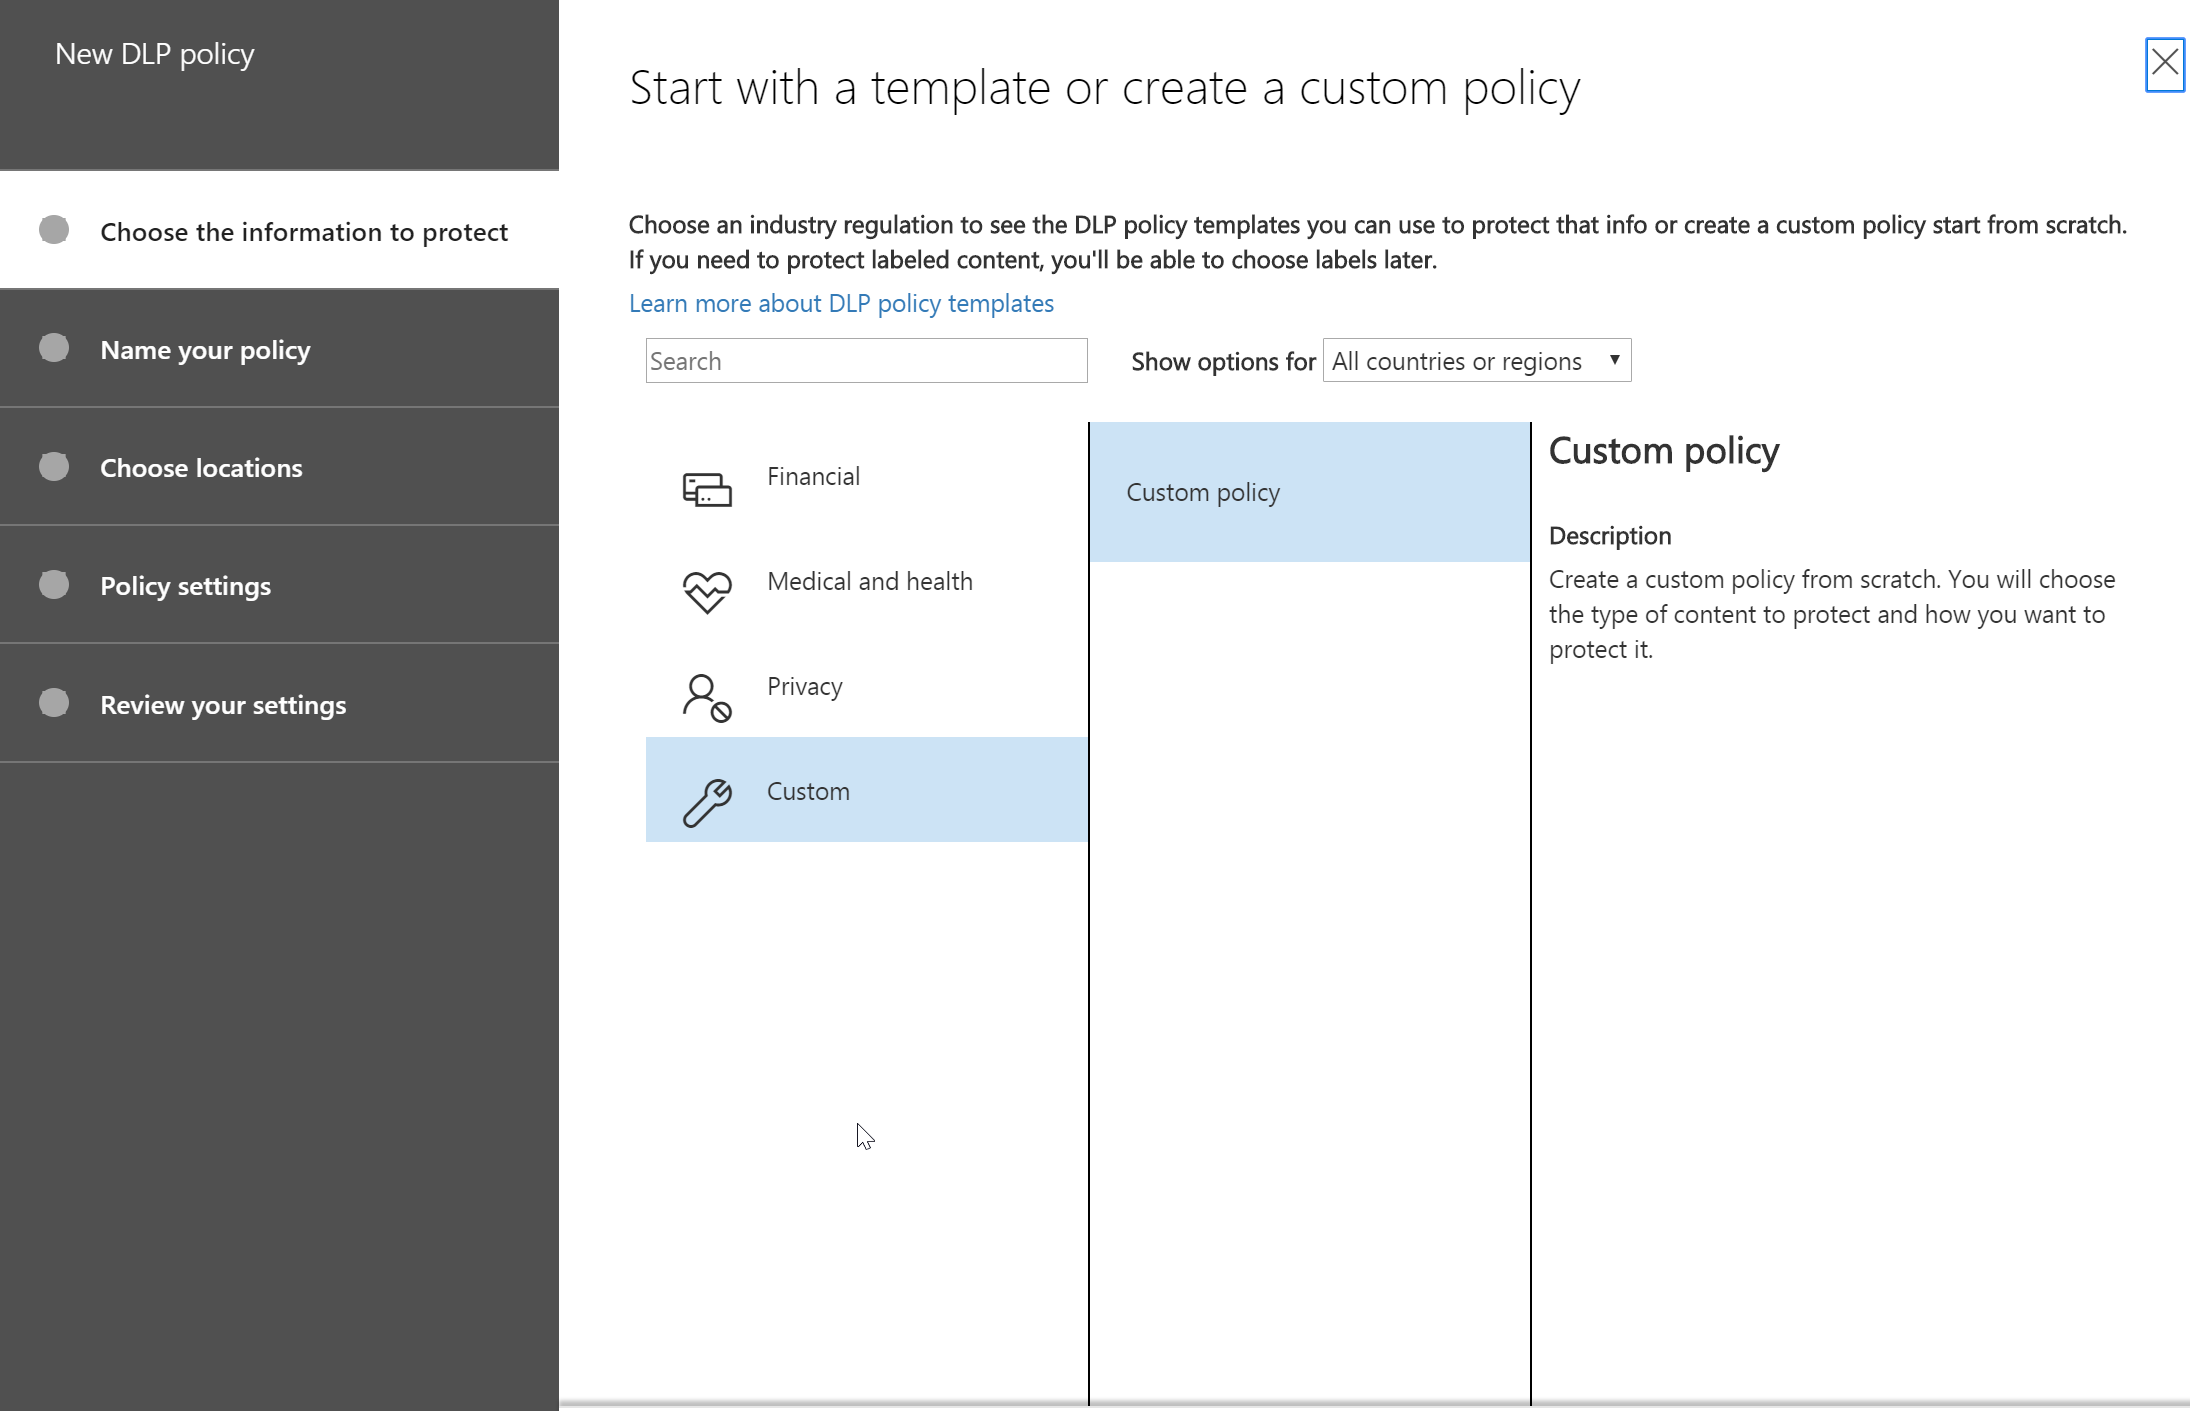
  4. First step of the policy creation would be select Custom Policy for DLP policy creation and give it a name.
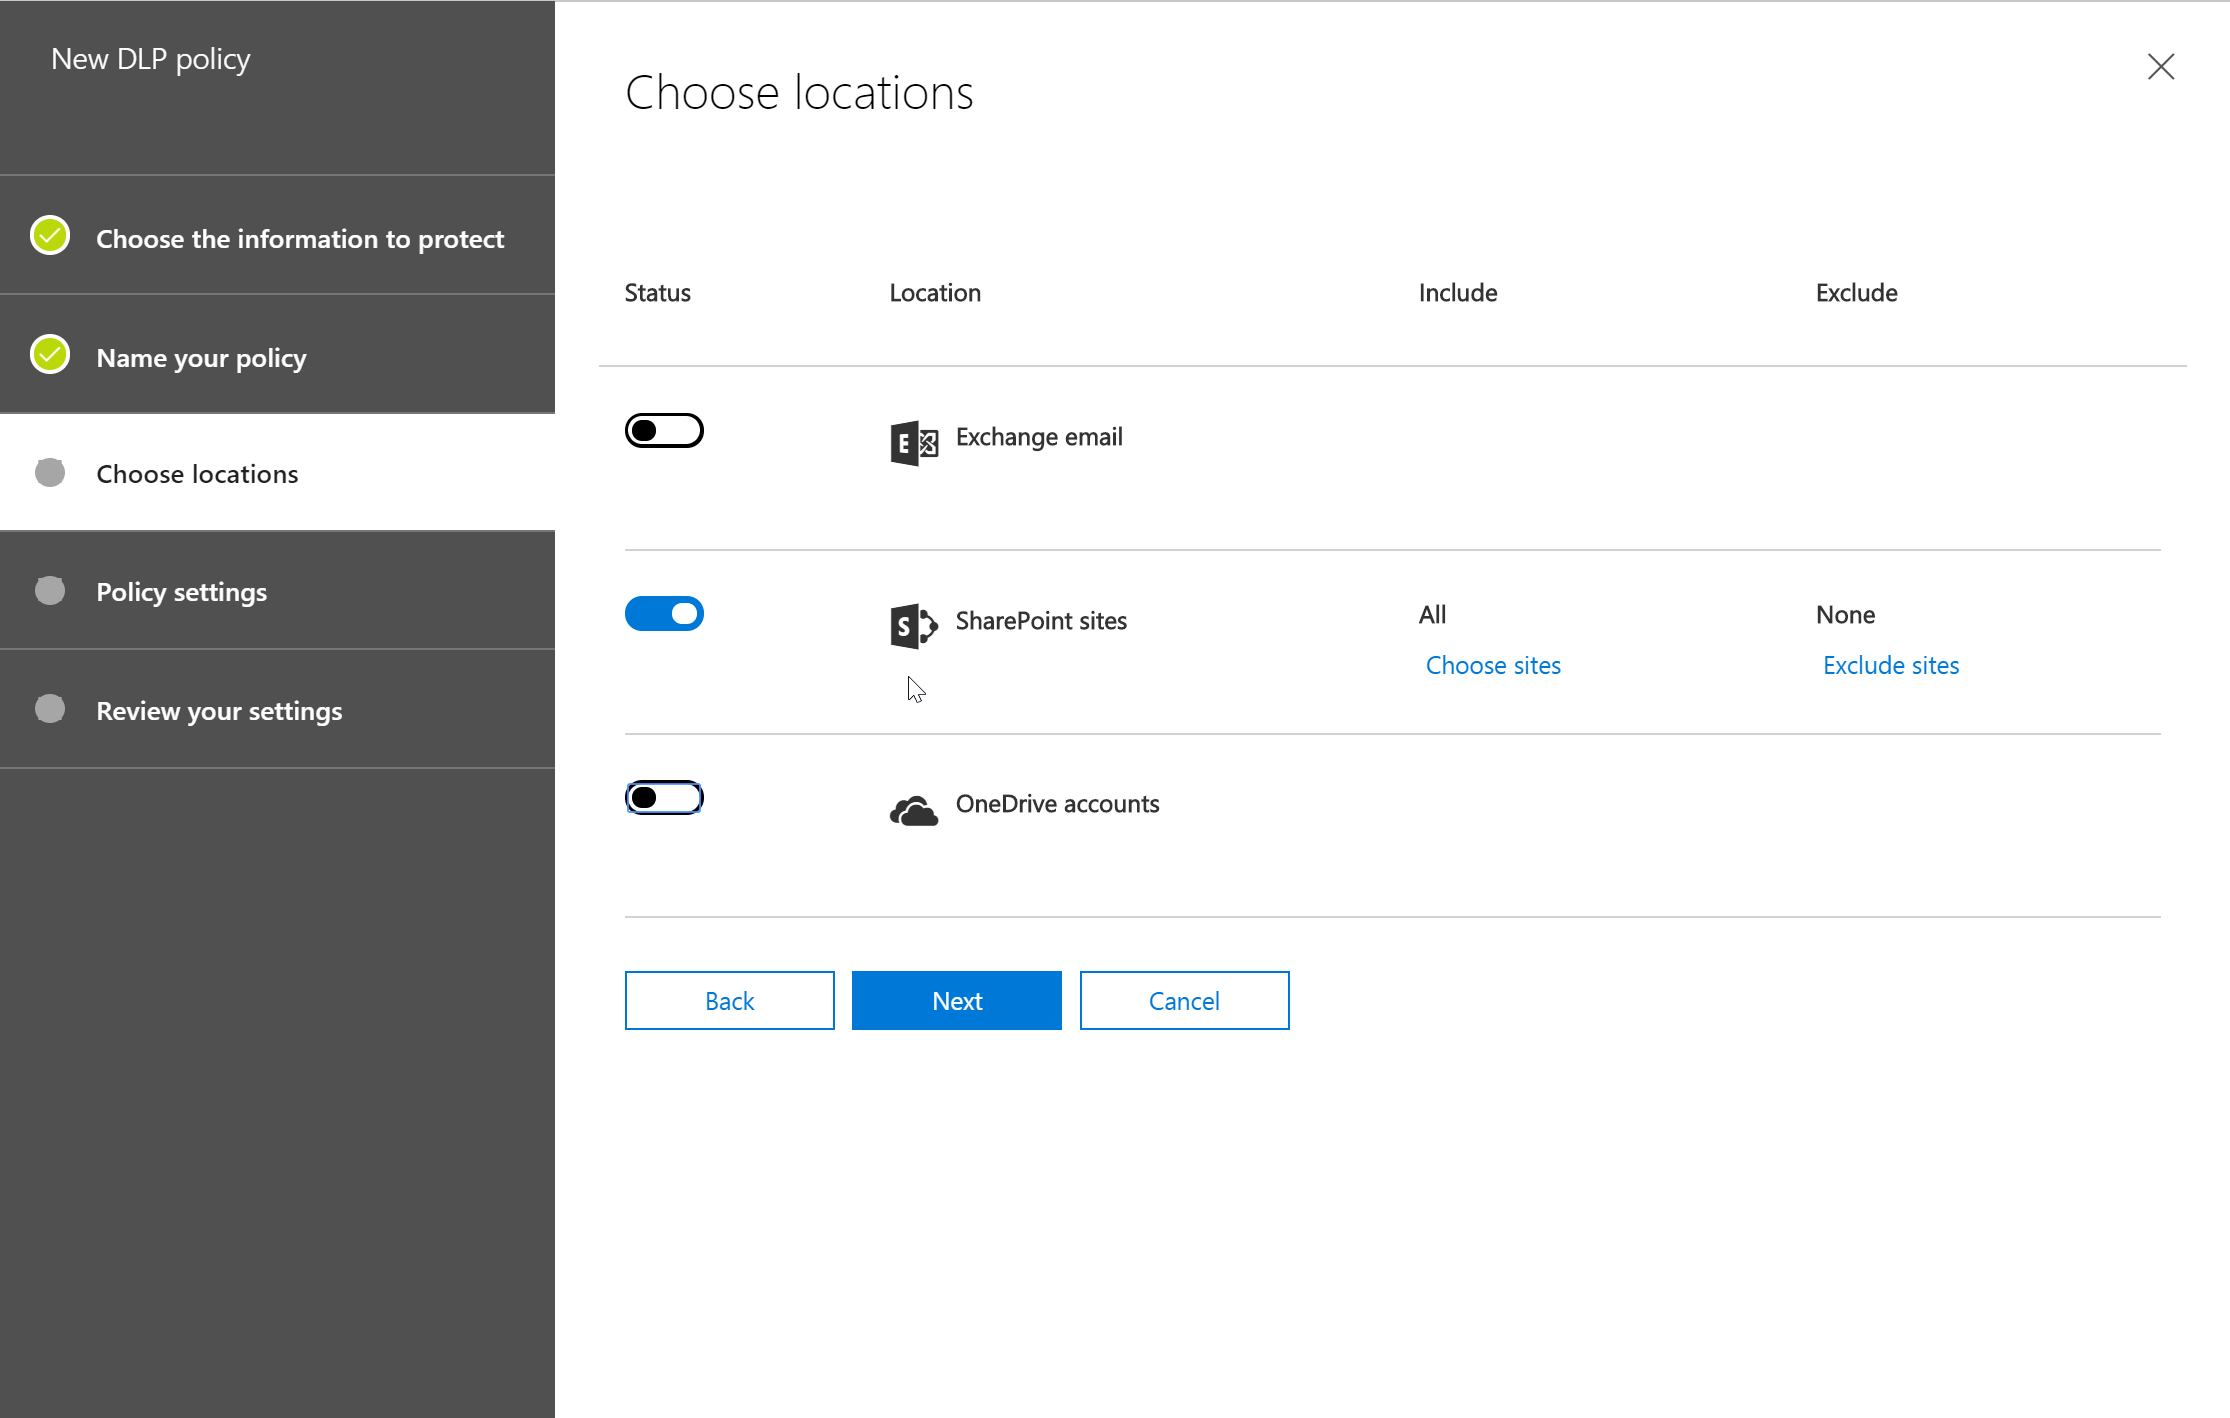
  5. Then, we would select the sources to be included for this policy. In our case, it is only SharePoint.
    SecurityAndCompliance_DLPPolicy2
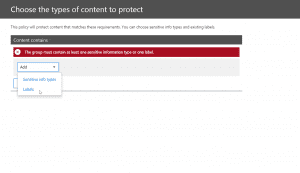
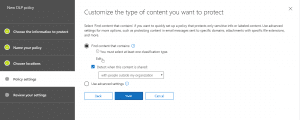
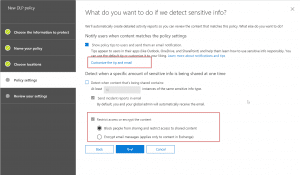
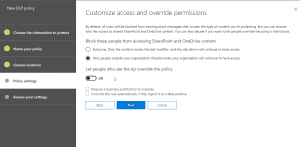
  6. After the above, we will set rule settings for the DLP policy where we will select the label to which the policy to apply, then select the policy tips, block sharing rules and override rules as shown in the below screenshots. We could also set the admins (provided) to get notified when such as content is shared externally.
     
  7. Next, we could allow the users to override the policy if needed. For this blog and our requirement, we had decided to not allow it to happen.
     
  8. After this is setup, we could turn on the DLP policy so that it could start applying the rules. There doesn’t seem to be any wait time for applying the policy later but give it some time if you don’t see it happening right away.
  9. Now the policy is enabled and if the label are published, the user can then apply the label on a content as shown in below screenshot.
    Note: In some cases, it takes about 2-3 min for the policy to be effective on the content after applying the label so give it some time.
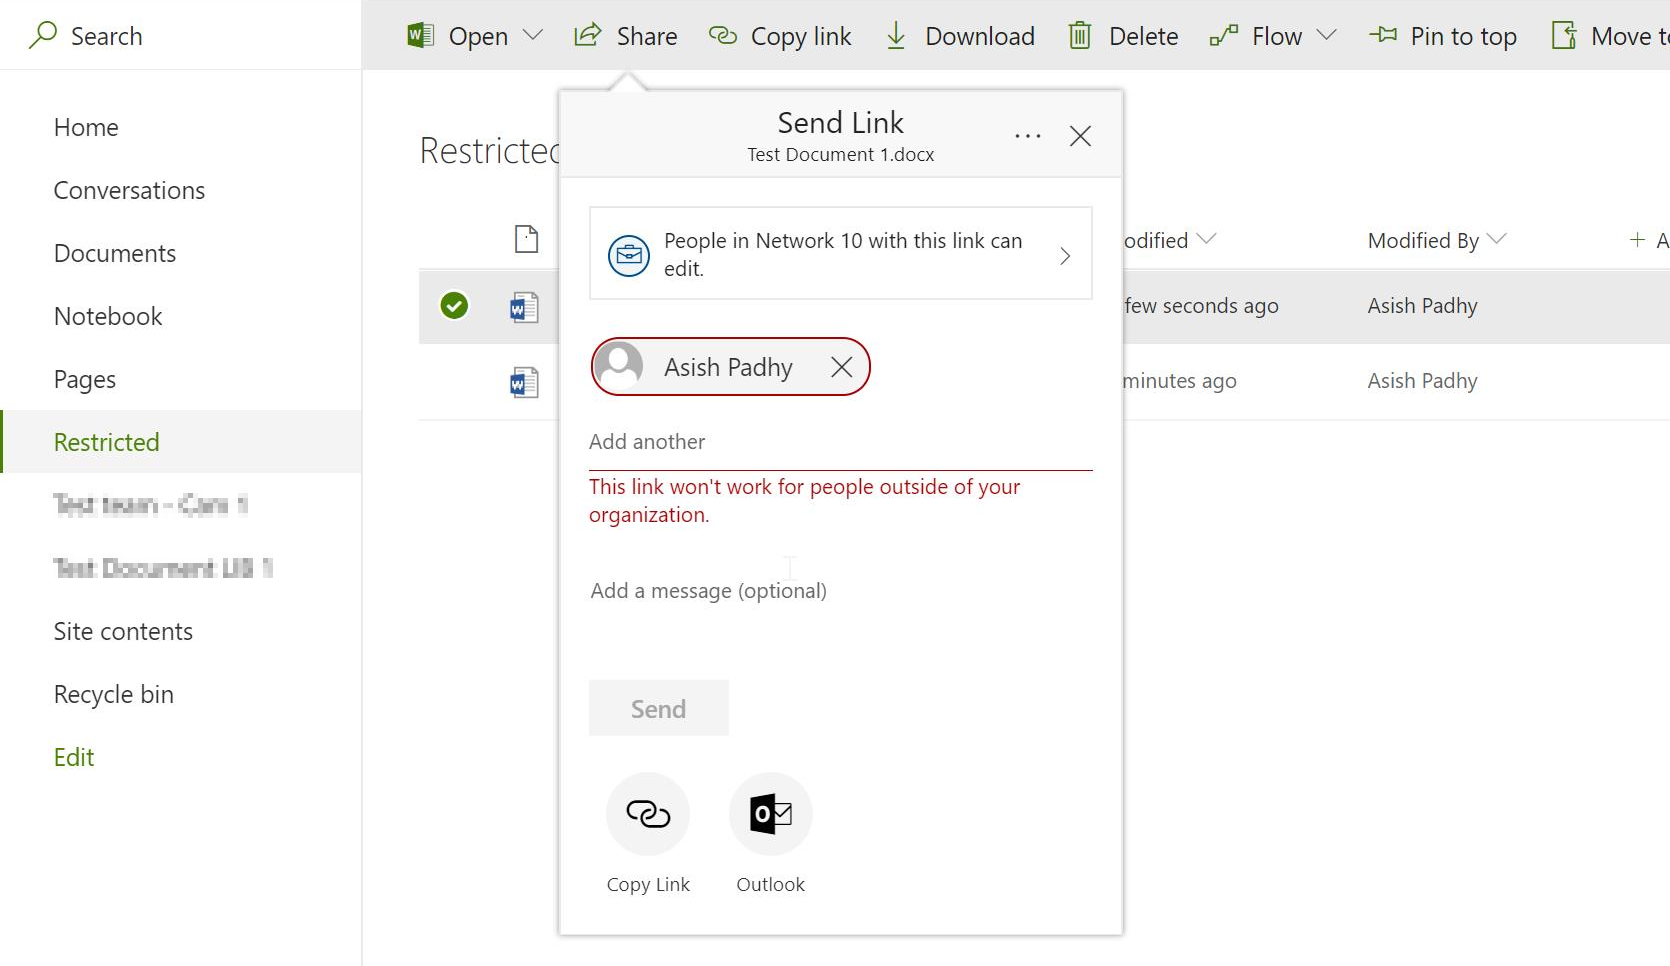
  10.  After the label is effective after 2-3 min wait, if the same content is shared with an external user, we get the following error.
    SharingFix1

Read More

Active Directory User Migration in Hybrid Exchange Environment Using ADMT – Part6

Security Translation – Local Profiles and things to consider for end user experience

The last bit of any migration project is to keep the end user experience as simple and smooth as possible. So, by now we have successfully migrated the groups, migrated the users keeping their mailboxes intact and providing them access to all their resources using SID history. As the last bit of the migration I would like to discuss about few things that should be considered from an end user’s perspective to make their experience good when they login to the new domain.… [Keep reading] “Active Directory User Migration in Hybrid Exchange Environment Using ADMT – Part6”

Active Directory User Migration in Hybrid Exchange Environment Using ADMT – Part5

Users Migration

The gun seems to be pretty much loaded with all the ammunition, ready to fire? Probably not yet …

Here I want to discuss about few basic things that are easily missed and can cause the migration to fail or go wrong. Few things worth noting down before getting into the migration:

  • Make sure you have a plan to provide the permissions of file shares that built-in groups in source domain have access to.
[Keep reading] “Active Directory User Migration in Hybrid Exchange Environment Using ADMT – Part5”

Active Directory User Migration in Hybrid Exchange Environment Using ADMT – Part4

Active Directory Groups

Now that we have got our both the AD environments ready to start the migration and installed all the required tools, let’s start moving the objects over. To ensure that we have the proper security structure in place before users are migrated to target domain, we’ll be dealing with Active Directory groups before migrating any of the user objects.

So, what is an AD group? How is the security structure controlled by these groups?… [Keep reading] “Active Directory User Migration in Hybrid Exchange Environment Using ADMT – Part4”

Active Directory User Migration in Hybrid Exchange Environment Using ADMT – Part3

Installation and configuration of ADMT tool and Password Export Server

Now that we have got our active directories in both source and target domain ready for migration, let’s install the tools required for migration.

ADMT Migration Account

The ADMT service account needs to have administrative rights in both source and target domains. It’s a good idea to create a user specifically for the ADMT Migration, however you may still use an existing user if desired. A single service account will be used for the entire migration:

  • In the target domain, create an administrator account

Target Domain:

  • In the source domain add the same user to the built-in Administrators group (it can’t be added directly to domain admins group).
[Keep reading] “Active Directory User Migration in Hybrid Exchange Environment Using ADMT – Part3”