If you would like to know more about what the AWS DeepRacer is, please refer to my previous post: AWS DeepRacer – Overview
There seems to be many ways to get your AWS DeepRacer model trained. These are a few I have discovered:
- The AWS DeepRacer Console (Live Preview yet to commence, GA early 2019)
- SageMaker RL notebook
- Locally from the DeepRacer GitHub repository
- AWS RoboMaker sample simulation
- AWS RoboMaker Cloud9 IDE with sample application downloaded
In this post, we will be exploring how to train a reinforcement learning model using AWS Robomaker, both with the sample application downloaded and in the Cloud9 development environment. The reason I chose to run through both, is that AWS has created a fully autonomous deployment using CloudFormation that does all the work for you, but this does not give you the ability to modify the code. If changing reward function and other things in the ROS application is what you want then the Cloud 9 development environment is the way to go, we can modify the code and takes you through most of the simulation workflow.
As for taking you through the Proximal Policy Optimization(PPO) algorithm that will require it’s own post as there is a heap of prerequisites to understanding this algorithm. AWS has leveraged Intel’s RL Coach which is a platform of packaged RL algorithm implementations, including Clipped PPO.
What you will need:
- An AWS account
- Access to create IAM roles within the AWS account
Running the Fully Autonomous Sample Application
1. Log into your AWS account
2. Switch to the us-east-1 region (N.Virginia)
3. Navigate to the AWS RoboMaker service
4. Click on the sample application link on the left

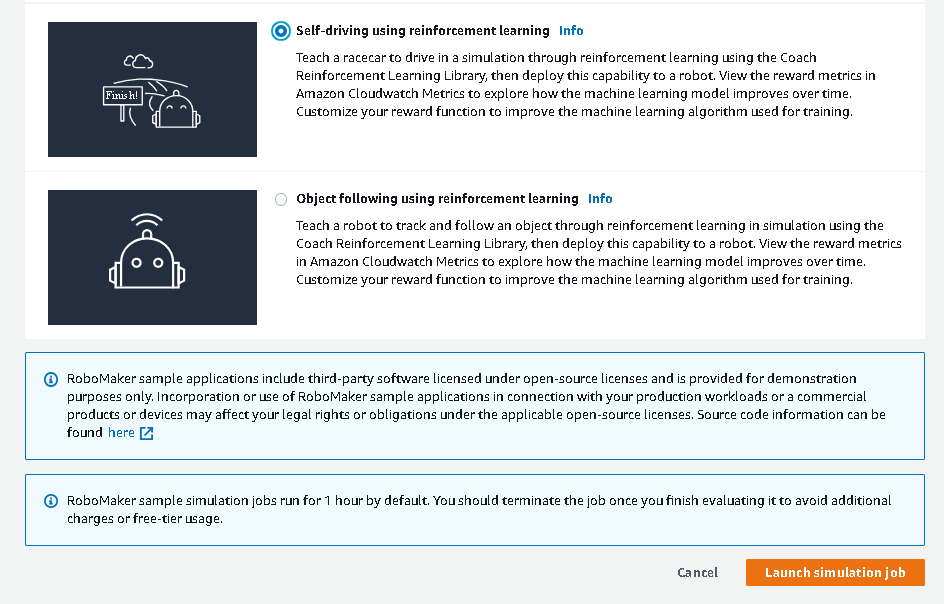
5. Scroll down the list and select Self-driving using reinforcement learning and then click the Launch simulation job button
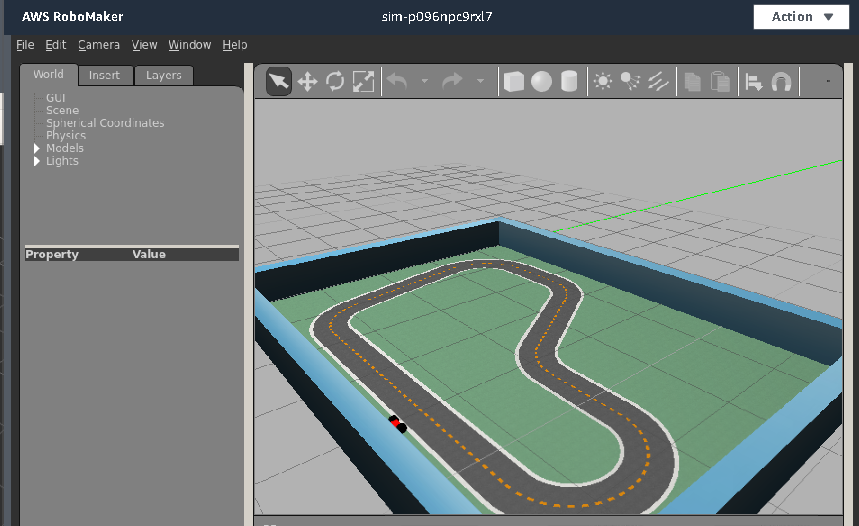
6. You can now view the simulation job from the Simulation jobs section
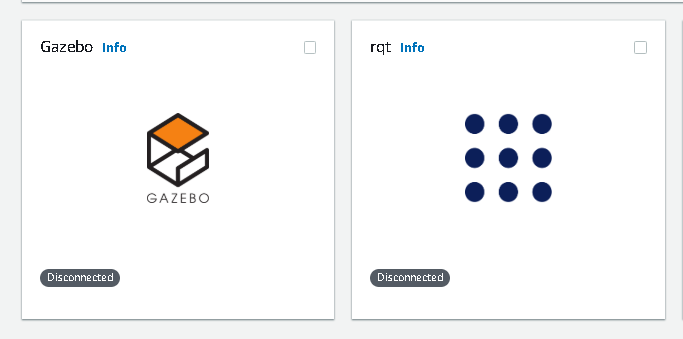
7. If you want to view the DeepRacer in simulation work click on the Gazebo icon (it does not show up until the simulation is in the Running state)
Running the Cloud9 development environment with a custom reward function
1. Log into your AWS account
2. Switch to the us-east-1 region (N.Virginia)
3. Run the above sample simulation as this creates all the resources you will need for the following. alternatively you can create the resources manually when you get to the roboMakerSettings.json section below
4. Navigate to the AWS RoboMaker service
5. Click on the development environments section
6. Click the create environment button
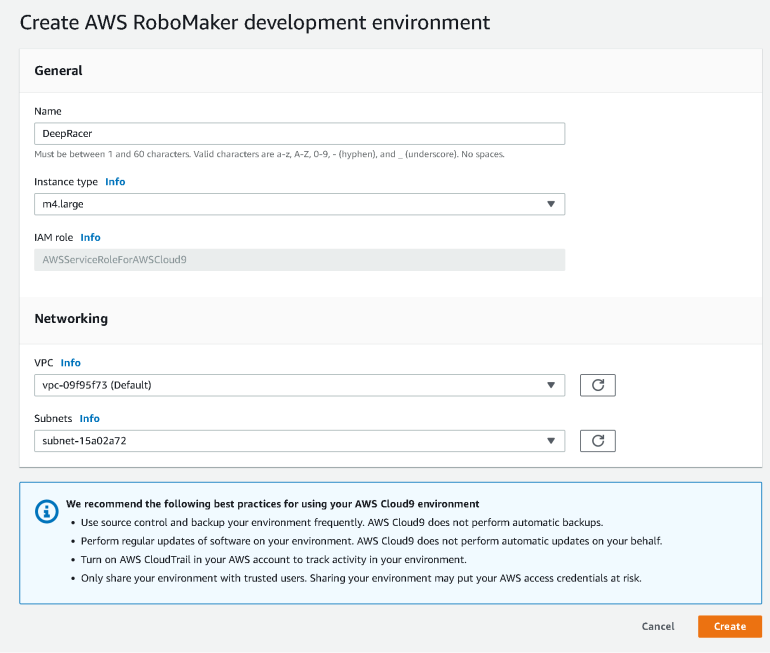
7. Fill out the Name, Instance type, VPC, and Subnets fields then click Create as in Figure 1.0 below
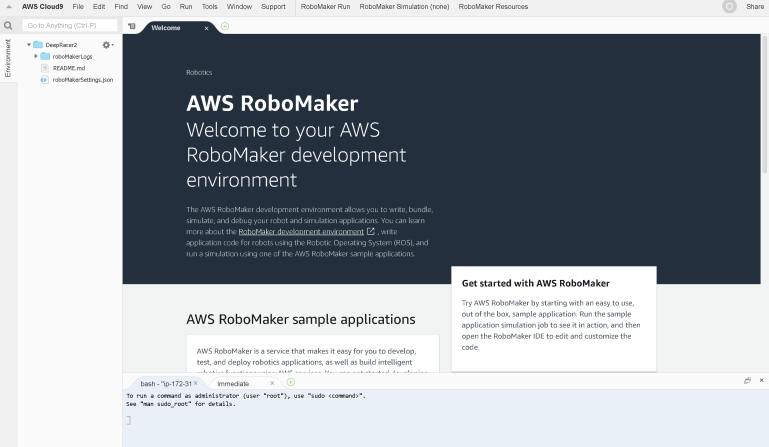
8. Once created click Open environment button to open Cloud9
9. The Cloud9 environment should look like Figure 1.1 below
10. Click on RoboMaker Resources and select Download Samples then 6. Self-Driving using Reinforcement Learning

11. You should now have two folders under the root path, you should delete the roboMakerLogs folder and base JSON file as it has duplicate config files and saves confusion later
12. Now its time to modify your roboMakerSettings.json file that is under the DeepRacer folder. This file has a number of values that need to be filled out. I used the output of the sample simulation job run in the first part of this post to populate this.
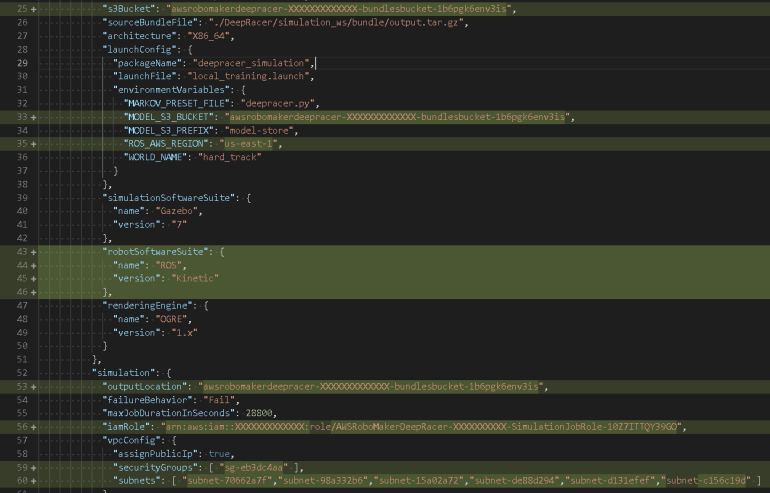
13. Ensure you add the “robotSoftwareSuite” section on line 43 (as of writing this post) as the simulation fails with it. The API for RoboMaker must have
14. Also pay attention to the “maxJobDurationInSeconds”: 28800 section and set the simulation job to something less than 8 hours unless you feel like you need that time.
15. Save the file, as Cloud9 doesn’t seem to auto-save your changes
16. At this

17. Click on the Robomaker Run button on the top-right, navigate to the Workflow menu option and select DeepRacer – Build and Bundle All
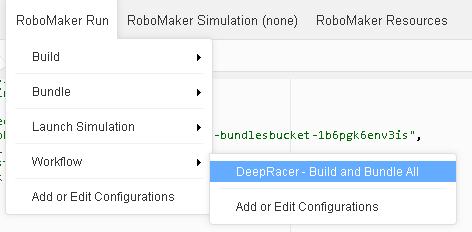
18. Monitor the tabs below and look for exit code 0 on the bundle tab.
19. Click on the RoboMaker Run button on the top-right, navigate to Launch Simulation and click on DeepRacer
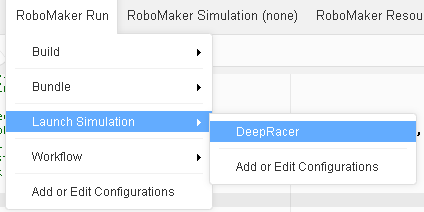
20. Check on your simulation job under the RoboMaker Simulation jobs
21. Once complete you can navigate to the S3 bucket configured in the JSON file above and look for the model.pb file in the model-store folder.
You can now use this model to load onto the AWS DeepRacer. If you are not sure how to do this, please read my previous post: AWS DeepRacer – How to load a model
In the next post I’ll take you through the SageMaker RL notebook and explore the Machine learning side of the AWS DeepRacer