First published at https://nivleshc.wordpress.com
Background
Machine Learning (ML) and Artificial Intelligence (AI) has been a hobby of mine for years now. After playing with it approximately 8 years back, I let it lapse till early this year, and boy oh boy, how things have matured! There are products in the market these days that use some form of ML – some examples are Apple’s Siri, Google Assistant, Amazon Alexa.
Computational power has increased to the point where calcuations that took months can now be done within days. However, the biggest change has come about due to the vast amounts of data that the models can be trained on. More data means better accuracy in models.
If you have taken any programming course, you would remember the hello world program. This is a foundation program, which introduces you to the language and gives you the confidence to continue on. The hello world for ML is identifying cats and dogs. Almost every online course I have taken, this is the first project that you build.
For anyone wanting a background on Machine Learning, I would highly recommend Andrew Ng’s https://www.coursera.org/learn/machine-learning in Coursera. However, be warned, it has a lot of maths 🙂 If you are able to get through it, you will get a very good foundational knowledge on ML.
If theory is not your cup of tea, another way to approach ML is to just implement it and learn as you go. You don’t need to get a PhD in ML to start implementing it. This is the philosophy behind Jeremy Howard’s and Rachel Thomas’s http://www.fast.ai. They take you through the implementation steps and introduce you to the theory on a need to know basis, in essence you are doing a top down approach.
I am still a few lessons away from finishing the fast.ai course however, I have learnt so much and I cannot recommend it enough.
In this blog, I will take you through the steps to implement a Convolutional Neural Network (CNN) that will be able to pick out horses from cows. CNNs are quite complicated in nature so we won’t go into the nitty-gritty details on creating them from scratch. Instead, we will use the foundational libraries from fast.ai’s lesson 1 and modify it abit, so that instead of identifying cats and dogs, we will use it to identify cows and horses.
In the process, I will introduce you to a tool that will help you scrape Google for your own image dataset.
Most important of all, I will show you how the amount of data used to train your CNN model affects its accuracy.
So, put your seatbelts on and lets get started!
1. Setting up the AWS EC2 Instance
ML requires a lot of processing power. To get really good throughput, it is recommended to use GPUs instead of CPUs. If you were to build a kit to try this at home, it can easily cost you a few thousands of dollars, not to mention the bill for the cooling and electricity usage.
However, with Cloud Computing, we don’t need to go out and buy the whole kit, instead we can just rent it for as long as we want. This provides a much affordable way to learn ML.
In this blog, we will be using AWS EC2 instances. For the cheapest GPU cores, we will use a p2.xlarge instance. Be warned, these cost $0.90/hr, so I would suggest turning them off after using them, otherwise you will surely rack up a huge bill.
Reshma has done a fantastic job of putting together the instructions on setting up an AWS Instance for running fast.ai course lessons. I will be using her instructions, with a few modifications. Reshma’s instructions can be found here.
Ok lets begin.
- Login to your AWS Console
- Go to the EC2 section
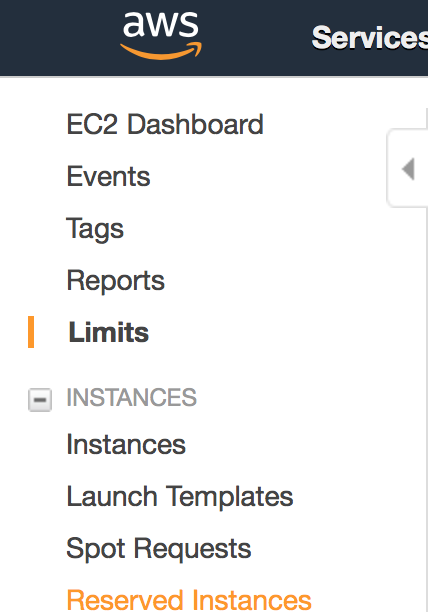
- On the top left menu, you will see EC2 Dashboard. Click on Limits under it
- Now, on the right you will see all the type of EC2 instances you are allowed to run. Search for p2.xlarge instances. These have a current limit of zero, meaning you cannot launch them. Click on Request limit increase and then fill out the form to justify why you want a p2.xlarge instance. Once done, click on Submit. In my case, within a few minutes, I received an email saying that my limit increase had been approved.
- Click on EC2 Dashboard from the left menu
- Click on Launch Instance
- In the next screen, in the left hand side menu, click on Community AMIs
- On the right side of the screen, search for fast.ai
- From the results, select fastai-part1v2-p2
- In the next screen (Instance Type) filter by GPU compute and choose p2.xlarge
- In the next screen configure the instance details. Ensure you get a public IP address (Auto-assign Pubic IP) because you will be connecting to this instance over the internet. Once done, click Next: Add Storage
- In the next screen, you don’t need to do anything. Just be aware that the community AMI comes with a 80GB harddisk (at $0.10/GB/Month, this will amount to $8/Month). Click Next
- In the next screen, add any tags for the EC2 Instance. To give the instance a name, you can set the Key to Name and the Value to fastai. Click Next
- For security groups, all you need to do is allow SSH to the instance. You can leave the source as 0.0.0.0/0 (this allows connections to the EC2 instance from any public IP address). However, if you want to be super secure, you can set the source to your current ip address. However, doing this means that should your public ip address change (hardly any ISPs give you a static IP address, unless you pay extra), you will have to go back into the AWS Console and update the source in the security group. Click Next
- In the next section, check that all details are correct and then click on Launch. You will be asked for your key pair. You can either choose an existing key pair or create a new one. Ensure you keep the key pair in a safe place because whoever possesses it can connect to your EC2 instance.
- Now, sit back and relax, Within a few minutes, your EC2 instance will be ready. You can monitor the progress in the EC2 Dashboard
DON’T FORGET TO SHUTDOWN THE INSTANCE WHEN NOT USING IT. AT $0.90/hr, IT MIGHT NOT SEEM MUCH, HOWEVER THE COST CAN EASILY ACCUMULATE TO SOMETHING QUITE EXPENSIVE
2. Creating the dataset
To train our Convolutional Neural Network (CNN), we need to get lots of images of cows and horses. This got me thinking. Why not get it off Google? But, then this provided another challenge. How do I download all the images? Surely I don’t want to be sitting there right clicking each search result and saving it!
After some googling, I landed on https://github.com/hardikvasa/google-images-download. It does exactly as to what I wanted. It will do a google image search using a keyword and download the results.
Install it using the instructions provided in the link above. By default, it only downloads 100 images. As CNNs need lots more, I would suggest installing chromedriver. The instructions to do this is in the Troubleshooting section under ## Installing the chromedriver (with Selenium)
To download 1000 images of cows and horses, use the following command line (for some reason the tool only downloads around 800 images)
- the downloaded images will be stored in the subfolder cows/downloaded and horses/downloaded in the /Users/x/Documents/images folder.
- keyword denotes what we are searching for in google. For cows, we will use cow because we want a single cow’s photo. The same for horses.
- –chromedriver provides the path to where the chromedriver has been stored
- the images will be in jpg format
googleimagesdownload --keywords "cow" --format jpg --output_directory "/Users/x/Documents/images/" --image_directory "cows/downloaded" --limit 1000 --chromedriver /Users/x/Documents/tools/chromedriver
googleimagesdownload --keywords "horse" --format jpg --output_directory "/Users/x/Documents/images/" --image_directory "horses/downloaded" --limit 1000 --chromedriver /Users/x/Documents/tools/chromedriver
3. Finding and Removing Corrupt Images
One disadvantage of using googleimagedownload script is that, at times a downloaded image cannot be opened. This will cause issues when our CNN tried to use it for training/validating. To ensure our CNN does not encounter any issues, we will do some housekeeping before hand and remove all corrupt images (images that cannot be opened).
I wrote the following python script to find and move the corrupt images to a separate folder. The script uses the matplotlib library (the same library used by the fast.ai CNN framework) If you don’t have it, you will need to download it from https://matplotlib.org/users/installing.html.
The script assumes that within the root folder, there is a subfolder called downloaded which contains all the images. It also assumes there is a subfolder called corrupt within the root folder. This is where the corrupt images will be moved to. Set the root_folder_path to the parent folder of the folder where the images are stored.
#this script will go through the downloaded images and find those that cannot be opened. These will be moved to the corrupt folder.
#load libraries
import matplotlib.pyplot as plt
import os
#image folder
root_folder_path = '/Users/x/Documents/images/cows/'
image_folder_path = root_folder_path + 'downloaded/'
corrupt_folder_path = root_folder_path + 'corrupt' #folder were the corrupt images will be moved to
#get a list of all files in the img folder
image_files = os.listdir(f'{image_folder_path}')
print (f'Total Image Files Found: {len(image_files)}')
num_image_moved = 0
#lets go through each image file and see if we can read it
for imageFile in image_files:
 filePath = image_folder_path + imageFile
 #print(f'Reading {filePath}')
 try:
 valid_img = plt.imread(f'{filePath}')
 except:
 print (f'Error reading {filePath}. File will be moved to corrupt folder')
 os.rename(filePath,os.path.join(corrupt_folder_path,imageFile))
 num_image_moved += 1
print (f'Moved {num_image_moved} images to corrupt folder')
For some unknown reason, the script, at times, moves good images into the corrupt folder as well. I would suggest that you go through the corrupt images and see if you can open them (there won’t be many in the corrupt folder). If you can, just manually move them back into the downloaded folder.
To make the images easier to handle, lets rename them using the following format.
- For the images in the cows/downloaded folder rename them to a format CowXXX.jpg where XXX is a number starting from 1
- For the images in the horses/downloaded folder rename them to a format HorseXXX.jpg where XXX is a number starting from 1
4. Transferring the images to the AWS EC2 Instance
In the following sections, I am using ssh and scp which come builtin with MacOS. For Windows, you can use putty for ssh and WinSCP for scp
A CNN (or any other Neural Network model) is trained using a set of images. Once training has finished, to find how accurate the model is, we give it a set of validation images (these are different to those it was trained on, however we know what these images are of) and ask it to identify the images. We then compare the results with what the actual image was, to find the accuracy.
In this blog, we will first train our CNN on a small set of images.
Do the following
- create a subfolder inside the cows folder and name it train
- create a subfolder inside the cows folder and name it valid
- move 100 images from the cows/downloaded folder into the cows/train folder
- move 20 images from the cows/downloaded folder into the cows/valid folder
Make sure the images in the cows/train folder are not the same as those in cows/valid folder
Do the same for the horses images, so basically
- create a subfolder inside the horses folder and name it train
- create a subfolder inside the horses folder and name it valid
- move 100 images from the horses/downloaded folder into the horses/train folder
- move 20 images from the horses/downloaded folder into the horses/valid folder
Now connect to the AWS EC2 instance the following command line
ssh -i key.pem ubuntu@public-ip
where
- key.pem is the key pair that was used to create the AWS EC2 instance (if the key pair is not in the current folder then provide the full path to it)
- public-ip is the public ip address for your AWS EC2 instance (this can be obtained from the EC2 Dashboard)
Once connected, use the following commands to create the required folders
cd data
mkdir cowshorses
mkdir cowhorses/train
mkdir cowhorses/valid
mkdir cowhorses/train/cows
mkdir cowhorses/train/horses
mkdir cowhorses/valid/cows
mkdir cowhorses/valid/horses
Close your ssh session by typing exit
Run the following commands to transfer the images from your local computer to the AWS EC2 instance
To transfer the cows training set
scp -i key.pem /Users/x/Documents/images/cows/train/*  ubuntu@public-ip::~/data/cowshorses/train/cows
To transfer the horses training set
scp -i key.pem /Users/x/Documents/images/horses/train/*  ubuntu@public-ip::~/data/cowshorses/train/horses
To transfer the cows validation set
scp -i key.pem /Users/x/Documents/images/cows/valid/*  ubuntu@public-ip::~/data/cowshorses/valid/cows
To transfer the horses validation set
scp -i key.pem /Users/x/Documents/images/horses/valid/*  ubuntu@public-ip::~/data/cowshorses/valid/horses
5. Starting the Jupyter Notebook
Jupyter Notebooks are one of the most popular tools used by ML and data scientists. For those that aren’t familiar with Jupyter Notebooks, in a nutshell, it a web page that contains descriptions and interactive code. The user can run the code live from within the document. This is possible because Jupyter Notebook’s execute the code on the server it is running on and then displays the result in the web page. For more information, you can check out http://jupyter.org
In our case, we will be running the Jupyter Notebook on the AWS EC2 instance. However, we will be accessing it through our local computer. For security reasons, we will not publish our Jupyter Notebook to the whole wide world (lol that does spell www).
Instead, we will use the following ssh command to bind our local computer’s tcp port 8888 to the AWS EC2 instance’s tcp port 8888 (this is the port on which the Jupyter Notebook will be running) when we connect to it. This will allow us to access the Jupyter Notebook as if it is running locally on our computer, however the connection will be tunnelled to the AWS EC2 instance.
ssh -i key.pem ubuntu@public-ip -L8888:localhost:8888
Next, run the following commands to start an instance of Jupyter Notebook
cd fastai
jupyter notebook
After the Jupyter Notebook starts, it will provide a URL to access it, along with the token to authenticate with. Copy it and then paste it into a browser on your local computer.
You will now be able to access the fastai Jupyter Notebook.
Follow the steps below to open Lesson 1.
- click on the courses folder
- once inside the courses folder, click on the dl1 folder
In the next screen, find the file lesson1.ipynb and double-click it. This will launch the lesson1 Jupyter Notebook in another tab.
Give yourself a big round of applause for reaching so far!
Now, start from the top of lesson1 and go through the first three code sections and execute them. To execute the code, put the mouse pointer in the code section and then press Shift+Enter.
In the next section, change the path to where we moved the cows and horses pictures to. It should look like below
PATH = "data/cowshorses/"
Then, execute this code section.
Skip the following sections
- Extra steps if NOT using Crestle or Paperspace or our scripts
- Extra steps if using Crestle
Just a word of caution. The original Jupyter Notebook is meant to distinguish between cats and dogs. However, since we are using it to distinguish between cows and horses, whenever you see a mention of cats, change it to cows and whenever you see a mention of dogs, change it to horses.
The following lines don’t need any changing, so just execute them as they are
os.listdir(PATH)
os.listdir(f'{PATH}valid')
In the next line, replace cats with cows so that you end up with the following
files = !ls {PATH}valid/cows | head
files
Execute the above code. A list of the first 10 cow image files will be displayed.
Next, lets see what the first cow image looks like.
In the next line, change cats to cows to get the following.
img = plt.imread(f'{PATH}valid/cows/{files[0]}')
plt.imshow(img);
Execute the code and you will see the cow image displayed.
Execute the next two code sections. Leave the section after that commented out.
Now, instead of creating a CNN model from scratch, we will use one that was pre-trained on ImageNet which had 1.2 million images and 1000 classes. So it already knows quite a lot about how to distinguish objects. To make it suitable to what we want to do, we will now train it further on our images of cows and horses.
The following defines which model to use and provides the data to train on (the CNN model that we will be using is called resnet34). Execute the below code section.
data = ImageClassifierData.from_paths(PATH, tfms=tfms_from_model(resnet34, sz))
learn = ConvLearner.pretrained(resnet34, data, precompute=True)
And now for the best part! Lets train the model and give it a learning rate of 0.01.
learn.fit(0.01, 1)
After you execute the above code, the model will be trained on the cows and horses images that were provided in the train folders. The model will then be tested for accuracy by getting it to identify the images contained in the valid folders. Since we already know what the images are of, we can use this to calculate the model’s accuracy.
When I ran the above code, I got an accuracy of 0.75. This is quite good since it means the model can identify cows from horses 75% of the time. Not to forget, we used only 100 cows and 100 horses images to train it, and it didn’t even take that long to train it !
Now, lets see what happens when we give it loads more images to train on.
BTW to get more insights into the results from the trained model, you can go through all the sections between the lines learning.fit(0.01,1) and Choosing a learning rate.
Another take at training the model
From all the literature I have been reading, one point keeps on repeating. More data means better models. Lets put this to the test.
This time around we will give the model ALL the images we downloaded.
Do the following.
- on your local computer, move the photos back to the downloaded folder
- move photos from cows/train to cows/downloaded
- move photos from cows/valid to cows/downloaded
- move photos from horses/train to horses/downloaded
- move photos from horses/valid to horses/downloaded
- on your local computer, move 100 photos of cows to cows/valid folder and the rest to the cows/train folder
- move 100 photos from cows/downloaded to cows/valid folder
- move the rest of the photos from cows/downloaded to cows/train folder
- on your local computer, move 100 photos for horses to horses/valid and the rest to horses/train folder
- move 100 photos from horses/downloaded to horses/valid folder
- move the rest of the photos from horses/downloaded to horses/train folder
- on the AWS EC2 instance, delete all the photos under the following folders
- /data/cowshorses/train/cows
- /data/cowshorses/train/horses
- /data/cowshorses/valid/cows
- /data/cowshorses/valid/horses
Use the following commands to copy the images from the local computer to the AWS EC2 Instance
To transfer the cows training set
scp -i key.pem /Users/x/Documents/images/cows/train/*  ubuntu@public-ip::~/data/cowshorses/train/cows
To transfer the horses training set
scp -i key.pem /Users/x/Documents/images/horses/train/*  ubuntu@public-ip::~/data/cowshorses/train/horses
To transfer the cows validation set
scp -i key.pem /Users/x/Documents/images/cows/valid/*  ubuntu@public-ip::~/data/cowshorses/valid/cows
To transfer the horses validation set
scp -i key.pem /Users/x/Documents/images/horses/valid/*  ubuntu@public-ip::~/data/cowshorses/valid/horses
Now that everything has been prepared, re-run the Jupyter Notebook, as stated under Starting Jupyter Notebook above (ensure you start from the top of the Notebook).
When I trained the model on ALL the images (less those in the valid folder) I got an accuracy of 0.95 ! Wow that is soo amazing! I didn’t do anything other than increase the amount of images in the training set.
Final thoughts
In a future blog post, I will show you how you can use the trained model to identify cows and horses from a unlabelled set of photos.
For now, I would highly recommend that you use the above mentioned image downloader to scrape Google for some other datasets. Then use the above instructions to train the model on those images and see what kind of accuracy you can achieve (maybe try identifying chickens and ducks?)
As mentioned before, once finished, don’t forget to shut down your AWS EC2 instance. If you don’t need it anymore, you can terminate it, to save on storage costs as well.
If you are keen about ML, you can check out the courses at http://www.fast.ai (they are free)
If you want to dabble in the maths behind ML, as perviously mentioned, Andrew Ng’s https://www.coursera.org/learn/machine-learning is one of the finest.
Lastly, if you are keen to take on some ML challenges, check out https://www.kaggle.com They have lots and lots competitions running all the time, some of which pay out actual money. There are lots of resources as well and you can learn off others on the site.
Till the next time, Enjoy 😉