Content Delivery Network
A content delivery network (CDN) is a distributed network of servers that will cache and serve content from edge nodes closer to the user’s browser. By utilising this functionality websites can offload much of their static content delivery to those servers saving valuable web processing and bandwidth for core business related activities and giving the user a better online experience.
A CDN should be considered for delivering content for Internet workloads that exhibit:
- Static or slow changing content
- Content shared by many users
- Geographically dispersed users
- Ad-hoc or irregular usage (and therefore don’t get the benefit of the browser cache)
- Expensive or saturated bandwidth connections
One or more of these characteristics is an indicator that a CDN may be a worthwhile investment, but the investment need not be a large one.
Azure CDN
The Windows Azure CDN is a network of servers deployed at strategically placed locations around the globe. They will cache and deliver Windows Azure blobs and the static content output of compute instances. The CDN can be enabled through the Windows Azure Platform Management Portal as an add-on feature to your subscription. This article shows how to cheaply and easily leverage the Azure CDN in your architecture without any development, migration nor publishing effort.
Before looking at Azure, it’s worth taking a step back to look at some of the foundational components that can be used to build a CDN. IIS 7 and later has a powerful module plug-in capability for affecting the request response pipeline which can been leveraged to implement content serving farms (in fact I bet these components are used under the Azure CDN)
URLRewrite
One of the powerful and under rated plugins is URLRewrite 2.0 which has a config driven regular expression rules engine for mapping incoming requests to new URLs and for modifying the content of the outgoing response. While this is a similar concept to ASP.NET URLRewrite used heavily in MVC, it works at a lower level and doesn’t actually need ASP.NET at all.
Start out by downloading and installing URLRewrite for IIS 7(or 8) which will put an icon like this in your IIS management console.

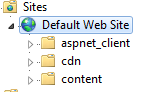
- Create a local website with some content in a folder like:
website/content/Kloud.jpg - Create a folder (or virtual directory) called “cdn”.
We can now create a rule that delivers the “Content” folder directly from a new content URL.
- In IIS click on the cdn folder and double click the URLRewrite icon and create a new “Blank” inbound rule.
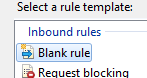
- Add a new rule called “cdn” as a case insensitive regular expression rule to match all incoming URLs (.*)
- and rewrite to them to the content folder
(/Content/{R:1}) - Click Apply.
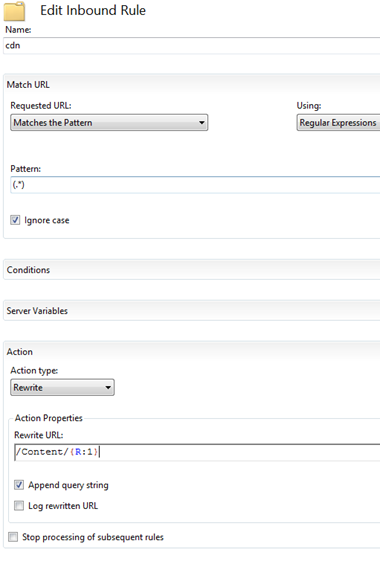
This will create a web.config file in the cdn folder with the rewrite rules (which can be directly edited if preferred to using the GUI wizard). Now the web site has two URLs on which content be retrieved.
http://localhost/cdn/kloud.jpg and http://localhost/Content/kloud.jpg
While that’s a handy way to create vanity URLs, the same could be achieved with a simple virtual directory. The real power of the Rewrite Module is in partnership with the Application Request Routing module.
Application Request Routing
Application Request Routing is a module designed to provide the functionality to build large content caching farms from IIS servers. ARR 2.5 (at time of writing) is available as a set of 4 dependant modules through the Web Platform Installer, but also as a direct install from here (this will become important later).
In our case we’ll use just one part, the ability to request “off box” for the rewritten URL. That is we can turn our virtual directory into a reverse proxy by simply editing our rewriting rules appropriately.
- Open the URLRewrite configuration for the cdn folder and “Disable Rule” on the cdn rule created previously
- Now click Add rule and choose the “Reverse Proxy” rule and click OK to the warning about setting up a proxy rule.
- Here we will define a server that will be serving the content, for instance this blog kloudsolutions.files.wordpress.com (but any site capable of serving content will do).
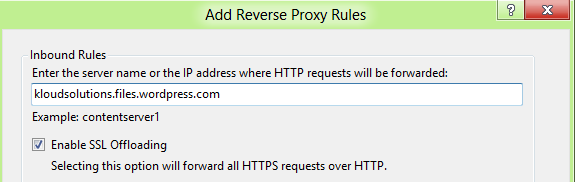
(Don’t worry about outbound rules that will come later)
- Accept the default rules (match all URLS and append query string) and Click Apply which will create a new reverse proxy inbound rule.

Now browse to the URL
and even with different query strings
The local IIS should now be forwarding requests and serving content on behalf of the Kloud blog, which is interesting but not altogether useful unless some other value adding service is provided like caching.
Azure WebRole CDN Folder
The first release of the CDN required static content to be pre-uploaded to an Azure Blob store marked for publishing via the CDN. That meant a big upfront effort to identify and manually publish the content appropriate for CDN publishing. The March 2011 update to Azure quietly released some updates to the CDN that made publishing content much easier and much more powerful.
“Developers can now use the Windows Azure Web and VM roles as “origin” for objects to be delivered at scale via the Windows Azure CDN”
That means if a user’s browser requests some content from the CDN that isn’t yet in the Blob store then Azure will try to hit your WebRole on the /cdn folder to deliver the content before giving the user a 404 not found error.
So what if we combine those two ideas and use an Azure Web Role to reverse proxy the requests from the Azure CDN to a content server? To do this we’ll need to install and configure ARR and URLRewrite on a WebRole. This can be done and is detailed here so won’t be detailed here.
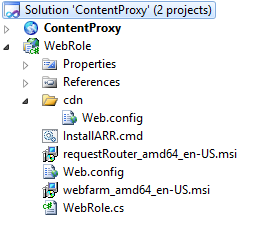
- Open Visual Studio and create a new Windows Azure Project called “ContentProxy” and add a WCF WebRole to it (that’s the simplest role to remove all the code from).
- Take the web.config file from the CDN folder we created locally and copy it into a CDN folder in the Azure project.
- Add the install files as described in the blog and remove everything else you can until it looks like this.
- Build and run the project in the development emulator and check it still returns proxied content from the blog
http://localhost:81/cdn/2011/12/121211_0222_lync2010mob1.png?w=630 - Deploy to Azure ensuring to tick the Remote Desktop option so the installation and config can be checked later if need be.
- Browse to the new Azure service and see that it’s still returning proxied content.
http://yourazure.cloudapp.net/cdn/2011/12/121211_0222_lync2010mob1.png?w=630
Now we have a content proxy deployed to Azure listening on the CDN folder for requests. Now there’s some final configuration required to publish a CDN end point and wire it up to our WebRole.
Azure CDN Endpoint
- Browse to and log in to the Azure Management Portal.
- Click on Hosted Services, Storage Accounts and CDN.
-
Click on the CDN menu item and the New Endpoint for your subscription

-
Create a new CDN end point and choose the hosted service running the content proxy and provide the CDN source URL for retrieving content.
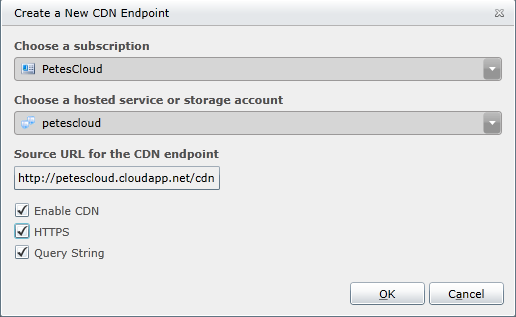
- This will create a new publically available end point like which can be used to get your dynamic content off the CDN:
http://az190064.vo.msecnd.net/2011/12/121211_0222_lync2010mob1.png?w=50
Now by changing the definition or the URL Rewrite rules you can cache and deliver via CDN any content from anywhere on the Internet including your own corporate web serving infrastructure. The effect will be that a piece of content will be requested from the host server only once when requested by a browser and then every subsequent request will come off the edge nodes of the Azure CDN until it expires from the CDN.
….with no code!
Visual Studio project available here [office src=”https://skydrive.live.com/embed?cid=E7F2E3C8DA56735E&resid=E7F2E3C8DA56735E%213792&authkey=AJvtfr8YrmgBneE” width=”98″ height=”120″]
Interesting approach to caching *any* content on the Azure CDN. I would have never thought of using a worker role as a proxy like that. Nice work! 🙂